使用自动化 ML 创建模型(预览版)
自动化机器学习(AutoML)包含一组技术和工具,旨在简化训练和优化机器学习模型的过程,只需最少人工干预。 AutoML 的主要目标是简化和加速为给定数据集选择最合适的机器学习模型和超参数,这一任务通常需要大量专业知识和计算资源。 在 Fabric 框架中,数据科学家可以利用 flaml.AutoML 模块自动执行其机器学习工作流的各个方面。
在本文中,我们将深入探讨使用 Spark 数据集直接从代码生成 AutoML 试用版的过程。 此外,我们将探讨将这些数据转换为 Pandas 数据帧的方法,并讨论并行化试验试验的方法。
重要
此功能目前为预览版。
先决条件
获取 Microsoft Fabric 订阅。 或者,注册免费的 Microsoft Fabric 试用版。
登录 Microsoft Fabric。
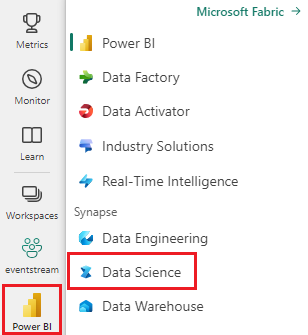
使用主页左下侧的体验切换器切换到 Fabric。
- 创建新的 Fabric 环境,或者确保正在运行 Fabric Runtime 1.2(Spark 3.4(或更高版本)和 Delta 2.4)
- 创建新的笔记本。
- 将笔记本附加到湖屋。 在笔记本左侧,选择“添加”以添加现有的湖屋或创建新湖屋。
加载和准备数据
在本节中,我们将指定数据的下载设置,然后将其保存到湖屋中。
下载数据
此代码块从远程源下载数据并将其保存到 Lakehouse
import os
import requests

IS_CUSTOM_DATA = False  # if TRUE, dataset has to be uploaded manually

if not IS_CUSTOM_DATA:
    # Specify the remote URL where the data is hosted
    remote_url = "https://synapseaisolutionsa.blob.core.windows.net/public/bankcustomerchurn"

    # List of data files to download
    file_list = ["churn.csv"]

    # Define the download path within the lakehouse
    download_path = "/lakehouse/default/Files/churn/raw"

    # Check if the lakehouse directory exists; if not, raise an error
    if not os.path.exists("/lakehouse/default"):
        raise FileNotFoundError("Default lakehouse not found. Please add a lakehouse and restart the session.")

    # Create the download directory if it doesn't exist
    os.makedirs(download_path, exist_ok=True)

    # Download each data file if it doesn't already exist in the lakehouse
    for fname in file_list:
        if not os.path.exists(f"{download_path}/{fname}"):
            r = requests.get(f"{remote_url}/{fname}", timeout=30)
            with open(f"{download_path}/{fname}", "wb") as f:
                f.write(r.content)

    print("Downloaded demo data files into lakehouse.")
将数据加载到 Spark 数据帧
以下代码块将数据从 CSV 文件加载到 Spark 数据帧中,并将其缓存以高效处理。
df = (
    spark.read.option("header", True)
    .option("inferSchema", True)
    .csv("Files/churn/raw/churn.csv")
    .cache()
)
此代码假定数据文件已下载并位于指定路径中。 它会将 CSV 文件读入 Spark 数据帧,推断架构,并在后续操作期间缓存该文件,以便更快地访问。
准备数据
在本部分中,我们将对数据集执行数据清理和特征工程。
清理数据
首先,我们定义一个函数来清理数据,其中包括删除包含缺失数据的行、删除基于特定列的重复行以及删除不必要的列。
# Define a function to clean the data
def clean_data(df):
    # Drop rows with missing data across all columns
    df = df.dropna(how="all")
    # Drop duplicate rows based on 'RowNumber' and 'CustomerId'
    df = df.dropDuplicates(subset=['RowNumber', 'CustomerId'])
    # Drop columns: 'RowNumber', 'CustomerId', 'Surname'
    df = df.drop('RowNumber', 'CustomerId', 'Surname')
    return df

# Create a copy of the original dataframe by selecting all the columns
df_copy = df.select("*")

# Apply the clean_data function to the copy
df_clean = clean_data(df_copy)
clean_data 函数有助于确保在删除不必要的列时,数据集没有缺失的值和重复项。
特征工程
接下来,我们通过使用独热编码为“Geography”和“Gender”列创建虚拟列,从而进行特征工程。
# Import PySpark functions
from pyspark.sql import functions as F

# Create dummy columns for 'Geography' and 'Gender' using one-hot encoding
df_clean = df_clean.select(
    "*",
    F.when(F.col("Geography") == "France", 1).otherwise(0).alias("Geography_France"),
    F.when(F.col("Geography") == "Germany", 1).otherwise(0).alias("Geography_Germany"),
    F.when(F.col("Geography") == "Spain", 1).otherwise(0).alias("Geography_Spain"),
    F.when(F.col("Gender") == "Female", 1).otherwise(0).alias("Gender_Female"),
    F.when(F.col("Gender") == "Male", 1).otherwise(0).alias("Gender_Male")
)

# Drop the original 'Geography' and 'Gender' columns
df_clean = df_clean.drop("Geography", "Gender")
在这里,我们使用单热编码将分类列转换为二进制虚拟列,使它们适合机器学习算法。
显示已清理的数据
最后,我们使用显示函数显示清理和特征工程数据集。
display(df_clean)
此步骤可以检查应用转换后的生成的 DataFrame。
保存到湖屋
现在,我们会将清理后和特征工程处理后的数据集保存到湖屋中。
# Create PySpark DataFrame from Pandas
df_clean.write.mode("overwrite").format("delta").save(f"Tables/churn_data_clean")
print(f"Spark dataframe saved to delta table: churn_data_clean")
在这里,我们会将清理和转换后的 PySpark DataFrame df_clean 保存为一个名为 churn_data_clean 的 Delta 表,并存储在湖屋中。 我们使用 Delta 格式对数据集进行高效的版本控制和管理。 mode("overwrite") 确保任何具有相同名称的现有表都会被覆盖,并创建一个新版本的表。
创建测试和训练数据集
接下来,我们将根据清理和特征工程的数据创建测试和训练数据集。
在提供的代码部分中,我们使用 Delta 格式从 Lakehouse 加载经过清理和功能工程的数据集,将其拆分为具有 80-20 比率的训练和测试集,并为机器学习准备数据。 此准备涉及从 PySpark ML 导入 VectorAssembler,以便将功能列合并到单个“功能”列中。 随后,我们使用 VectorAssembler 转换训练和测试数据集,从而生成包含目标变量“Exited”和特征向量 train_data 和 test_data 数据帧。 这些数据集现在可用于生成和评估机器学习模型。
# Import the necessary library for feature vectorization
from pyspark.ml.feature import VectorAssembler

# Load the cleaned and feature-engineered dataset from the lakehouse
df_final = spark.read.format("delta").load("Tables/churn_data_clean")

# Train-Test Separation
train_raw, test_raw = df_final.randomSplit([0.8, 0.2], seed=41)

# Define the feature columns (excluding the target variable 'Exited')
feature_cols = [col for col in df_final.columns if col != "Exited"]

# Create a VectorAssembler to combine feature columns into a single 'features' column
featurizer = VectorAssembler(inputCols=feature_cols, outputCol="features")

# Transform the training and testing datasets using the VectorAssembler
train_data = featurizer.transform(train_raw)["Exited", "features"]
test_data = featurizer.transform(test_raw)["Exited", "features"]
训练基线模型
使用特征化数据,我们将训练基线机器学习模型,为试验跟踪配置 MLflow,定义指标计算的预测函数,最后查看和记录生成的 ROC AUC 分数。
设置日志记录级别
在这里,我们将日志记录级别配置为禁止 Synapse.ml 库的不必要的输出,使日志更加简洁。
import logging

logging.getLogger('synapse.ml').setLevel(logging.ERROR)
配置 MLflow
在本部分中,我们将 MLflow 配置为用于试验跟踪。 我们将试验名称设置为“automl_sample”以组织运行。 此外,我们启用自动日志记录,确保模型参数、指标和项目自动记录到 MLflow。
import mlflow

# Set the MLflow experiment to "automl_sample" and enable automatic logging
mlflow.set_experiment("automl_sample")
mlflow.autolog(exclusive=False)
训练和评估模型
最后,我们基于提供的训练数据训练 LightGBMClassifier 模型。 该模型配置了用于二元分类和不平衡处理的必要设置。 然后,我们使用此训练的模型对测试数据进行预测。 我们从测试数据中提取正类和真实标签的预测概率。 之后,我们使用 sklearn 的 roc_auc_score 函数计算 ROC AUC 分数。
from synapse.ml.lightgbm import LightGBMClassifier
from sklearn.metrics import roc_auc_score

# Assuming you have already defined 'train_data' and 'test_data'

with mlflow.start_run(run_name="default") as run:
    # Create a LightGBMClassifier model with specified settings
    model = LightGBMClassifier(objective="binary", featuresCol="features", labelCol="Exited", dataTransferMode="bulk")

    # Fit the model to the training data
    model = model.fit(train_data)

    # Get the predictions
    predictions = model.transform(test_data)

    # Extract the predicted probabilities for the positive class
    y_pred = predictions.select("probability").rdd.map(lambda x: x[0][1]).collect()

    # Extract the true labels from the 'test_data' DataFrame
    y_true = test_data.select("Exited").rdd.map(lambda x: x[0]).collect()

    # Compute the ROC AUC score
    roc_auc = roc_auc_score(y_true, y_pred)

    # Log the ROC AUC score with MLflow
    mlflow.log_metric("ROC_AUC", roc_auc)

    # Print or log the ROC AUC score
    print("ROC AUC Score:", roc_auc)
从这里我们可以看到,最终模型的 ROC AUC 分数为 84%。
使用 FLAML 创建 AutoML 试用版
在本部分中,我们将使用 FLAML 包创建 AutoML 试用版,配置试用设置,将 Spark 数据集转换为 Spark 数据集上的 Pandas,运行 AutoML 试用版,并查看生成的指标。
配置 AutoML 试用版
在这里,我们将从 FLAML 包导入必要的类和模块,并创建 AutoML 实例,该实例将用于自动化机器学习管道。
# Import the AutoML class from the FLAML package
from flaml import AutoML
from flaml.automl.spark.utils import to_pandas_on_spark

# Create an AutoML instance
automl = AutoML()
配置设置
在本部分中,我们将定义 AutoML 试用版的配置设置。
# Define AutoML settings
settings = {
    "time_budget": 250,         # Total running time in seconds
    "metric": 'roc_auc',       # Optimization metric (ROC AUC in this case)
    "task": 'classification',  # Task type (classification)
    "log_file_name": 'flaml_experiment.log',  # FLAML log file
    "seed": 41,                # Random seed
    "force_cancel": True,      # Force stop training once time_budget is used up
    "mlflow_exp_name": "automl_sample"      # MLflow experiment name
}
转换为 Spark 上的 Pandas
若要使用基于 Spark 的数据集运行 AutoML,需要使用 to_pandas_on_spark 函数将其转换为 Pandas on Spark 数据集。 这使 FLAML 能够有效地处理数据。
# Convert the Spark training dataset to a Pandas on Spark dataset
df_automl = to_pandas_on_spark(train_data)
运行 AutoML 试用版
现在,我们执行 AutoML 试用版。 我们使用嵌套的 MLflow 运行来跟踪现有 MLflow 运行上下文中的试验。 AutoML 试验在 Spark 上的 Pandas 数据集(df_automl)上执行,目标变量“Exited”,定义的设置将传递至 fit 函数以便进行配置。
'''The main flaml automl API'''

with mlflow.start_run(nested=True):
    automl.fit(dataframe=df_automl, label='Exited', isUnbalance=True, **settings)
查看生成的指标
在此最后一部分中,我们将检索并显示 AutoML 试用版的结果。 这些指标提供有关给定数据集上 AutoML 模型性能和配置的见解。
# Retrieve and display the best hyperparameter configuration and metrics
print('Best hyperparameter config:', automl.best_config)
print('Best ROC AUC on validation data: {0:.4g}'.format(1 - automl.best_loss))
print('Training duration of the best run: {0:.4g} s'.format(automl.best_config_train_time))
使用 Apache Spark 并行化您的 AutoML 实验
在您的数据集能适应单个节点的场景下,并且您想要利用 Spark 的强大功能同时运行多个并行 AutoML 实验时,可以按照以下步骤操作:
转换为 Pandas 数据帧
若要启用并行化,必须先将数据转换为 Pandas 数据帧。
pandas_df = train_raw.toPandas()
在这里,我们将 train_raw Spark 数据帧转换为名为 pandas_df 的 Pandas 数据帧,使其适合并行处理。
配置并行化设置
将 use_spark 设置为 True 以启用基于 Spark 的并行度。 默认情况下,FLAML 将为每个执行程序启动一个试用版。 可以使用 n_concurrent_trials 参数自定义并发试用版数。
settings = {
    "time_budget": 250,           # Total running time in seconds
    "metric": 'roc_auc',         # Optimization metric (ROC AUC in this case)
    "task": 'classification',    # Task type (classification)
    "seed": 41,                  # Random seed
    "use_spark": True,           # Enable Spark-based parallelism
    "n_concurrent_trials": 3,    # Number of concurrent trials to run
    "force_cancel": True,        # Force stop training once time_budget is used up
    "mlflow_exp_name": "automl_sample"  # MLflow experiment name

}
在这些设置中,我们通过将 use_spark 设置为 True来指定我们希望利用 Spark 实现并行度。 我们还将并发试验数设置为 3,这意味着三个试验将在 Spark 上并行运行。
要详细了解如何并行化 AutoML 跟踪,请访问 FLAML 文档,了解并行 Spark 作业。
并行运行 AutoML 试用版
现在,我们将与指定的设置并行运行 AutoML 试用版。 我们将使用嵌套的 MLflow 运行来跟踪现有 MLflow 运行上下文中的实验。
'''The main FLAML AutoML API'''
with mlflow.start_run(nested=True, run_name="parallel_trial"):
    automl.fit(dataframe=pandas_df, label='Exited', **settings)
现在,这将执行已启用并行化的 AutoML 试用版。 dataframe 参数设置为 Pandas 数据帧 pandas_df,并将其他设置传递给 fit 函数进行并行执行。
查看指标
运行并行 AutoML 试用后,检索并显示结果,包括最佳超参数配置、验证数据的 ROC AUC 以及性能最佳的运行训练持续时间。
''' retrieve best config'''
print('Best hyperparmeter config:', automl.best_config)
print('Best roc_auc on validation data: {0:.4g}'.format(1-automl.best_loss))
print('Training duration of best run: {0:.4g} s'.format(automl.best_config_train_time))