模块 1:使用数据工厂创建管道

此模块需要 10 分钟时间,内容是使用管道中的复制活动将源存储中的原始数据引入数据 Lakehouse 的 Bronze 表。

模块 1 中的概要步骤如下:

  1. 创建数据管道。
  2. 在管道中使用复制活动将示例数据加载到数据 Lakehouse 中。

创建数据管道

  1. 需要具有活动订阅的 Microsoft Fabric 租户帐户。 创建一个免费帐户

  2. 确保你具有已启用 Microsoft Fabric 的工作区:创建工作区

  3. 登录到 Power BI

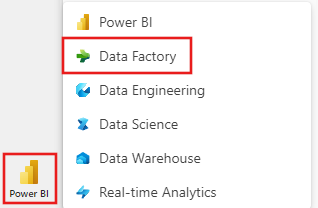
  4. 选择屏幕左下角的默认 Power BI 图标,并切换到数据工厂体验。

    Screenshot showing the selection of the Data Factory experience.

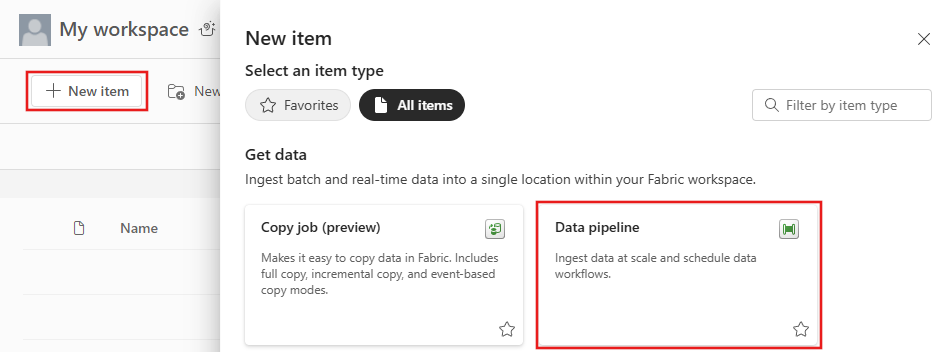
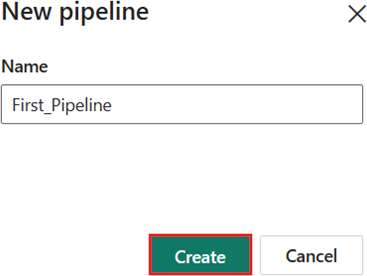
  5. 选择“数据管道”并提供管道名称。 然后选择“创建”。

    Screenshot of the Data Factory start page with the button to create a new data pipeline selected.

    Screenshot showing the dialog to give the new pipeline a name.

使用管道中的复制活动将示例数据加载到数据 Lakehouse

步骤 1:使用复制助手配置复制活动。

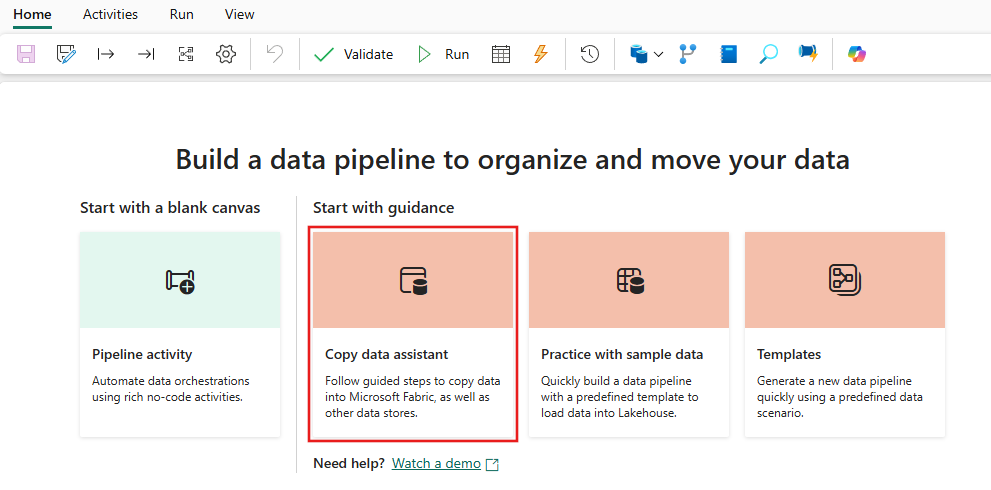
选择“复制数据”打开复制助手工具。

Screenshot showing the selection of the Copy data activity from the new pipeline start page.

步骤 2:在副本助手中配置设置。

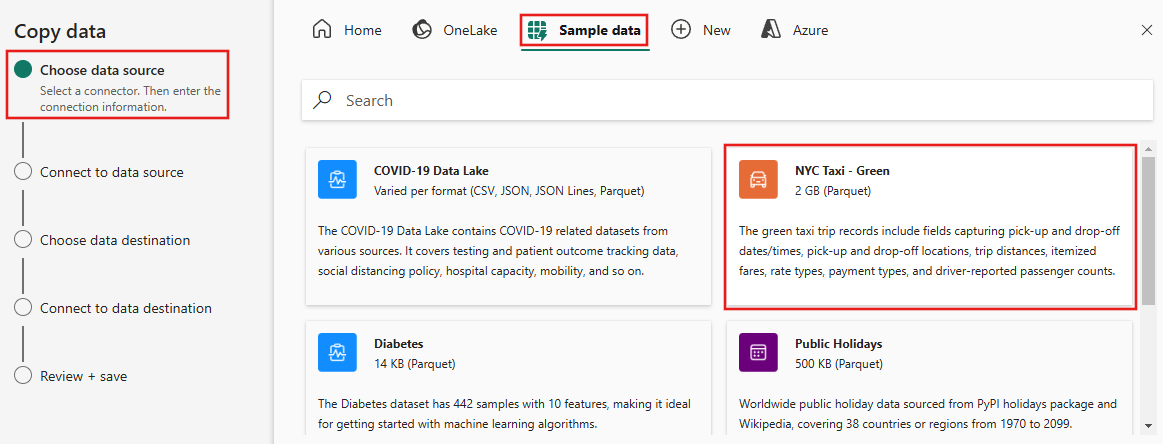
  1. 显示了“复制数据”对话框,突出显示了第一步“选择数据源”。 如有必要,向下滚动到“数据源”部分,然后选择 Azure Blob 存储数据源类型。 然后,选择“下一步”。

    Screenshot showing the selection of the Azure Blob Storage data source type in the copy assistant on the Choose data source tab.

  2. 在下一步中,选择“创建新连接”,然后提供托管本教程在 https://nyctaxisample.blob.core.windows.net/sample 提供的示例数据的 Blob 存储的 URL。 身份验证类型为匿名。 提供 URL 后,选择“下一步”。

    Screenshot showing the creation of a new Azure Blob Storage connection with the URL for the sample data in the tutorial.

  3. 此时会显示“连接到数据源”步骤,最初你会看到错误“无法列出文件”,因为仅向 Blob 存储中的示例文件夹授予了权限。 请提供文件夹名称:示例,然后选择“重试”。

    Screenshot showing the Unable to list files error with the folder name Sample provided.

    注意

    Blob 存储文件夹区分大小写,应全部为小写。

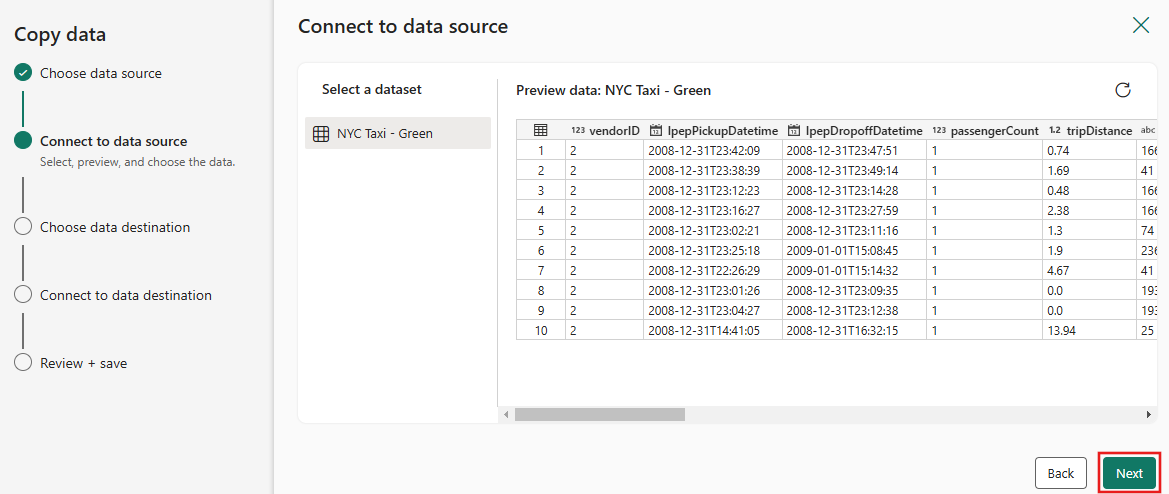
  4. Blob 存储浏览器随即显示。 选择 NYC-Taxi-Green-2015-01.parquet 文件,并等待数据预览出现。 然后,选择“下一步”。

    Screenshot showing the preview data for the NYC-Taxi-Green-2015-01.parquet file.

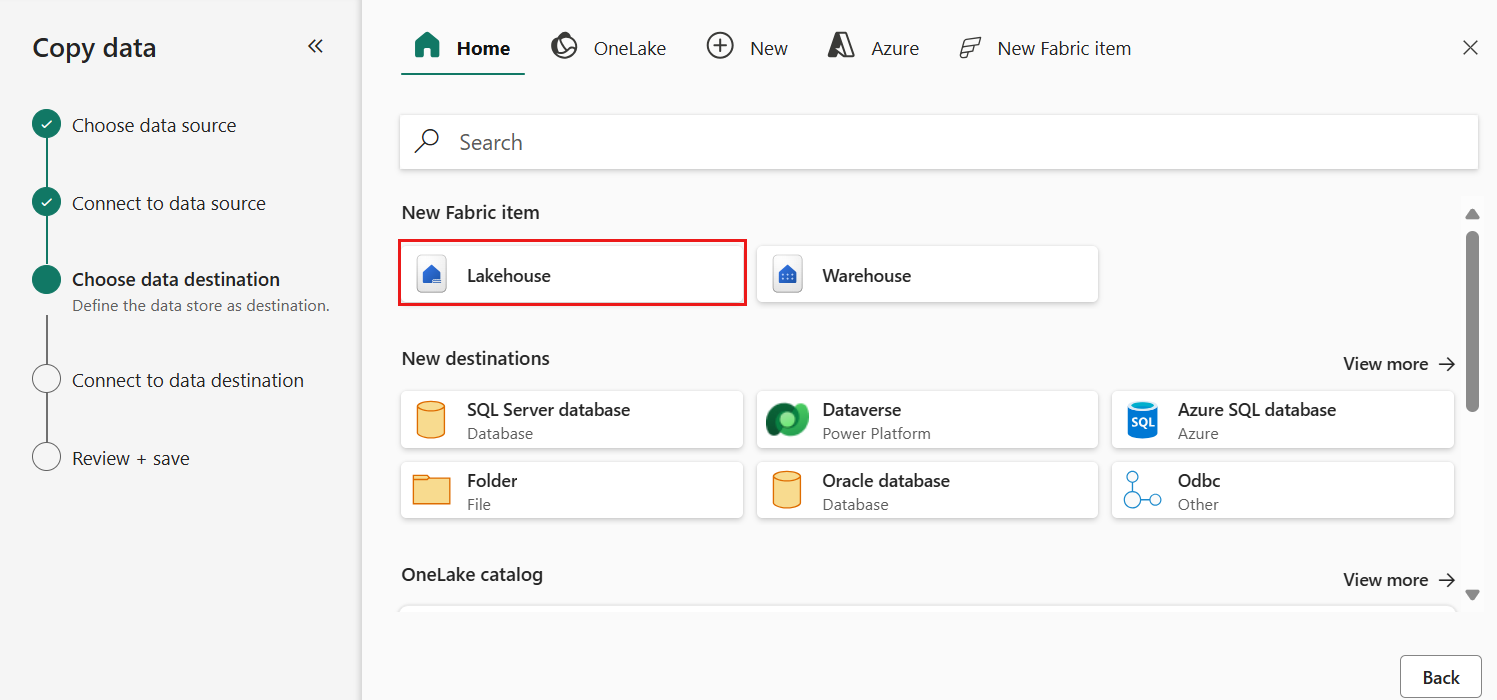
  5. 对于复制助手的“选择数据目标”步骤,请选择“Lakehouse”,然后选择“下一步”。

    Screenshot showing the selection of the Lakehouse destination on the Choose data destination tab of the Copy data assistant.

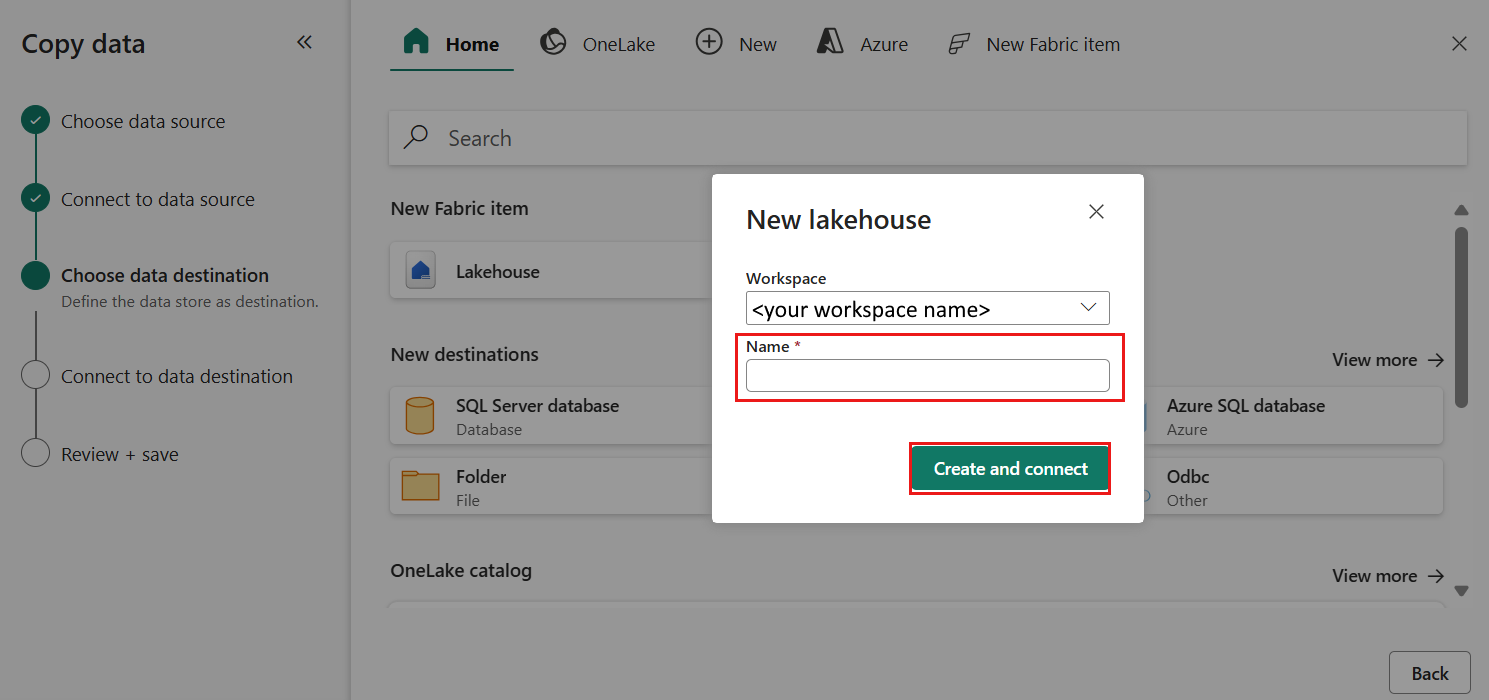
  6. 在显示的数据目标配置页上,选择“创建新的 Lakehouse”,并输入新 Lakehouse 的名称。 然后,再次选择“下一步”。

    Screenshot showing the data destination configuration page of the Copy assistant, choosing the Create new Lakehouse option and providing a Lakehouse name.

  7. 现在,在“选择并映射到文件夹路径或表”页上配置 Lakehouse 目标的详细信息。 为“根文件夹”选择“”,提供表名称,然后选择“覆盖”操作。 请勿选中在你选择了“覆盖”表操作后显示的“启用分区”复选框。
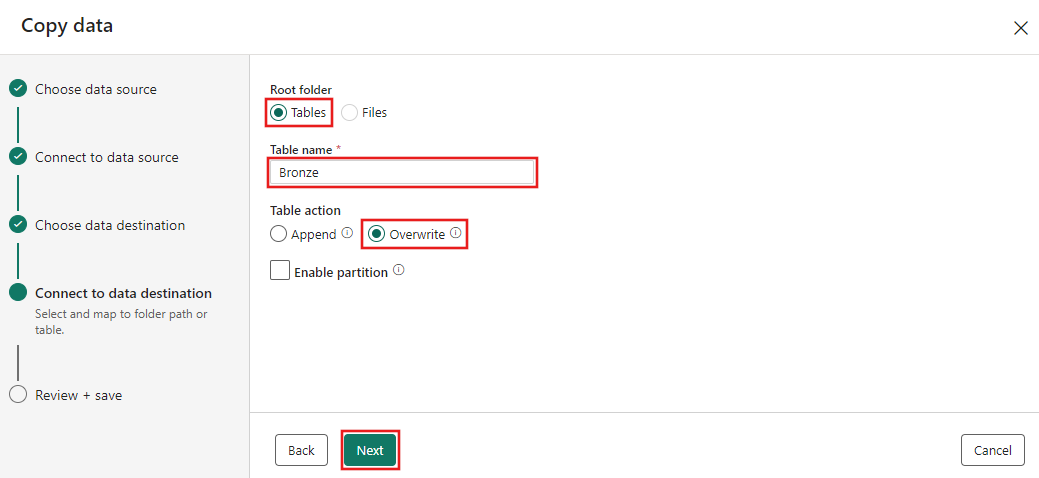
    Screenshot showing the Connect to data destination tab of the Copy data assistant, on the Select and map to folder path or table step.

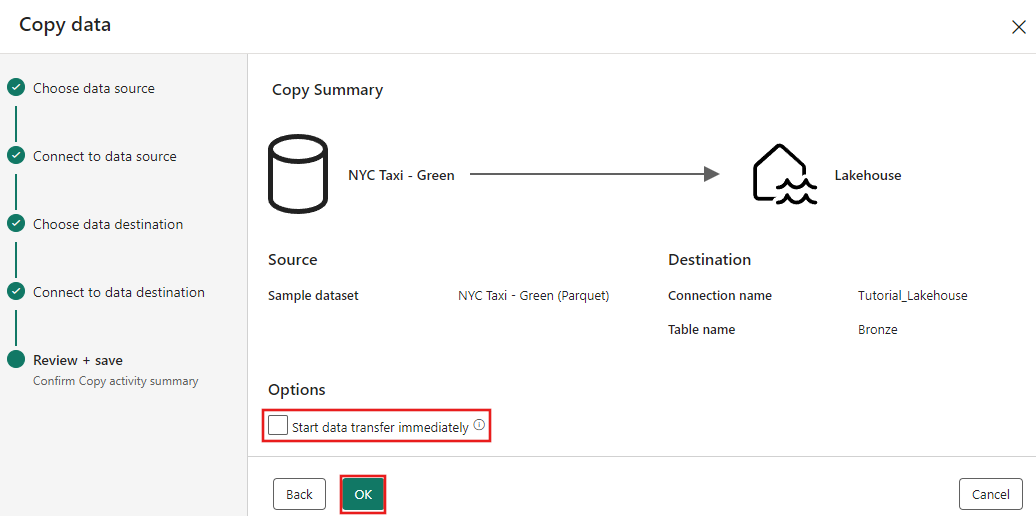
  8. 最后,在复制数据助手的“查看 + 保存”页上,查看配置。 在本教程中,请取消选中“立即开始数据传输”复选框,因为我们会在下一步中手动运行活动。 然后选择“确定”。

    Screenshot showing the Copy data assistant on the Review + save page.

步骤 3:运行并查看复制活动的结果。

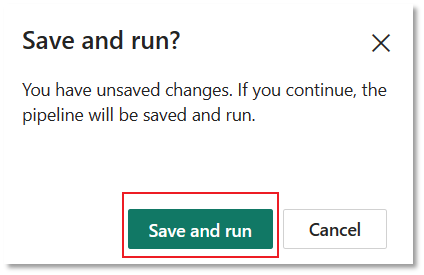
  1. 在管道编辑器中选择“运行”选项卡。 然后选择“运行”按钮,在提示时选择“保存并运行”以运行复制活动。

    Screenshot showing the pipeline Run tab with the Run button highlighted.

    Screenshot showing the Save and run dialog with the Save and run button highlighted.

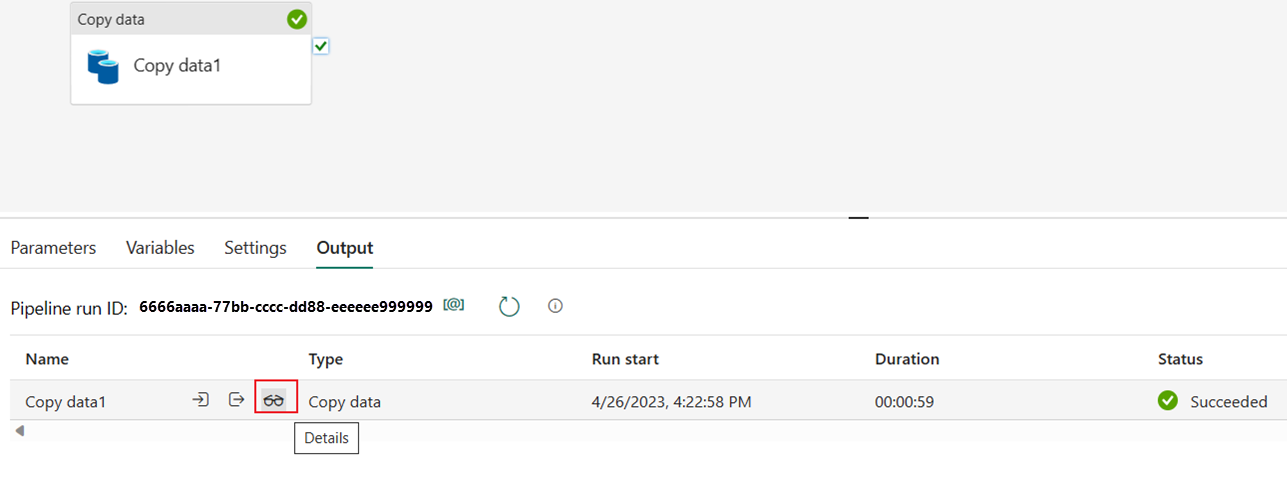
  2. 可以监视该运行,并在管道画布下方的“输出”选项卡上检查结果。 选择运行详细信息按钮(将鼠标悬停在正在运行的管道运行上时显示的“眼镜”图标)以查看运行详细信息。

    Screenshot showing the run details button in the pipeline Output tab.

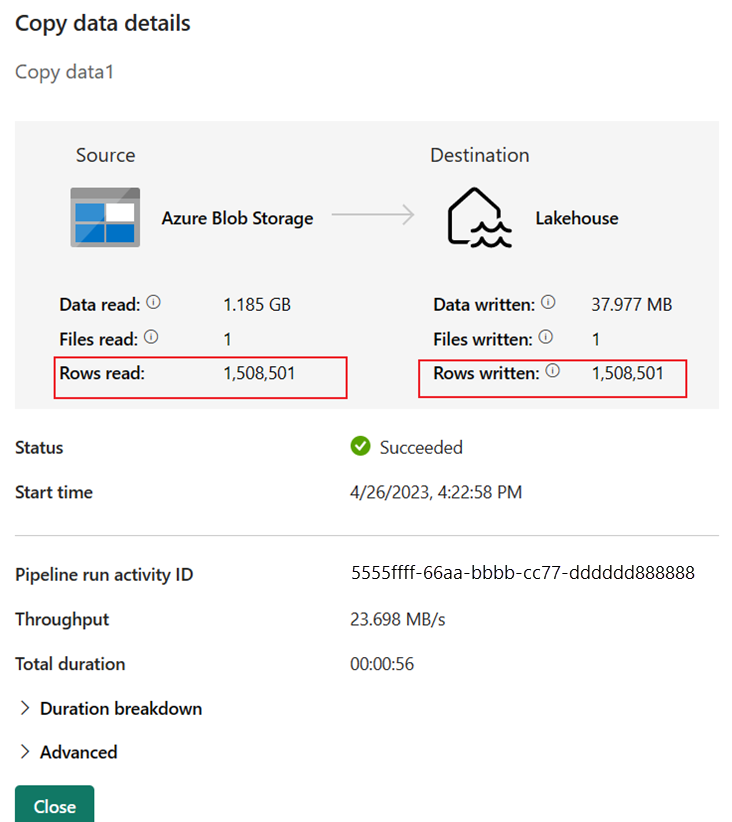
  3. 运行详细信息显示读取和写入了 1,508,501 行。

    Screenshot of the Copy data details for the pipeline run.

  4. 展开“持续时间明细”部分,查看复制活动的每个阶段的持续时间。 查看复制的详细信息后,选择“关闭”。
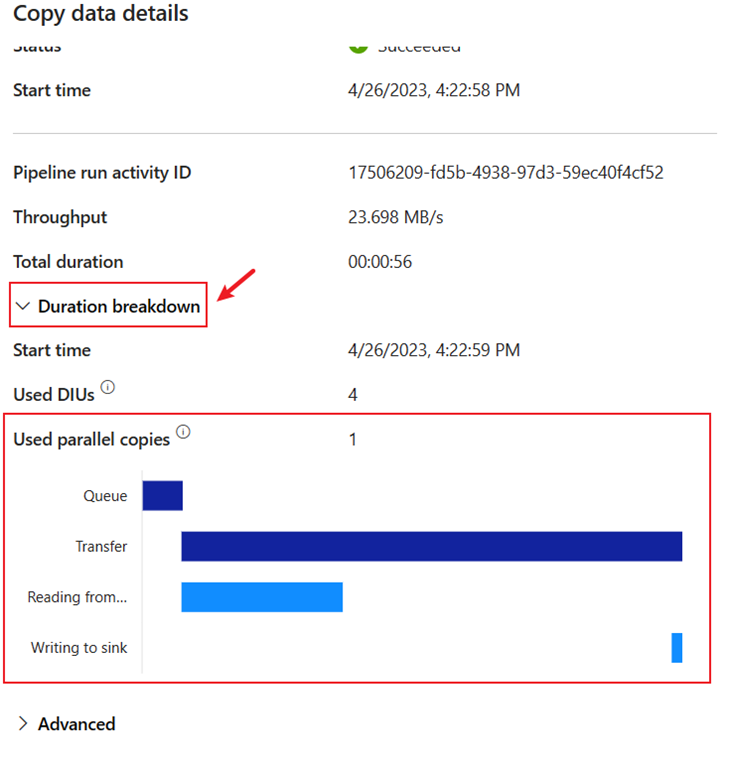
    Screenshot showing the duration breakdown of the Copy activity run.

在我们在 Microsoft Fabric 中使用数据工厂进行首次数据集成的端到端教程的第一个模块中,你学习了如何:

  • 创建数据管道。
  • 将复制活动添加到管道。
  • 使用示例数据并创建数据 Lakehouse 以将数据存储到新表。
  • 运行管道并查看其详细信息和持续时间明细。

现在请继续前往下一部分,创建你的数据流。