为自断言声明创建可验证凭据
使用自颁证明类型的规则定义会生成颁发流,你需要通过该流在 Microsoft Authenticator 中手动输入声明的值。
使用自颁证明类型创建自定义凭据
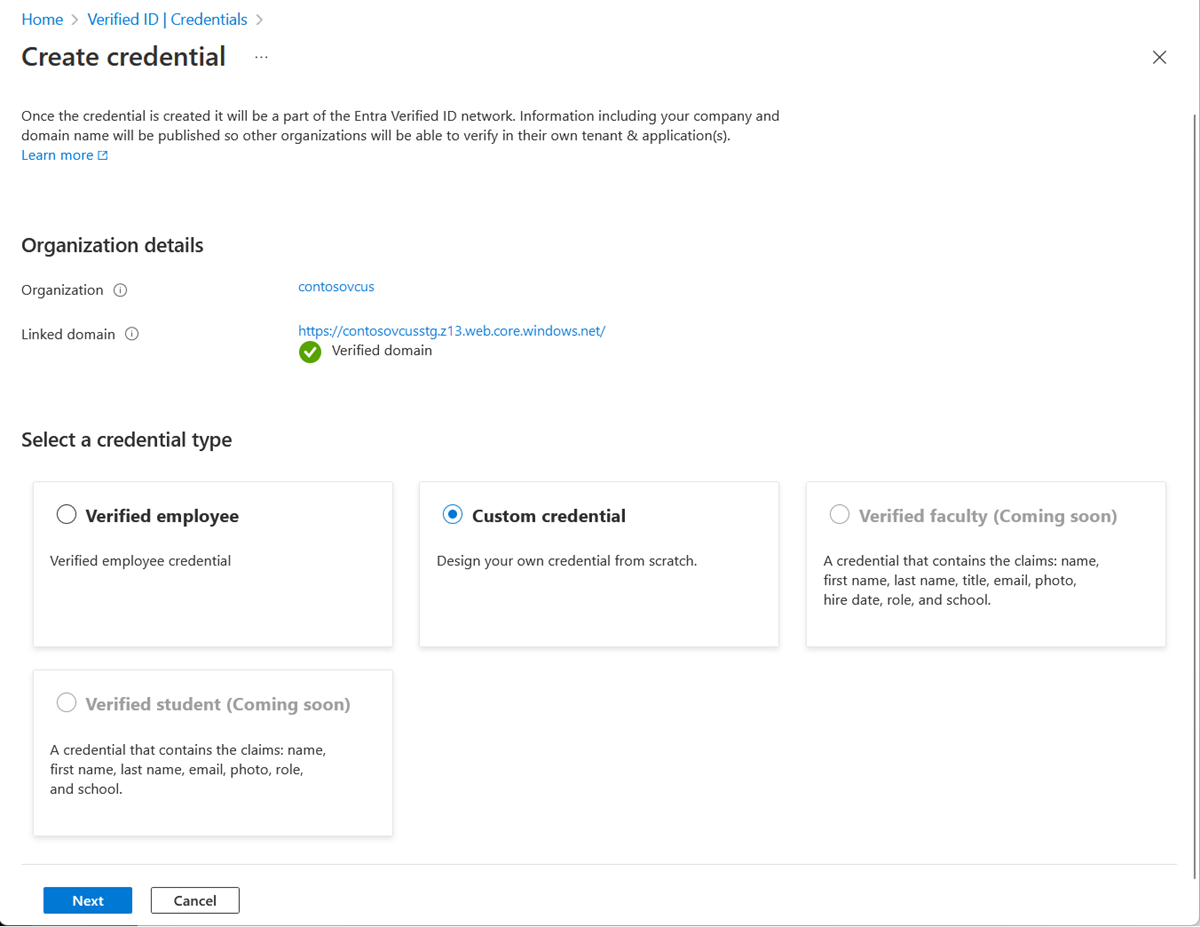
在 Azure 门户中选择“添加凭据”时,可以选择启动两个快速入门。 选择“自定义凭据”,然后选择“下一步”。

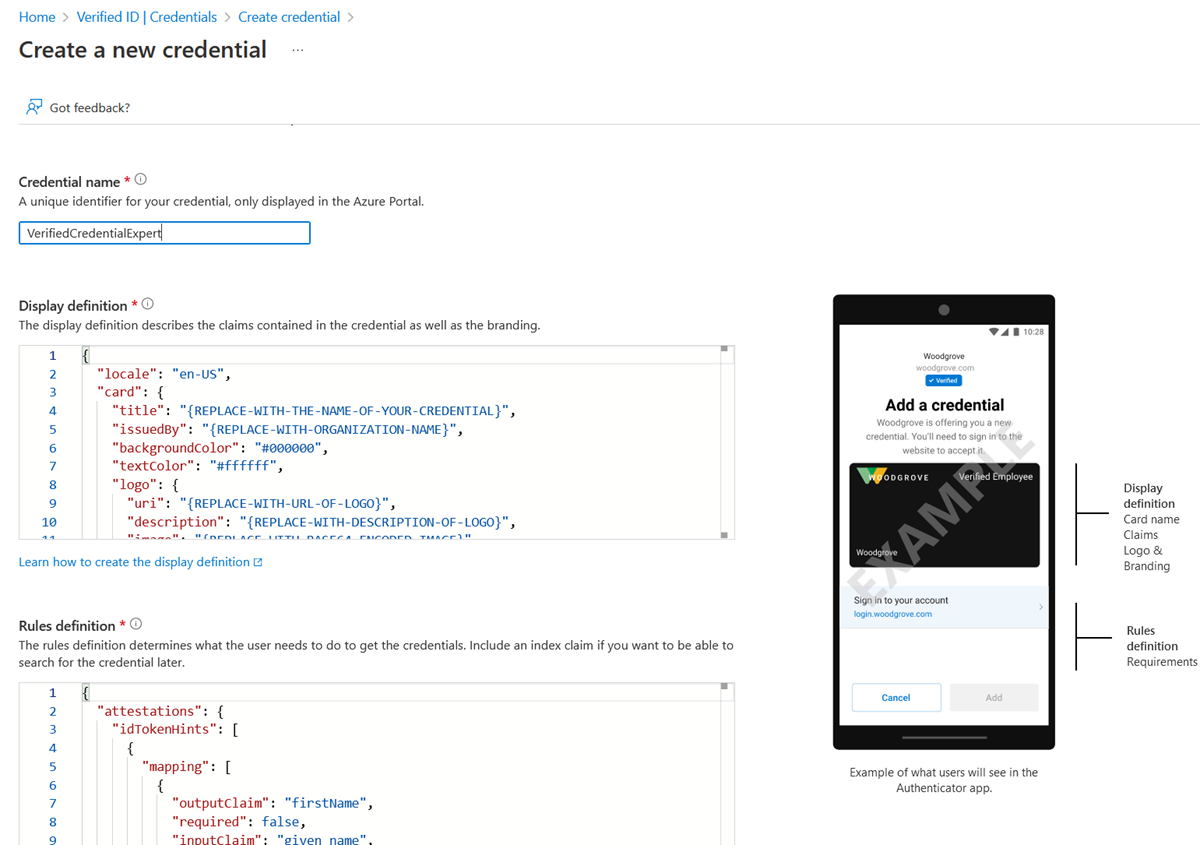
在“创建新凭据”页上,输入显示和规则定义的 JSON 代码。 在“凭据名称”框中,为凭据提供类型名称。 选择“创建”以创建凭据。

示例 JSON 显示定义
无论证明类型如何,JSON 显示定义都几乎相同。 只需根据可验证凭据所拥有的声明来调整标签。 显示定义的预期 JSON 是显示集合的内部内容。 JSON 是一个集合,如果要支持多个区域设置,则添加多个条目,以逗号作为分隔符。
{
    "locale": "en-US",
    "card": {
      "title": "Verified Credential Expert",
      "issuedBy": "Microsoft",
      "backgroundColor": "#000000",
      "textColor": "#ffffff",
      "logo": {
        "uri": "https://didcustomerplayground.z13.web.core.windows.net/VerifiedCredentialExpert_icon.png",
        "description": "Verified Credential Expert Logo"
      },
      "description": "Use your verified credential to prove to anyone that you know all about verifiable credentials."
    },
    "consent": {
      "title": "Do you want to get your Verified Credential?",
      "instructions": "Sign in with your account to get your card."
    },
    "claims": [
      {
        "claim": "vc.credentialSubject.displayName",
        "label": "Name",
        "type": "String"
      },
      {
        "claim": "vc.credentialSubject.companyName",
        "label": "Company",
        "type": "String"
      }
    ]
}
示例 JSON 规则定义
JSON 证明定义应包含自颁名称和声明映射部分。 由于声明是自颁发的,因此对于 outputClaim 和 inputClaim,该值相同。 规则定义的预期 JSON 是规则属性的内部内容,它以 attestation 属性开头。
{
  "attestations": {
    "selfIssued": {
      "mapping": [
        {
          "outputClaim": "displayName",
          "required": true,
          "inputClaim": "displayName",
          "indexed": true
        },
        {
          "outputClaim": "companyName",
          "required": true,
          "inputClaim": "companyName",
          "indexed": false
        }
      ],
      "required": false
    }
  },
  "validityInterval": 2592000,
  "vc": {
    "type": [
      "VerifiedCredentialExpert"
    ]
  }
}
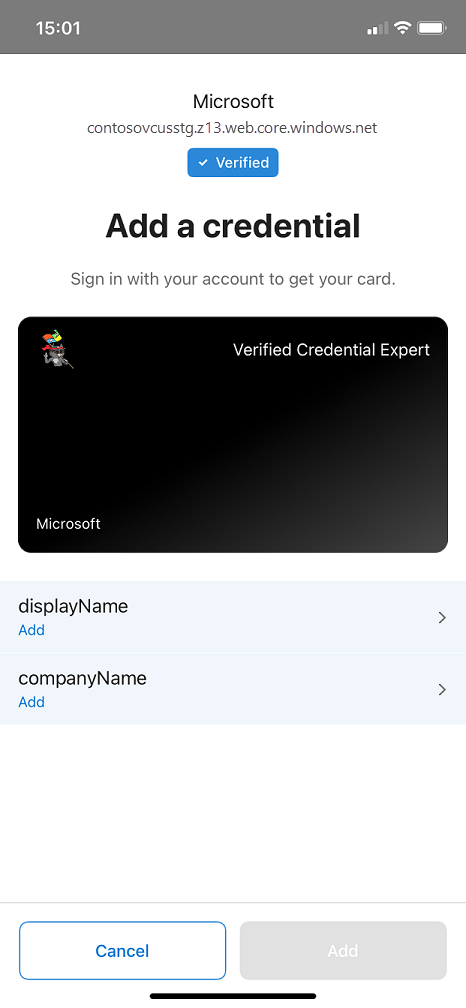
在颁发期间输入的声明
在颁发期间,Authenticator 会提示你为指定的声明输入值。 未验证用户输入。

配置示例用于颁发和验证自定义凭据
要配置示例代码用于颁发和验证自定义凭据,需要:
- 租户的颁发者分散式标识符 (DID)
- 凭据类型
- 指向凭据的清单 URL
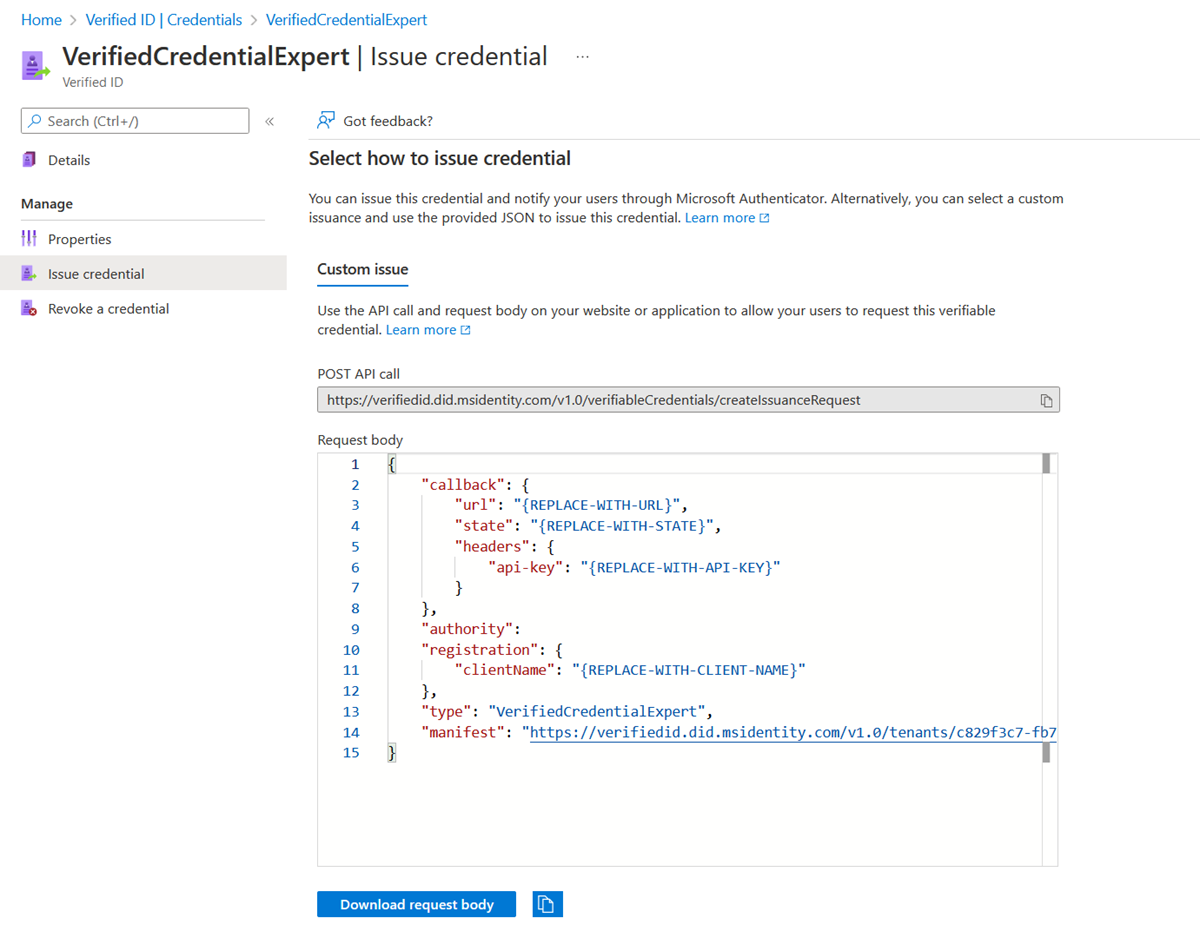
查找自定义凭据的此信息的最简单方法是转到 Azure 门户中的凭据。 选择“颁发凭据”。 然后便可以访问具有请求服务 API JSON 有效负载的文本框。 将占位符值替换为环境的信息。 颁发者的 DID 是 authority 值。

后续步骤
查看规则和显示定义参考。