向窗体添加控件(Windows 窗体 .NET)
大多数窗体都是通过将控件添加到窗体图面来定义用户界面(UI)设计的。 控件 是窗体上的组件,用于显示信息或接受用户输入。
控件添加到窗体的主要方式是通过 Visual Studio Designer,但你也可以通过代码在运行时管理窗体上的控件。
使用设计器添加
Visual Studio 使用窗体设计器设计窗体。 有一个“控件”窗格,其中列出了应用可用的所有控件。 可以通过两种方式从窗格中添加控件:
双击添加控件
双击控件时,会自动将其以默认设置添加到当前打开的窗体中。

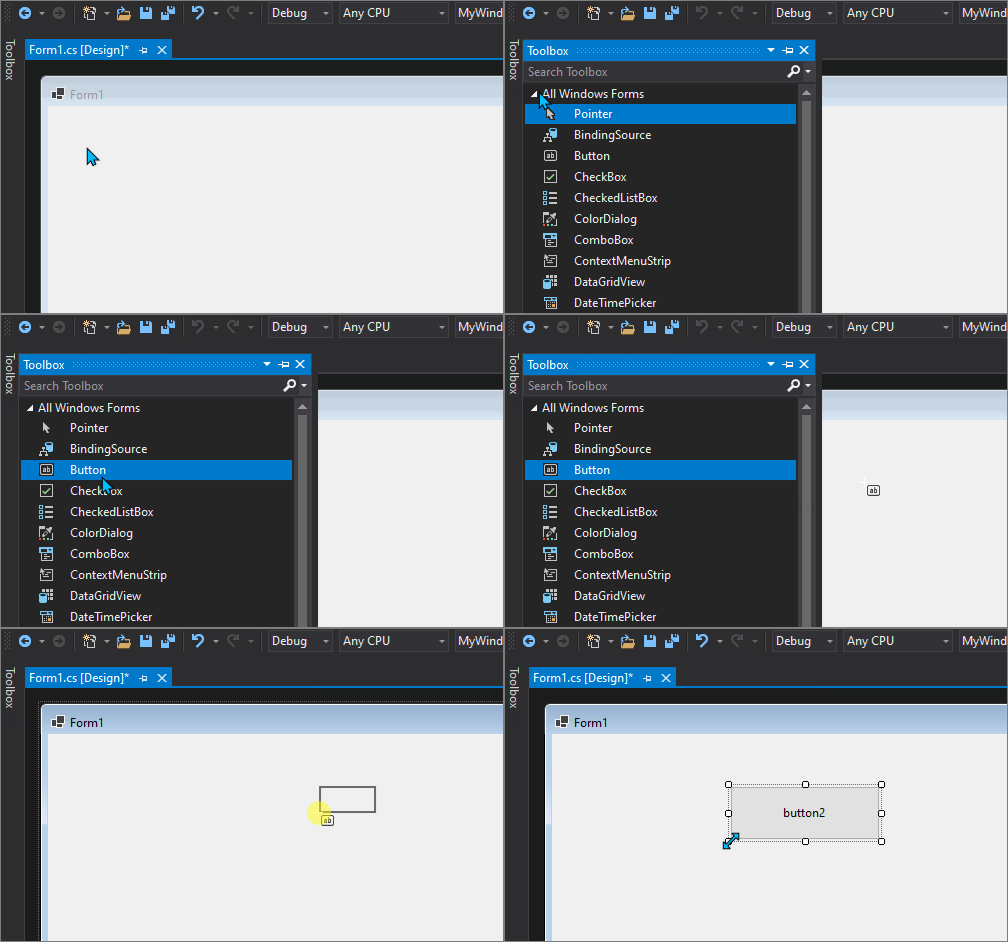
通过绘图添加控件
通过单击选择控件。 在表单中拖动选择一个区域。 控件将被放置以适应您所选区域的大小。
 的工具箱中拖动选择并绘制控件
通过代码添加
可以创建控件,然后在运行时使用窗体的 Controls 集合将其添加到窗体。 此集合还可用于从窗体中删除控件。
以下代码添加并放置两个控件:Label 和 TextBox:
Label label1 = new Label()
{
    Text = "&First Name",
    Location = new Point(10, 10),
    TabIndex = 10
};

TextBox field1 = new TextBox()
{
    Location = new Point(label1.Location.X, label1.Bounds.Bottom + Padding.Top),
    TabIndex = 11
};

Controls.Add(label1);
Controls.Add(field1);
Dim label1 As New Label With {.Text = "&First Name",
                              .Location = New Point(10, 10),
                              .TabIndex = 10}

Dim field1 As New TextBox With {.Location = New Point(label1.Location.X,
                                                      label1.Bounds.Bottom + Padding.Top),
                                .TabIndex = 11}

Controls.Add(label1)
Controls.Add(field1)
