使用 Office 365 Outlook 联系人适配器创建联系人 - BizTalk Server
使用 BizTalk Server 中的Office 365 Outlook 联系人适配器在 Office 365 Outlook 中创建联系人。
使用发送端口创建联系人
在BizTalk Server管理控制台中,右键单击“发送端口”,选择“新建”,然后选择“静态单向发送端口”。
创建发送端口 提供了一些指导。
输入“名称”。 在“传输”中,将“类型”设置为“Office 365 Outlook 联系人”,然后选择“配置”。
选择“登录...”,然后登录到Office 365帐户。 帐户会自动填充你的电子邮件地址。
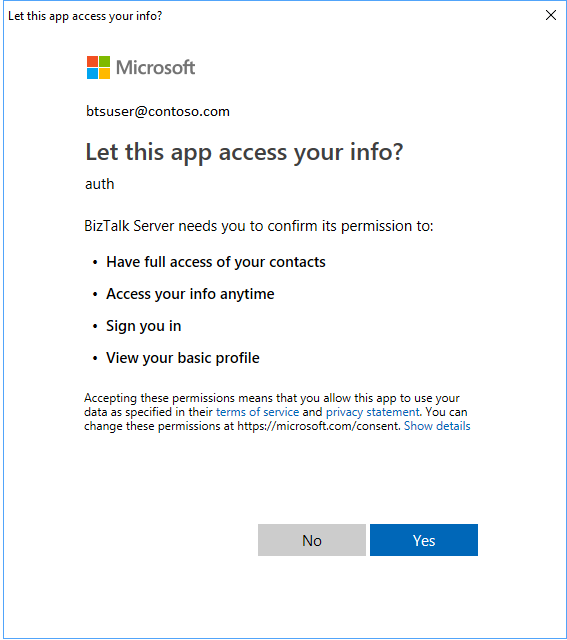
允许BizTalk Server审批访问权限:

选择“ 确定” 以保存更改。
测试发送端口
可以使用简单的文件接收端口和位置在Office 365 Outlook 联系人适配器上创建事件。
使用文件适配器创建接收端口。 在接收位置中,将 Receive 文件夹 设置为 C:\Temp\In\,并将文件掩码设置为 *.xml。
在Office 365 Outlook 联系人适配器发送端口属性中,将“筛选器”设置为
BTS.ReceivePortName == <Receive Port Name>。将以下内容粘贴到文本编辑器中,并将文件另存为 Office365Contact.xml。 这是示例消息。
    <ns0:Contact xmlns:ns0="http://schemas.microsoft.com/BizTalk/Office365OutlookContacts/Send">
        <categories>categories_0</categories>
        <categories>categories_1</categories>
        <categories>categories_2</categories>
        <birthday>1999-05-31T13:20:00.000-05:00</birthday>
        <fileAs>fileAs_0</fileAs>
        <displayName>displayName_0</displayName>
        <givenName>givenName_0</givenName>
        <initials>initials_0</initials>
        <middleName>middleName_0</middleName>
        <nickName>nickName_0</nickName>
        <surname>surname_0</surname>
        <title>title_0</title>
        <yomiGivenName>yomiGivenName_0</yomiGivenName>
        <yomiSurname>yomiSurname_0</yomiSurname>
        <yomiCompanyName>yomiCompanyName_0</yomiCompanyName>
        <generation>generation_0</generation>
        <jobTitle>jobTitle_0</jobTitle>
        <companyName>companyName_0</companyName>
        <department>department_0</department>
        <officeLocation>officeLocation_0</officeLocation>
        <profession>profession_0</profession>
        <businessHomePage>businessHomePage_0</businessHomePage>
        <assistantName>assistantName_0</assistantName>
        <manager>manager_0</manager>
        <homePhones>homePhones_0</homePhones>
        <homePhones>homePhones_1</homePhones>
        <mobilePhone>mobilePhone_0</mobilePhone>
        <businessPhones>businessPhones_0</businessPhones>
        <businessPhones>businessPhones_1</businessPhones>
        <spouseName>spouseName_0</spouseName>
        <personalNotes>personalNotes_0</personalNotes>
        <children>children_0</children>
        <children>children_1</children>
        <children>children_2</children>
        <emailAddresses>
            <name>name_0</name>
            <address>address_0</address>
        </emailAddresses>
        <emailAddresses>
            <name>name_0</name>
            <address>address_0</address>
        </emailAddresses>
        <homeAddress>
            <city>city_0</city>
            <countryOrRegion>countryOrRegion_0</countryOrRegion>
            <postalCode>10000</postalCode>
            <state>state_0</state>
            <street>street_0</street>
        </homeAddress>
        <businessAddress>
            <city>city_0</city>
            <countryOrRegion>countryOrRegion_0</countryOrRegion>
            <postalCode>11111</postalCode>
            <state>state_0</state>
            <street>street_0</street>
        </businessAddress>
        <otherAddress>
            <city>city_0</city>
            <countryOrRegion>countryOrRegion_0</countryOrRegion>
            <postalCode>21222</postalCode>
            <state>state_0</state>
            <street>street_0</street>
        </otherAddress>
    </ns0:Contact>
XML 架构作为 BizTalk 安装文件夹\SDK\Schemas 中的 < SDK 的一部分提供 >
启动文件接收位置和Office 365 Outlook 联系人适配器发送端口。
将Office365Contact.xml 示例邮件复制到接收文件夹中 (C:\Temp\In\) 。 发送端口基于 xml 在 Office 365 Outlook 帐户中创建联系人。
后续步骤
查看所有Office 365适配器。