你当前正在访问 Microsoft Azure Global Edition 技术文档网站。 如果需要访问由世纪互联运营的 Microsoft Azure 中国技术文档网站,请访问 https://docs.azure.cn。
教程:将数据从 OPC UA 服务器发送到 Azure Data Lake Storage Gen 2
在本快速入门中,你创建了一个数据流,用于将数据从 Azure IoT 操作发送到事件中心,然后通过 EventStreams 将数据发送到 Microsoft Fabric。
但是,也可以在不使用事件中心的情况下将数据直接发送到存储终结点。 此方法需要创建一个表示数据的 Delta Lake 架构,将架构上传到 Azure IoT 操作,然后创建一个数据流,用于从 OPC UA 服务器读取数据并将其写入存储终结点。
本教程基于快速入门设置,演示了如何将数据分流到 Azure Data Lake Storage Gen 2。 此方法允许直接将数据存储在可缩放且安全的数据湖中,该数据湖可用于进一步分析和处理。
先决条件
完成快速入门的第二步,获取从 OPC UA 服务器到 Azure IoT Operations MQTT 代理的数据。 确保可以看到事件中心中的数据。
创建包含 Data Lake Storage 功能的存储帐户
首先,按照以下步骤创建具有 Data Lake Storage Gen 2 功能的存储帐户。
- 为存储帐户选择一个难忘但唯一的名称,因为在后续步骤中需要用到该名称。
- 为了获得最佳结果,请使用靠近运行 Azure IoT 操作的 Kubernetes 群集的位置。
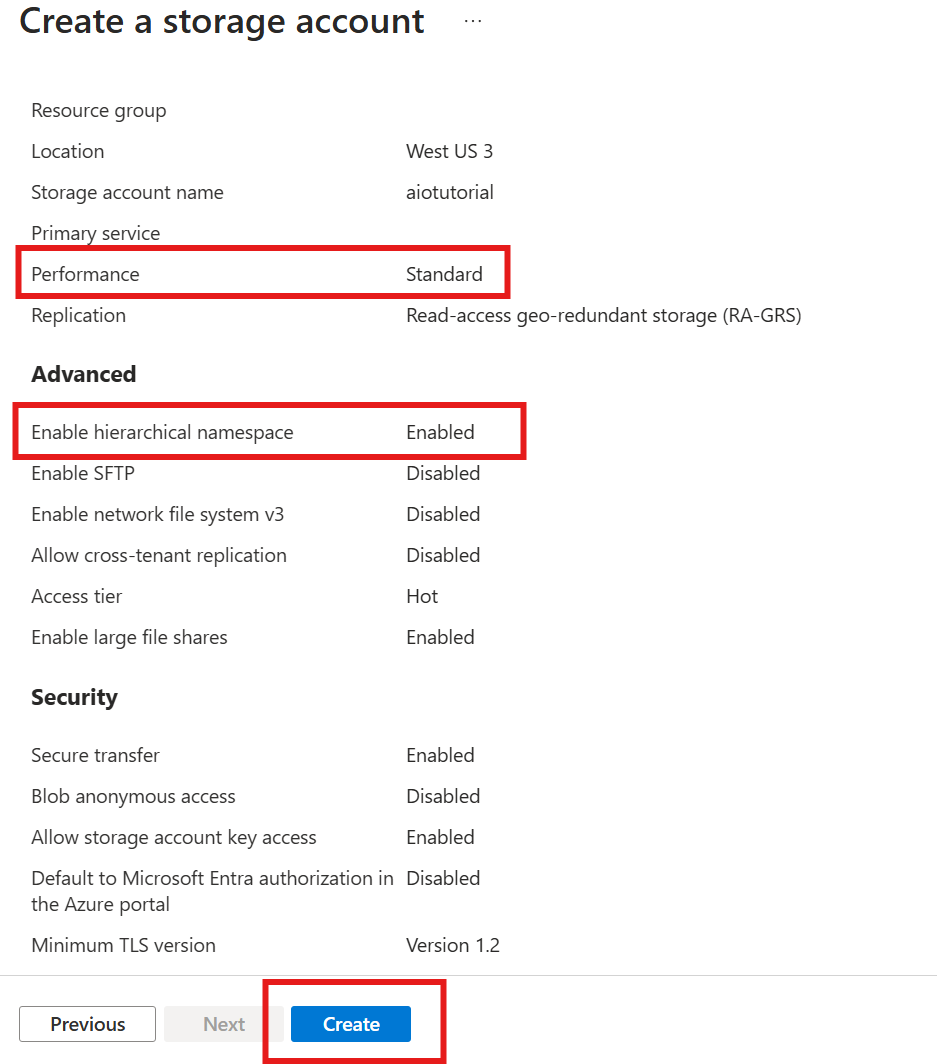
- 在创建过程中,启用“分层命名空间”设置。 执行 Azure IoT 操作需要此设置才能写入存储帐户。
- 你可以将其他设置保留为默认设置。
在“评审”步骤中,验证设置并选择“创建”以创建存储帐户。
获取 Azure IoT 操作的扩展名称
在 Azure 门户中,找到在快速入门中创建的 Azure IoT 操作实例。 在“概述”边栏选项卡中,找到“Arc 扩展”部分,并查看扩展的名称。 它看起来应该类似于:azure-iot-operations-xxxxx。
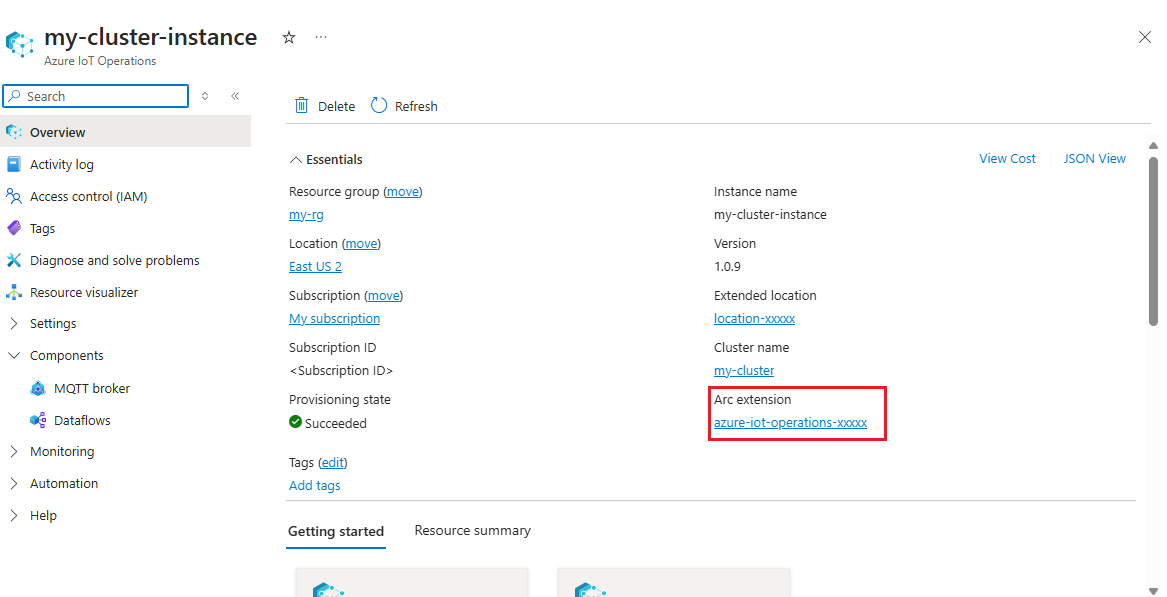
后续步骤中需使用此扩展名称向存储帐户分配权限。
将权限分配给 Azure IoT 操作以写入存储帐户
首先,在存储帐户中,转到“访问控制 (IAM)”边栏选项卡,然后选择“+ 添加角色分配”。 在“添加角色分配”边栏选项卡中,搜索角色“存储 Blob 数据参与者”并选择该角色。
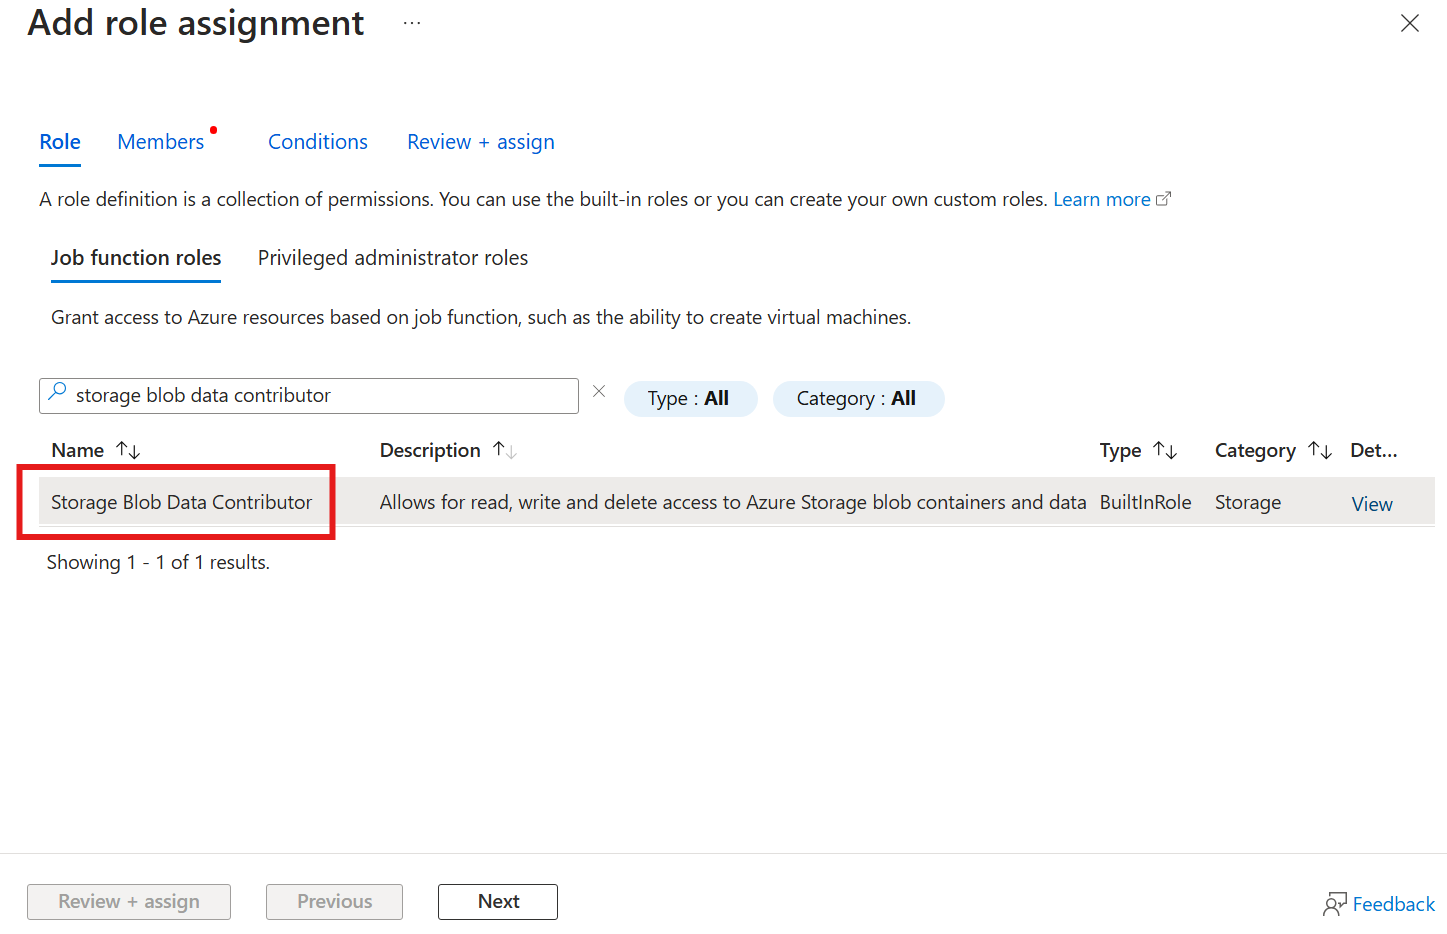
然后,选择“下一步”以访问“成员”部分。
接下来,选择“选择成员”,然后在“选择”框中,搜索名为 azure-iot-operations-xxxxx 的 Azure IoT Operations Arc 扩展托管标识并选择它。
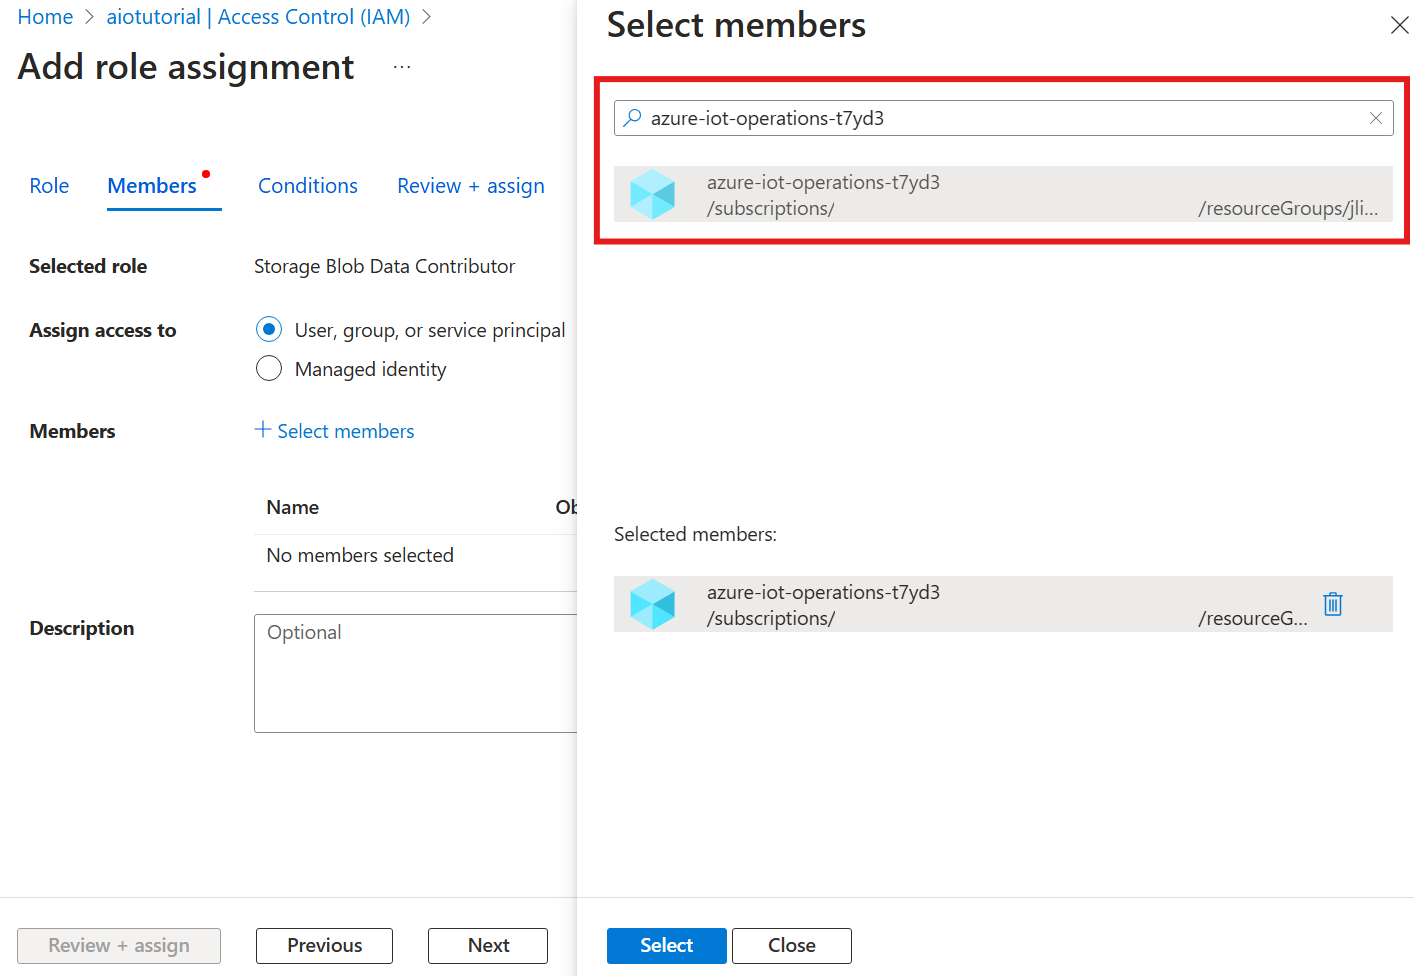
使用“审阅 + 分配”完成分配。
在存储帐户中创建容器
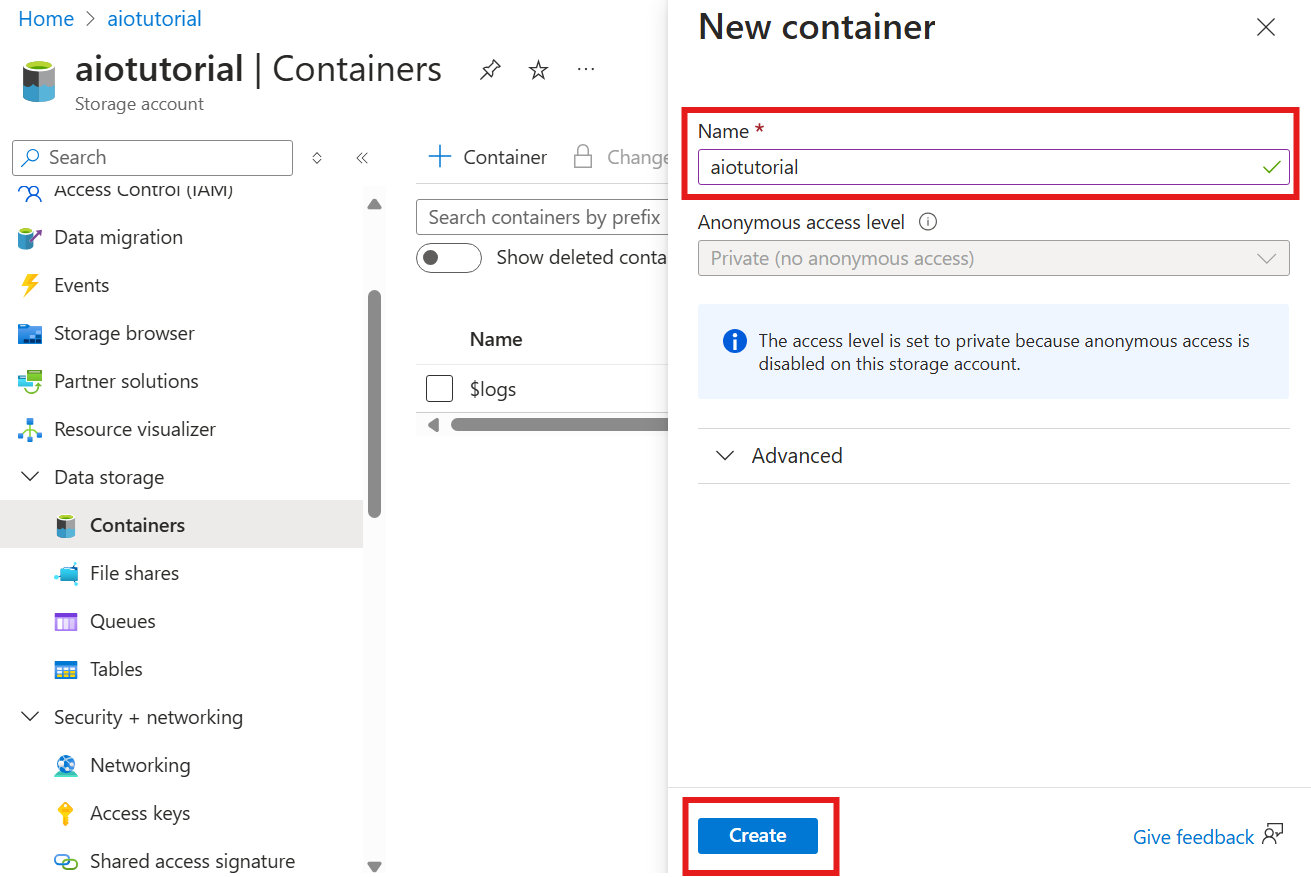
在存储帐户中,转到“容器”边栏选项卡,然后选择“+ 容器”。 对于本教程,请将容器命名为 aiotutorial。 选择“创建”创建容器。
获取架构注册表名称和命名空间
若要将架构上传到 Azure IoT 操作,需要知道架构注册表名称和命名空间。 你可以使用 Azure CLI 获取此信息。
运行以下命令以获取架构注册表名称和命名空间。 将占位符替换成自己的值。
az iot ops schema registry list -g <RESOURCE_GROUP> --query "[0].{name: name, namespace: properties.namespace}" -o tsv
输出应如下所示:
<REGISTRY_NAME> <SCHEMA_NAMESPACE>
保存后续步骤的值。
将架构上传到 Azure IoT 操作
在快速入门中,来自烤箱资产的数据如下所示:
{
  "Temperature": {
    "SourceTimestamp": "2024-11-15T21:40:28.5062427Z",
    "Value": 6416
  },
  "FillWeight": {
    "SourceTimestamp": "2024-11-15T21:40:28.5063811Z",
    "Value": 6416
  },
  "EnergyUse": {
    "SourceTimestamp": "2024-11-15T21:40:28.506383Z",
    "Value": 6416
  }
}
Delta Lake 所需的架构格式是遵循 Delta Lake 架构序列化格式的 JSON 对象。 架构应定义数据的结构,包括每个字段的类型和属性。 有关架构格式的更多详细信息,请参阅 Delta Lake 架构序列化格式文档。
提示
若要从示例数据文件生成架构,请使用 Schema Gen Helper。
对于本教程中,数据的架构如下所示:
{
  "$schema": "Delta/1.0",
  "type": "object",
  "properties": {
    "type": "struct",
    "fields": [
      {
        "name": "Temperature",
        "type": {
          "type": "struct",
          "fields": [
            {
              "name": "SourceTimestamp",
              "type": "timestamp",
              "nullable": false,
              "metadata": {}
            },
            {
              "name": "Value",
              "type": "integer",
              "nullable": false,
              "metadata": {}
            }
          ]
        },
        "nullable": false,
        "metadata": {}
      },
      {
        "name": "FillWeight",
        "type": {
          "type": "struct",
          "fields": [
            {
              "name": "SourceTimestamp",
              "type": "timestamp",
              "nullable": false,
              "metadata": {}
            },
            {
              "name": "Value",
              "type": "integer",
              "nullable": false,
              "metadata": {}
            }
          ]
        },
        "nullable": false,
        "metadata": {}
      },
      {
        "name": "EnergyUse",
        "type": {
          "type": "struct",
          "fields": [
            {
              "name": "SourceTimestamp",
              "type": "timestamp",
              "nullable": false,
              "metadata": {}
            },
            {
              "name": "Value",
              "type": "integer",
              "nullable": false,
              "metadata": {}
            }
          ]
        },
        "nullable": false,
        "metadata": {}
      }
    ]
  }
}
将其另存为名为 opcua-schema.json 的文件。
然后,使用 Azure CLI 将架构上传到 Azure IoT 操作。 将占位符替换成自己的值。
az iot ops schema create -n opcua-schema -g <RESOURCE_GROUP> --registry <REGISTRY_NAME> --format delta --type message --version-content opcua-schema.json --ver 1
该操作会使用版本 1 在 Azure IoT 操作注册表中创建名为 opcua-schema 的架构。
若要验证架构是否已上传,请使用 Azure CLI 列出架构版本。
az iot ops schema version list -g <RESOURCE_GROUP> --schema opcua-schema --registry <REGISTRY_NAME>
创建数据流终结点
数据流终结点是发送数据的目标。 在这种情况下,系统会将数据发送到 Azure Data Lake Storage Gen 2。 身份验证方法是系统分配的托管标识,你已将其设置为有权写入存储帐户。
使用 Bicep 创建数据流终结点。 将占位符替换成自己的值。
// Replace with your values
param aioInstanceName string = '<AIO_INSTANCE_NAME>'
param customLocationName string = '<CUSTOM_LOCATION_NAME>'

// Tutorial specific values
param endpointName string = 'adls-gen2-endpoint'
param host string = 'https://<ACCOUNT>.blob.core.windows.net'

resource aioInstance 'Microsoft.IoTOperations/instances@2024-11-01' existing = {
  name: aioInstanceName
}

resource customLocation 'Microsoft.ExtendedLocation/customLocations@2021-08-31-preview' existing = {
  name: customLocationName
}

resource adlsGen2Endpoint 'Microsoft.IoTOperations/instances/dataflowEndpoints@2024-11-01' = {
  parent: aioInstance
  name: endpointName
  extendedLocation: {
    name: customLocation.id
    type: 'CustomLocation'
  }
  properties: {
    endpointType: 'DataLakeStorage'
    dataLakeStorageSettings: {
      host: host
      authentication: {
        method: 'SystemAssignedManagedIdentity'
        systemAssignedManagedIdentitySettings: {}
      }
    }
  }
}
将文件另存为并使用 adls-gen2-endpoint.bicep Azure CLI 进行部署
az deployment group create -g <RESOURCE_GROUP> --template-file adls-gen2-endpoint.bicep
创建数据流
若要将数据发送到 Azure Data Lake Storage Gen 2,需要创建从 OPC UA 服务器读取数据的数据流,并将其写入存储帐户。 在这种情况下不需要执行转换,因此数据按原样写入。
使用 Bicep 创建数据流。 将占位符替换成自己的值。
// Replace with your values
param aioInstanceName string = '<AIO_INSTANCE_NAME>'
param customLocationName string = '<CUSTOM_LOCATION_NAME>'
param schemaNamespace string = '<SCHEMA_NAMESPACE>'

// Tutorial specific values
param schema string = 'opcua-schema'
param schemaVersion string = '1'
param dataflowName string = 'tutorial-adls-gen2'
param assetName string = 'oven'
param endpointName string = 'adls-gen2-endpoint'
param containerName string = 'aiotutorial'
param serialFormat string = 'Delta'

resource aioInstance 'Microsoft.IoTOperations/instances@2024-11-01' existing = {
  name: aioInstanceName
}

resource customLocation 'Microsoft.ExtendedLocation/customLocations@2021-08-31-preview' existing = {
  name: customLocationName
}

// Pointer to the default data flow profile
resource defaultDataflowProfile 'Microsoft.IoTOperations/instances/dataflowProfiles@2024-11-01' existing = {
  parent: aioInstance
  name: 'default'
}

resource adlsEndpoint 'Microsoft.IoTOperations/instances/dataflowEndpoints@2024-11-01' existing = {
  parent: aioInstance
  name: endpointName
}

resource defaultDataflowEndpoint 'Microsoft.IoTOperations/instances/dataflowEndpoints@2024-11-01' existing = {
  parent: aioInstance
  name: 'default'
}

resource asset 'Microsoft.DeviceRegistry/assets@2024-11-01' existing = {
  name: assetName
}

resource dataflow 'Microsoft.IoTOperations/instances/dataflowProfiles/dataflows@2024-11-01' = {
  // Reference to the parent data flow profile, the default profile in this case
  // Same usage as profileRef in Kubernetes YAML
  parent: defaultDataflowProfile
  name: dataflowName
  extendedLocation: {
    name: customLocation.id
    type: 'CustomLocation'
  }
  properties: {
    mode: 'Enabled'
    operations: [
      {
        operationType: 'Source'
        sourceSettings: {
          endpointRef: defaultDataflowEndpoint.name
          assetRef: asset.name
          dataSources: ['azure-iot-operations/data/${assetName}']
        }
      }
      // Transformation optional
      {
        operationType: 'BuiltInTransformation'
        builtInTransformationSettings: {
          serializationFormat: serialFormat
          schemaRef: 'aio-sr://${schemaNamespace}/${schema}:${schemaVersion}'
          map: [
            {
              type: 'PassThrough'
              inputs: [
                '*'
              ]
              output: '*'
            }
         ]
        }
      }
      {
        operationType: 'Destination'
        destinationSettings: {
          endpointRef: adlsEndpoint.name
          dataDestination: containerName
        }
      }
    ]
  }
}
将文件另存为并使用 adls-gen2-dataflow.bicep Azure CLI 进行部署
az deployment group create -g <RESOURCE_GROUP> --template-file adls-gen2-dataflow.bicep
验证 Azure Data Lake Storage Gen 2 中的数据
在存储帐户中,转到“容器”边栏选项卡,然后选择创建的容器 aiotutorial。 你应该会看到一个名为 aiotutorial 的文件夹及其内部情况,还会看到包含 OPC UA 服务器数据的 Parquet 文件。 文件名采用格式 part-00001-44686130-347f-4c2c-81c8-eb891601ef98-c000.snappy.parquet。
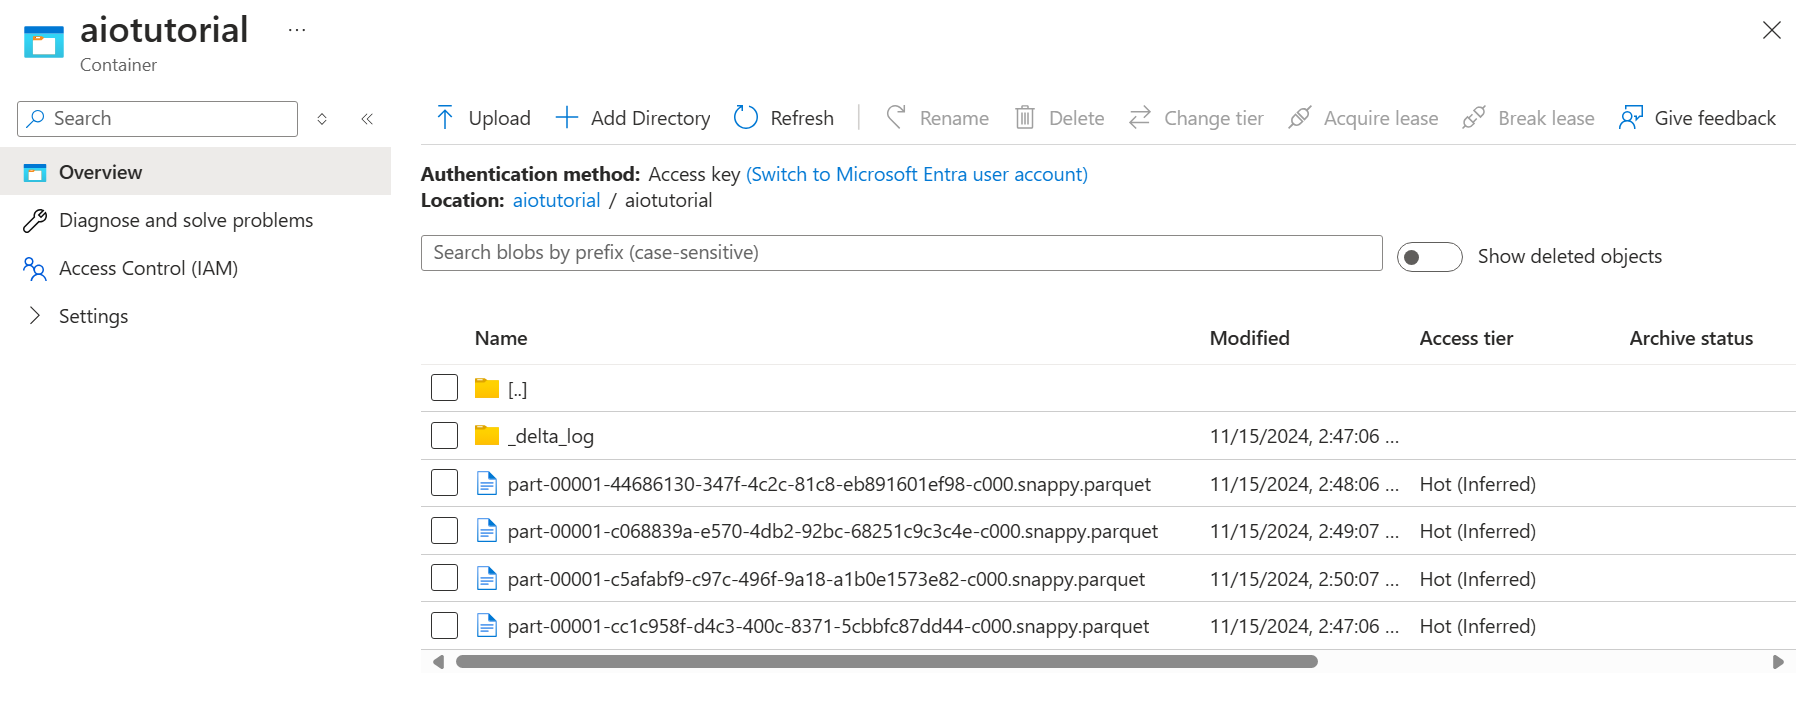
若要查看文件的内容,请选择每个文件,然后选择“编辑”。
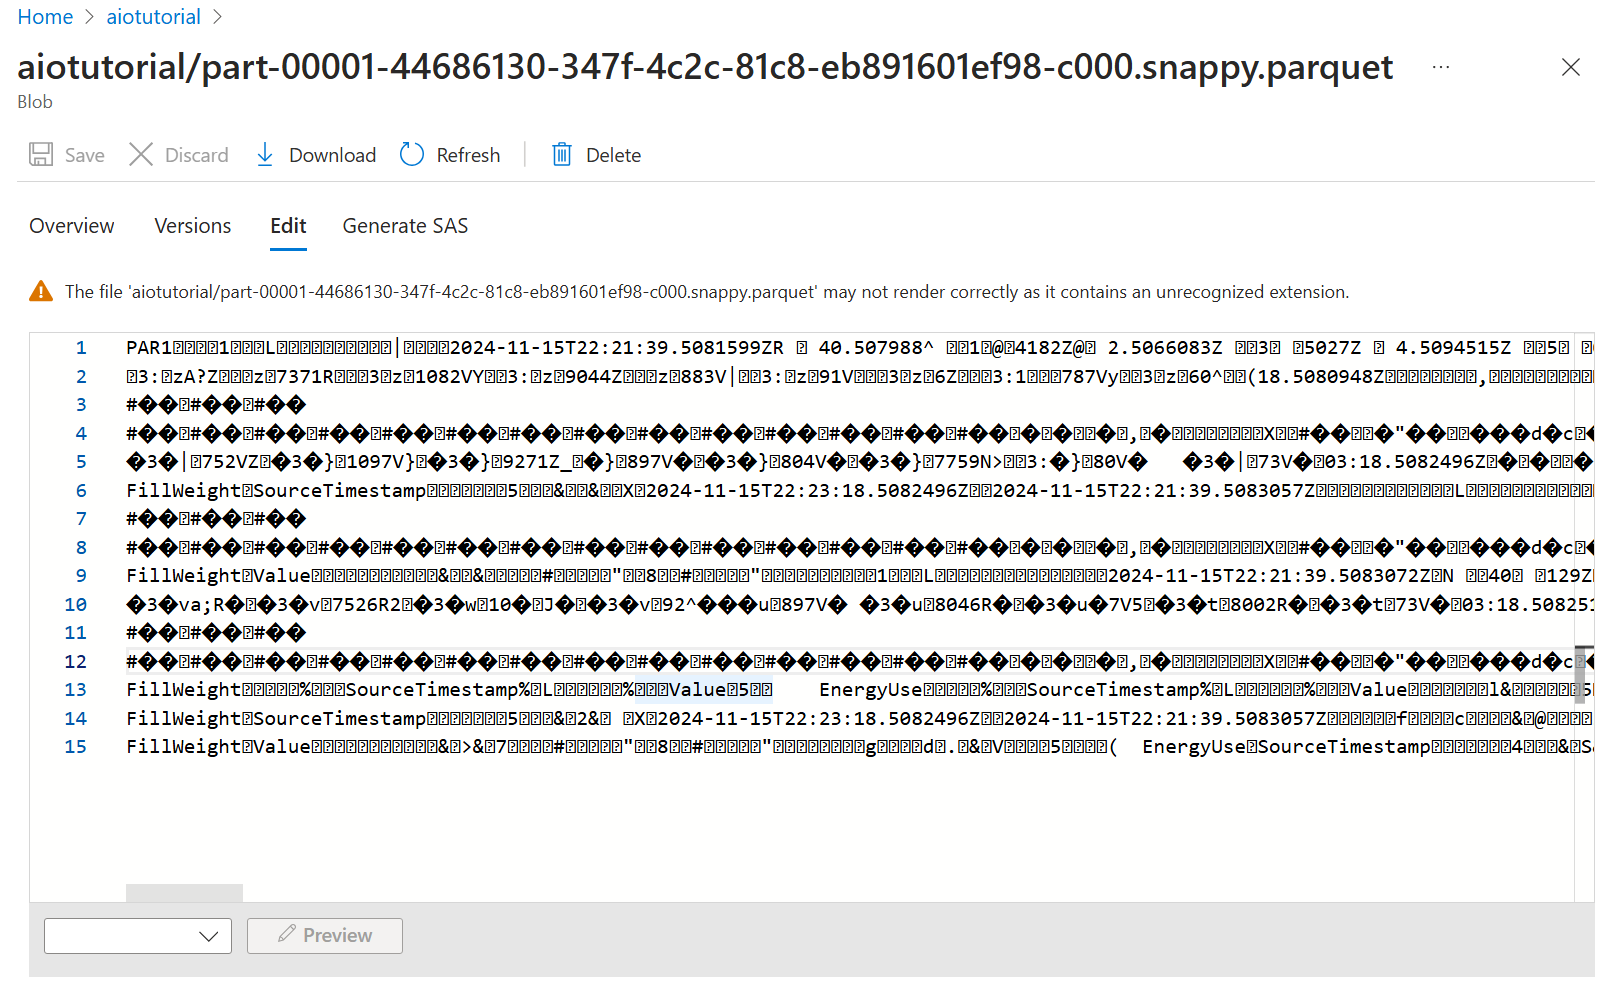
该内容在 Azure 门户中无法正确呈现,但你可以下载该文件,并在 Parquet 查看器等工具中将其打开。