InstallSSHKey@0 - 安装 SSH 密钥 v0 任务
在管道中使用此任务在生成或发布步骤之前安装 SSH 密钥。
语法
# Install SSH key v0
# Install an SSH key prior to a build or deployment.
- task: InstallSSHKey@0
  inputs:
    knownHostsEntry: # string. Alias: hostName. Required. Known Hosts Entry.
    #sshPublicKey: # string. SSH Public Key.
    #sshPassphrase: # string. SSH Passphrase.
    sshKeySecureFile: # string. Required. SSH Key.
  # Advanced
    #addEntryToConfig: false # boolean. Add entry to SSH config. Default: false.
    #configHostAlias: # string. Required when addEntryToConfig = true. Alias.
    #configHostname: # string. Required when addEntryToConfig = true. Host name.
    #configUser: # string. Optional. Use when addEntryToConfig = true. User.
    #configPort: # string. Optional. Use when addEntryToConfig = true. Port.
# Install SSH key v0
# Install an SSH key prior to a build or deployment.
- task: InstallSSHKey@0
  inputs:
    knownHostsEntry: # string. Alias: hostName. Required. Known Hosts Entry.
    #sshPublicKey: # string. SSH Public Key.
    #sshPassphrase: # string. SSH Passphrase.
    sshKeySecureFile: # string. Required. SSH Key.
输入
knownHostsEntry
-
已知主机条目
输入别名:hostName。
string。 必填。
指定known_hosts文件的 SSH 密钥条目。
sshPublicKey
-
SSH 公钥
string。
可选。 指定公钥 SSH 密钥的内容。
sshPassphrase
-
SSH 通行短语
string。
可选。 指定 SSH 密钥的通行短语(如果有)。
sshKeySecureFile
-
SSH 密钥
string。 必填。
指定上传到 Secure Files 以在代理上安装的 SSH 密钥。
addEntryToConfig
-
将条目添加到 SSH 配置
boolean。 默认值:false。
可选。 添加与安装到 SSH 配置文件的密钥相关的条目。 密钥文件将可用于所有后续任务。
configHostAlias
-
别名
string。
addEntryToConfig = true时是必需的。
指定 SSH 配置条目的名称。
configHostname
-
主机名
string。
addEntryToConfig = true时是必需的。
指定 SSH 配置条目的主机名属性。
configUser
-
用户
string。 可选。 当 addEntryToConfig = true时使用。
指定 SSH 配置条目的用户名属性。
configPort
-
端口
string。 可选。 当 addEntryToConfig = true时使用。
指定 SSH 配置条目的端口。
任务控制选项
除任务输入之外,所有任务都具有控制选项。 有关详细信息,请参阅 控件选项和常见任务属性。
输出变量
没有。
注解
在管道中使用此任务在生成或发布步骤之前安装 SSH 密钥。
注释
此任务需要代理上的 Git Bash for Windows。
使用情况和最佳做法
如果在 托管池中安装 SSH 密钥,请在管道中的后续步骤中,连接到已就地匹配公钥的远程系统。 例如,可以连接到 Git 存储库或 Azure 中的 VM。
建议不要将公钥作为纯文本传入任务配置。 相反,在管道中为 mykey.pub 文件的内容设置机密变量。 然后,将管道定义中的变量作为 $(myPubKey)调用。 对于密钥的机密部分,请在 Azure Pipelines 中使用 安全文件库。
若要创建任务,请使用配置良好的安装 SSH 密钥任务的示例:
steps:
- task: InstallSSHKey@0
  displayName: 'Install an SSH key'
  inputs:
    knownHostsEntry: 'SHA256:1Hyr55tsxGifESBMc0s+2NtutnR/4+LOkVwrOGrIp8U johndoe@contoso'
    sshPublicKey: '$(myPubKey)'
    sshKeySecureFile: 'id_rsa'
注释
公钥应添加到存储库\组织;否则,会出现访问问题。 对于 GitHub,请按照上述指南 作。 对于 Azure DevOps Services,请使用 将公钥添加到 Azure DevOps Services/TFS。
在同一管道作业中安装多个 SSH 密钥
在同一管道作业中使用多个密钥时,默认使用第一个密钥。 若要在建立 SSH 连接时能够使用所需的密钥,可以使用 InstallSSHKey 任务的 Advanced 部分设置以下参数:addEntryToConfig、configHostAlias、configHostname、configUser和 configPort。
这些参数允许将主机添加到 SSH 配置文件(例如,/root/.ssh/config for Linux),以便通过别名将其用于自定义脚本。
生成完成后,任务将尝试还原原始 SSH 配置文件。 如果最初没有 SSH 配置文件,则会从代理中删除主机。
多个 SSH 密钥安装的示例。 每个存储库都有多个 GitHub 存储库及其自己的密钥的情况:
pool: <Some Agent Pool>

steps:
- task: InstallSSHKey@0
  inputs:
    knownHostsEntry: $(known_host)
    sshPublicKey: $(first_public_key)
    sshKeySecureFile: $(first_private_key)
    addEntryToConfig: true
    configHostAlias: <first-host-alias>
    configHostname: github.com
    configUser: git
  displayName: Install First Repo SSH Key

- task: InstallSSHKey@0
  inputs:
    knownHostsEntry: $(known_host)
    sshPublicKey: $(second_public_key)
    sshKeySecureFile: $(second_private_key)
    addEntryToConfig: true
    configHostAlias: <second-host-alias>
    configHostname: github.com
    configUser: git
  displayName: Install Second Repo SSH Key

- bash: git clone git@<first-host-alias>:<owner>/<first-repo>.git
  displayName: Clone First Repo

- bash: git clone git@<second-host-alias>:<owner>/<second-repo>.git
  displayName: Clone Second Repo
例子
使用 GitHub 的示例设置
本部分介绍如何在 Azure Pipelines 中将专用 GitHub 存储库与 YAML 配合使用。
如果你有一个不想向开源社区公开的存储库,一种常见做法是将存储库设为专用。 但是,如果想要使用该工具来管理存储库,则 AZURE DevOps 等 CI/CD 工具需要访问存储库。 若要授予 Azure DevOps 访问权限,可能需要 SSH 密钥才能对 GitHub 的访问权限进行身份验证。
下面是使用 SSH 密钥对 GitHub 的访问权限进行身份验证的步骤:
生成用于对从 GitHub 到 Azure DevOps 的访问进行身份验证的密钥对:
在 GitBash 中运行以下命令:
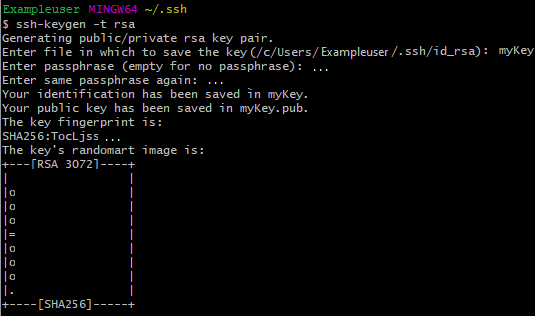
ssh-keygen -t rsa输入 SSH 密钥对的名称。 在我们的示例中,我们使用 myKey。

(可选)可以输入密码来加密私钥。 此步骤是可选的。 使用通行短语比不使用密码更安全。

ssh-keygen创建 SSH 密钥对,并显示以下成功消息:
在 Windows 文件资源管理器中,检查新创建的密钥对:

将公钥添加到 GitHub 存储库。 (公钥以“.pub”结尾)。 为此,请在浏览器中转到以下 URL:
https://github.com/(organization-name)/(repository-name)/settings/keys。选择“添加部署密钥”。
在“添加新 对话框中,输入标题,然后复制并粘贴 SSH 密钥:

选择添加键。
将私钥上传到 Azure DevOps:
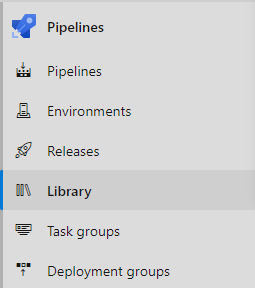
在 Azure DevOps 的左侧菜单中,选择 管道>库。

选择 安全文件>+ 安全文件:

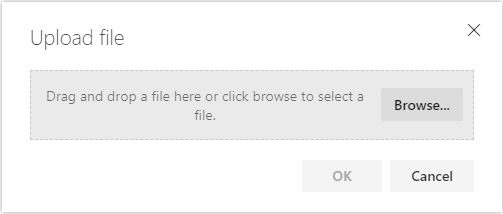
选择 浏览,然后选择私钥:

恢复“已知主机条目”。 在 GitBash 中,输入以下命令:
ssh-keyscan github.com“已知主机条目”是 GitBash 结果中不以 # 开头的显示值:

创建 YAML 管道。
若要创建 YAML 管道,请在 YAML 定义中添加以下任务:
- task: InstallSSHKey@0
 inputs:
   knownHostsEntry: #{Enter your Known Hosts Entry Here}
   sshPublicKey: #{Enter your Public key Here}
   sshKeySecureFile: #{Enter the name of your key in "Secure Files" Here}
SSH 密钥现已安装,你可以继续使用脚本来使用 SSH 进行连接,而不是默认 HTTPS。