教程:使用 TypeScript 生成图像分析 Web 应用
本教程介绍如何使用 GitHub 操作在本地生成 React/TypeScript 客户端应用程序并将其部署到 Azure 静态 Web 应用。 使用 React 应用,可以通过认知服务计算机视觉分析图像。
本教程介绍如何执行下列操作:
- 使用 Azure CLI 创建 Azure 资源
- 将环境变量添加到远程环境
- 将 GitHub 操作与环境变量配合使用
- 查看已部署的 Web 应用
先决条件
- 具有活动订阅的 Azure 用户帐户。 免费创建一个。
- Node.js 和 npm - 已安装到本地计算机。
- Visual Studio Code - 已安装到本地计算机。
- Azure Static Web Apps - 用于将 React 应用部署到 Azure 静态 Web 应用。
- Git - 用于推送到 GitHub,这将激活 GitHub 操作。
- GitHub 帐户 - 分支并推送到存储库。
- 在 bash 环境中使用 Azure Cloud Shell。
- 你的 Azure 帐户必须分配有“认知服务参与者”角色,你才能同意负责任 AI 条款并创建资源。 若要将此角色分配给你的帐户,请按照分配角色文档中的步骤进行操作,或与管理员联系。
什么是 Azure 静态 Web 应用
生成静态 Web 应用时,可以根据你感兴趣的功能和控制程度,在 Azure 上有多个选择。 本教程重点介绍最简单的服务,其中提供了许多选项,这样你就可以专注于前端代码而不是宿主环境。
React (create-react-app) 提供以下功能:
- 如果找不到用于认知服务计算机视觉的 Azure 密钥和终结点,则显示消息
- 允许使用认知服务计算机视觉分析图像
- 输入公共图像 URL 或分析集合中的图像
- 分析完成后
- 显示图像
- 显示计算机视觉 JSON 结果
若要部署静态 Web 应用,请使用 GitHub 操作,该操作在推送到特定分支时启动:
创建示例存储库的分支
创建存储库的分支,而不是仅将其克隆到本地计算机,以便拥有自己的 GitHub 存储库,可以向其中推送更改。
打开单独的浏览器窗口或选项卡,然后登录到 GitHub。
导航到 GitHub 示例存储库。
https://github.com/Azure-Samples/js-e2e-client-cognitive-services
在页面的右上部分,选择“分支”。
选择“代码”,然后复制分支的位置 URL。
创建本地开发环境
在终端或 bash 窗口中,将分支克隆到本地计算机。 将
YOUR-ACCOUNT-NAME
替换为 GitHub 帐户名。git clone https://github.com/YOUR-ACCOUNT-NAME/js-e2e-client-cognitive-services
更改为新目录并安装依赖项。
cd js-e2e-client-cognitive-services && npm install
安装步骤安装所需的依赖项,包括 @azure/cognitiveservices-computervision。
运行本地示例
运行该示例。
npm start
停止应用。 关闭终端窗口或在终端上使用
control+c
。
创建资源组
在终端或 bash shell 中输入 Azure CLI 命令以创建 Azure 资源组,并将其命名为 rg-demo
:
az group create \
--location eastus \
--name rg-demo \
--subscription YOUR-SUBSCRIPTION-NAME-OR-ID
创建计算机视觉资源
通过创建资源组,可以轻松找到资源,并在完成后将其删除。 这种类型的资源要求同意责任使用协议。 使用以下列表来了解如何快速创建正确的资源:
- 你的第一个计算机视觉资源 - 同意责任使用协议
- 其他计算机视觉 - 已同意责任使用协议
创建第一个计算机视觉资源
如果这是你的第一个 AI 服务,则必须通过门户创建服务,并在创建该资源时同意责任使用协议。 如果这不是你的第一个需要同意责任使用协议的资源,则可以使用下一部分中的 Azure CLI 创建资源。
使用下表来帮助在 Azure 门户中创建资源。
设置 | 值 |
---|---|
资源组 | rg-demo |
名称 | demo-ComputerVision |
Sku | S1 |
位置 | eastus |
创建其他计算机视觉资源
运行以下命令以创建计算机视觉资源:
az cognitiveservices account create \
--name demo-ComputerVision \
--resource-group rg-demo \
--kind ComputerVision \
--sku S1 \
--location eastus \
--yes
获取计算机视觉资源终结点和密钥
在结果中,查找并复制
properties.endpoint
。 稍后需要用到它。... "properties":{ ... "endpoint": "https://eastus.api.cognitive.microsoft.com/", ... } ...
运行以下命令以获取密钥。
az cognitiveservices account keys list \ --name demo-ComputerVision \ --resource-group rg-demo
复制其中一个密钥,稍后将需要该密钥。
{ "key1": "8eb7f878bdce4e96b26c89b2b8d05319", "key2": "c2067cea18254bdda71c8ba6428c1e1a" }
将环境变量添加到本地环境
若要使用资源,本地代码需要具有可用的密钥和终结点。 此代码库将它们存储在环境变量中:
- REACT_APP_AZURE_COMPUTER_VISION_KEY
- REACT_APP_AZURE_COMPUTER_VISION_ENDPOINT
运行以下命令,将这些变量添加到环境中。
将环境变量添加到远程环境
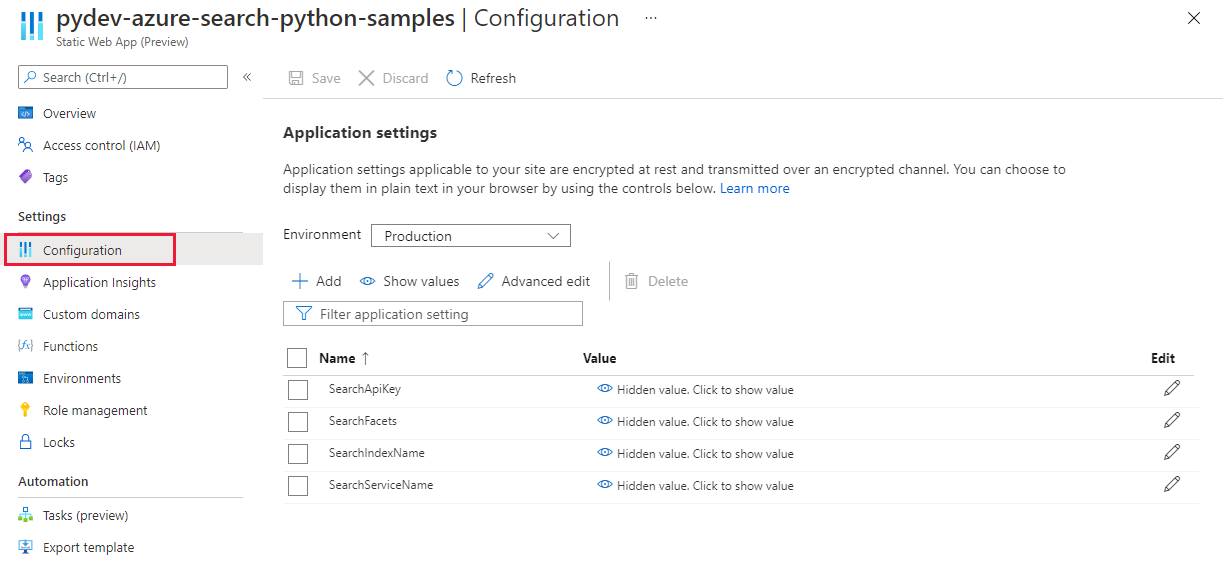
使用 Azure 静态 Web 应用时,需要将环境变量(例如机密)从 GitHub 操作传递到静态 Web 应用。 GitHub 操作会构建应用,包括从相应存储库的 GitHub 机密传入的计算机视觉密钥和终结点,然后将具有环境变量的代码推送到静态 Web 应用。
在 Web 浏览器中的 GitHub 存储库上,依次选择“设置”、“机密”、“新建存储库机密”。
为在上一部分中使用的终结点输入相同的名称和值。 然后,使用在上一部分中使用的相同密钥名称和值创建另一个机密。
使用 ComputerVision 资源运行本地 react 应用
在命令行处重新启动应用:
npm start
将文本字段留空,从默认目录中选择一个图像,然后选择“分析”按钮。
此图像是从
./src/DefaultImages.js
中定义的图像目录中随机选择的。继续选择“分析”按钮,查看其他图像和结果。
将本地分支推送到 GitHub
在 Visual Studio Code 终端中,将本地分支 main
推送到远程存储库。
git push origin main
由于尚未做出任何更改,因此无需提交任何更改。
创建静态 Web 应用资源
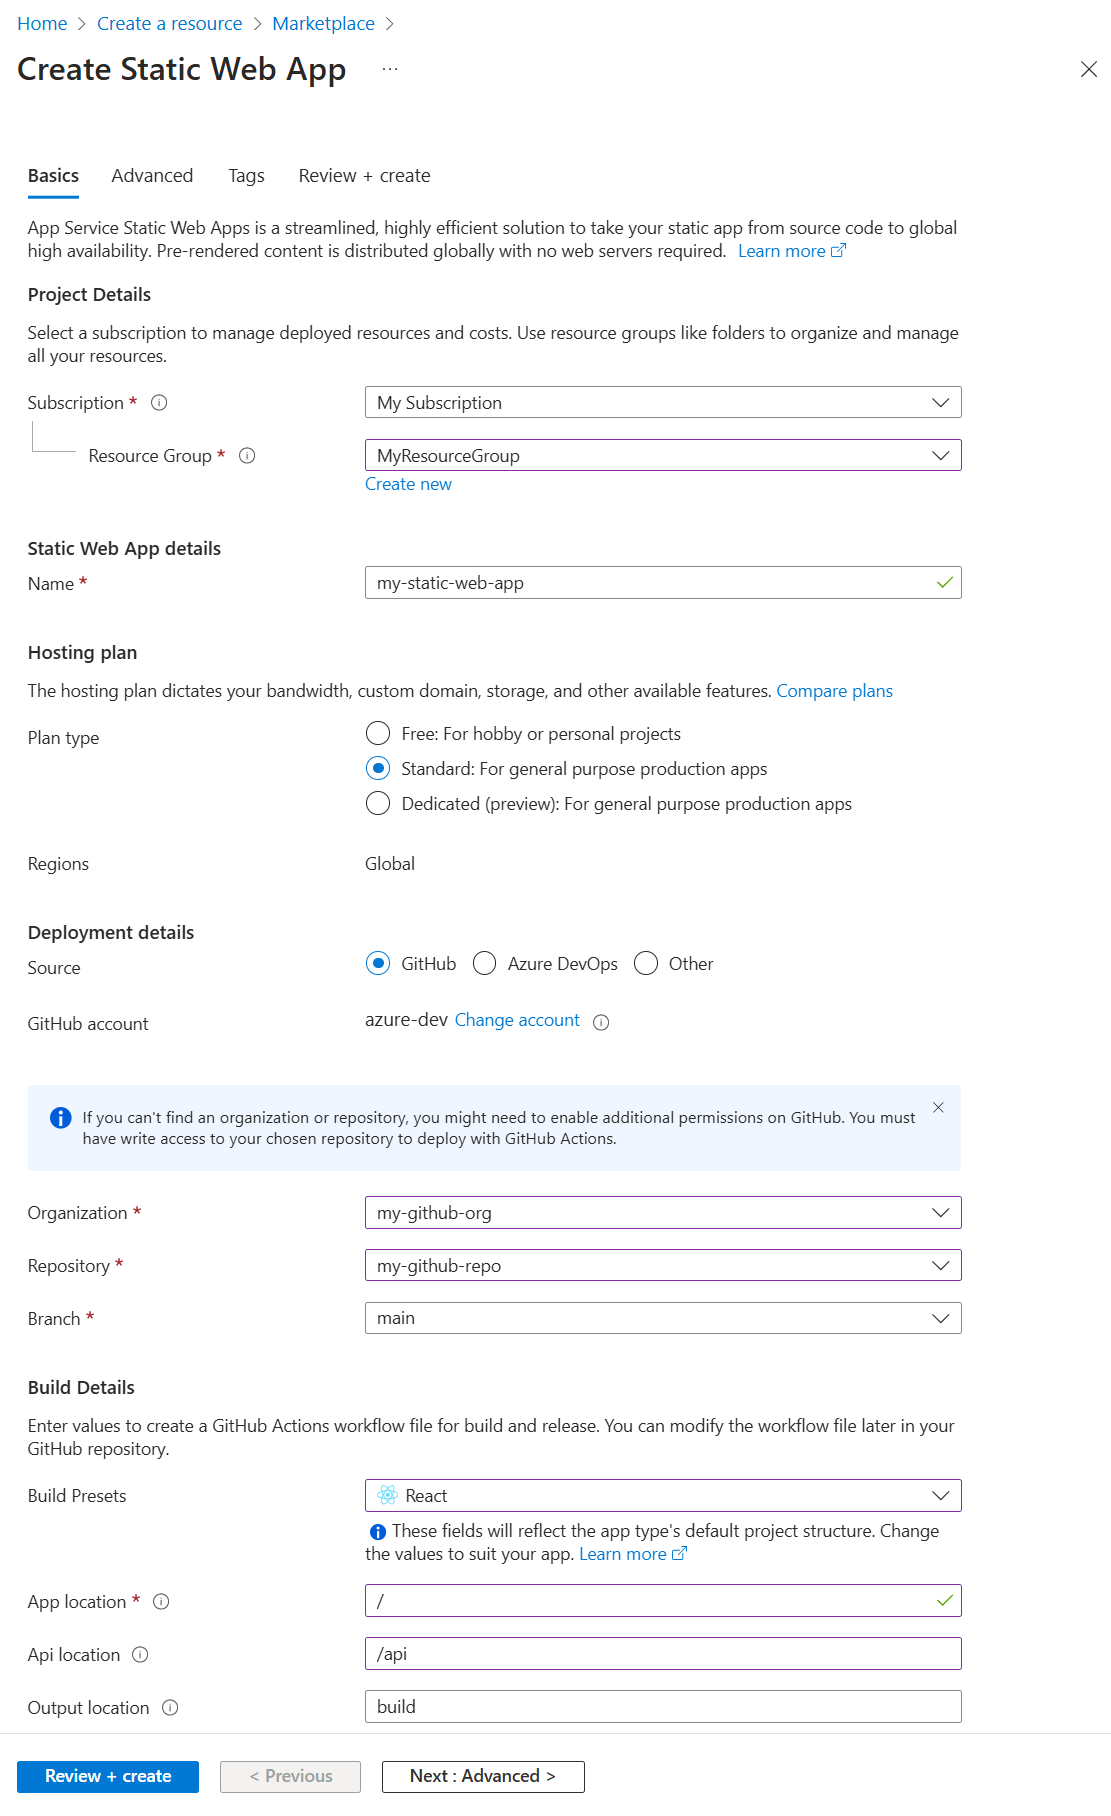
选择 Azure 图标,再右键单击 Static Web Apps 服务,然后选择“创建 Static Web App (高级)”。
如果弹出窗口询问是否要在
main
分支上继续,请选择“继续”。在后续字段中输入以下信息,每次显示一个字段。
字段名称 value 选择新资源的资源组。 选择为 ComputerVision 资源创建的资源组 demo-ComputerVision
。输入新的静态 Web 应用的名称。 Demo-ComputerVisionAnalyzer
选择定价选项 选择“免费”。 选择应用程序代码的位置。 请选择与创建资源组时选择的相同位置 eastus
。选择“生成预设”以配置默认项目结构。 React
输入应用程序代码的位置。 /
请输入 Azure Functions 代码的位置。 使用默认值。 输入构建输出相对于应用的位置的路径。 build
使用机密环境变量更新 GitHub 操作
计算机视觉密钥和终结点位于存储库的机密集合中,但尚未在 GitHub 操作中。 此步骤会将密钥和终结点添加到操作中。
下拉创建 Azure 资源所做的更改,以获取 GitHub 操作文件。
git pull origin main
在 Visual Studio Code 编辑器中,编辑在
./.github/workflows/
中找到的 GitHub 操作文件以添加机密。name: Azure Static Web Apps CI/CD on: push: branches: - from-local pull_request: types: [opened, synchronize, reopened, closed] branches: - from-local jobs: build_and_deploy_job: if: github.event_name == 'push' || (github.event_name == 'pull_request' && github.event.action != 'closed') runs-on: ubuntu-latest name: Build and Deploy Job steps: - uses: actions/checkout@v2 with: submodules: true - name: Build And Deploy id: builddeploy uses: Azure/static-web-apps-deploy@v0.0.1-preview with: azure_static_web_apps_api_token: ${{ secrets.AZURE_STATIC_WEB_APPS_API_TOKEN_RANDOM_NAME_HERE }} repo_token: ${{ secrets.GITHUB_TOKEN }} # Used for Github integrations (i.e. PR comments) action: "upload" ###### Repository/Build Configurations - These values can be configured to match you app requirements. ###### # For more information regarding Static Web App workflow configurations, please visit: https://aka.ms/swaworkflowconfig app_location: "/" # App source code path api_location: "api" # Api source code path - optional output_location: "build" # Built app content directory - optional ###### End of Repository/Build Configurations ###### env: REACT_APP_AZURE_COMPUTER_VISION_ENDPOINT: ${{secrets.REACT_APP_AZURE_COMPUTER_VISION_ENDPOINT}} REACT_APP_AZURE_COMPUTER_VISION_KEY: ${{secrets.REACT_APP_AZURE_COMPUTER_VISION_KEY}} close_pull_request_job: if: github.event_name == 'pull_request' && github.event.action == 'closed' runs-on: ubuntu-latest name: Close Pull Request Job steps: - name: Close Pull Request id: closepullrequest uses: Azure/static-web-apps-deploy@v0.0.1-preview with: azure_static_web_apps_api_token: ${{ secrets.AZURE_STATIC_WEB_APPS_API_TOKEN_RANDOM_NAME_HERE }} action: "close"
添加并提交对本地
main
分支所做的更改。git add . && git commit -m "add secrets to action"
将更改推送到远程存储库,对 Azure 静态 Web 应用启动新的 build-and-deploy 操作。
git push origin main
查看 GitHub 操作构建过程
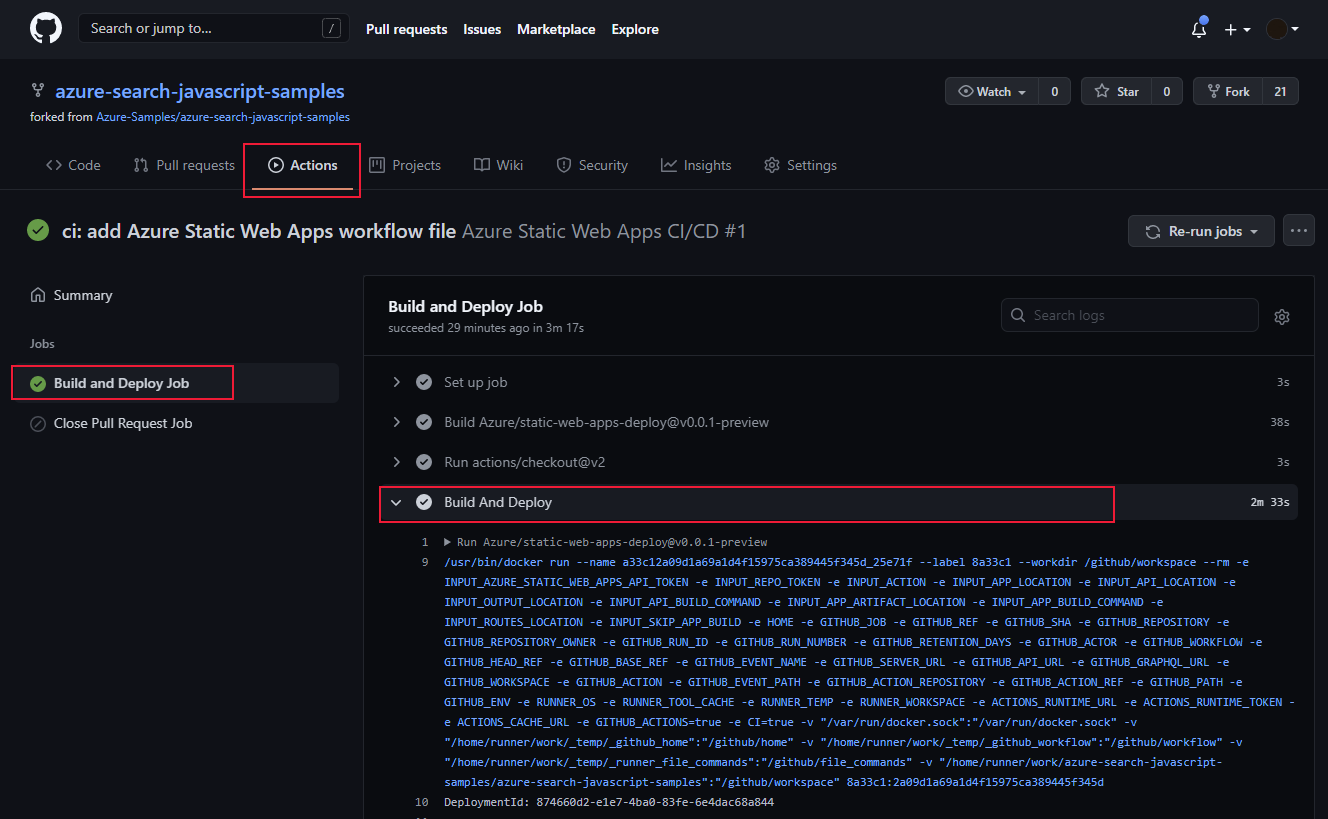
在 Web 浏览器中,打开用于本教程的 GitHub 存储库,然后选择“操作”。
在列表中选择顶部的构建,然后在左侧菜单上选择“构建并部署作业”来监视构建过程。 等待“构建并部署”成功完成。
在浏览器中查看远程 Azure 静态网站
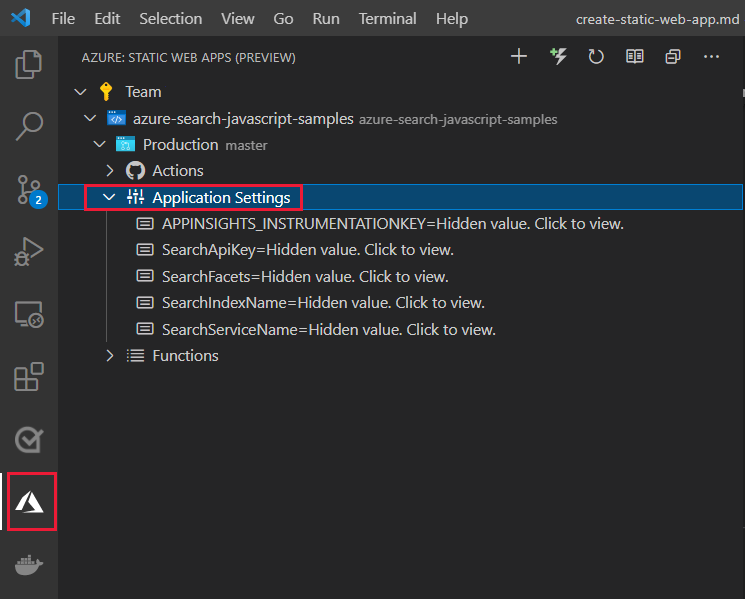
- 在 Visual Studio Code 中,选择最右侧菜单中的 Azure 图标,选择静态 Web 应用,右键单击“浏览站点”,然后选择“打开”查看公共静态网站。
还可以在以下位置找到该站点的 URL:
- “概述”页上的资源的 Azure 门户。
- GitHub 操作的 build-and-deploy 输出在脚本的末尾包含该站点的 URL
代码:将计算机视觉添加到本地 React 应用
使用 npm 将计算机视觉添加到 package.json 文件。
npm install @azure/cognitiveservices-computervision
代码:将计算机视觉代码添加为单独的模块
计算机视觉代码包含在名为 ./src/azure-cognitiveservices-computervision.js
的单独的文件中。 重点介绍模块的主要功能。
// ./src/azure-cognitiveservices-computervision.js
// Azure SDK client libraries
import { ComputerVisionClient } from '@azure/cognitiveservices-computervision';
import { ApiKeyCredentials } from '@azure/ms-rest-js';
// List of sample images to use in demo
import RandomImageUrl from './DefaultImages';
// Authentication requirements
const key = process.env.REACT_APP_AZURE_COMPUTER_VISION_KEY;
const endpoint = process.env.REACT_APP_AZURE_COMPUTER_VISION_ENDPOINT;
console.log(`key = ${key}`)
console.log(`endpoint = ${endpoint}`)
// Cognitive service features
const visualFeatures = [
"ImageType",
"Faces",
"Adult",
"Categories",
"Color",
"Tags",
"Description",
"Objects",
"Brands"
];
export const isConfigured = () => {
const result = (key && endpoint && (key.length > 0) && (endpoint.length > 0)) ? true : false;
console.log(`key = ${key}`)
console.log(`endpoint = ${endpoint}`)
console.log(`ComputerVision isConfigured = ${result}`)
return result;
}
// Computer Vision detected Printed Text
const includesText = async (tags) => {
return tags.filter((el) => {
return el.name.toLowerCase() === "text";
});
}
// Computer Vision detected Handwriting
const includesHandwriting = async (tags) => {
return tags.filter((el) => {
return el.name.toLowerCase() === "handwriting";
});
}
// Wait for text detection to succeed
const wait = (timeout) => {
return new Promise(resolve => {
setTimeout(resolve, timeout);
});
}
// Analyze Image from URL
export const computerVision = async (url) => {
// authenticate to Azure service
const computerVisionClient = new ComputerVisionClient(
new ApiKeyCredentials({ inHeader: { 'Ocp-Apim-Subscription-Key': key } }), endpoint);
// get image URL - entered in form or random from Default Images
const urlToAnalyze = url || RandomImageUrl();
// analyze image
const analysis = await computerVisionClient.analyzeImage(urlToAnalyze, { visualFeatures });
// text detected - what does it say and where is it
if (includesText(analysis.tags) || includesHandwriting(analysis.tags)) {
analysis.text = await readTextFromURL(computerVisionClient, urlToAnalyze);
}
// all information about image
return { "URL": urlToAnalyze, ...analysis};
}
// analyze text in image
const readTextFromURL = async (client, url) => {
let result = await client.read(url);
let operationID = result.operationLocation.split('/').slice(-1)[0];
// Wait for read recognition to complete
// result.status is initially undefined, since it's the result of read
const start = Date.now();
console.log(`${start} -${result?.status} `);
while (result.status !== "succeeded") {
await wait(500);
console.log(`${Date.now() - start} -${result?.status} `);
result = await client.getReadResult(operationID);
}
// Return the first page of result.
// Replace[0] with the desired page if this is a multi-page file such as .pdf or.tiff.
return result.analyzeResult;
}
代码:将图像目录添加为单独的模块
如果用户未输入图像 URL,则应用会从目录中随机选择一个图像。 重点介绍随机选择功能
// ./src/DefaultImages.js
const describeURL = 'https://raw.githubusercontent.com/Azure-Samples/cognitive-services-sample-data-files/master/ComputerVision/Images/celebrities.jpg';
const categoryURLImage = 'https://moderatorsampleimages.blob.core.windows.net/samples/sample16.png';
const tagsURL = 'https://moderatorsampleimages.blob.core.windows.net/samples/sample16.png';
const objectURL = 'https://raw.githubusercontent.com/Azure-Samples/cognitive-services-node-sdk-samples/master/Data/image.jpg';
const brandURLImage = 'https://docs.microsoft.com/en-us/azure/cognitive-services/computer-vision/images/red-shirt-logo.jpg';
const facesImageURL = 'https://raw.githubusercontent.com/Azure-Samples/cognitive-services-sample-data-files/master/ComputerVision/Images/faces.jpg';
const printedTextSampleURL = 'https://moderatorsampleimages.blob.core.windows.net/samples/sample2.jpg';
const multiLingualTextURL = 'https://raw.githubusercontent.com/Azure-Samples/cognitive-services-sample-data-files/master/ComputerVision/Images/MultiLingual.png';
const adultURLImage = 'https://raw.githubusercontent.com/Azure-Samples/cognitive-services-sample-data-files/master/ComputerVision/Images/celebrities.jpg';
const colorURLImage = 'https://raw.githubusercontent.com/Azure-Samples/cognitive-services-sample-data-files/master/ComputerVision/Images/celebrities.jpg';
// don't use with picture analysis
// eslint-disable-next-line
const mixedMultiPagePDFURL = 'https://raw.githubusercontent.com/Azure-Samples/cognitive-services-sample-data-files/master/ComputerVision/Images/MultiPageHandwrittenForm.pdf';
const domainURLImage = 'https://raw.githubusercontent.com/Azure-Samples/cognitive-services-sample-data-files/master/ComputerVision/Images/landmark.jpg';
const typeURLImage = 'https://raw.githubusercontent.com/Azure-Samples/cognitive-services-python-sdk-samples/master/samples/vision/images/make_things_happen.jpg';
const DefaultImages = [
describeURL,
categoryURLImage,
tagsURL,
objectURL,
brandURLImage,
facesImageURL,
adultURLImage,
colorURLImage,
domainURLImage,
typeURLImage,
printedTextSampleURL,
multiLingualTextURL,
//mixedMultiPagePDFURL
];
const RandomImageUrl = () => {
return DefaultImages[Math.floor(Math.random() * Math.floor(DefaultImages.length))];
}
export default RandomImageUrl;
代码:将自定义计算机视觉模块添加到 React 应用
将方法添加到 React app.js
。 重点介绍图像分析和结果显示功能。
// ./src/App.js
import React, { useState } from 'react';
import './App.css';
import { computerVision, isConfigured as ComputerVisionIsConfigured } from './azure-cognitiveservices-computervision';
function App() {
const [fileSelected, setFileSelected] = useState(null);
const [analysis, setAnalysis] = useState(null);
const [processing, setProcessing] = useState(false);
const handleChange = (e) => {
setFileSelected(e.target.value)
}
const onFileUrlEntered = (e) => {
// hold UI
setProcessing(true);
setAnalysis(null);
computerVision(fileSelected || null).then((item) => {
// reset state/form
setAnalysis(item);
setFileSelected("");
setProcessing(false);
});
};
// Display JSON data in readable format
const PrettyPrintJson = (data) => {
return (<div><pre>{JSON.stringify(data, null, 2)}</pre></div>);
}
const DisplayResults = () => {
return (
<div>
<h2>Computer Vision Analysis</h2>
<div><img src={analysis.URL} height="200" border="1" alt={(analysis.description && analysis.description.captions && analysis.description.captions[0].text ? analysis.description.captions[0].text : "can't find caption")} /></div>
{PrettyPrintJson(analysis)}
</div>
)
};
const Analyze = () => {
return (
<div>
<h1>Analyze image</h1>
{!processing &&
<div>
<div>
<label>URL</label>
<input type="text" placeholder="Enter URL or leave empty for random image from collection" size="50" onChange={handleChange}></input>
</div>
<button onClick={onFileUrlEntered}>Analyze</button>
</div>
}
{processing && <div>Processing</div>}
<hr />
{analysis && DisplayResults()}
</div>
)
}
const CantAnalyze = () => {
return (
<div>Key and/or endpoint not configured in ./azure-cognitiveservices-computervision.js</div>
)
}
function Render() {
const ready = ComputerVisionIsConfigured();
if (ready) {
return <Analyze />;
}
return <CantAnalyze />;
}
return (
<div>
{Render()}
</div>
);
}
export default App;
清理资源
完成本教程后,需要删除资源组(包括计算机视觉资源和静态 Web 应用),以确保不会再按使用量计费。
在 VS Code 中,选择 Azure 资源管理器,右键单击订阅下列出的资源组,然后选择“删除”。