你当前正在访问 Microsoft Azure Global Edition 技术文档网站。 如果需要访问由世纪互联运营的 Microsoft Azure 中国技术文档网站,请访问 https://docs.azure.cn。
Tutorial: Part 3 - Evaluate a custom chat application with the Azure AI Foundry SDK
In this tutorial, you use the Azure AI Foundry SDK (and other libraries) to evaluate the chat app you built in Part 2 of the tutorial series. In this part three, you learn how to:
- Create an evaluation dataset
- Evaluate the chat app with Azure AI evaluators
- Iterate and improve your app
This tutorial is part three of a three-part tutorial.
Prerequisites
- Complete part 2 of the tutorial series to build the chat application.
- Make sure you've completed the steps to add telemetry logging from part 2.
Evaluate the quality of the chat app responses
Now that you know your chat app responds well to your queries, including with chat history, it's time to evaluate how it does across a few different metrics and more data.
You use an evaluator with an evaluation dataset and the get_chat_response() target function, then assess the evaluation results.
Once you run an evaluation, you can then make improvements to your logic, like improving your system prompt, and observing how the chat app responses change and improve.
Create evaluation dataset
Use the following evaluation dataset, which contains example questions and expected answers (truth).
Create a file called chat_eval_data.jsonl in your assets folder.
Paste this dataset into the file:
{"query": "Which tent is the most waterproof?", "truth": "The Alpine Explorer Tent has the highest rainfly waterproof rating at 3000m"}
{"query": "Which camping table holds the most weight?", "truth": "The Adventure Dining Table has a higher weight capacity than all of the other camping tables mentioned"}
{"query": "How much do the TrailWalker Hiking Shoes cost? ", "truth": "The Trailewalker Hiking Shoes are priced at $110"}
{"query": "What is the proper care for trailwalker hiking shoes? ", "truth": "After each use, remove any dirt or debris by brushing or wiping the shoes with a damp cloth."}
{"query": "What brand is TrailMaster tent? ", "truth": "OutdoorLiving"}
{"query": "How do I carry the TrailMaster tent around? ", "truth": " Carry bag included for convenient storage and transportation"}
{"query": "What is the floor area for Floor Area? ", "truth": "80 square feet"}
{"query": "What is the material for TrailBlaze Hiking Pants?", "truth": "Made of high-quality nylon fabric"}
{"query": "What color does TrailBlaze Hiking Pants come in?", "truth": "Khaki"}
{"query": "Can the warrenty for TrailBlaze pants be transfered? ", "truth": "The warranty is non-transferable and applies only to the original purchaser of the TrailBlaze Hiking Pants. It is valid only when the product is purchased from an authorized retailer."}
{"query": "How long are the TrailBlaze pants under warranty for? ", "truth": " The TrailBlaze Hiking Pants are backed by a 1-year limited warranty from the date of purchase."}
{"query": "What is the material for PowerBurner Camping Stove? ", "truth": "Stainless Steel"}
{"query": "Is France in Europe?", "truth": "Sorry, I can only queries related to outdoor/camping gear and equipment"}
Evaluate with Azure AI evaluators
Now define an evaluation script that will:
- Generate a target function wrapper around our chat app logic.
- Load the sample
.jsonldataset. - Run the evaluation, which takes the target function, and merges the evaluation dataset with the responses from the chat app.
- Generate a set of GPT-assisted metrics (relevance, groundedness, and coherence) to evaluate the quality of the chat app responses.
- Output the results locally, and logs the results to the cloud project.
The script allows you to review the results locally, by outputting the results in the command line, and to a json file.
The script also logs the evaluation results to the cloud project so that you can compare evaluation runs in the UI.
Create a file called evaluate.py in your main folder.
Add the following code to import the required libraries, create a project client, and configure some settings:
import os
import pandas as pd
from azure.ai.projects import AIProjectClient
from azure.ai.projects.models import ConnectionType
from azure.ai.evaluation import evaluate, GroundednessEvaluator
from azure.identity import DefaultAzureCredential

from chat_with_products import chat_with_products

# load environment variables from the .env file at the root of this repo
from dotenv import load_dotenv

load_dotenv()

# create a project client using environment variables loaded from the .env file
project = AIProjectClient.from_connection_string(
    conn_str=os.environ["AIPROJECT_CONNECTION_STRING"], credential=DefaultAzureCredential()
)

connection = project.connections.get_default(connection_type=ConnectionType.AZURE_OPEN_AI, include_credentials=True)

evaluator_model = {
    "azure_endpoint": connection.endpoint_url,
    "azure_deployment": os.environ["EVALUATION_MODEL"],
    "api_version": "2024-06-01",
    "api_key": connection.key,
}

groundedness = GroundednessEvaluator(evaluator_model)
Add code to create a wrapper function that implements the evaluation interface for query and response evaluation:
def evaluate_chat_with_products(query):
    response = chat_with_products(messages=[{"role": "user", "content": query}])
    return {"response": response["message"].content, "context": response["context"]["grounding_data"]}
Finally, add code to run the evaluation, view the results locally, and gives you a link to the evaluation results in Azure AI Foundry portal:
# Evaluate must be called inside of __main__, not on import
if __name__ == "__main__":
    from config import ASSET_PATH

    # workaround for multiprocessing issue on linux
    from pprint import pprint
    from pathlib import Path
    import multiprocessing
    import contextlib

    with contextlib.suppress(RuntimeError):
        multiprocessing.set_start_method("spawn", force=True)

    # run evaluation with a dataset and target function, log to the project
    result = evaluate(
        data=Path(ASSET_PATH) / "chat_eval_data.jsonl",
        target=evaluate_chat_with_products,
        evaluation_name="evaluate_chat_with_products",
        evaluators={
            "groundedness": groundedness,
        },
        evaluator_config={
            "default": {
                "query": {"${data.query}"},
                "response": {"${target.response}"},
                "context": {"${target.context}"},
            }
        },
        azure_ai_project=project.scope,
        output_path="./myevalresults.json",
    )

    tabular_result = pd.DataFrame(result.get("rows"))

    pprint("-----Summarized Metrics-----")
    pprint(result["metrics"])
    pprint("-----Tabular Result-----")
    pprint(tabular_result)
    pprint(f"View evaluation results in AI Studio: {result['studio_url']}")
Configure the evaluation model
Since the evaluation script calls the model many times, you might want to increase the number of tokens per minute for the evaluation model.
In Part 1 of this tutorial series, you created an .env file that specifies the name of the evaluation model, gpt-4o-mini. Try to increase the tokens per minute limit for this model, if you have available quota. If you don't have enough quota to increase the value, don't worry. The script is designed to handle limit errors.
- In your project in Azure AI Foundry portal, select Models + endpoints.
- Select gpt-4o-mini.
- Select Edit.
- If you have quota to increase the Tokens per Minute Rate Limit, try increasing it to 30 or above.
- Select Save and close.
Run the evaluation script
From your console, sign in to your Azure account with the Azure CLI:
az loginInstall the required package:
pip install azure-ai-evaluation[remote]Now run the evaluation script:
python evaluate.py
Expect the evaluation to take a few minutes to complete.
Interpret the evaluation output
In the console output, you see an answer for each question, followed by a table with summarized metrics. (You might see different columns in your output.)
If you weren't able to increase the tokens per minute limit for your model, you might see some time-out errors, which are expected. The evaluation script is designed to handle these errors and continue running.
Note
You may also see many WARNING:opentelemetry.attributes: - these can be safely ignored and do not affect the evaluation results.
====================================================
'-----Summarized Metrics-----'
{'groundedness.gpt_groundedness': 1.6666666666666667,
 'groundedness.groundedness': 1.6666666666666667}
'-----Tabular Result-----'
                                     outputs.response  ... line_number
0   Could you specify which tent you are referring...  ...           0
1   Could you please specify which camping table y...  ...           1
2   Sorry, I only can answer queries related to ou...  ...           2
3   Could you please clarify which aspects of care...  ...           3
4   Sorry, I only can answer queries related to ou...  ...           4
5   The TrailMaster X4 Tent comes with an included...  ...           5
6                                            (Failed)  ...           6
7   The TrailBlaze Hiking Pants are crafted from h...  ...           7
8   Sorry, I only can answer queries related to ou...  ...           8
9   Sorry, I only can answer queries related to ou...  ...           9
10  Sorry, I only can answer queries related to ou...  ...          10
11  The PowerBurner Camping Stove is designed with...  ...          11
12  Sorry, I only can answer queries related to ou...  ...          12

[13 rows x 8 columns]
('View evaluation results in Azure AI Foundry portal: '
 'https://xxxxxxxxxxxxxxxxxxxxxxx')
View evaluation results in Azure AI Foundry portal
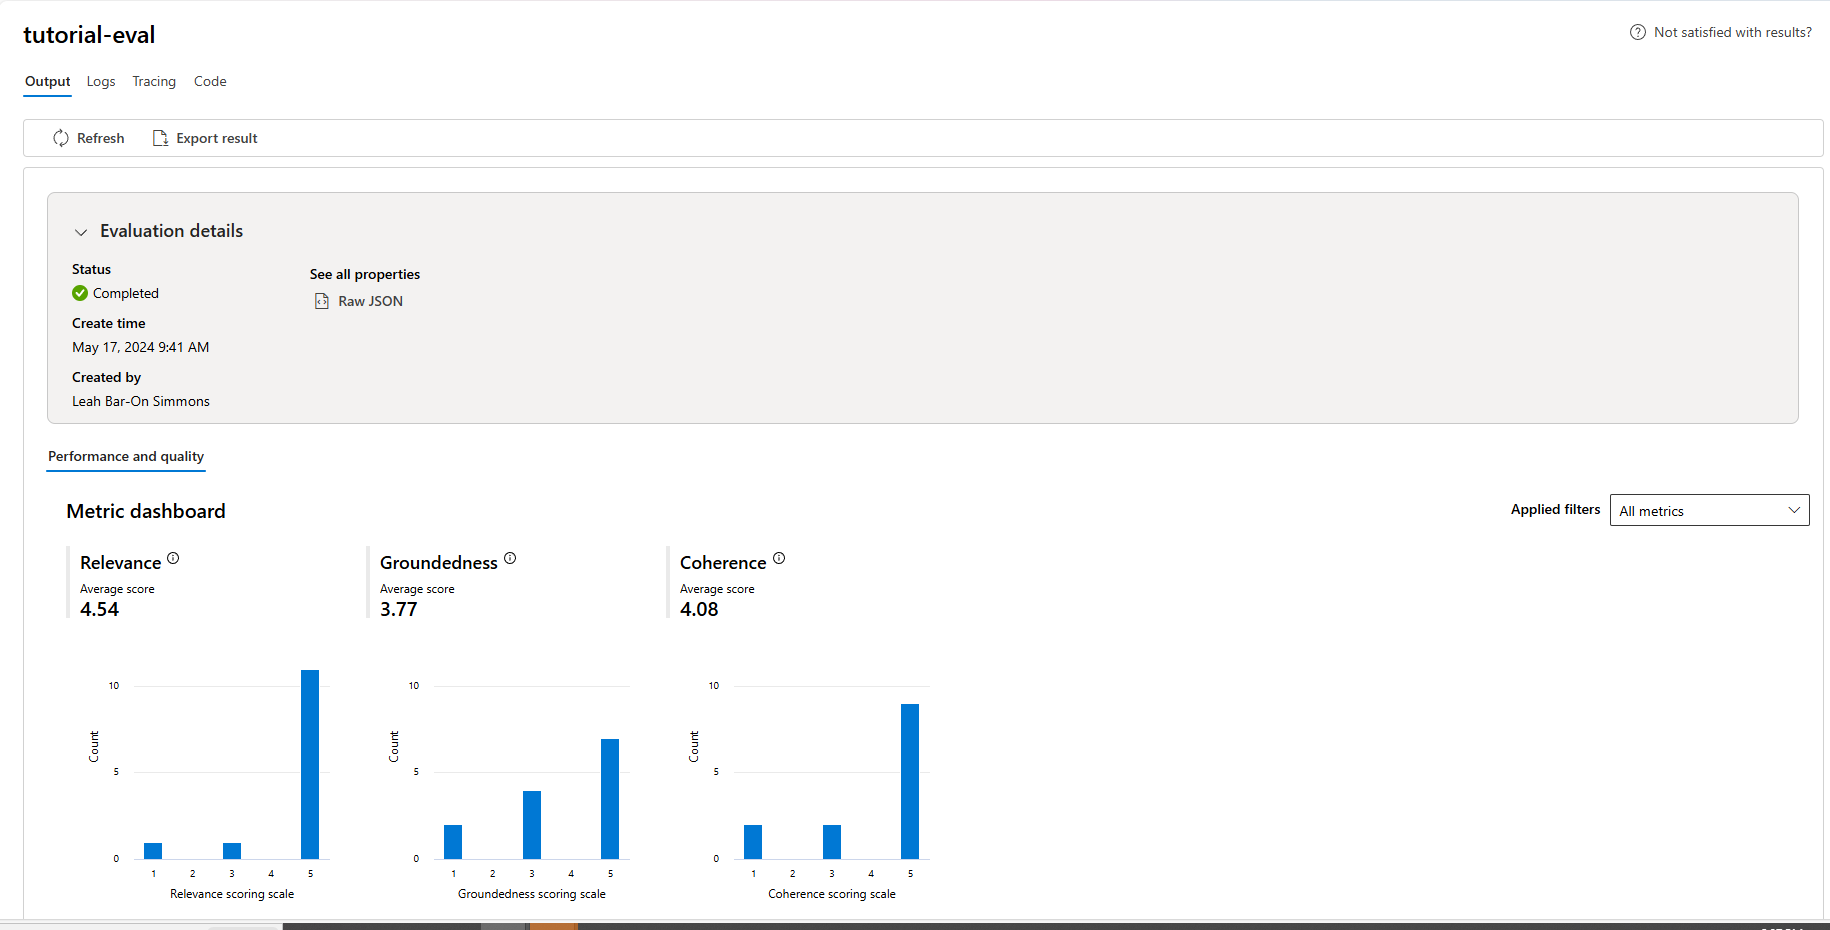
Once the evaluation run completes, follow the link to view the evaluation results on the Evaluation page in the Azure AI Foundry portal.

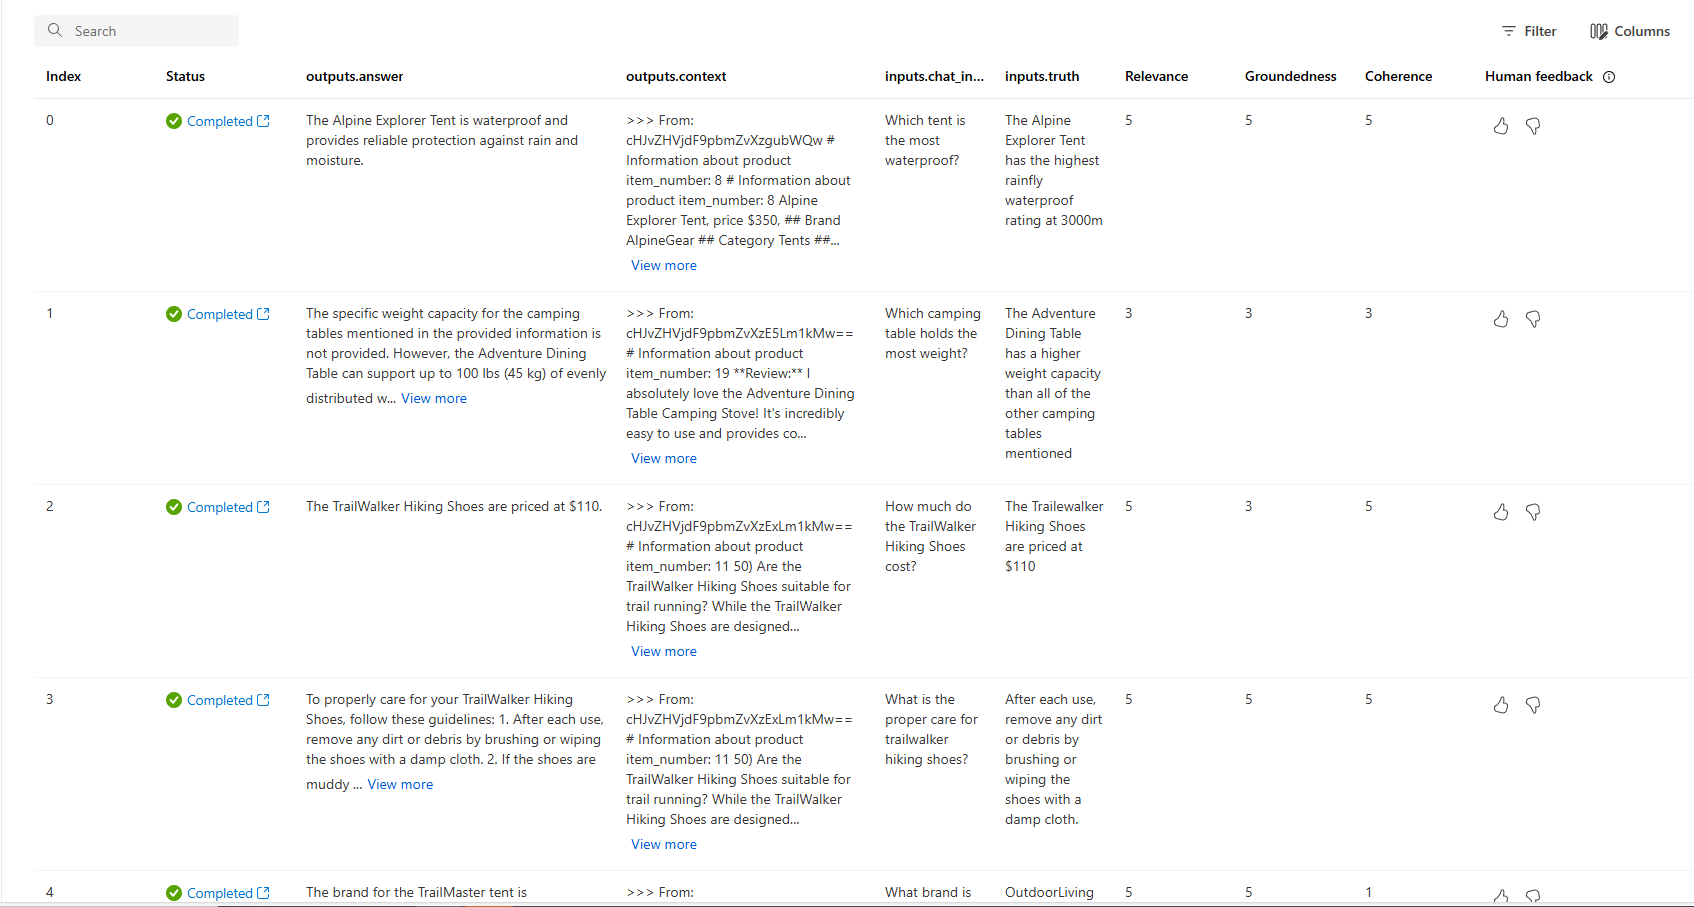
You can also look at the individual rows and see metric scores per row, and view the full context/documents that were retrieved. These metrics can be helpful in interpreting and debugging evaluation results.

For more information about evaluation results in Azure AI Foundry portal, see How to view evaluation results in Azure AI Foundry portal.
Iterate and improve
Notice that the responses are not well grounded. In many cases, the model replies with a question rather than an answer. This is a result of the prompt template instructions.
- In your assets/grounded_chat.prompty file, find the sentence "If the question is not related to outdoor/camping gear and clothing, just say 'Sorry, I only can answer queries related to outdoor/camping gear and clothing. So, how can I help?'"
- Change the sentence to "If the question is related to outdoor/camping gear and clothing but vague, try to answer based on the reference documents, then ask for clarifying questions."
- Save the file and re-run the evaluation script.
Try other modifications to the prompt template, or try different models, to see how the changes affect the evaluation results.
Clean up resources
To avoid incurring unnecessary Azure costs, you should delete the resources you created in this tutorial if they're no longer needed. To manage resources, you can use the Azure portal.