你当前正在访问 Microsoft Azure Global Edition 技术文档网站。 如果需要访问由世纪互联运营的 Microsoft Azure 中国技术文档网站,请访问 https://docs.azure.cn。
如何使用简单的语言模式匹配来识别意向
Azure AI 服务语音 SDK 内置了一项功能,可通过简单语言模式匹配来提供意向识别。 意向是用户想要执行的操作:关闭窗口、标记复选框、插入一些文本等。
在本指南中,我们将使用语音 SDK 开发一个 C++ 控制台应用程序,用于通过设备麦克风从用户语句中派生意向。 学习如何:
- 创建引用语音 SDK NuGet 包的 Visual Studio 项目
- 创建语音配置并获取意向识别器
- 通过语音 SDK API 添加意向和模式
- 识别来自麦克风的语音
- 使用异步的事件驱动的连续识别
何时使用模式匹配
在以下情况下使用模式匹配:
- 你只对严格匹配用户所说的内容感兴趣。 这些模式比对话语言理解 (CLU) 更严格。
- 你没有访问 CLU 模式的权限,但仍需要意向。
有关详细信息,请参阅模式匹配概述。
先决条件
在开始阅读本指南之前,请务必准备好以下各项:
语音和简单模式
简单模式是语音 SDK 的一项功能,需要具有 Azure AI 服务资源或统一语音资源。
模式是一个短语,其中包括一个实体。 实体是通过将字词扩在大括号中来定义的。 此示例定义了一个 ID 为“floorName”的实体,它区分大小写:
Take me to the {floorName}
所有其他特殊字符和标点符号都将被忽略。
将使用对 IntentRecognizer->AddIntent() API 的调用来添加意向。
创建项目
在 Visual Studio 2019 中创建新的 C# 控制台应用程序项目并安装语音 SDK。
从一些样本代码入手
让我们打开 Program.cs 并添加一些代码作为项目的框架。
using System;
using System.Threading.Tasks;
using Microsoft.CognitiveServices.Speech;
using Microsoft.CognitiveServices.Speech.Intent;

namespace helloworld
{
    class Program
    {
        static void Main(string[] args)
        {
            IntentPatternMatchingWithMicrophoneAsync().Wait();
        }

        private static async Task IntentPatternMatchingWithMicrophoneAsync()
        {
            var config = SpeechConfig.FromSubscription("YOUR_SUBSCRIPTION_KEY", "YOUR_SUBSCRIPTION_REGION");
        }
    }
}
创建语音配置
在初始化 IntentRecognizer 对象之前,需要创建一个配置来使用 Azure AI 服务预测资源的密钥和位置。
- 将
"YOUR_SUBSCRIPTION_KEY"替换为 Azure AI 服务预测密钥。 - 将
"YOUR_SUBSCRIPTION_REGION"替换为 Azure AI 服务资源区域。
此示例使用 FromSubscription() 方法来生成 SpeechConfig。 有关可用方法的完整列表,请参阅 SpeechConfig 类。
初始化 IntentRecognizer
现在创建一个 IntentRecognizer。 将此代码插入语音配置下。
using (var intentRecognizer = new IntentRecognizer(config))
{

}
添加一些意向
需要通过调用 AddIntent() 将一些模式与 IntentRecognizer 关联。
我们将添加 2 个具有相同 ID 的意向用于更改楼层,再添加另一个具有单独 ID 的意向用于开门和关门。
在 using 块内插入此代码:
intentRecognizer.AddIntent("Take me to floor {floorName}.", "ChangeFloors");
intentRecognizer.AddIntent("Go to floor {floorName}.", "ChangeFloors");
intentRecognizer.AddIntent("{action} the door.", "OpenCloseDoor");
注意
对可以声明的实体数量没有限制,但它们是松散匹配的。 如果添加一个短语,如“{action} door”,每当单词“door”前面有文本时,它都会匹配。 意向是根据其实体数量来评估的。 如果有两种模式匹配,则返回具有更多已定义实体的模式。
识别意向
在 IntentRecognizer 对象中,我们将调用 RecognizeOnceAsync() 方法。 此方法要求语音服务识别单个短语中的语音,并在识别到短语后停止识别语音。 此为简写内容,今后将回头补充。
将下面的代码插入到你的意向下方:
Console.WriteLine("Say something...");

var result = await intentRecognizer.RecognizeOnceAsync();
显示识别结果(或错误)
当语音服务返回识别结果后,我们将输出结果。
将此代码插在 var result = await recognizer.RecognizeOnceAsync(); 下:
string floorName;
switch (result.Reason)
{
    case ResultReason.RecognizedSpeech:
        Console.WriteLine($"RECOGNIZED: Text= {result.Text}");
        Console.WriteLine($"    Intent not recognized.");
        break;
    case ResultReason.RecognizedIntent:
        Console.WriteLine($"RECOGNIZED: Text= {result.Text}");
        Console.WriteLine($"       Intent Id= {result.IntentId}.");
        var entities = result.Entities;
        if (entities.TryGetValue("floorName", out floorName))
        {
            Console.WriteLine($"       FloorName= {floorName}");
        }

        if (entities.TryGetValue("action", out floorName))
        {
            Console.WriteLine($"       Action= {floorName}");
        }

        break;
    case ResultReason.NoMatch:
    {
        Console.WriteLine($"NOMATCH: Speech could not be recognized.");
        var noMatch = NoMatchDetails.FromResult(result);
        switch (noMatch.Reason)
        {
            case NoMatchReason.NotRecognized:
                Console.WriteLine($"NOMATCH: Speech was detected, but not recognized.");
                break;
            case NoMatchReason.InitialSilenceTimeout:
                Console.WriteLine($"NOMATCH: The start of the audio stream contains only silence, and the service timed out waiting for speech.");
                break;
            case NoMatchReason.InitialBabbleTimeout:
                Console.WriteLine($"NOMATCH: The start of the audio stream contains only noise, and the service timed out waiting for speech.");
                break;
            case NoMatchReason.KeywordNotRecognized:
                Console.WriteLine($"NOMATCH: Keyword not recognized");
                break;
        }
        break;
    }
    case ResultReason.Canceled:
    {
        var cancellation = CancellationDetails.FromResult(result);
        Console.WriteLine($"CANCELED: Reason={cancellation.Reason}");

        if (cancellation.Reason == CancellationReason.Error)
        {
            Console.WriteLine($"CANCELED: ErrorCode={cancellation.ErrorCode}");
            Console.WriteLine($"CANCELED: ErrorDetails={cancellation.ErrorDetails}");
            Console.WriteLine($"CANCELED: Did you set the speech resource key and region values?");
        }
        break;
    }
    default:
        break;
}
查看代码
此时,代码应如下所示:
using System;
using System.Threading.Tasks;
using Microsoft.CognitiveServices.Speech;
using Microsoft.CognitiveServices.Speech.Intent;

namespace helloworld
{
    class Program
    {
        static void Main(string[] args)
        {
            IntentPatternMatchingWithMicrophoneAsync().Wait();
        }

        private static async Task IntentPatternMatchingWithMicrophoneAsync()
        {
            var config = SpeechConfig.FromSubscription("YOUR_SUBSCRIPTION_KEY", "YOUR_SUBSCRIPTION_REGION");
            using (var intentRecognizer = new IntentRecognizer(config))
            {
                intentRecognizer.AddIntent("Take me to floor {floorName}.", "ChangeFloors");
                intentRecognizer.AddIntent("Go to floor {floorName}.", "ChangeFloors");
                intentRecognizer.AddIntent("{action} the door.", "OpenCloseDoor");

                Console.WriteLine("Say something...");

                var result = await intentRecognizer.RecognizeOnceAsync();

                string floorName;
                switch (result.Reason)
                {
                    case ResultReason.RecognizedSpeech:
                        Console.WriteLine($"RECOGNIZED: Text= {result.Text}");
                        Console.WriteLine($"    Intent not recognized.");
                        break;
                    case ResultReason.RecognizedIntent:
                        Console.WriteLine($"RECOGNIZED: Text= {result.Text}");
                        Console.WriteLine($"       Intent Id= {result.IntentId}.");
                        var entities = result.Entities;
                        if (entities.TryGetValue("floorName", out floorName))
                        {
                            Console.WriteLine($"       FloorName= {floorName}");
                        }

                        if (entities.TryGetValue("action", out floorName))
                        {
                            Console.WriteLine($"       Action= {floorName}");
                        }

                        break;
                    case ResultReason.NoMatch:
                    {
                        Console.WriteLine($"NOMATCH: Speech could not be recognized.");
                        var noMatch = NoMatchDetails.FromResult(result);
                        switch (noMatch.Reason)
                        {
                            case NoMatchReason.NotRecognized:
                                Console.WriteLine($"NOMATCH: Speech was detected, but not recognized.");
                                break;
                            case NoMatchReason.InitialSilenceTimeout:
                                Console.WriteLine($"NOMATCH: The start of the audio stream contains only silence, and the service timed out waiting for speech.");
                                break;
                            case NoMatchReason.InitialBabbleTimeout:
                                Console.WriteLine($"NOMATCH: The start of the audio stream contains only noise, and the service timed out waiting for speech.");
                                break;
                            case NoMatchReason.KeywordNotRecognized:
                                Console.WriteLine($"NOMATCH: Keyword not recognized");
                                break;
                        }
                        break;
                    }
                    case ResultReason.Canceled:
                    {
                        var cancellation = CancellationDetails.FromResult(result);
                        Console.WriteLine($"CANCELED: Reason={cancellation.Reason}");

                        if (cancellation.Reason == CancellationReason.Error)
                        {
                            Console.WriteLine($"CANCELED: ErrorCode={cancellation.ErrorCode}");
                            Console.WriteLine($"CANCELED: ErrorDetails={cancellation.ErrorDetails}");
                            Console.WriteLine($"CANCELED: Did you set the speech resource key and region values?");
                        }
                        break;
                    }
                    default:
                        break;
                }
            }
        }
    }
}
生成并运行应用
现在,可以使用语音服务构建应用并测试语音识别。
- 编译代码- 在 Visual Studio 菜单栏中,选择“生成”>“生成解决方案” 。
- 启动应用 - 在菜单栏中,选择“调试”>“开始调试”,或按 F5 。
- 开始识别 - 它将提示你说点什么。 默认语言为英语。 语音将发送到语音服务,转录为文本,并在控制台中呈现。
例如,如果你说“Take me to floor 7”,则输出如下所示:
Say something ...
RECOGNIZED: Text= Take me to floor 7.
  Intent Id= ChangeFloors
  FloorName= 7
创建项目
在 Visual Studio 2019 中创建新的 C++ 控制台应用程序项目并安装语音 SDK。
从一些样本代码入手
让我们打开 helloworld.cpp 并添加一些代码作为项目的框架。
    #include <iostream>
    #include <speechapi_cxx.h>

    using namespace Microsoft::CognitiveServices::Speech;
    using namespace Microsoft::CognitiveServices::Speech::Intent;

    int main()
    {
        std::cout << "Hello World!\n";

        auto config = SpeechConfig::FromSubscription("YOUR_SUBSCRIPTION_KEY", "YOUR_SUBSCRIPTION_REGION");
    }
创建语音配置
在初始化 IntentRecognizer 对象之前,需要创建一个配置来使用 Azure AI 服务预测资源的密钥和位置。
- 将
"YOUR_SUBSCRIPTION_KEY"替换为 Azure AI 服务预测密钥。 - 将
"YOUR_SUBSCRIPTION_REGION"替换为 Azure AI 服务资源区域。
此示例使用 FromSubscription() 方法来生成 SpeechConfig。 有关可用方法的完整列表,请参阅 SpeechConfig 类。
初始化 IntentRecognizer
现在创建一个 IntentRecognizer。 将此代码插入语音配置下。
auto intentRecognizer = IntentRecognizer::FromConfig(config);
添加一些意向
需要通过调用 AddIntent() 将一些模式与 IntentRecognizer 关联。
我们将添加 2 个具有相同 ID 的意向用于更改楼层,再添加另一个具有单独 ID 的意向用于开门和关门。
    intentRecognizer->AddIntent("Take me to floor {floorName}.", "ChangeFloors");
    intentRecognizer->AddIntent("Go to floor {floorName}.", "ChangeFloors");
    intentRecognizer->AddIntent("{action} the door.", "OpenCloseDoor");
注意
对可以声明的实体数量没有限制,但它们是松散匹配的。 如果添加一个短语,如“{action} door”,每当单词“door”前面有文本时,它都会匹配。 意向是根据其实体数量来评估的。 如果有两种模式匹配,则返回具有更多已定义实体的模式。
识别意向
在 IntentRecognizer 对象中,我们将调用 RecognizeOnceAsync() 方法。 此方法要求语音服务识别单个短语中的语音,并在识别到短语后停止识别语音。 此为简写内容,今后将回头补充。
将下面的代码插入到你的意向下方:
    std::cout << "Say something ..." << std::endl;
    auto result = intentRecognizer->RecognizeOnceAsync().get();
显示识别结果(或错误)
当语音服务返回识别结果后,我们将输出结果。
将此代码插在 auto result = intentRecognizer->RecognizeOnceAsync().get(); 下:
switch (result->Reason)
{
case ResultReason::RecognizedSpeech:
        std::cout << "RECOGNIZED: Text = " << result->Text.c_str() << std::endl;
        std::cout << "NO INTENT RECOGNIZED!" << std::endl;
        break;
case ResultReason::RecognizedIntent:
    std::cout << "RECOGNIZED: Text = " << result->Text.c_str() << std::endl;
    std::cout << "  Intent Id = " << result->IntentId.c_str() << std::endl;
    auto entities = result->GetEntities();
    if (entities.find("floorName") != entities.end())
    {
        std::cout << "  Floor name: = " << entities["floorName"].c_str() << std::endl;
    }

    if (entities.find("action") != entities.end())
    {
        std::cout << "  Action: = " << entities["action"].c_str() << std::endl;
    }

    break;
case ResultReason::NoMatch:
{
    auto noMatch = NoMatchDetails::FromResult(result);
    switch (noMatch->Reason)
    {
    case NoMatchReason::NotRecognized:
        std::cout << "NOMATCH: Speech was detected, but not recognized." << std::endl;
        break;
    case NoMatchReason::InitialSilenceTimeout:
        std::cout << "NOMATCH: The start of the audio stream contains only silence, and the service timed out waiting for speech." << std::endl;
        break;
    case NoMatchReason::InitialBabbleTimeout:
        std::cout << "NOMATCH: The start of the audio stream contains only noise, and the service timed out waiting for speech." << std::endl;
        break;
    case NoMatchReason::KeywordNotRecognized:
        std::cout << "NOMATCH: Keyword not recognized" << std::endl;
        break;
    }
    break;
}
case ResultReason::Canceled:
{
    auto cancellation = CancellationDetails::FromResult(result);

    if (!cancellation->ErrorDetails.empty())
    {
        std::cout << "CANCELED: ErrorDetails=" << cancellation->ErrorDetails.c_str() << std::endl;
        std::cout << "CANCELED: Did you set the speech resource key and region values?" << std::endl;
    }
}
default:
    break;
}
查看代码
此时,代码应如下所示:
#include <iostream>
#include <speechapi_cxx.h>

using namespace Microsoft::CognitiveServices::Speech;
using namespace Microsoft::CognitiveServices::Speech::Intent;

int main()
{
    auto config = SpeechConfig::FromSubscription("YOUR_SUBSCRIPTION_KEY", "YOUR_SUBSCRIPTION_REGION");
    auto intentRecognizer = IntentRecognizer::FromConfig(config);

    intentRecognizer->AddIntent("Take me to floor {floorName}.", "ChangeFloors");
    intentRecognizer->AddIntent("Go to floor {floorName}.", "ChangeFloors");
    intentRecognizer->AddIntent("{action} the door.", "OpenCloseDoor");

    std::cout << "Say something ..." << std::endl;

    auto result = intentRecognizer->RecognizeOnceAsync().get();

    switch (result->Reason)
    {
    case ResultReason::RecognizedSpeech:
        std::cout << "RECOGNIZED: Text = " << result->Text.c_str() << std::endl;
        std::cout << "NO INTENT RECOGNIZED!" << std::endl;
        break;
    case ResultReason::RecognizedIntent:
        std::cout << "RECOGNIZED: Text = " << result->Text.c_str() << std::endl;
        std::cout << "  Intent Id = " << result->IntentId.c_str() << std::endl;
        auto entities = result->GetEntities();
        if (entities.find("floorName") != entities.end())
        {
            std::cout << "  Floor name: = " << entities["floorName"].c_str() << std::endl;
        }

        if (entities.find("action") != entities.end())
        {
            std::cout << "  Action: = " << entities["action"].c_str() << std::endl;
        }

        break;
    case ResultReason::NoMatch:
    {
        auto noMatch = NoMatchDetails::FromResult(result);
        switch (noMatch->Reason)
        {
        case NoMatchReason::NotRecognized:
            std::cout << "NOMATCH: Speech was detected, but not recognized." << std::endl;
            break;
        case NoMatchReason::InitialSilenceTimeout:
            std::cout << "NOMATCH: The start of the audio stream contains only silence, and the service timed out waiting for speech." << std::endl;
            break;
        case NoMatchReason::InitialBabbleTimeout:
            std::cout << "NOMATCH: The start of the audio stream contains only noise, and the service timed out waiting for speech." << std::endl;
            break;
        case NoMatchReason::KeywordNotRecognized:
            std::cout << "NOMATCH: Keyword not recognized." << std::endl;
            break;
        }
        break;
    }
    case ResultReason::Canceled:
    {
        auto cancellation = CancellationDetails::FromResult(result);

        if (!cancellation->ErrorDetails.empty())
        {
            std::cout << "CANCELED: ErrorDetails=" << cancellation->ErrorDetails.c_str() << std::endl;
            std::cout << "CANCELED: Did you set the speech resource key and region values?" << std::endl;
        }
    }
    default:
        break;
    }
}
生成并运行应用
现在,可以使用语音服务构建应用并测试语音识别。
- 编译代码- 在 Visual Studio 菜单栏中,选择“生成”>“生成解决方案” 。
- 启动应用 - 在菜单栏中,选择“调试”>“开始调试”,或按 F5 。
- 开始识别 - 它将提示你说点什么。 默认语言为英语。 语音将发送到语音服务,转录为文本,并在控制台中呈现。
例如,如果你说“Take me to floor 7”,则输出如下所示:
Say something ...
RECOGNIZED: Text = Take me to floor 7.
  Intent Id = ChangeFloors
  Floor name: = 7
在本快速入门中,我们安装适用于 Java 的语音 SDK。
平台要求
选择目标环境:
适用于 Java 的语音 SDK 与 Windows、Linux 和 macOS 兼容。
在 Windows 上,你必须使用 64 位目标体系结构。 需要 Windows 10 或更高版本。
安装适用于你的平台的 Microsoft Visual C++ Redistributable for Visual Studio 2015、2017、2019 和 2022。 首次安装此包时,可能需要重启。
适用于 Java 的语音 SDK 不支持 ARM64 上的 Windows。
安装 Java 开发工具包,例如 Azul Zulu OpenJDK。 Microsoft Build of OpenJDK 或你喜欢的 JDK 应该也能正常工作。
安装适用于 Java 的语音 SDK
某些说明使用特定的 SDK 版本,例如 1.24.2。 若要查看最新版本,请搜索我们的 GitHub 存储库。
选择目标环境:
本指南介绍如何在 Java 运行时上安装用于 Java 的语音 SDK。
支持的操作系统
用于 Java 包的语音 SDK 适用于以下操作系统:
- Windows:仅限 64 位。
- Mac:macOS X 版本 10.14 或更高版本。
- Linux:请参阅受支持的 Linux 分发和目标体系结构。
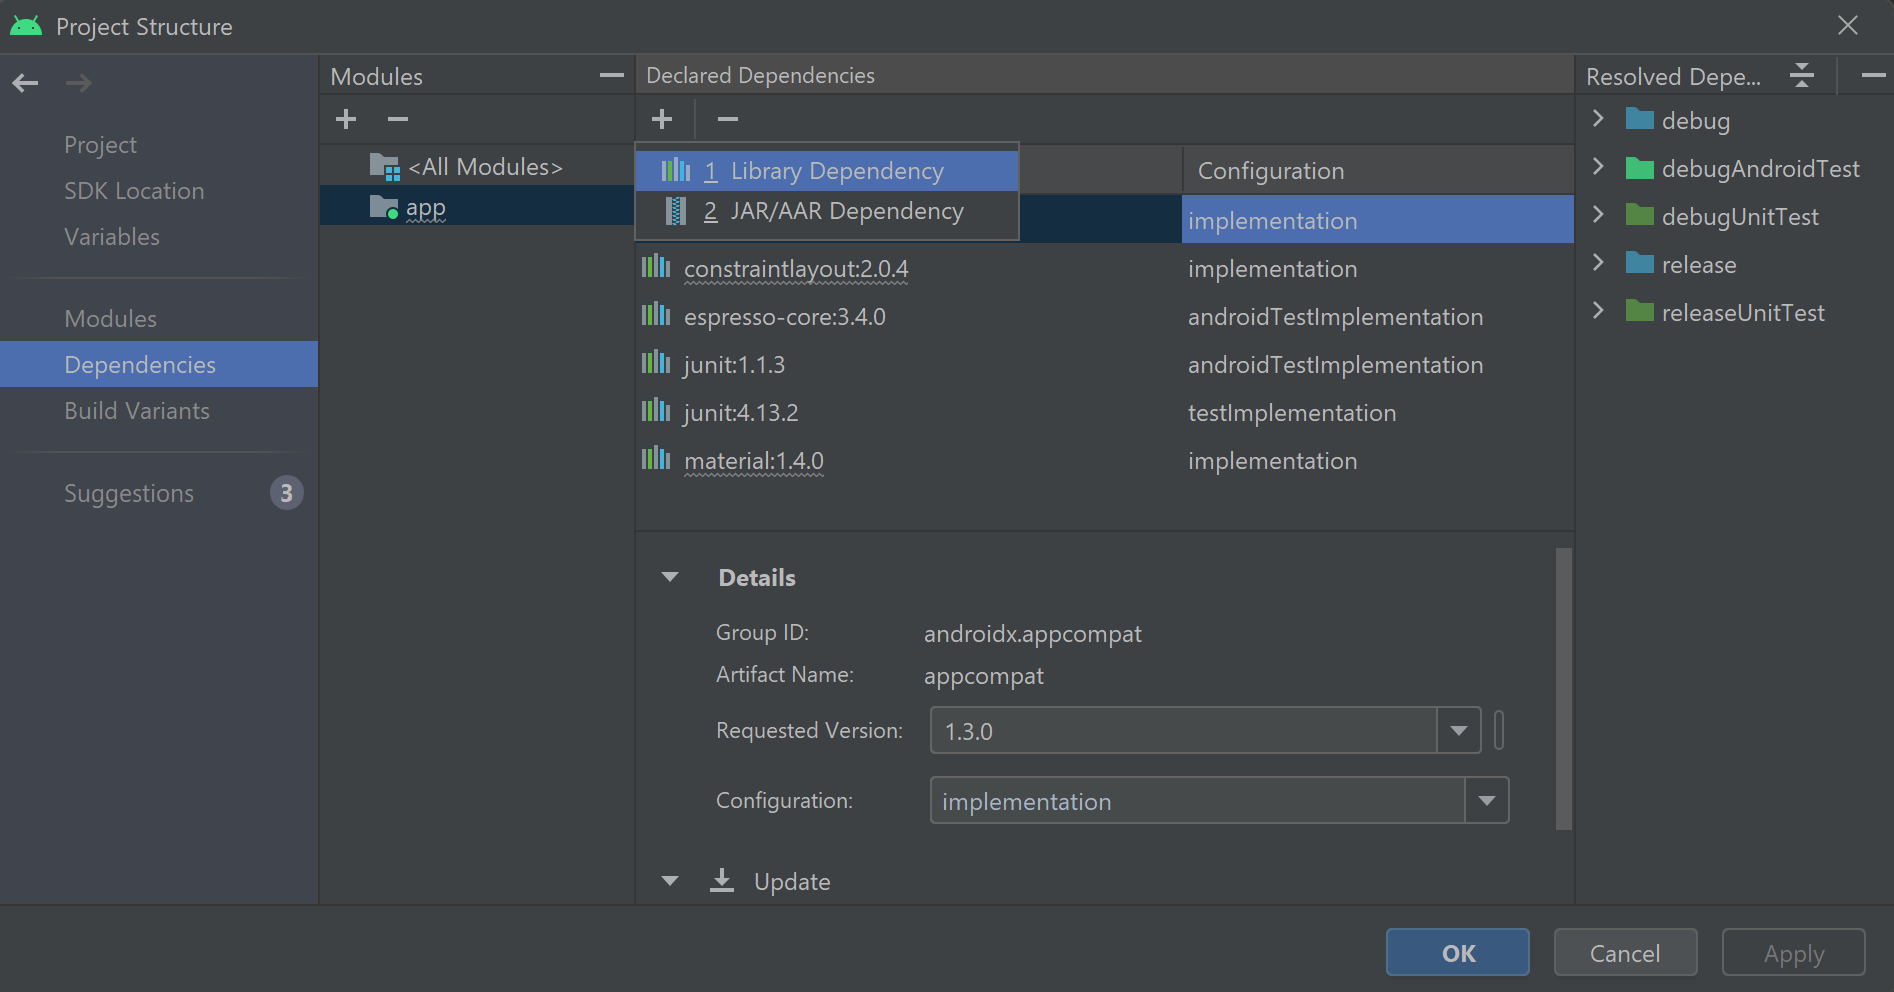
按照以下步骤使用 Apache Maven 安装适用于 Java 的语音 SDK:
安装 Apache Maven。
在需要新项目的位置打开命令提示符,并创建一个新的 pom.xml 文件。
将以下 XML 内容复制到 pom.xml 中:
<project xmlns="http://maven.apache.org/POM/4.0.0" xmlns:xsi="http://www.w3.org/2001/XMLSchema-instance" xsi:schemaLocation="http://maven.apache.org/POM/4.0.0 http://maven.apache.org/xsd/maven-4.0.0.xsd">
    <modelVersion>4.0.0</modelVersion>
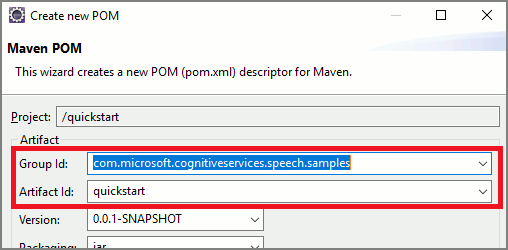
    <groupId>com.microsoft.cognitiveservices.speech.samples</groupId>
    <artifactId>quickstart-eclipse</artifactId>
    <version>1.0.0-SNAPSHOT</version>
    <build>
        <sourceDirectory>src</sourceDirectory>
        <plugins>
        <plugin>
            <artifactId>maven-compiler-plugin</artifactId>
            <version>3.7.0</version>
            <configuration>
            <source>1.8</source>
            <target>1.8</target>
            </configuration>
        </plugin>
        </plugins>
    </build>
    <dependencies>
        <dependency>
        <groupId>com.microsoft.cognitiveservices.speech</groupId>
        <artifactId>client-sdk</artifactId>
        <version>1.42.0</version>
        </dependency>
    </dependencies>
</project>
若要安装语音 SDK 和依赖项,请运行以下 Maven 命令。
mvn clean dependency:copy-dependencies
从一些样本代码入手
从 src dir 打开
Main.java。将文件的内容替换为以下内容:
package quickstart;
import java.util.Dictionary;
import java.util.concurrent.ExecutionException;

import com.microsoft.cognitiveservices.speech.*;
import com.microsoft.cognitiveservices.speech.intent.*;

public class Program {
    public static void main(String[] args) throws InterruptedException, ExecutionException {
        IntentPatternMatchingWithMicrophone();
    }

    public static void IntentPatternMatchingWithMicrophone() throws InterruptedException, ExecutionException {
        SpeechConfig config = SpeechConfig.fromSubscription("YOUR_SUBSCRIPTION_KEY", "YOUR_SUBSCRIPTION_REGION");
    }
}
创建语音配置
在初始化 IntentRecognizer 对象之前,需要创建一个配置来使用 Azure AI 服务预测资源的密钥和位置。
- 将
"YOUR_SUBSCRIPTION_KEY"替换为 Azure AI 服务预测密钥。 - 将
"YOUR_SUBSCRIPTION_REGION"替换为 Azure AI 服务资源区域。
此示例使用 FromSubscription() 方法来生成 SpeechConfig。 有关可用方法的完整列表,请参阅 SpeechConfig 类。
初始化 IntentRecognizer
现在创建一个 IntentRecognizer。 将此代码插入语音配置下。
try (IntentRecognizer intentRecognizer = new IntentRecognizer(config)) {

}
添加一些意向
需要通过调用 addIntent() 将一些模式与 IntentRecognizer 关联。
我们将添加 2 个具有相同 ID 的意向用于更改楼层,再添加另一个具有单独 ID 的意向用于开门和关门。
在 try 块内插入此代码:
intentRecognizer.addIntent("Take me to floor {floorName}.", "ChangeFloors");
intentRecognizer.addIntent("Go to floor {floorName}.", "ChangeFloors");
intentRecognizer.addIntent("{action} the door.", "OpenCloseDoor");
注意
对可以声明的实体数量没有限制,但它们是松散匹配的。 如果添加一个短语,如“{action} door”,每当单词“door”前面有文本时,它都会匹配。 意向是根据其实体数量来评估的。 如果有两种模式匹配,则返回具有更多已定义实体的模式。
识别意向
在 IntentRecognizer 对象中,我们将调用 recognizeOnceAsync() 方法。 此方法要求语音服务识别单个短语中的语音,并在识别到短语后停止识别语音。 此为简写内容,今后将回头补充。
将下面的代码插入到你的意向下方:
System.out.println("Say something...");

IntentRecognitionResult result = intentRecognizer.recognizeOnceAsync().get();
显示识别结果(或错误)
当语音服务返回识别结果后,我们将输出结果。
将此代码插在 IntentRecognitionResult result = recognizer.recognizeOnceAsync().get(); 下:
if (result.getReason() == ResultReason.RecognizedSpeech) {
    System.out.println("RECOGNIZED: Text= " + result.getText());
    System.out.println(String.format("%17s", "Intent not recognized."));
}
else if (result.getReason() == ResultReason.RecognizedIntent) {
    System.out.println("RECOGNIZED: Text= " + result.getText());
    System.out.println(String.format("%17s %s", "Intent Id=", result.getIntentId() + "."));
    Dictionary<String, String> entities = result.getEntities();

    if (entities.get("floorName") != null) {
        System.out.println(String.format("%17s %s", "FloorName=", entities.get("floorName")));
    }
    if (entities.get("action") != null) {
        System.out.println(String.format("%17s %s", "Action=", entities.get("action")));
    }
}
else if (result.getReason() == ResultReason.NoMatch) {
    System.out.println("NOMATCH: Speech could not be recognized.");
}
else if (result.getReason() == ResultReason.Canceled) {
    CancellationDetails cancellation = CancellationDetails.fromResult(result);
    System.out.println("CANCELED: Reason=" + cancellation.getReason());

    if (cancellation.getReason() == CancellationReason.Error)
    {
        System.out.println("CANCELED: ErrorCode=" + cancellation.getErrorCode());
        System.out.println("CANCELED: ErrorDetails=" + cancellation.getErrorDetails());
        System.out.println("CANCELED: Did you update the subscription info?");
    }
}
查看代码
此时,代码应如下所示:
package quickstart;
import java.util.Dictionary;
import java.util.concurrent.ExecutionException;

import com.microsoft.cognitiveservices.speech.*;
import com.microsoft.cognitiveservices.speech.intent.*;

public class Main {
    public static void main(String[] args) throws InterruptedException, ExecutionException {
        IntentPatternMatchingWithMicrophone();
    }

    public static void IntentPatternMatchingWithMicrophone() throws InterruptedException, ExecutionException {
        SpeechConfig config = SpeechConfig.fromSubscription("YOUR_SUBSCRIPTION_KEY", "YOUR_SUBSCRIPTION_REGION");

        try (IntentRecognizer intentRecognizer = new IntentRecognizer(config)) {
            intentRecognizer.addIntent("Take me to floor {floorName}.", "ChangeFloors");
            intentRecognizer.addIntent("Go to floor {floorName}.", "ChangeFloors");
            intentRecognizer.addIntent("{action} the door.", "OpenCloseDoor");

            System.out.println("Say something...");

            IntentRecognitionResult result = intentRecognizer.recognizeOnceAsync().get();
            if (result.getReason() == ResultReason.RecognizedSpeech) {
            System.out.println("RECOGNIZED: Text= " + result.getText());
            System.out.println(String.format("%17s", "Intent not recognized."));
            }
            else if (result.getReason() == ResultReason.RecognizedIntent) {
                System.out.println("RECOGNIZED: Text= " + result.getText());
                System.out.println(String.format("%17s %s", "Intent Id=", result.getIntentId() + "."));
                Dictionary<String, String> entities = result.getEntities();

                if (entities.get("floorName") != null) {
                    System.out.println(String.format("%17s %s", "FloorName=", entities.get("floorName")));
                }
                if (entities.get("action") != null) {
                    System.out.println(String.format("%17s %s", "Action=", entities.get("action")));
                }
            }
            else if (result.getReason() == ResultReason.NoMatch) {
                System.out.println("NOMATCH: Speech could not be recognized.");
            }
            else if (result.getReason() == ResultReason.Canceled) {
                CancellationDetails cancellation = CancellationDetails.fromResult(result);
                System.out.println("CANCELED: Reason=" + cancellation.getReason());

                if (cancellation.getReason() == CancellationReason.Error)
                {
                    System.out.println("CANCELED: ErrorCode=" + cancellation.getErrorCode());
                    System.out.println("CANCELED: ErrorDetails=" + cancellation.getErrorDetails());
                    System.out.println("CANCELED: Did you update the subscription info?");
                }
            }
        }
    }
}
生成并运行应用
现在,你已准备好使用语音服务和嵌入式模式匹配程序生成应用并测试我们的意向识别。
在 Eclipse 中选择“运行”按钮或按 Ctrl+F11,然后观看输出中的“说些...”提示。 一旦出现,它就会说出你的语句并观看输出。
例如,如果你说“Take me to floor 7”,则输出如下所示:
Say something ...
RECOGNIZED: Text= Take me to floor 7.
  Intent Id= ChangeFloors
  FloorName= 7
后续步骤
使用自定义实体改进模式匹配。
