使用 Papermill 创建参数化笔记本
Azure Data Studio 中的参数化使用不同的参数集运行同一笔记本。
本文介绍如何使用 Python 内核在 Azure Data Studio 中创建和运行参数化笔记本。
注意
当前,可将参数化与 Python、PySpark、PowerShell 和 .NET Interactive 内核结合使用。
先决条件
在 Azure Data Studio 中安装并设置 Papermill
此部分中的所有步骤都在一个 Azure Data Studio 笔记本中运行。
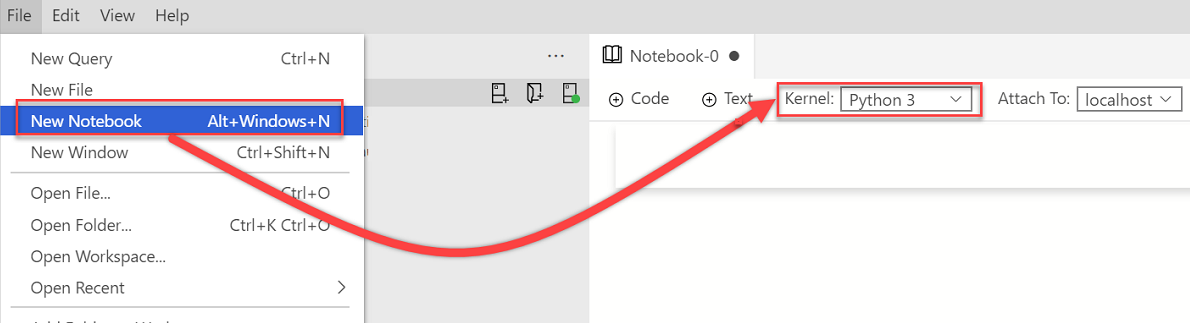
创建新的笔记本。 将“内核”更改为“Python 3” :
当包需要更新时,如果系统提示你升级 Python 包,则选择“是”:

安装 Papermill:
import sys
!{sys.executable} -m pip install papermill --no-cache-dir --upgrade
验证已安装 Papermill:
import sys
!{sys.executable} -m pip list
若要验证已正确安装 Papermill,请检查 Papermill 的版本:
import papermill
papermill
参数化示例
可使用示例笔记本文件来完成本文中的步骤:
- 转到 GitHub 中的笔记本文件。 选择“Raw”。
- 选择 Ctrl+S 或单击右键,然后使用 .ipynb 扩展名保存该文件。
- 在 Azure Data Studio 中打开该文件。
设置参数化笔记本
可从在 Azure Data Studio 中打开的示例笔记本开始操作,或完成以下步骤来创建一个笔记本。 然后,尝试使用不同的参数。 所有步骤都在一个 Azure Data Studio 笔记本中运行。
验证“内核”设置为“Python 3” :

创建一个新代码单元格。 选择“参数”,将该单元格标记为参数单元格。
x = 2.0
y = 5.0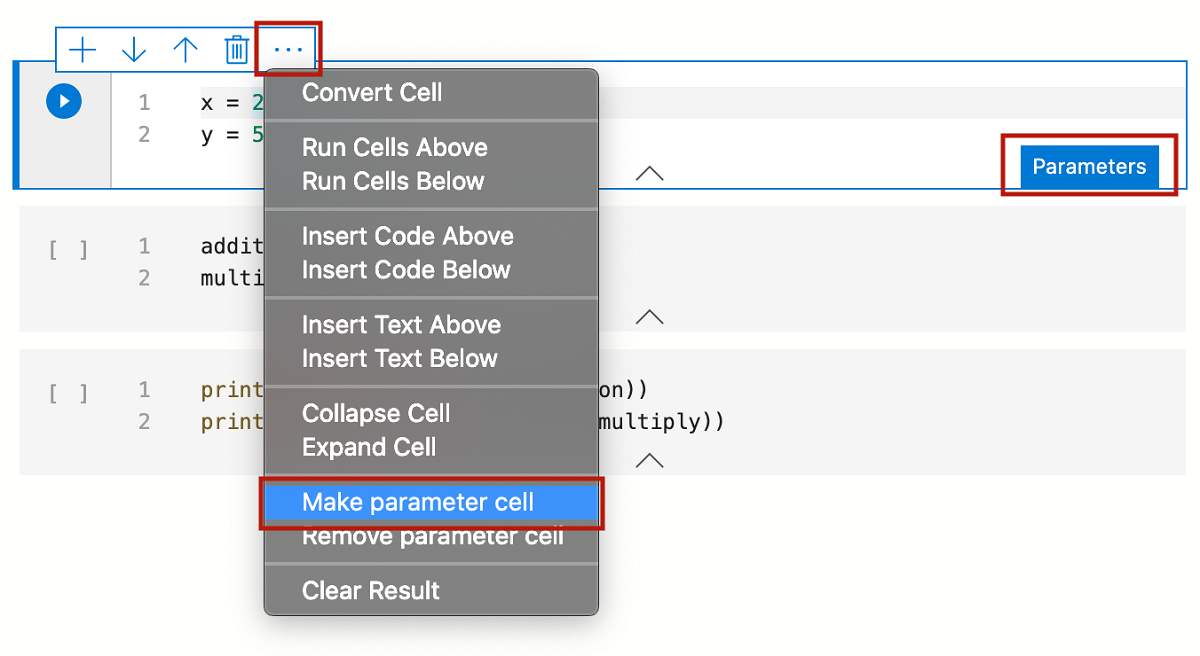
添加其他单元格以测试不同的参数:
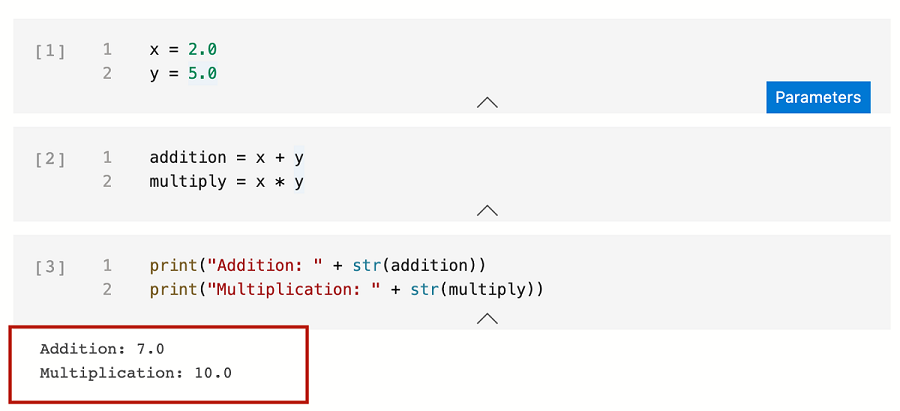
addition = x + y
multiply = x * y
print("Addition: " + str(addition)) print("Multiplication: " + str(multiply))运行所有单元后,输出将类似于以下示例:
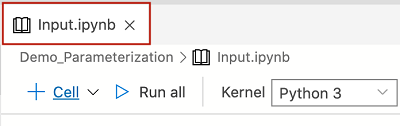
将笔记本保存为“Input.ipynb”:
执行 Papermill 笔记本
可通过两种方式执行 Papermill:
- 命令行接口 (CLI)
- Python API
参数化 CLI 执行
若要使用 CLI 执行笔记本,请在终端中输入 papermill 命令,以及输入笔记本、输出笔记本的位置和各个选项。
注意
若要了解详细信息,请参阅 Papermill CLI 文档。
使用新参数执行输入笔记本:
papermill Input.ipynb Output.ipynb -p x 10 -p y 20此命令使用参数 x 和 y 的新值执行输入笔记本 。
标为
# Injected-Parameters的新单元格包含通过 CLI 传入的新参数值。 新# Injected-Parameters值用于在最后一个单元格中显示的新输出: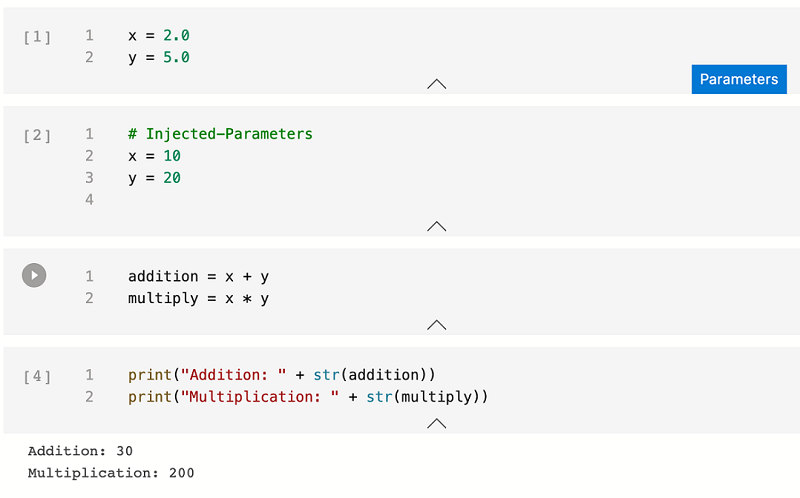
参数化 Python API 执行
注意
若要了解详细信息,请参阅 Papermill Python 文档。
创建新的笔记本。 将“内核”更改为“Python 3” :
添加一个新代码单元格。 然后,使用 Papermill Python API 执行并生成输出参数化笔记本:
import papermill as pm

pm.execute_notebook(
'/Users/vasubhog/GitProjects/AzureDataStudio-Notebooks/Demo_Parameterization/Input.ipynb',
'/Users/vasubhog/GitProjects/AzureDataStudio-Notebooks/Demo_Parameterization/Output.ipynb',
parameters = dict(x = 10, y = 20)
)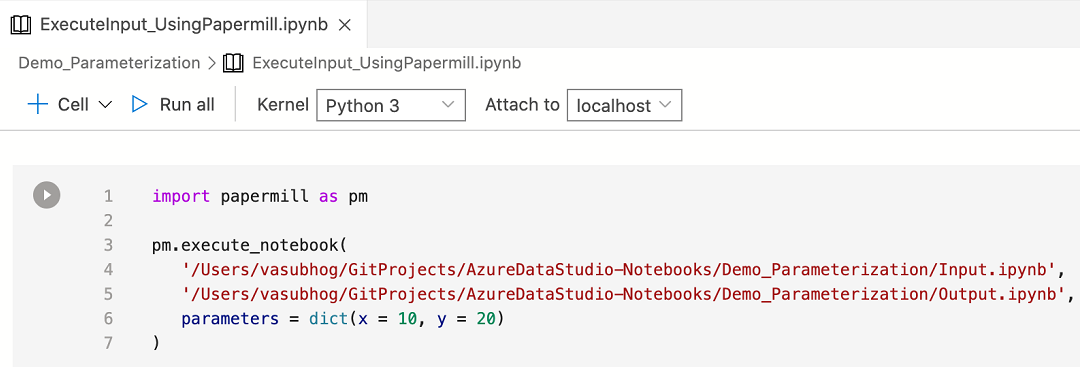
标为
# Injected-Parameters的新单元格包含传入的新参数值。 新# Injected-Parameters值用于在最后一个单元格中显示的新输出:
后续步骤
了解有关笔记本和参数化的详细信息: