批量删除 (C#)
了解如何在单个操作中删除多个数据库记录。 在用户界面层中,我们构建在前面的教程中创建的增强型 GridView。 在数据访问层中,我们会将多个删除操作包装在一个事务中,以确保所有删除都成功或回滚所有删除操作。
简介
前面的教程探讨了如何使用完全可编辑的 GridView 创建批处理编辑界面。 如果用户通常同时编辑多个记录,批处理编辑界面需要的回发和键盘到鼠标上下文切换将少得多,从而提高最终用户的效率。 对于用户通常一次性删除许多记录的页面,此方法同样有用。
任何使用过联机电子邮件客户端的用户都已熟悉最常见的批量删除界面之一:网格中每行都有一个复选框,其中包含相应的“删除所有选中的项目”按钮 (请参阅图 1) 。 本教程相当简短,因为我们已经在前面的教程中完成了创建基于 Web 的接口和将一系列记录作为单个原子操作删除的方法的所有艰苦工作。 在添加复选框的 GridView 列教程中,我们创建了一个包含复选框列的 GridView,在事务内包装数据库修改教程中,我们在 BLL 中创建了一个方法,该方法将使用事务删除List<T>ProductID值的 。 在本教程中,我们将基于和合并之前的经验来创建一个工作批处理删除示例。
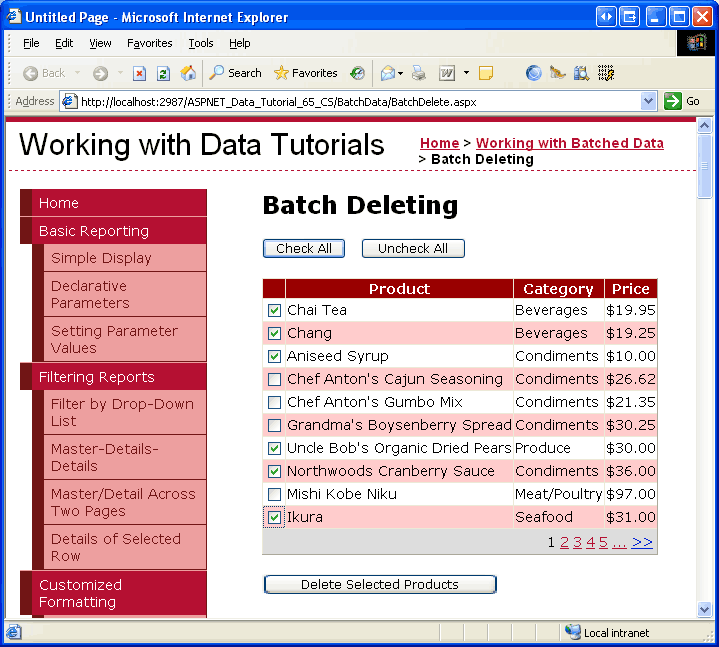
图 1:每行包含一个复选框 (单击以查看全尺寸图像)
步骤 1:创建批处理删除接口
由于我们已在 添加 GridView 复选框列 教程中创建批处理删除接口,因此只需将其 BatchDelete.aspx 复制到 ,而不是从头开始创建它。 首先打开 文件夹中的页面BatchDelete.aspxBatchData和 CheckBoxField.aspx 文件夹中的页面EnhancedGridView。 从 CheckBoxField.aspx 页面转到“源”视图,并在标记之间 <asp:Content> 复制标记,如图 2 所示。
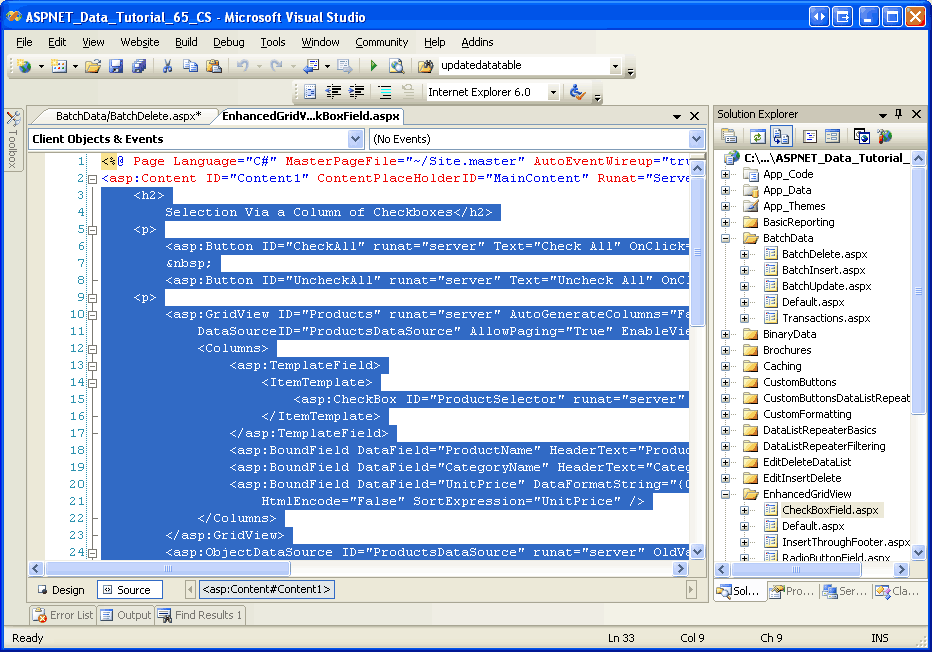
图 2:将 的 CheckBoxField.aspx 声明性标记复制到剪贴板 (单击以查看全尺寸图像)
接下来,转到 中的 BatchDelete.aspx “源”视图,并将剪贴板的内容粘贴到标记中 <asp:Content> 。 此外,将代码从 代码隐藏类中的 CheckBoxField.aspx.cs 复制并粘贴到 BatchDelete.aspx.cs (DeleteSelectedProducts Button 的 Click 事件处理程序、ToggleCheckState方法以及 Click 和 UncheckAll Buttons) 的事件处理程序CheckAll。 复制此内容后, BatchDelete.aspx 页面代码隐藏类应包含以下代码:
using System;
using System.Data;
using System.Configuration;
using System.Collections;
using System.Web;
using System.Web.Security;
using System.Web.UI;
using System.Web.UI.WebControls;
using System.Web.UI.WebControls.WebParts;
using System.Web.UI.HtmlControls;
public partial class BatchData_BatchDelete : System.Web.UI.Page
{
    protected void DeleteSelectedProducts_Click(object sender, EventArgs e)
    {
        bool atLeastOneRowDeleted = false;
        // Iterate through the Products.Rows property
        foreach (GridViewRow row in Products.Rows)
        {
            // Access the CheckBox
            CheckBox cb = (CheckBox)row.FindControl("ProductSelector");
            if (cb != null && cb.Checked)
            {
                // Delete row! (Well, not really...)
                atLeastOneRowDeleted = true;
                // First, get the ProductID for the selected row
                int productID = Convert.ToInt32(Products.DataKeys[row.RowIndex].Value);
                // "Delete" the row
                DeleteResults.Text += string.Format
                    ("This would have deleted ProductID {0}<br />", productID);
                //... To actually delete the product, use ...
                //ProductsBLL productAPI = new ProductsBLL();
                //productAPI.DeleteProduct(productID);
                //............................................
            }
        }
        // Show the Label if at least one row was deleted...
        DeleteResults.Visible = atLeastOneRowDeleted;
    }
    private void ToggleCheckState(bool checkState)
    {
        // Iterate through the Products.Rows property
        foreach (GridViewRow row in Products.Rows)
        {
            // Access the CheckBox
            CheckBox cb = (CheckBox)row.FindControl("ProductSelector");
            if (cb != null)
                cb.Checked = checkState;
        }
    }
    protected void CheckAll_Click(object sender, EventArgs e)
    {
        ToggleCheckState(true);
    }
    protected void UncheckAll_Click(object sender, EventArgs e)
    {
        ToggleCheckState(false);
    }
}
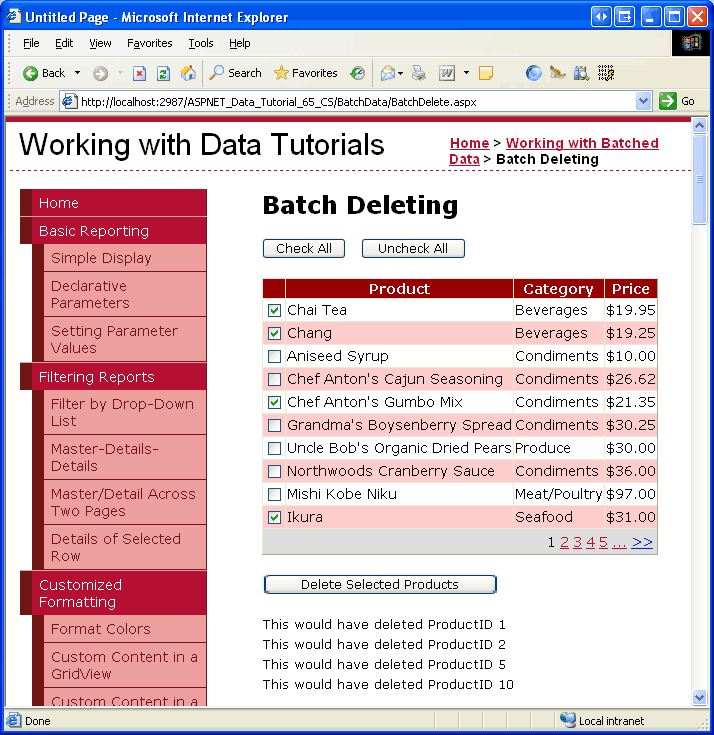
复制声明性标记和源代码后,请花点时间通过浏览器查看它进行测试 BatchDelete.aspx 。 应会看到一个 GridView,其中列出了 GridView 中的前十个产品,每行都列出了产品的名称、类别和价格以及一个复选框。 应有三个按钮:“全部选中”、“全部取消选中”和“删除所选产品”。 单击“全部选中”按钮将选中所有复选框,而“全部取消选中”将清除所有复选框。 单击“删除所选产品”将显示一条消息,其中列出了 ProductID 所选产品的值,但实际上不会删除产品。

图 3:来自 CheckBoxField.aspx 的接口已移动到 BatchDeleting.aspx (单击以查看全尺寸图像)
步骤 2:使用事务删除已检查的产品
将批量删除接口成功复制到 BatchDeleting.aspx后,剩下的就是更新代码,以便“删除所选产品”按钮使用 DeleteProductsWithTransaction 类中的 ProductsBLL 方法删除已检查的产品。 在事务中包装数据库修改教程中添加的此方法接受 值作为List<T>ProductID其输入,并删除事务范围内的每个对应ProductID项。
DeleteSelectedProducts Button 事件处理程序Click当前使用以下foreach循环来循环访问每个 GridView 行:
// Iterate through the Products.Rows property
foreach (GridViewRow row in Products.Rows)
{
    // Access the CheckBox
    CheckBox cb = (CheckBox)row.FindControl("ProductSelector");
    if (cb != null && cb.Checked)
    {
        // Delete row! (Well, not really...)
        atLeastOneRowDeleted = true;
        // First, get the ProductID for the selected row
        int productID = Convert.ToInt32(Products.DataKeys[row.RowIndex].Value);
        // "Delete" the row
        DeleteResults.Text += string.Format
            ("This would have deleted ProductID {0}<br />", productID);
        //... To actually delete the product, use ...
        //ProductsBLL productAPI = new ProductsBLL();
        //productAPI.DeleteProduct(productID);
        //............................................
    }
}
对于每一行, ProductSelector 以编程方式引用 CheckBox Web 控件。 如果选中该行,则会从DataKeys集合中检索该行ProductID,并且 DeleteResults Label 属性Text将更新为包含一条消息,指示已选择删除该行。
上述代码实际上不会删除任何记录,因为对 ProductsBLL 类方法的 Delete 调用被注释掉。如果应用此删除逻辑,代码将删除产品,但不会在原子操作中。 也就是说,如果序列中的前几个删除成功,但后来的删除失败 (可能是由于外键约束冲突) ,则会引发异常,但已删除的产品将保持删除状态。
为了确保原子性,我们需要改用 ProductsBLL 类 的 DeleteProductsWithTransaction 方法。 由于此方法接受值列表 ProductID ,因此我们需要首先从网格编译此列表,然后将其作为参数传递。 我们首先创建 类型int为 List<T> 的 实例。 在 循环中 foreach ,我们需要将所选产品 ProductID 值添加到此 List<T>。 在 循环之后,必须将此 List<T> 传递给 ProductsBLL 类 方法 DeleteProductsWithTransaction 。 使用以下 DeleteSelectedProducts 代码更新 Button 事件处理程序 Click :
protected void DeleteSelectedProducts_Click(object sender, EventArgs e)
{
    // Create a List to hold the ProductID values to delete
    System.Collections.Generic.List<int> productIDsToDelete =
        new System.Collections.Generic.List<int>();
    // Iterate through the Products.Rows property
    foreach (GridViewRow row in Products.Rows)
    {
        // Access the CheckBox
        CheckBox cb = (CheckBox)row.FindControl("ProductSelector");
        if (cb != null && cb.Checked)
        {
            // Save the ProductID value for deletion
            // First, get the ProductID for the selected row
            int productID = Convert.ToInt32(Products.DataKeys[row.RowIndex].Value);
            // Add it to the List...
            productIDsToDelete.Add(productID);
            // Add a confirmation message
            DeleteResults.Text += string.Format
                ("ProductID {0} has been deleted<br />", productID);
        }
    }
    // Call the DeleteProductsWithTransaction method and show the Label
    // if at least one row was deleted...
    if (productIDsToDelete.Count > 0)
    {
        ProductsBLL productAPI = new ProductsBLL();
        productAPI.DeleteProductsWithTransaction(productIDsToDelete);
        DeleteResults.Visible = true;
        // Rebind the data to the GridView
        Products.DataBind();
    }
}
更新后的代码创建 List<T> () 类型的 int ,并使用要删除的值填充它ProductIDproductIDsToDelete 。 在循环之后 foreach ,如果至少选择了一个产品,则 ProductsBLL 调用类 s DeleteProductsWithTransaction 方法并传递此列表。 DeleteResults还会显示“标签”,并将数据重新绑定到 GridView (,以便新删除的记录不再显示为网格) 中的行。
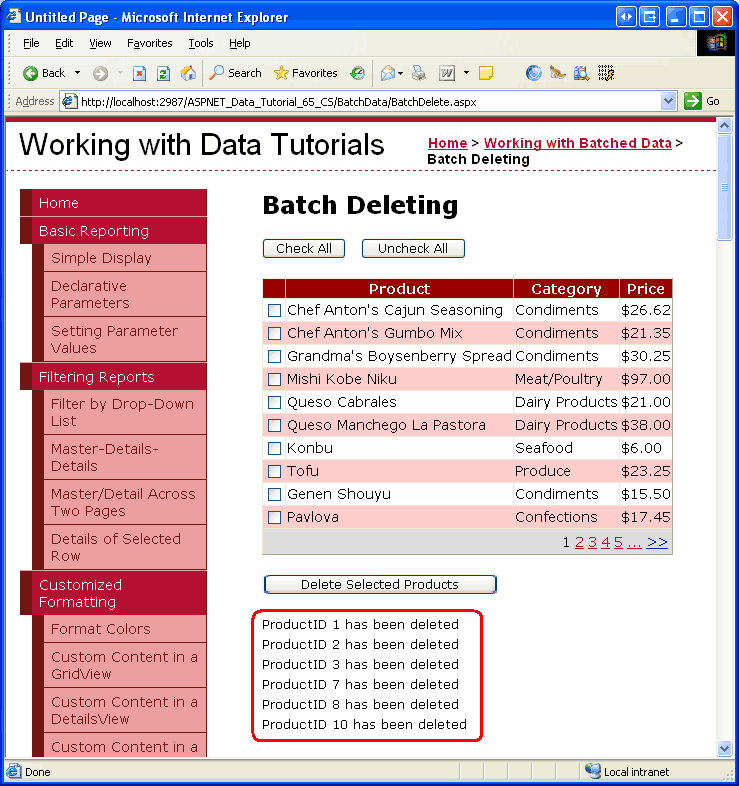
图 4 显示了选择要删除的行数之后的 GridView。 图 5 显示单击“删除所选产品”按钮后立即显示的屏幕。 请注意,在图 5 中, ProductID 已删除记录的值显示在 GridView 下的 Label 中,这些行不再位于 GridView 中。
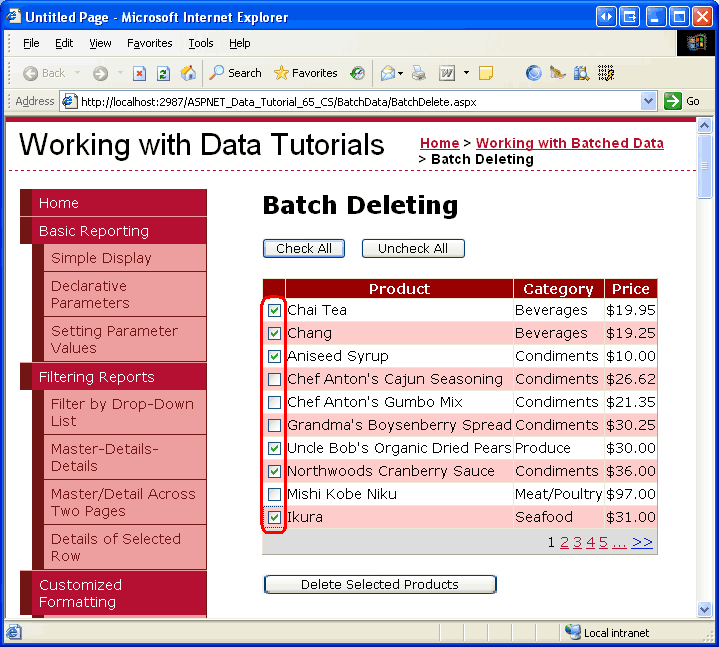
图 4:将删除所选产品 (单击以查看全尺寸图像)

图 5:“已删除的产品 ProductID ”值列在 GridView 下方 (单击以查看全尺寸图像)
注意
若要测试 DeleteProductsWithTransaction 方法的原子性,请手动为 Order Details 表中的产品添加一个条目,然后尝试删除该产品 (以及其他) 。 尝试删除具有关联订单的产品时,将收到外键约束冲突,但请注意其他所选产品删除操作的回滚方式。
总结
创建批处理删除接口涉及添加包含一列复选框的 GridView 和按钮 Web 控件,单击该控件时,将删除所有选定的行作为单个原子操作。 在本教程中,我们通过将前面两个教程( 添加复选框的 GridView 列 和在 事务中包装数据库修改)中完成的工作拼凑在一起来构建此类接口。 在第一个教程中,我们创建了一个包含复选框列的 GridView,在后一个教程中,我们在 BLL 中实现了一个方法,该方法在传递 List<T> 值为 的 ProductID 时,在事务范围内将其全部删除。
在下一教程中,我们将创建用于执行批量插入的接口。
编程愉快!
关于作者
Scott Mitchell 是七本 ASP/ASP.NET 书籍的作者, 4GuysFromRolla.com 的创始人,自 1998 年以来一直从事 Microsoft Web 技术工作。 Scott 担任独立顾问、培训师和作家。 他的最新书是 山姆斯在24小时内 ASP.NET 2.0自学。 可以在 上联系 mitchell@4GuysFromRolla.com他, 也可以通过他的博客联系到他,该博客可在 http://ScottOnWriting.NET中找到。
特别感谢
本教程系列由许多有用的审阅者查看。 本教程的主要审阅者是希尔顿·吉森诺和特蕾莎·墨菲。 有兴趣查看我即将发布的 MSDN 文章? 如果是,请在 处放置一行 mitchell@4GuysFromRolla.com。