Building a first project using Microsoft Azure’s Language Understanding Intelligent Services
Guest post by Sam Gao Microsoft Student Partner University College London
About me
I am a first-year Mathematical Computation student at UCL, with a keen interest in competitive algorithmic and machine learning. Today, I’ll guide you through setting up and building a first project using Microsoft Azure’s Language Understanding Intelligent Service (https://www.luis.ai/), or LUIS.
Language Understanding?
Language is one of the primary methods we use to communicate among ourselves – as such, it represents a highly convenient and natural form of human-computer interaction. With the advent of voice assistants such as Cortana, Google Assistant, Siri and Alexa, there has been considerable interest in creating more applications and interfaces that can understand us the way we understand each other.
However, interpreting natural language is complex and out of reach of most programmers. While it may be simple to parse a statement looking for tokens that correspond to actions, doing this with accuracy and speed in deciphering the intended meaning is a Herculean task in comparison. A simple intent can be expressed in a multitude of ways: “wake me up at 10 tomorrow”, “set my alarm for 10AM”, and “alarm at 10” are just some of the ways of expressing the same intent, and to match all of them to the same action is a large task, especially in contrast with the actual functionality of the application itself – a simple alarm.
Enter LUIS
To gain access to this domain, LUIS allows us to parse and extract meaning from naturally-formed commands through the use of machine learning. In order to make use of LUIS, we have to understand and define three different components of the LUIS model specific to our application – intents, entities and utterances.
Intents and entities are exactly what they say on the tin. An intent represents an action that a user would like your application to execute, such as setting an alarm, switching on an IoT lamp or doing a web search, while an entity corresponds to the parameters of the intent. Examples of entities include “10AM”, “green”, “news”. LUIS comes with a large library of prebuilt entities and entity lists, allowing you to get started easily.
Combining entities and intents, we get the more familiar utterance, which is simply the text input that users will present to your application. Utterances can vary in completeness and simplicity, ranging from “green lamps”, to “wake me up at 10AM”, to “what are the latest headlines about Microsoft”.
To set up LUIS, we’re going to need to define the entities and intents we want our application to process, link these to example utterances we want to be able to answer, and finally train the LUIS model so that we can process future utterances provided by users. LUIS offers a free tier of 10,000 API calls a month, which we’re going to use in our project.
With that, let’s get right into our project – setting up a chat bot that can tell us about and show us things we ask for using Wikipedia’s REST API. We’ll accomplish this in two parts – first, setting up and training LUIS, and secondly, using the Bot Framework (/en-us/azure/bot-service/?view=azure-bot-service-3.0) to connect LUIS to a chat interface.
Part 1: Getting Started
Setting up LUIS
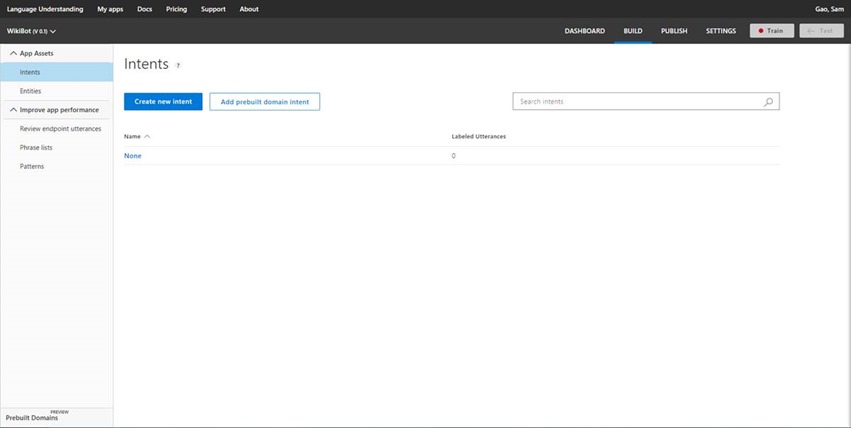
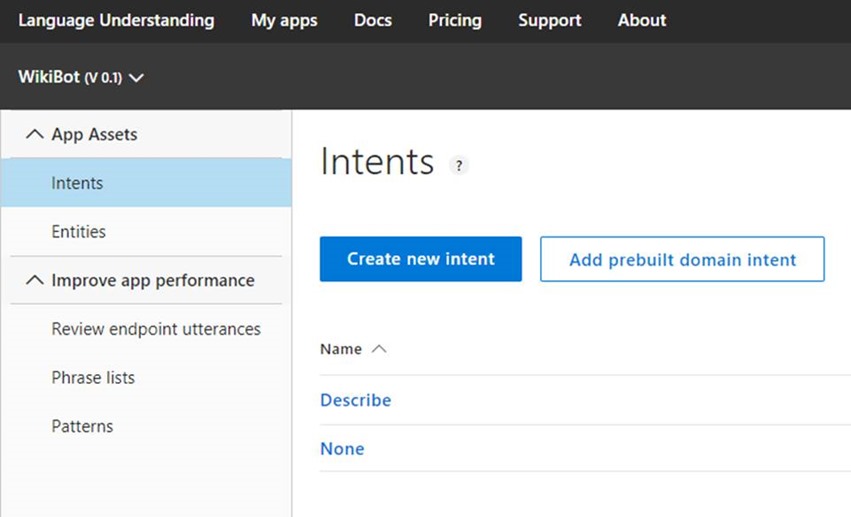
First, head on over to the LUIS dashboard (https://www.luis.ai/) and log in to your Microsoft account. Click the “Create new app” button – for this experiment, we’ll call our application “WikiBot”. Go ahead and fill that in, and hit “Done”. You should now be at the main LUIS dashboard on the Intents panel, which looks something like this.
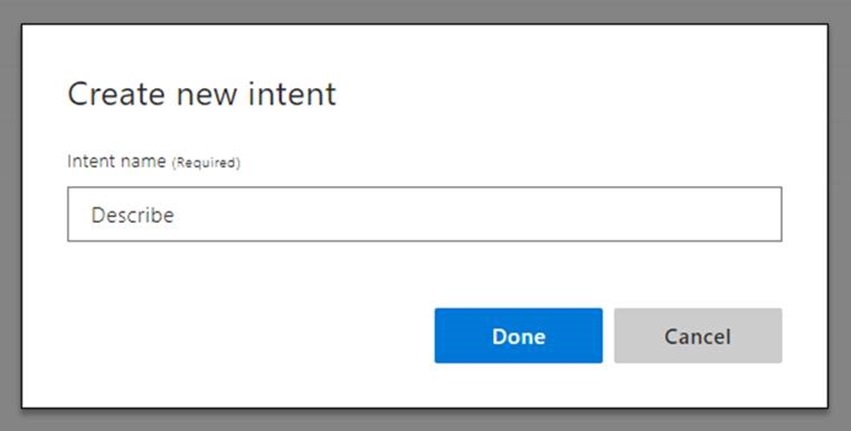
We want our bot to be able to respond to two types of intents – describe, and show images. Let’s start with the Describe intent – click “Create new intent”, and fill in the name “Describe”, and hit “Done”.
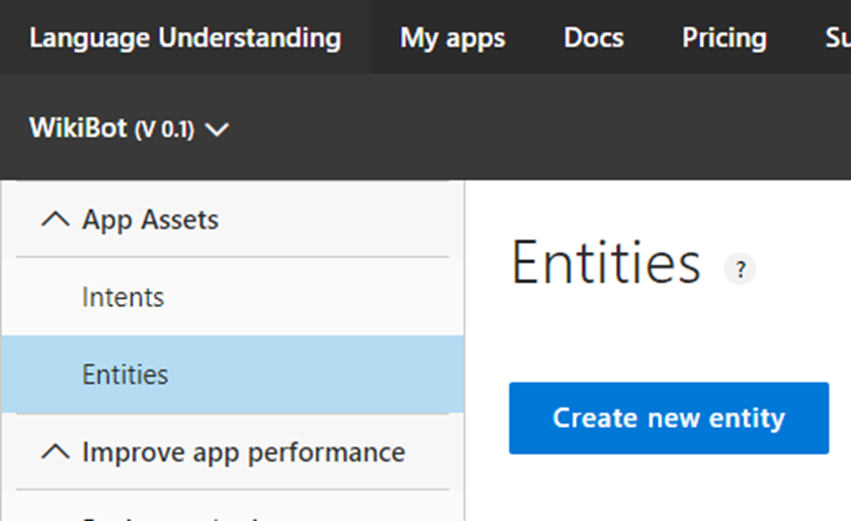
You should now be in the utterance input panel. We can’t train our intent without first having entities defined, so let’s leave this for now, and add our entities for this project. Go on and click “Entities” in the left panel, then click on “Create new entity”.
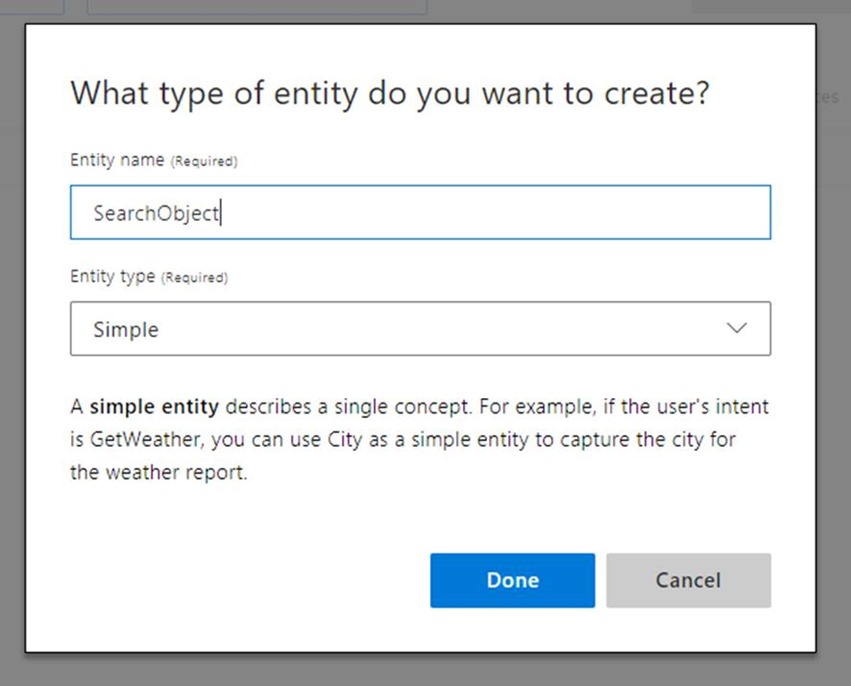
We’ll call our entity “SearchObject”. Leave the type as “Simple”, and hit “Done”.
Now, let’s set up our Describe intent. Go back to the Intents panel by clicking Intents in the left panel, and then click on the Describe intent.
To start, we have to come up with some examples of utterances we want our intent to respond to. Type “what is football” into the test utterance box, and hit Enter. The utterance then appears below.
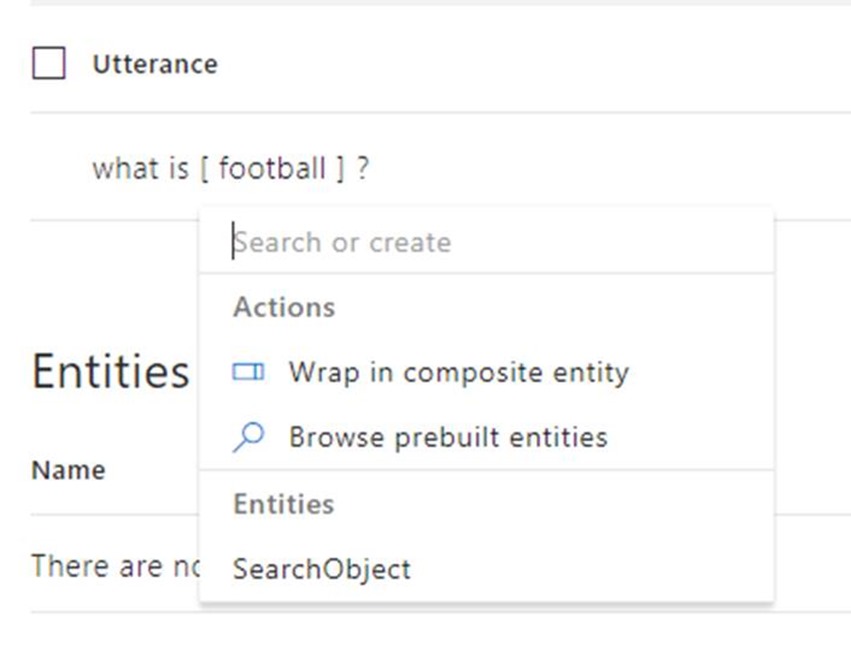
Click on “football”, and then on SearchObject to mark it as the entity. The utterance then turns into “what is [SearchObject]”.
The utterance is now associated with the Describe intent. Try adding some additional utterance yourself, such as “describe football”, “explain football”, etc. When that’s done, you should have a few labelled utterances like so:
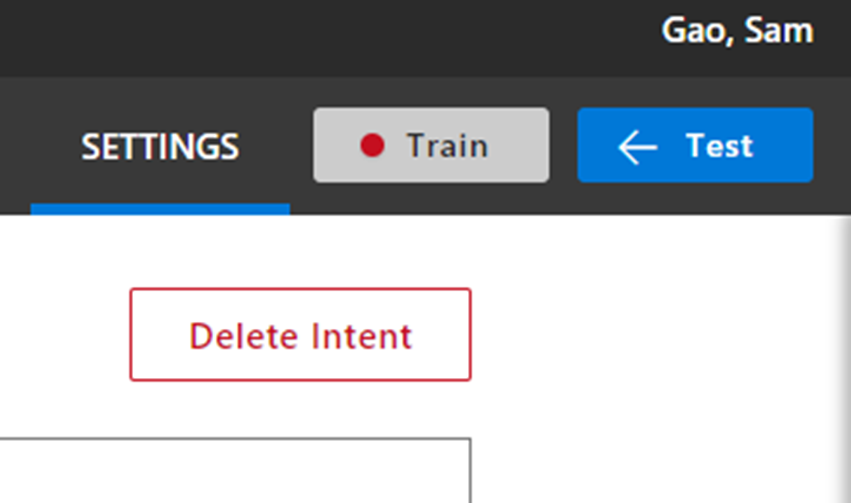
To train the LUIS model, click the Train button in the top right corner.
Now, go back to the utterance box and try entering utterances such as “what is water”, “what is an apple”, “what is a banana” and “describe bananas”. LUIS should automatically label them with SearchObject entities – if it doesn’t or labels them wrongly, adjust the labels accordingly and retrain the model to improve its accuracy.
At the same time, let’s head back to the None intent and add in some examples of utterances we don’t want our bot to search for – nonsensical things like “hi”, “I am a potato”, “I have a pen”, “I have an apple”, etc.
After doing that, train the LUIS model again. We should train LUIS every once in a while when adding new utterances, even if we’re not done adding all of them yet, to improve the accuracy of the machine learning algorithm.
At this point, LUIS is functional – to test it, click on the Test button to open the Test panel. Entering a test utterance here will show you the deciphered intent below the utterance you’ve entered, and clicking on it will bring up the Inspector panel which allows you to see details such as predicted entities.
Publishing the Model
Finally, to be able to access our LUIS model from outside of the designer interface, we have to publish it to an endpoint. Select the “Publish” tab on the top bar.
In the “Select slot” dropdown, make sure “Production” is selected, then click Publish.
At the bottom of the page, you’ll see a URL under the column labelled “Endpoint”, in the region that you registered with. That’s our API endpoint, which we’ll use to invoke LUIS from our application.
To test API endpoint responses, I personally like to use Insomnia (https://insomnia.rest/), which features proper syntax highlighting and formatting in responses as well as several other useful options like OAuth2 and custom headers, but for this purpose we’ll be fine using your browser.
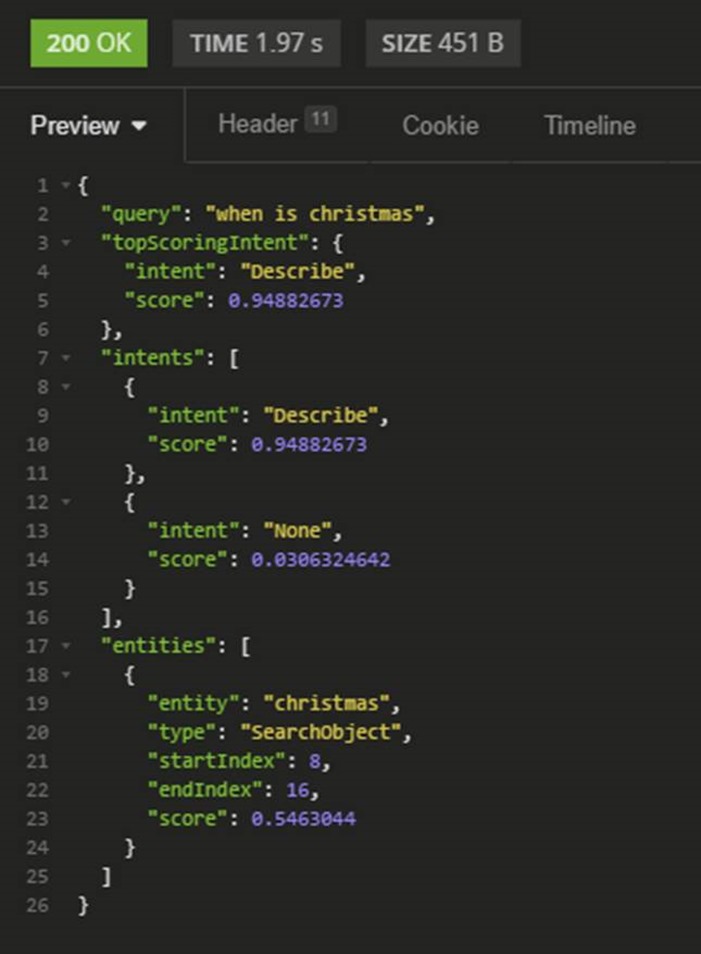
Simply add a test query such as “when is christmas” after the “&q=” at the end of the URL, and open it in your browser or REST client.
You should get a response containing the predicted intent as well as confidence level, and all predicted entities, “Describe” and “christmas” respectively in our test utterance.
We can further tune our LUIS model by adding prebuilt entities, as well as training the None intent with examples of utterances we don’t want our bot to respond to, but that’s it for this experiment. Now that your LUIS model is accessible over HTTP, it’s time to write our chat bot to make use of its language understanding capability.
Part 2: Setting up the bot
To write our bot, we’ll need to have node.js with Visual Studio Code installed, as well as the Microsoft Bot Framework Emulator (https://emulator.botframework.com/). If you haven’t yet, download and install those before continuing further into this section.
Writing the bot
To start, let’s create a working directory in a location of your choice, say D:\WikiBot. Open Visual Studio Code, and select File > Open Folder. Browse to your working directory, and click Select Folder.
In Visual Studio Code, click New File to create a new file in the working directory. We’ll call this app.js, and it will be the main code file for our application.
Now, let’s install some dependencies: to work with the Bot Framework, we’ll need the Bot Builder SDK (botbuilder), and a REST framework (restify). To do this, in the menu bar, select View > Integrated Terminal. A terminal window should open in the bottom pane within the IDE. In this terminal, enter:
npm init
This sets up the working folder as a node.js project. We’ll accept the default values for now, so hit Enter until you see the prompt again. Next, enter:
npm install --save botbuilder restify request
This should take a few minutes – upon completion, the prompt should reappear, with the message “added [number] packages within [time] ”.
Going back to app.js, copy and paste the content of the following file: https://gist.github.com/firemansamm/64cfbca0e43e2b78d1d14d9192af4e89
Take some time to go through the code, and the comments to understand how it uses the Recognizer class to integrate with LUIS.
Before we can test our bot, we will need to update the LUIS API endpoint to our newly created app. Go back to the Publish panel in LUIS, and copy the URL in the Endpoint colum.
Then, replace the constant LUIS_ENDPOINT on line 26 as shown below with the URL you copied, deleting the trailing &q=.
It should then look something like this:
var luisEndpoint = "https://xxxxxx.api.cognitive.microsoft.com/luis/v2.0/apps/xxxxxxxx-xxxx-xxxx-xxxx-xxxxxxxxxxxx?subscription-key=xxxxxxxxxxxxxxxxxxxxxxxxxxxxxxxx&verbose=true&timezoneOffset=0"; // Endpoint on the Publish page, without the trailing &q=.
Once we’ve done that, in the integrated terminal, enter node app.js, then Enter. It should say “restify listening at https://[::]:3990”. At this point, the bot is complete, and we just need to test it by connecting to it with the Bot Framework Emulator.
Testing the bot
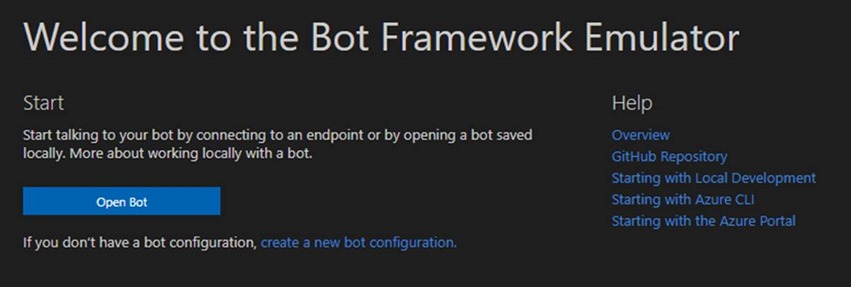
Open the Bot Framework Emulator. Start by clicking the “create a new bot configuration” link on the welcome screen.
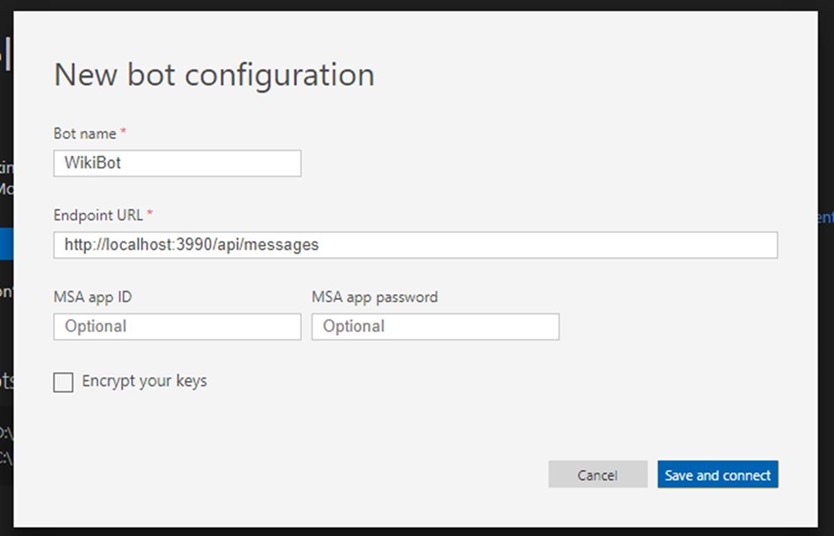
Let’s call our bot WikiBot, and the endpoint will be https://localhost:3990/api/messages. Leave the app ID and the app password blank – these are security features which we will use if we want to deploy the chat bot to Microsoft Azure in the future.
Click the “Save and connect” button, and save the .bot file to our working directory. We’ll be able to connect directly to our bot by opening this file in the future. The chat interface then opens, which is reminiscent of a standard text messaging program.
Let’s say hi to our new chat bot! Enter a greeting into the chat box and hit Enter to send the message.
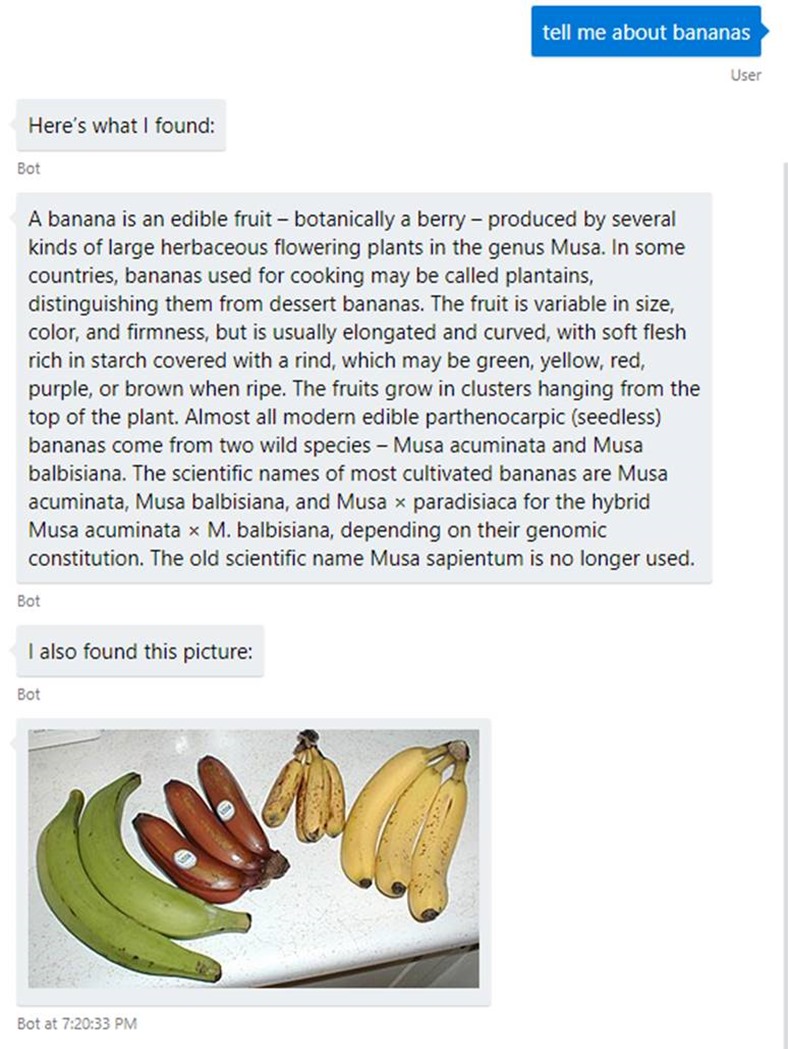
Now that we’ve confirmed our default intent is functioning as it should, let’s try out the core function of our bot. Enter a query such as “tell me about bananas” – and see what our bot has to say!
Pretty cool, huh? Try it with other search terms, and other forms of questions! You’ll notice that the bot sometimes fails to correctly understand more complex questions, but that’s because our training data sets are extremely small, with less than 20 utterances for each intent – with larger data sets, we can achieve much better accuracy.
Conclusion
What we’ve made here is a very basic implementation of LUIS in a chat bot – however, LUIS has many more powerful features such as Prebuilt Domains and Intent Dialogs, both of which allow your bot to better understand the context of conversations. With these features and sufficient training data, LUIS serves as a powerful yet simple way to integrate language understanding capabilities into your project. Have fun exploring!
Comments
- Anonymous
August 06, 2018
Great article, thanks!
