(Cloud) Tip of the Day: Step by Step - Create E-mail Alerts for Windows Events on Azure Virtual Machines
Today’s Tip…
There’s great power offered by the Log Analytics + Operations Management Suite and its “Solutions” which can be used as plug-ins to the OMS.
However, one customer asked the simple question of how he can set up Email alerts on specific VM Windows Events, with just the tools offered by the Azure platform, with no custom code, custom components or anything extraordinary.
He just wanted to have an email alert if some Events are logged in the Windows Event logs. In his case was the Antimalware events that he wanted alerts on, in case a threat was detected from the Antimalware extension.
Here below is the solution I sent to him. Needless to say it is a mere glimpse into the potential of the Log Analytics and OMS platform but it can be a great way to start exploring the possibilities.
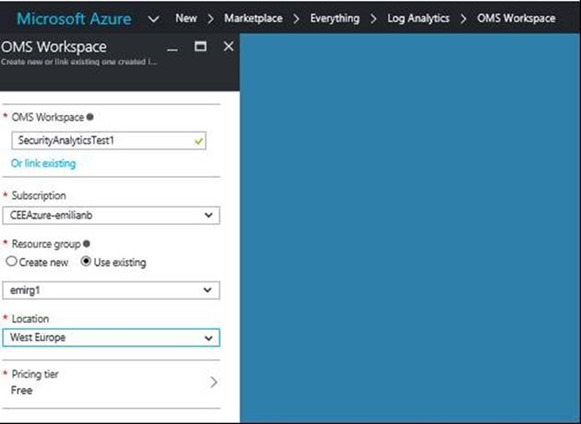
You should start by creating a new Log Analytics resource. In the Portal : New ->Marketplace -> Everything -> Log analytics -> OMS Workspace.
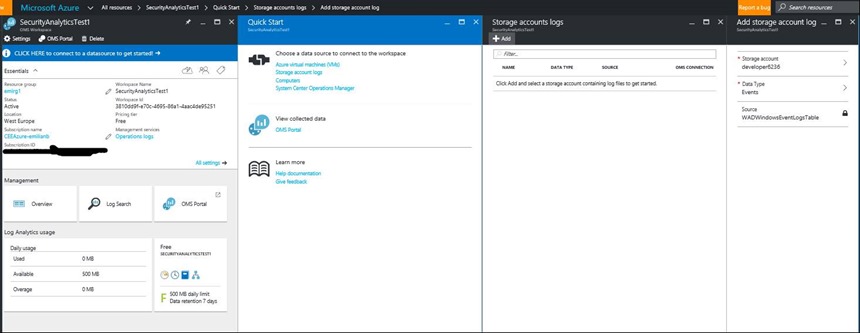
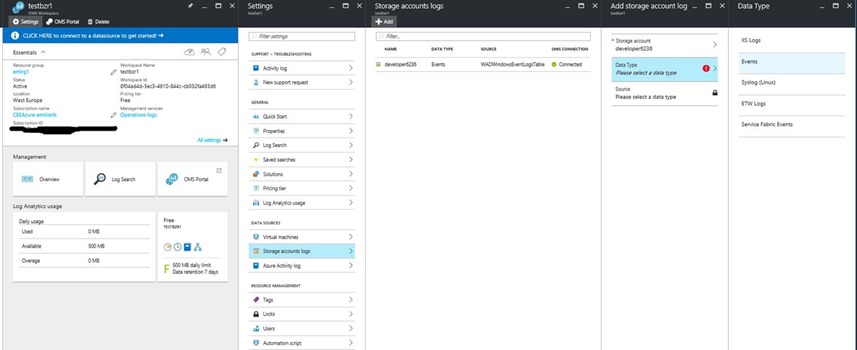
Once the OMS Workspace is created, you can add Storage Account logs as data source either by clicking on the top banner “Click HERE to connect to a datasource to get started!” or by going to Settings ->Storage Account logs as the below captures show. There are two captures showing both of the options. You just need to use one of them and choose the Storage Account that you are using for storing the machine’s event logs and choosing Events. This is the storage account that you use for that VM on which you have the Antimalware installed.
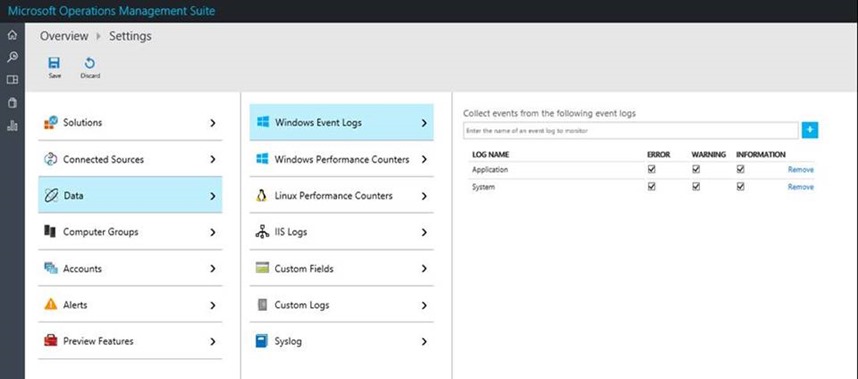
After choosing the Storage Account that hosts the Logs, you can click on OMS Portal to open the portal for Operations Management Suite and go to Settings -> Data -> Windows Event Logs and click on the text box and type Application and + sign to add the application log, then system and then Click SAVE on the top banner.
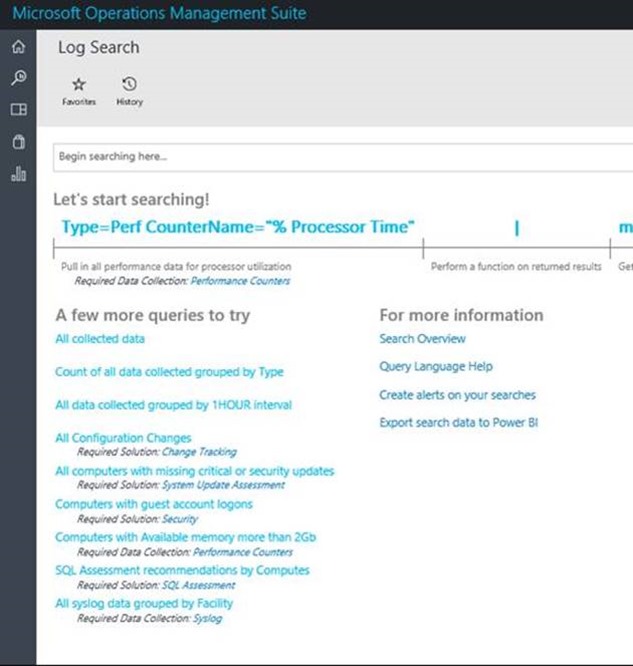
Now it will take some time for the location and logs to be indexed. After that you should already be able to go the Search page. You can start creating your alert from there. On the Search you can start with All collected data.
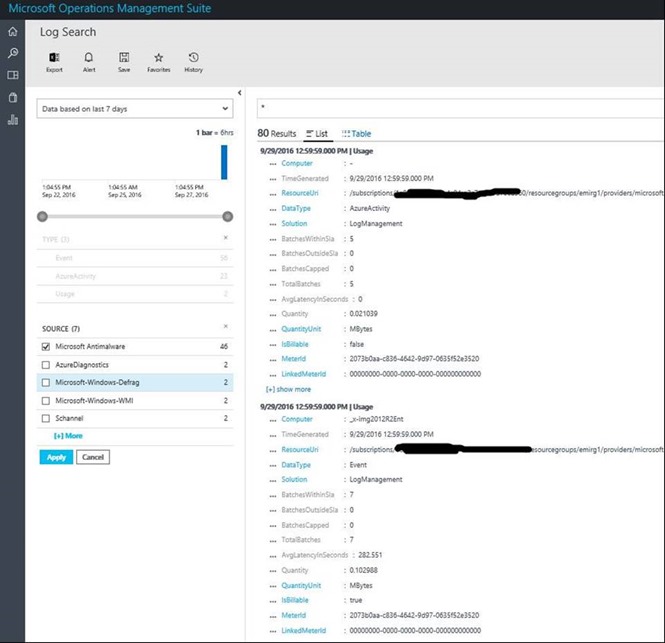
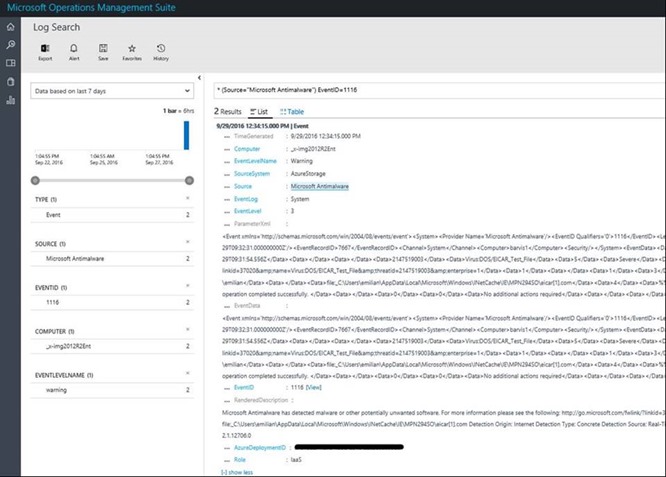
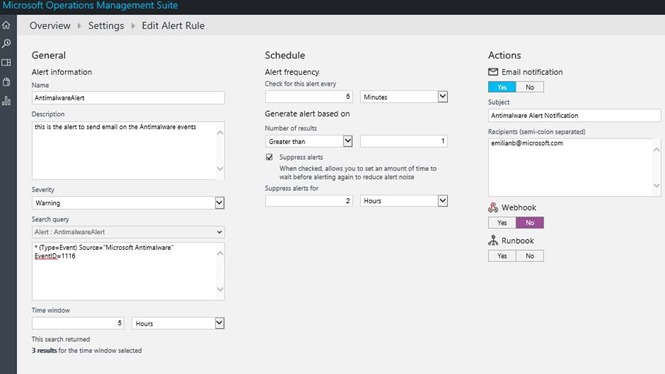
Then the interface makes it very easy to configure the query. Clicking on the fields you will have the option to add it as filter. For example here, I have clicked on the Source and it was added to the left as filter. Then checking it to add it to the query. Same thing with the Event ID. For example on the second capture I clicked on the Event ID, then checked only event 1116 (you could include other events as well). Then, I clicked on the Alert button which allowed me to create an email alert on the query as the 3rd below capture shows.
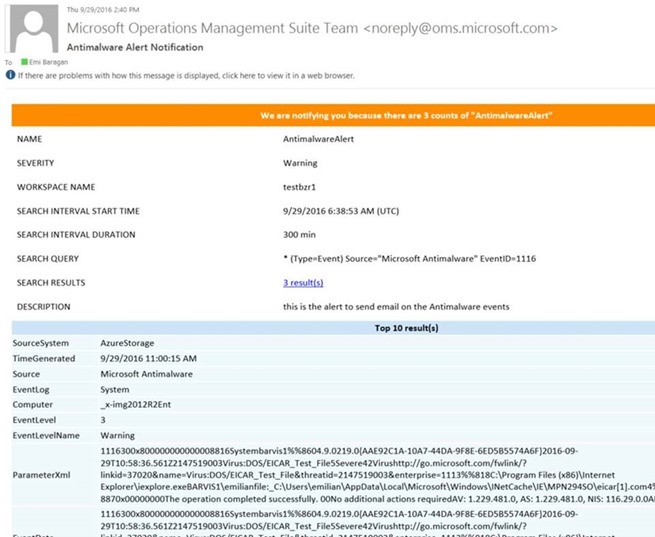
Finally, with the test I made, I received an email alert for the selected event, as below
