Creating SharePoint Site for a Team Project in TFS 2010
Creating SharePoint Site for a Team Project
For creating a SharePoint site for an existing Team Project, follow the steps:
First of all, a test Team Project named “SharePointSiteCreation” is created as shown in the screenshot below.
We will be creating a SharePoint site for “SharePointSiteCreation” project.
Open the “SharePoint Central Administration” site. Click on the “Application Management” tab.
Go to SharePoint Site Management àCreate Site Collection. This is shown below:
Start by providing the appropriate “Web Application” under which the site collection has to be created.
(In our case https://<server_name >)
Under “Title and Description”, provide the Team Project name (SharePointSiteCreation) and description for the site.
In “Web Site Address” URL, select “/sites/” from the dropdown list. Then provide the Team Project name in the textbox.
Note: - Remove the “empty spaces” in project name (if any) when entering it in the URL textbox.
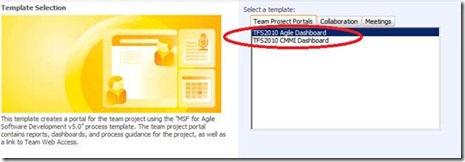
In “Template Selection”, select the appropriate template for the project. For “SharePointSiteCreation” it is “TFS2010 Agile Dashboard”.
In “Primary Site Collection Administrator”, provide user with optimal permissions. (TFS Admin Account)
In “Secondary Site Collection Administrator”, provide another user with optimal permissions. (TFS Service Account)
In “Quota Template” select “No Quota”.
Then click “OK” to proceed.
The following page will appear.
Make a note of the URL. This is the site URL for the SharePointSiteCreation project.
Now, open “Visual Studio Team Explorer” and right click on the “SharePointSiteCreation” project and then select “Team Project Settings à Portal Settings” as shown:
In the “Project Portal Settings” box, check the checkbox “Enable team project portal”. Select the radio button for “Use this SharePoint site”. Now click on “Configure URL” button.
In the “Specify an existing SharePoint site” box, provide “Web Application” under which the site was created. Also, provide the relative path. The format of the path should be “sites/<Team Project Name> ”. The URL shown shows the site for the project when browsed.
Click “OK”.
Now, check the checkbox for “Reports and Dashboards refer to data for this team project”.
Click “OK”.
Now, the project protal can be opened by right-clicking on the Team Project in the “Team Explorer” and selecting “Show Project Portal” as shown.
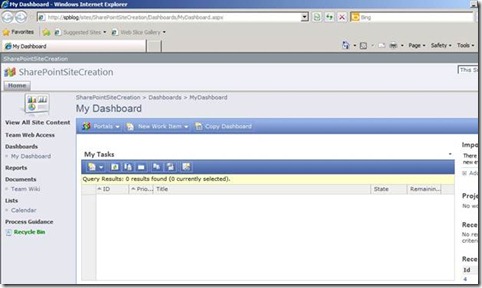
It opens up the site as shown:
To activate the Dashboards
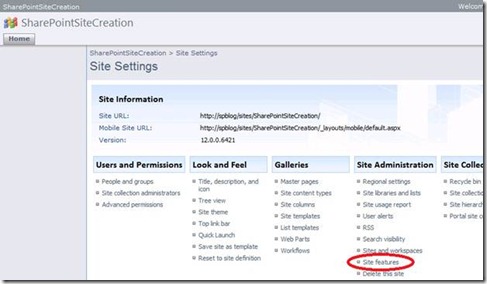
1. Select the “Site Settings” under “Site Actions”.
2. Select the “Site Features” option under “Site Administration”.
3. “Activate” “Agile Dashboards” and “Agile Dashboards with Basic Reporting”. (In this case it’s Agile for SharePointSiteCreation project).
4. After activating.
NOTE: - The process of activating the dashboards has to be done for every site being created using this process.
NOTE: - The same process can be followed when creating the sub-sites under the site collection as well.
Content developed by: Abhilash
Content reviewed by: Lakhminder


