Having fun with Windows 7 Sensor API and XNA Game Studio
One of the coolest features in Windows 7 are the new Sensor (and Location) APIs. The API are native, but you can use them from .NET Framework if you download the Windows API Code Pack 1.0.
If you would like to test the Sensor API you can do even without a real hardware sensor, in fact in the Windows 7 SDK you can find (both x86 and x64) a Virtual Light Sensor (you can check from this link how to install the Virtual Light Sensor), a simple app that simulate an Ambient Sensor, that, after installed, you can see from Windows 7 sensor’s panel. In the following image you see the app running.
1) Buy a sensor
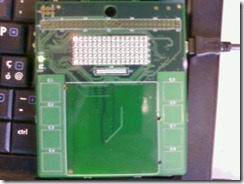
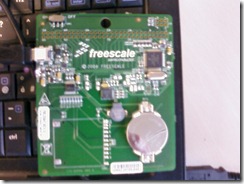
But if you would like to test a real-hardware sensor, you can buy this one from Freescale. You can see the front and back side in picture taken from my phone:
The Freescale’s board has the following sensors:
- Ambient light sensor
- 3D accelerometer
- Dual touch strips
2) Update the firmware
To use it with Windows 7 you have to download the Windows 7 Sensor Development Kit from here and update the firmware first, following the readme file. To update the firmware you have first to mount a driver on your system. Tips: to do that, following the instructions, you have to touch the E4 button BEFORE the led display stop says “Press E4 to enter bootloader.”.
In the following picture I’ve highlighted the led display and the touch E4 Button.. so press the touch button quickly.
3) Test the sensor with Windows 7
If you would like to test the 3 sensor on board you can launch the test application (SensorDevKitDiagnosticApp.exe) in the tools\Diagnostic\Binaries Tool directory of the Win 7 Sensor Development kit:
Ok , now I’ve tested the sensor, but how to have MORE fun ?
4) Installing XNA Game Studio 3.0
On codeplex you can download some classes that you can use to extend one of the starter kit that comes with XNA Game Studio … all in .NET. Because not all the code is implemented , l’ll show you how to minimally do that to drive the car with the accelerometer, of course just for fun and to show how you can use .NET to interact with Windows 7 Sensor API.
- Install Microsoft XNA Game Studio 3.0 (62 MB)
- Install Microsoft XNA Racing Game Starter Kit (127 MB)
- Download Windows 7 Sensor XNA Racing Game (inside you’ll find two classes and a dll).
Now you can create a simple racing Game Project from Visual Studio 2008:
After that you have to follow the instruction on the sample from codeplex
- add the Windows7.SensorAndLocation.dll that contains the wrapper that expose the native API to the .NET world.
- copy in the Shaders folder, PreScreenSkyCubeMapping.cs (\RacingGame\Shaders\ PreScreenSkyCubeMapping.cs. This file is used to change the light in the sky based on the sensor input
- In the GameLogic folder, replace Input.cs (\RacingGame\GameLogic\Input.cs) : this file contains all the code used to get the input from different device: mouse, keyboard and with the accelerometer. You can look the Initialize method that initialize the sensor and expose the acceleration in the X and Y axis, as show in the code:
The code exposes tree properties:
The first is used to see if an accelerometer is connected and the other two are used to return the real value from the accelerometer. From my test I’ve seen value from –1 o 1.
Now you have the value returned from accelerometer but how to use in the gaming app ? You first have to initialize the sensor to make the app aware of it, than we have to control the acceleration, deceleration of the car, the left/right turn.
- go to Graphics\BaseGame.cs in the end of the BaseGame constructor and call the Input.Initialize() that as show before initialize the Accelerometer3D sensor.
- go to GameLogic\CarPhysics.cs in the Update method you can control the X Axis, for example, value to make the car turn left and right:
I’ve tried some experiment to correct the sensibility and you can change the 3.0f value to do it yourself.
To make the car accelerate and go straight or backward I added this code in the same method:
Ok probably if you are a XNA Game developer you’ll find a smarter approach to do that, but ok this is another story :-)
You can download my sample classes from here.
5) Have fun with Windows 7 Sensor API !
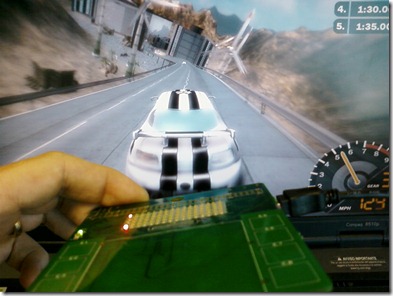
Now, you can press F5 and play the game with you sensor!
6) More on Sensor API..
If you would like to know more about the sensor and location API in Windows 7 and see the video that inspired me to have some fun: watch here.
Comments
Anonymous
September 25, 2009
mmm it is time to come back to computer graphics programming :)Anonymous
September 25, 2009
solo per divertirsi, però :-)Anonymous
September 28, 2009
>solo per divertirsi, però :-) fino a quando Microsoft non si decide ad aprire lo store dello Zune (per adesso le mie applicazioni devono rimanere solo sul mio :( ). Intanto provo ad arricchirmi con quello della '360'.Anonymous
January 28, 2010
It is difficult to handle the chip of a computer. This is the experties of engineers.Anonymous
February 06, 2010
Hi, I like the post,i have a question: can i integrate WiimoteController with XNA using this Windows 7 Sensor API??Anonymous
February 07, 2010
Hi Edison, I suspect you have to write a custom umdf driver for the win 7 location platform for a custom device, starting from the DDK. http://channel9.msdn.com/posts/PietroBrambati/Windows-7-Sensor-and-Location-Platform-dalle-API-all-UMDF-Sensor-Driver/


