Creating an Ubuntu Server 16.10 generalized image on Azure and Deploying a new VM based on this image using Azure CLI 2.0
Hello Everyone,
This step by step guide will show you how to prepare a generalized image from an Ubuntu 16.10 image from the marketplace, using the newest managed disks that were released on 02/08/2017.
Generalized virtual machines are nothing more than a virtual machine installed from the Azure Marketplace then manually customized and prepared to become an image, if it is based on Windows, that means executing Sysprep as a final step, if it is Linux-based, that means de-provisioning the Linux agent (the Azure agent) as a final step.
In order to follow this guide, please deploy a new Ubuntu 16.10 virtual machine using managed disks instead of unmanaged disks (the old way with storage accounts), through the portal or any other deployment method, for this example, I customized the image by installing XRDP on it, by following the steps outlined in this document.
It is also assumed that you have Azure CLI 2.0 installed in a management computer by following the steps outlined here to perform the installation, all command line instructions below assumes you are executing them on Linux bash only. I’m using Bash on Ubuntu on Windows 10 to write this post.
Creating the generalized image from specialized image
After you have your master Ubuntu virtual machine configured the way you need, please execute the following commands in order to make it available to be used as an image, this needs to be accomplished inside your virtual machine.
 sudo waagent -force -deprovision
 export HISTSIZE=0
From a management computer (where Azure CLI 2.0 is installed) shutdown your specialized virtual machine
az vm deallocate --resource-group linux-test-rg --name ubuntu-vm-01Generalize the virtual machine from Azure perspective
az vm generalize --resource-group linux-test-rg --name Ubuntu-VM-01Still from the management computer, create an image from the generalized virtual machine, must be in the same resource group as your master virtual machine.
az image create --resource-group linux-test-rg --name UbuntuMasterImage01 --os-type Linux --source Ubuntu-VM-01 --location eastus
Deploying a new VM from image using managed disks
Obtain the image id
az image list --query '[].{name: name, id: id}'Result
Create the VM based on the generalized image
 az vm create \
     --image /subscriptions/<GUID>/resourceGroups/LINUX-TEST-RG/providers/Microsoft.Compute/images/UbuntuMasterImage01 \
     --admin-username azureuser \
     --admin-password Test@2017-123! \
     --public-ip-address-dns-name tstubuntudemo01 \
     --resource-group linux-test-rg \
     --location eastus \
     --name Ubuntu-VM-03 \
     --vnet-name vnet \
     --subnet subnet01 \
     --size standard_a1_v2 \
     --os-type linux \
     --authentication-type password \
     --os-disk-name Ubuntu-VM-03-osdisk
Adjusting the automatically created Network Security Group
The customization made to this image was enabling RDP service on Ubuntu, since the az vm create command also creates a network security group by default, we need to change it to allow port 3389 which is the one that RDP uses.
The following steps will guide you through adding a new security rule to the existing NSG:
To obtain the NSG associated with this new virtual machine, first let's get the ID of the network adapter
az vm show --resource-group linux-test-rg --name Ubuntu-VM-03 --query 'networkProfile.networkInterfaces[0].id' --output tsvResult
Getting the network security group id
az network nic show --ids /subscriptions/<GUID>/resourceGroups/linux-test-rg/providers/Microsoft.Network/networkInterfaces/Ubuntu-VM-03VMNic --query 'networkSecurityGroup.id' --output tsvResult
Getting the network security group name
az network nsg show --ids /subscriptions/<GUID>/resourceGroups/linux-test-rg/providers/Microsoft.Network/networkSecurityGroups/Ubuntu-VM-03NSG --query 'name' --output tsvResult
Adding the network security rule to the existing NSG
 az network nsg rule create --resource-group linux-test-rg \
     --nsg-name Ubuntu-VM-03NSG \
     --name allow-rdp \
     --protocol tcp \
     --direction inbound \
     --priority 300 \
     --source-address-prefix "*" \
     --source-port-range "*" \
     --destination-address-prefix "*" \
     --destination-port-range 3389 \
     --access allow
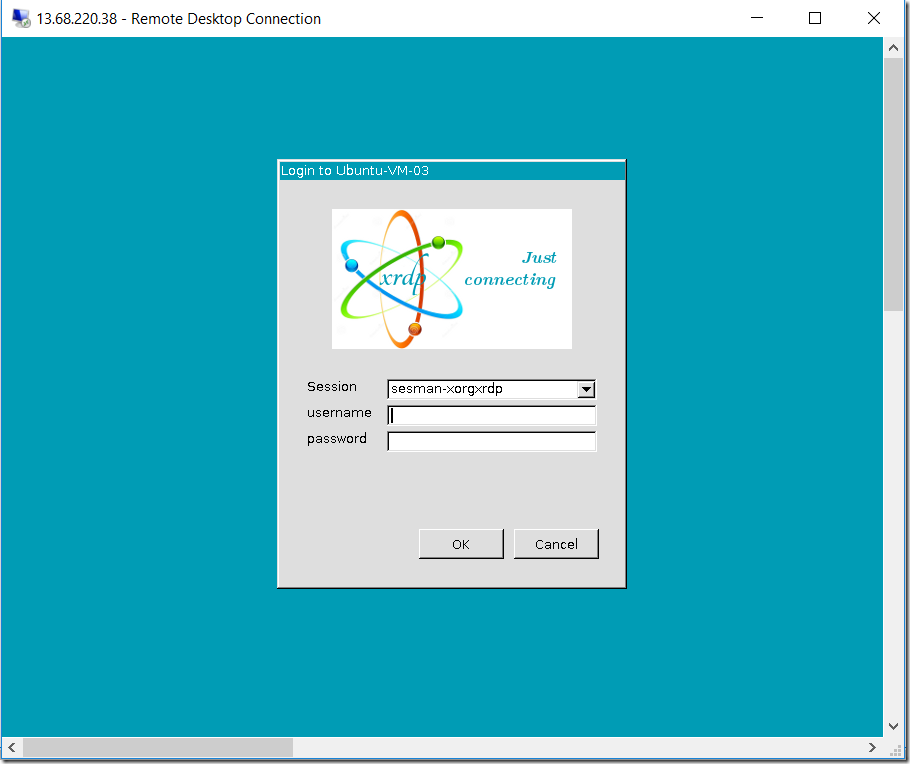
Since XRDP does not come installed by default, this demonstrates that the new virtual machine came from the specialized image that you just created.
If you want to expand this scenario and execute a post deployment script on this newly deployed virtual machine, please refer to the post Executing Custom Script Extension using Azure CLI 2.0 on an Azure Linux Virtual Machine.
I hope you have enjoyed this short post and have fun creating your own custom images in Azure.
For more information, please refer to the following documents:
Create a Linux VM using the Azure CLI 2.0 Preview (az.py)
Create a copy of a VHD stored as an Azure Managed Disk by using Managed Snapshots
Upload and create a Linux VM from custom disk by using the Azure CLI 2.0 (Preview)
See you in the next post!
Paulo


