A new Home Server
I’ve been running WHS since an internal beta on a box that really wasn’t quite what I wanted – in that it was way too large. As far as I’m concerned a home server should be a small appliance that sits on your network, is on all the time, and consumes as little wattage as possible. My previous version wasn’t too bad in the wattage area but left a little to be desired in terms of size as it was based around a Coolermaster Centurion case.
So, I’ve been planning the build of a new home server for some months – I had most of the bits but the elusive part was the case. I wanted something that was as small as possible, but had room for at least 3 hard drives. With the capacity of HDD’s now I don’t think I’ll ever need more than 3 drives – and should mean I can swap one out to upgrade it with all likelihood that the other two will be able to balance my storage between them.
A few days ago I noticed that the ITX Warehouse had the new Morex Cubid 6600 case in stock. This fulfilled my main requirements, the first being that it should accommodate 3 disks and the other was that it should take a standard ATX power supply. The other contender was the most beautiful Silverstone SG04B but that was a fair bit pricier, and also a fair bit larger.
I eagerly awaited the arrival of the case and it came yesterday, so this evening I spent some time building the machine. I’d also purchased a Zalman ZM-NBF47 passive Northbridge heat sink and a pair of WD 1TB Green Power 32MB buffer SATA drives. I went for the 1TB drives as these were a load cheaper than the 2TB drives, and I know that by the time I grow out of the two drives I have that the 2TB’s will be as cheap as chips. I can then pop a 2TB in, let it rebalance, and when the time comes I can swap out the non-system 1TB drive for something larger again. My last WHS had about 1.8TB of storage and I only ever used about 600Mb so I have plenty of space to play with for now.
The Build
So, on with the build. I’m using the Intel D945GCLF2 dual Atom motherboard which has a fan on the Northbridge and it’s not the quietest of fans to be fair. I removed this and its heat sink and after cleaning the chip of any residual compound I then test attached the Zalman, at which point I realised that it wouldn't fit. There were two problems – one being the physical shape of the heat sink, the other being the metal bars that attach it.
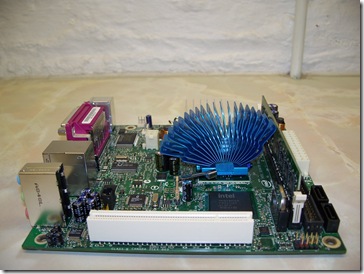
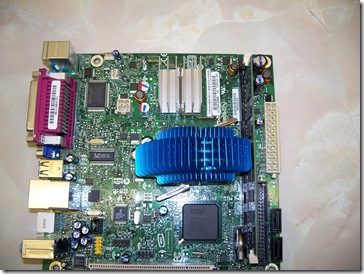
I did some work on the metal bars to get them to work for me, and then splayed the fins of the heat sink as shown in the image below.
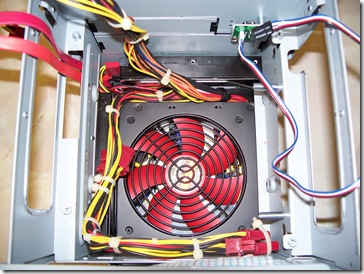
Here on the left image you can see that I have bent the fins away from one side as I had to make room for it to clear the stick of RAM. Looking down from the top you’ll see that the attaching arms have been splayed out a little, and I also had to reverse the part that attaches to the heat sink. Anyhow with that done I could fill the case with all its goodies. I removed the existing PSU and inserted my new one (well, the one I’ve had in my other WHS box for a while). This was the Xilence XP420 model and it looks the business inside the case as shown below. Whilst there is no direct pathway from the fan on top of this PSU over the motherboard, in use it is suprisingly cool in the top of the case.
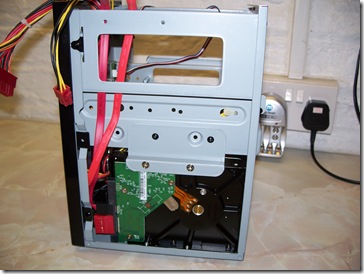
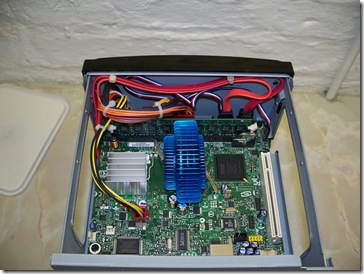
I went to town with cable ties as there was so little space in the case that I wanted to ensure the maximum airflow. The bundle of cables towards the bottom left of the photo are extras that I’ve tied up out of the way – the wires not tied in place are waiting to be connected to the appropriate sockets on the motherboard. The image on the right shows one of the drives in place (the other is in the left hand image at the top, which is the front of the case when it’s oriented correctly). I used a slot on the left hand side of the case to feed up the SATA cables. There was a small fitting for another hard drive on the right of the case but I removed that for now to get better airflow from the fan. I can always pop it back again when I add a 3rd hard drive.
Then I inserted the motherboard – a tight squeeze. I found it better to attach the IO mounting plate to the motherboard before sliding it in – and had to be careful of the wires whilst doing this as there was so little space and I didn’t want to cut one on the side of the PCB or one of the edges of the case.
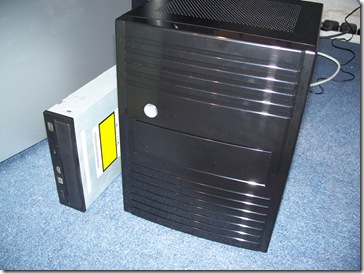
The last two photos show the motherboard in place with the cables fairly neatly tied out of the way, and the last shot is of the machine once built next to a DVD drive that I used when installing the operating system. I didn’t want this in the case full time so just installed with it connected and then removed it. The DVD drive gives you some idea of the scale of this box – it really is small and perfectly formed. The front is a little bit on the plasticy side but that’s the only bad thing I have to say about the case.
The Results
So, was it worth it? Oh yes.
My old WHS was a bit on the noisy side to say the least. It also drew about 80w when idle, a little more whilst making a backup. I couldn’t leave it on all the time as it was simply too noisy (as I work in my office at home and it was distracting).
The new box consumes roughly half that – about 40w when idle and currently 43.1w whilst backing up my media centre box to it. The media centre is across the room and I can hear its disks, whereas the WHS box is currently next to me on the floor (waiting for pride of place on a shelf) and I can only hear a low hum from the fan and the odd disk write which doesn’t happen very often – I guess that’s the 32Mb buffer doing its thing well.
It’ll cost me about £3 a month to run if I leave it on all the time. I purchased a plug-in wattage monitor from Maplin here at the recommendation of a colleague from which I got these figures.
The Bits
Here’s a list of all the bits I used when building the box.
| Case | Morex Cubid 6600 |
| PSU | Xilence XP420 |
| Motherboard | Intel D945GCLF2 |
| RAM | Corsair value select 2GB DDR2 667Mhz |
| Northbridge Heatsink | Zalman ZM-NBF47 |
| Operating System | Windows Home Server with Power Pack 1 |
| Disks | 2 * Western Digital WD10EADS 1TB 32Mb Cache |
I used various suppliers for the parts – ITX Warehouse for the case, Micro Direct for the motherboard, RAM and Zalman heat sink, Aria for the hard drives and the PSU was probably from Aria too. Aria and MD are a short drive for me so I can shop around to get the best price without having to pay for postage.
Comments
Anonymous
June 16, 2009
PingBack from http://workfromhomecareer.info/story.php?id=2737Anonymous
October 02, 2010
How do you use a PCI card? Does the case come with a fixed adapter to re-route PCI under the board or is it a flexible cable?Anonymous
October 03, 2010
Methanoid: I didn't need a PCI card but there's room for a low profile one on the right of the motherboard (when looking at the rear of the machine). You can also buy a riser in order to squeeze in a full height card.
