Grouping and Sorting in the New Azure Transform Designer
First a Little Background
Many years ago now I had to do some grouping with an incoming file in BizTalk for a POC. Essentially I needed to take a flat structure and group it by a particular field. Here is an example with Movies:
<Movies>
<Movie>
<Title>The Matrix</Title>
<Genre>Action</Genre>
</Movie>
<Movie>
<Title>Shaun of the Dead</Title>
<Genre>Comedy</Genre>
</Movie>
<Movie>
<Title>Kung Fu Panda 2</Title>
<Genre>Family</Genre>
</Movie>
<Movie>
<Title>Despicable Me</Title>
<Genre>Family</Genre>
</Movie>
<Movie>
<Title>X-Men: First Class</Title>
<Genre>Action</Genre>
</Movie>
<Movie>
<Title>The Dark Knight </Title>
<Genre>Action</Genre>
</Movie>
</Movies>
And I want to transform them to something like this:
<MoviesByGenre>
<Genre GenreType="Action">
<Movie>
<Title>The Dark Knight </Title>
</Movie>
<Movie>
<Title>The Matrix</Title>
</Movie>
<Movie>
<Title>X-Men: First Class</Title>
</Movie>
</Genre>
<Genre GenreType="Comedy">
<Movie>
<Title>Shaun of the Dead</Title>
</Movie>
</Genre>
<Genre GenreType="Family">
<Movie>
<Title>Kung Fu Panda 2</Title>
</Movie>
<Movie>
<Title>Despicable Me</Title>
</Movie>
</Genre>
</MoviesByGenre>
What I want out of this is to have Movies grouped by Genre. Within BizTalk Server 2010 and with previous versions, this is not possible without writing some XSLT. When I did this years ago, I used something called Muenchian Grouping and since then, has been described in various places: Muenchian Grouping and Sorting in BizTalk Maps, BizTalk Training – Mapping – Muenchian Grouping and Sorting in BizTalk Maps without losing Map functionalities, and BizTalk 2010 Recipes : Document Mapping - Using XSLT Group-By.
Another option would be to use the for-each-group in XSLT. This is possible outside of BizTalk with custom XSLT. Unfortunately, BizTalk uses XSLT 1.0 and that version doesn’t have this function available. Either way it required custom XSLT.
Fast Forward to Azure
The good news is that custom code will no longer be required. With the CTP of the “Service Bus EAI and EDI Labs - December 2011 Release,” (can I just call this Azure Service Bus Integration or ASBI for short?) a new graphical mapping tool in Visual Studio is available. On the surface this is very similar to the BizTalk mapper with Functoids now called Operations and the mapper is the Transform Designer. But most importantly, you are no longer bound by the XSLT looping from BizTalk. The Transform Designer introduces new sets of operations called List and Loop Operations. These along with another concept of Scopes allow you to do any number of mini-transforms with filters, groups, and ordering that you might want. At least that is my take on it.
To take it for a quick trip around the block, I decided to take out this old problem I ran into way back when and see if I could do it in the new mapper and I was very happy to discover I could. Let’s take a look.
NOTE: This is a CTP and not the final product, it can change. I like the functionality here although as a CTP still needs some work on the UI. If you have feedback on this please provide it at the CTP forum.
What We Need to Do
There will be two main steps in this transformation, the first is to use the List Operations to get the data we want to manipulate. These Map Operations allow you to build a table inside of your map. The second step is to then use Loop Operations that will generate the output.
If you want to build your own, you can get started with the CTP here.
Lists: Your In-Memory Dataset
After adding a Transform (.trfm file) to your project, select your input and out schemas. These are XSDs, same as the BizTalk mapper. Once you have this, you can start to work with your List Operations.
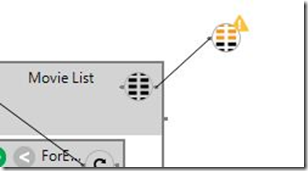
Start by adding a Create List Operation, which is a container for the fields to be added. After adding this, bring up the properties window and add in each of the fields Think of the Create List Operation as a table in the map, so these are your column names. Right now you have to manually type in the fields. Hopefully this will get easier, nice thing is that the incoming fields can be aliased with friendly names.
Add a ForEach Loop Operation inside the Create List Box and create a link from the Movie record to the Operation. The ForEach Loop Operation is used when looping over a node, but has no output to connect to a destination node. Essentially doing a SELECT FROM and bringing up the properties for this Operation shows that a condition can also be specified.
Drag an Add Item to List Operation inside the ForEach Loop and then create links from the source fields to this Operation allowing the selection of individual fields.
After completing this, open the properties window for the Add Item to List Operation to see the mapping from the incoming links to the fields you manually added. If any are out of order they can be changed using the arrows. Like the ForEach Loop Operation, this dialog has an optional condition where you can filter records. Other operations also allow this.
Notice the Scopes
When I started working in the designer, I didn’t realize at first that Scopes are explicitly set. In using BizTalk, there was no concept of Scope before, every Functoid was an individual entity, essentially private, and the best you could do is use a trick to create some global variables. With scopes, operations and links are grouped together and a specific scope is set for them. Any scope can access scope in the parent hierarchy, but not from sibling or child scopes. Each scope can be a map in and of itself. To select or deselect the scope, click the arrow button on the shape.
Besides the highlighting of the scope, the working scope is also shown via bread crumb trail at the top of the window:
That is all I will mention about scopes today, but is probably worth a separate blog post.
Create Grouped Records with Loop and List Operations
At this point a list holds the records that are needed for a destination file. By using additional Loop and List Operations the records will be sorted and grouped from the Movie List.
Firs add a Select Unique Groups List Operation to the Home Scope.
The incoming link for this is the List and the properties window for it specifies how the records should be grouped. Select the Genre member to group by.
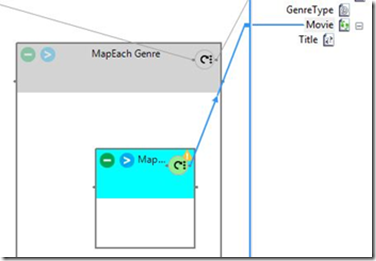
The output of this is connected to a MapEach Loop Operation and that in turn is mapped to the Genre record on the output file. The MapEach Loop for Genre creates destination records as opposed to the ForEach Loop Operation that does not.
To create the Movie record on the output file, add another ForEach Loop Operation inside of the Genre MapEach Loop. Connec this MapEach Operation to the Movie Record.
NOTE: Make sure you first set the MapEach Loop for Genre as the working scope. If you don’t change the scope, the new MapEach Loop Operation is added outside the Genre Loop. It is possible to move items after the fact by setting a new current scope and then right-clicking on an item and selecting 'Move to Working Scope. '
In the next section, the transform is completed by mapping from List Operations to the destination fields.
Mapping to Destination Records and Fields with Loop Operations
Once you have the Map Each Loops Created we are now ready to create destination links from our scope shapes to the appropriate destination records. We already have the structure of them mimicked in our transform, the individual fields’ just need to get pulled out. First add a Get Items List Operation to the Genre Scope. Get Items receives the records from the unique groups generated from a list.
In the Genre Scope add a Select Value List Operation for each destination field. In this example, there is only the GenreType field. The Select Value Operation allows you to specify the field from the list. Additionally, criteria can be specified. If criteria is specified the first record that matches it will be used. Connect the Get Items Operation to the Select Value Operations. Open the properties for the Select Value Operation and select the appropriate field. Finally connect the Select Value Operation to the destination record. This takes care of the Genre Records, but still need to handle the Movie Records.
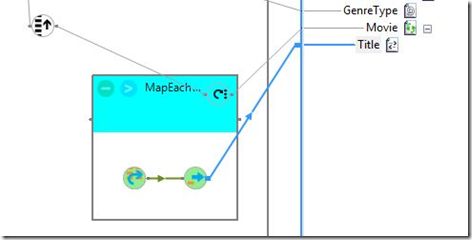
Creating the Movies records will entail much of the same steps. The only change is that the ordering will be changed based on a field. Make sure the working scope is the MapEach Genre scope. Add another new operation from the toolbox, the Order By List Operation. From the Get Items Operation, draw a link to the Order By and from that to the Movie MapEach Loop. Open the properties for the Order By Operation and select the Title field.
Make the Movie scope your selected scope. Now add Get Items Operation and the Select Value Operations to the Movie Scope and connect them together. Connect the Select Value Operations to the destination field and also select the Title field in the Select Value Operations.
The last thing to do is test out the map to see if it works. They have included a similar testing capabilities inside the designer that existing in the BizTalk Mapper. Select the .trfm file and in the properties windows set the Test Map Input File. Then just right-click on the .trfm file and select Test Map. The output will be displayed in a window.
That’s it. Hopefully this has given you some insight into core piece of the new functionality offered in the Azure Transform Designer. This opens up numerous new possibilities for creating maps that would have never been available before. Try your own scenarios and give some feedback on the forum.
Also if you have some of your own BizTalk maps you want to try in the Transform Designer, a new command line tool has just been released on codeplex to be able to move your BizTalk maps over. This is an initial ‘best effort’ release so let them know if you run into issues.
2/14/2012: RaviBollapragada just posted a blog on the new mapper as well on the Azure blog.
I've also uploaded the files I used in this blog, the sample input file, the source and destination schemas and the transform file.
-Jonathan
Grouping and Sorting in the New Azure Transform Designer.zip


