SPLA Reporting - Installing SILA
In this post I will provide a step-by-step guide of SILA installation in service provider environment. If you missed the first post in the series - it is available here. I prefer installing everything in one virtual machine, so it will be a single box installation. This is my best practice - it is easier to manage, and if this VM sill fail, you'll be able to recover in from backup. Even several days downtime is not critical for SILA server, because you will use it to generate report only once a month.
Check the environment
My environment uses 2 domain controllers with Windows Server 2012 R2. Domain name is cosn.hostingcloud.hu, it's a child domain of hostingcloud.hu domain, which is externally resolvable. Also I have one Enterprise Certificate Authority on Windows Server 2012 R2. This is a root CA, which is trusted by all domain-joined servers in cosn.hostingcloud.hu domain.
Prepare a VM
First of all, prepare a new VM. I use Hyper-V 2012 R2, but you can use any available hypervisor.
I used these parameters:
- Generation 2
- 2 virtual CPUs
- 2048 GB RAM, Static
- 60 Gb Dynamic VHDX
- Windows Server 2012 R2 Datacenter with all available required updates installed.
Networking stuff if tricky, there are several ways to make SILA accessible in your network. Best practice - SILA must be accessible via HTTPS by any server inside your network (including tenant virtual networks), but not accessible from external addresses. Some sort of DMZ will be OK. Also SILA VM must be able to access management network - Domain Controllers, Certificate Authorities, Hyper-V and vSphere hosts.
Create service account
I will join this server to the management domain called cosn.hostingcloud.hu. FQDN of the server is SILA.cosn.hostingcloud.hu. It's public IP is accessible by every server inside my organization via TCP port 443. This FQDN can be resolved by external DNS servers, so if a tenant will use Google DNS, he still will be able to resolve this DNS name.
Also I've created a user in Active Directory: silaacc@cosn.hostingcloud.hu. This is user is member or Domain Users group.
Also I've added this user to local Administrators group on SILA server:
Install prerequisites
OK, we have Windows Server 2012 R2 Datacenter will all latest updates, added to the domain. We need to install the prerequisites:
- IIS
- SQL Server 2014 SP1 Standard
- Microsoft Excel 2013 (64 bit)
- VMWare PowerCLI 5.5
First, logon to the server using SILA Account in AD (with local admin rights). In my case it is SILAAcc.
Install and configure IIS
Next step - install IIS. Just add a new role via Server Manager. Also you need to add a new server feature: .Net Framework 4.5 -> WCF Services -> HTTP Activation.
SILA Installer requires certificate in a form of PFX file during installation. We'll create it using Enterprise Certificate Authority, published to Active Directory. To do that, open IIS Manager console and go to "Server Certificates" menu.
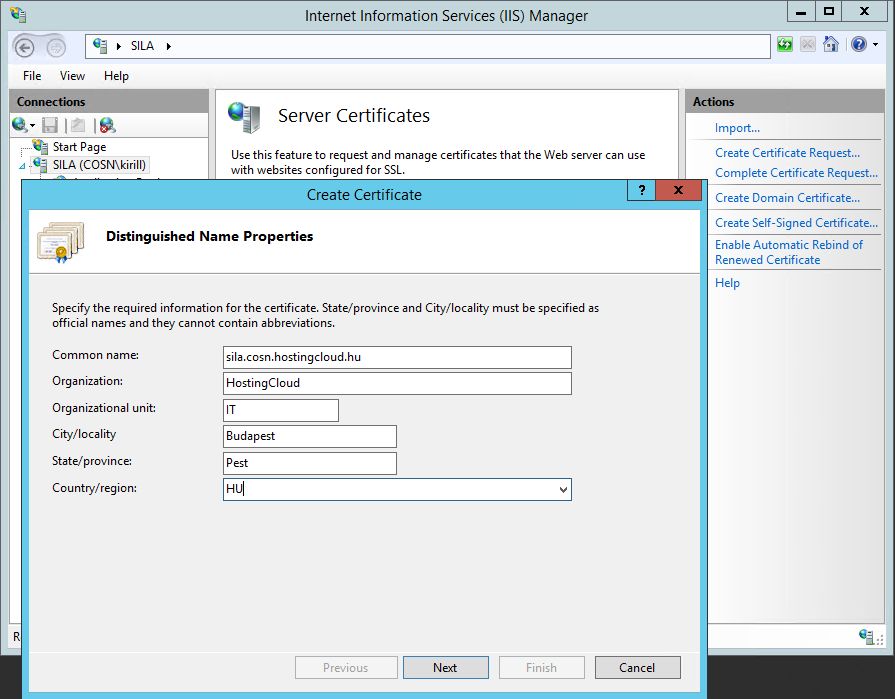
Now we need to request Web Server certificate. Click "Create Domain Certificate". Put your server external name to "Common Name" field. Other information in this windows is required, but not so important.
Select your Enterprise Certificate Authority and put a friendly name for this certificate.
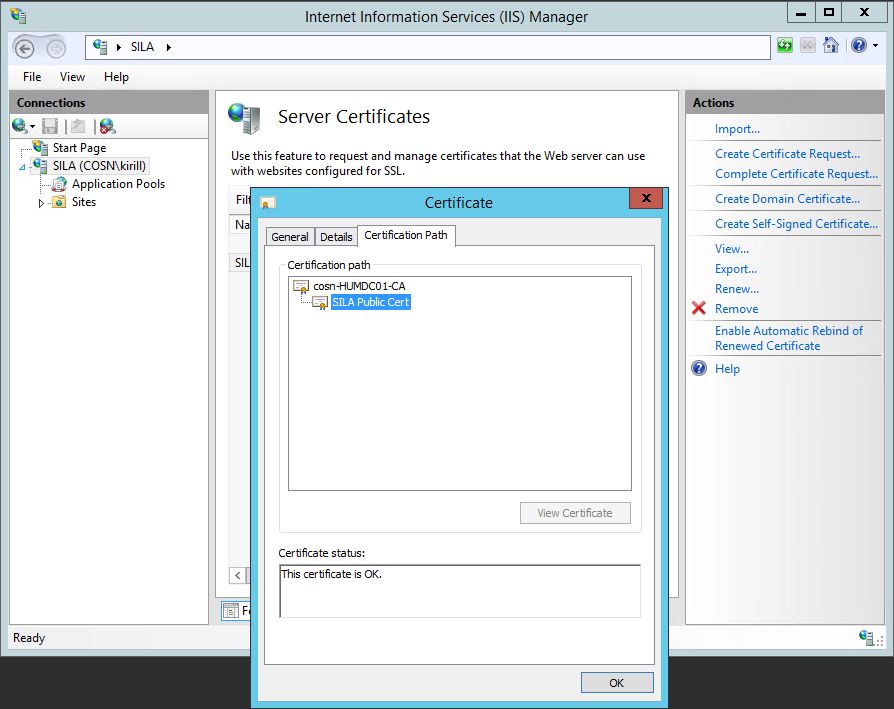
Check that certificate is valid.
Now we need to export this certificate into PFX file. Press start and start typing "Certificates", you will see "Manage computer certificates" button.
Select the issued certificate by a friendly name and click "Export".
Select "Export private key". If you won't do that, CER file will be created instead of PFX file.
Use strong password to protect this PFX file.
Save the PFX file, you'll need is to SILA installation.
Install SQL Server
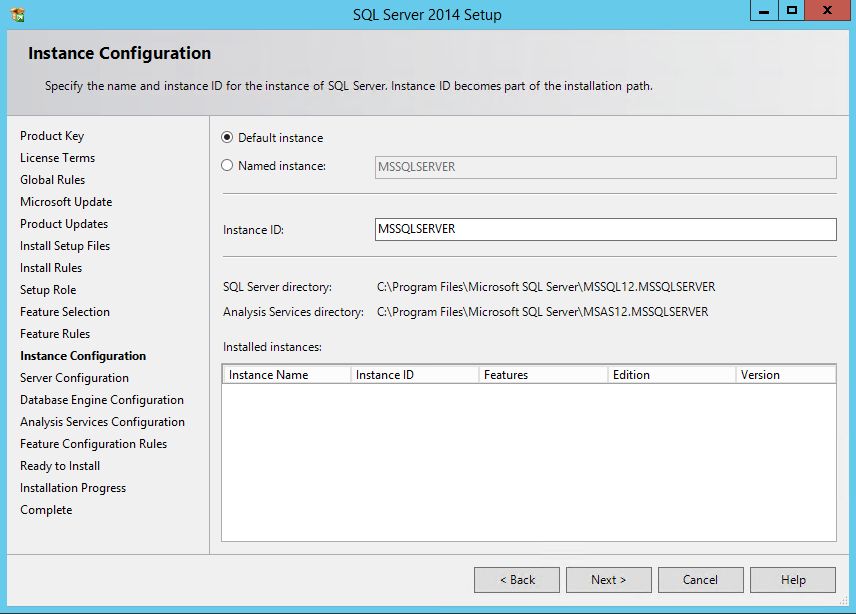
SILA collects the data into SQL Server database. You can use SQL Server 2012 SP2 or SQL Server 2014, Standard Edition. I will use SQL Server 2014 Standard SP1 distributive for the installation. I will use default instance name.
You should get its distributive and product key on VLSC site. You need to install Database Engine Services, Analysis Services and Management Tools.
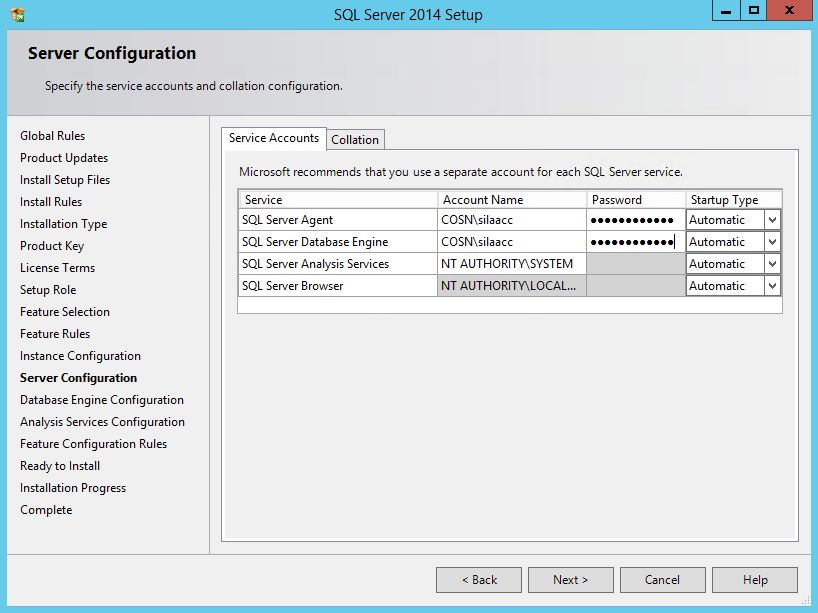
I will use SILAAcc for SQL Server Agent and SQL Server Database services, but this is optional. Important: System account for Analysis Services must be used, this is SILA requirement. Also SQL Server Agent must be set to "Automatic" mode.
Use Windows Authentication Mode, which if default. Add SILA Account to SQL Server Admins group. I've also added Domain Admins to this group, but this is optional - maybe you have a dedicated security group with users, who must be able to manage SQL Servers in your organization.
And the same for SQL Server Analysis Services:
Start the installation, wait for ~10 minutes and check that all components were installed correctly:
Install Excel
Also you need to install 64 bit Microsoft Excel to manage SILA reports on this VM. I don't have an Excel distributive, so I will use Microsoft Office 2013 64-bit distributive. Start the installer, click "Customize" and uncheck all components except Microsoft Excel.
Start Excel after installation and activate is as usual. I will use Product Key from VLSC site.
Install VMWare PowerCLI
If you have VMWare hosts, or plan to add them in future, you need to install VMWare PowerCLI 5.5.0. You can download it here. Installer will also install 2 additional components - Remote Console Plug-in and VIX. Just install them Next-Next-Next. If you don't have any VMWare in your environment, then you can skip this step.
Install SILA Server
OK, we're ready to install SILA Server. Download the distributive here and start the installation. Right now the last version is 1.0. Launch Setup.exe (not the msi file) to start the installation.
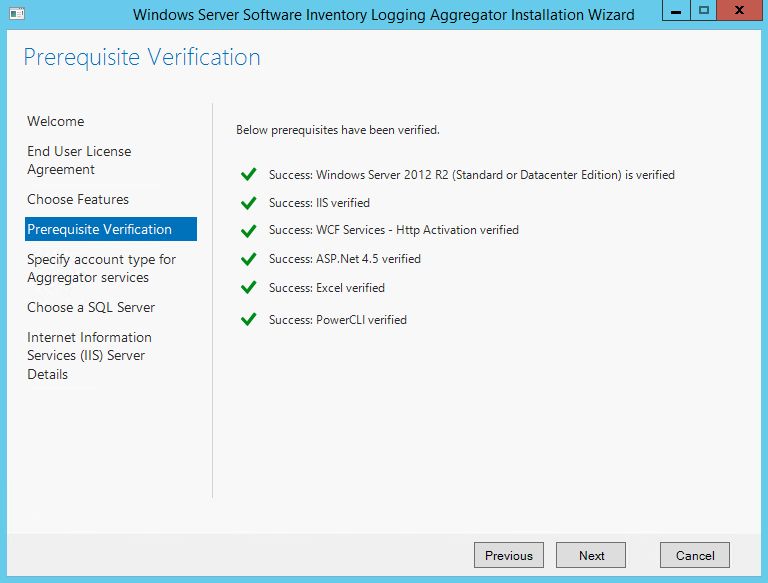
If you installed all prerequisites correctly, then everything should be OK on this screen:
We use single VM installation, so choose first option on this screen:
Specify localhost as SQL Server address. Click "Verify SQL" to check if SQL Server works OK:
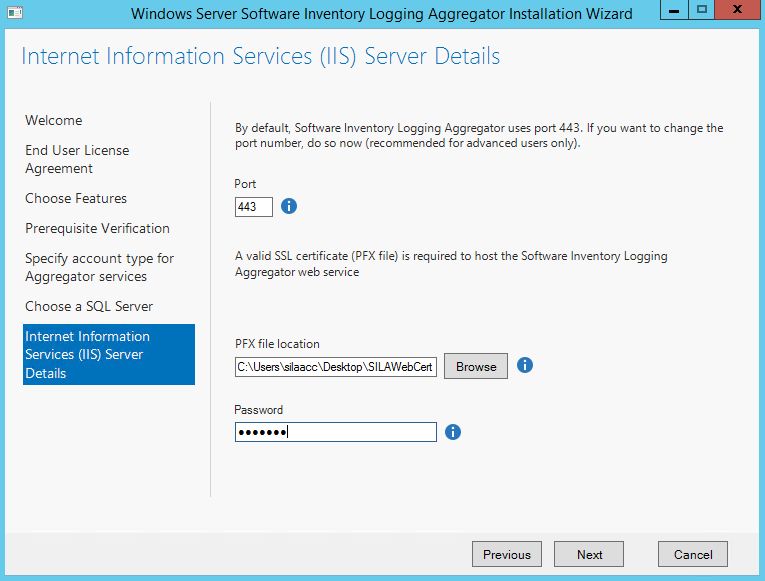
Choose PFX file with SILA Webserver certificate:
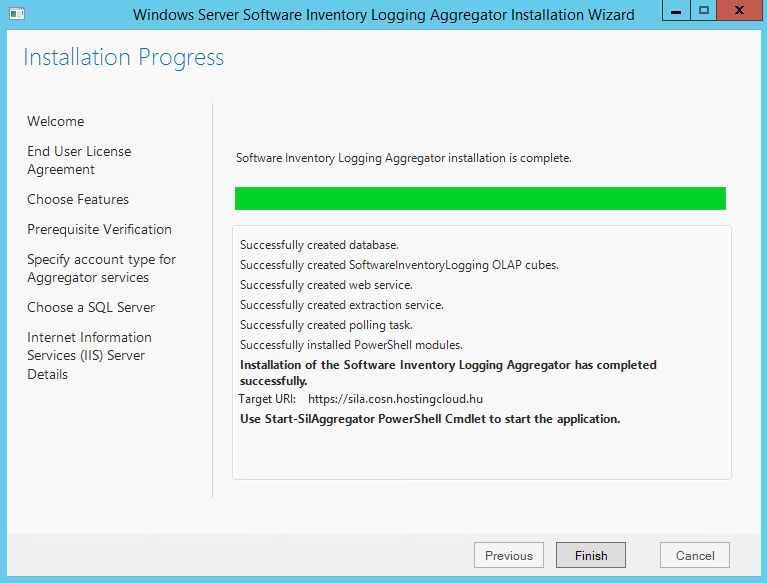
Great, SILA in installed. Now we need to configure it.
Create certificate for SIL
Important: This is a very important step, but it is poor documented in official SILA documentation. So be careful.
Create new certificate template
SIL on client servers uses certificate-based authentication on SILA server. Available by default "Computer" template can be used for this certificate, but by default validity period of such certificate will be only 1 year. It means that in a year you'll need to replace SIL certificates in every client VM, which is a tough task. To avoid this, I recommend to create a new certificate template on Certificate Authority server with 5 year validity period.
To do this, logon to Enterprise Certificate Authority server or use "Certificate Authority" console to manage it remotely. Go to "Certificate Templates" and click "Manage".
Let's use "Workstation Authentication" template as source. Click "Duplicate Template":
On General tab specify "Template display name" that you wish to use. Change "Validity period" to 5 years and "Renewal period" to 1 year.
Enable "Allow private key to be exported" checkmark on "Request handling" tab:
On "Subject name" tab switch to "Specify in the request". Don't worry about the security warning - we'll delete this template after certificate creation.
Click OK after that to create a certificate template. Enable the newly created Certificate Template on your CA:
Issue a certificate
Switch back to SILA Server. Go to Computer Certificates on SILA Server, go to Personal -> Certificates and click "Create custom request":
Choose "Active Directory Enrollment Policy":
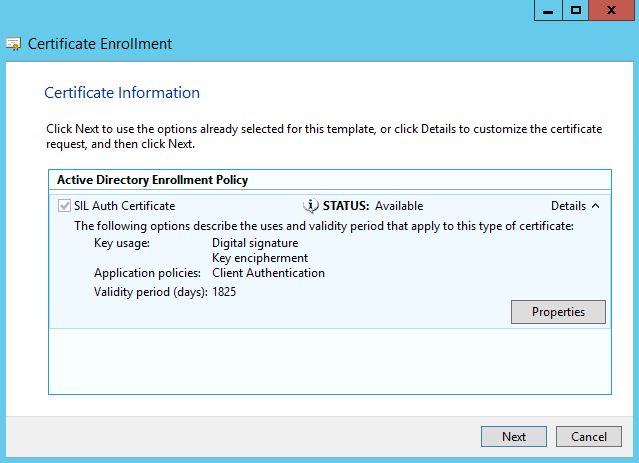
Choose the Certificate Template that we've recently created:
Click "Properties":
Specify Common Name for this certificate. I recommend to specify something unique, but this field is not so important. I will use sil-auth.cosn.hostingcloud.hu. After that, specify Friendly Name that you'd like to use.
Specify where to put the certificate request file (*.req).
Switch to Enterprise Certificate Authority console. Submit the certificate request using "Submit new request button" and save the resulting *.cer file.
Switch to SILA server, open "Computer Certificates" again. Go to "Personal" folder and click "Import".
Select *.cer file that we've recently created:
After several seconds certificate will be created. Little key in the certificate icon shows us that is has private key included. Open certificate details and copy certificate Thumbprint. You'll need it later to configure SILA Server. The resulting thumbprint (without spaces) must consist of 40 symbols.
Export the SIL Certificate
Export this certificate like we did earlier. Save this PFX file, backup it several times - it is super important for SIL environment.
For security reasons I recommend you to delete certificate template that we've used for SIL certificate from your Enterprise Certificate Authority.
Configure SILA
SILA installation is almost finished. Only several steps left. Prepare SIL Certificate thumbprint that you've copied before, without spaces. Go to SILA server and run PowerShell as administrator. Launch 2 commands:
Start-SilAggregator
Set-SilAggregator –AddCertificateThumbprint "yourcertificatethumbprint"
That's all, SILA is deployed and configured. In the next posts I'll show you how hosts are added to SILA and how guest VMs should be configured.
This post is a part of a series about SPLA Reporting.
Part 1 - SPLA Reporting - Introduction
Part 2 - Installing SILA (this post)
Part 3 - Adding virtualization hosts to SILA
Part 4 - Configuring SIL
Part 5 - Creating and submitting inventory report
Comments
- Anonymous
February 11, 2016
Hi, we have a complex environment with many isolated domains. There is no way for us to set up an Enterprise CA that can work all over these domains.
Is SIL really required to use Enterprise certificates?
We have tried with Standalone CA, but for some reason our clients VM fails to "Reach the Target URI" when using Publish-SilData.
The funny thing is, that we can see in the IIS log on the SILA server that there is a correct HTTPS POST from the client VM so there is connection.
We suspect that is it getting rejected because it is not Enterprise certificates?
The thumbprint from the certificate used on the VM client is also added to the SILA server.
Any help?
Best regards,
Stig- Anonymous
May 28, 2017
I had the same problem, most of our machines are non domain. I created a dummy domain and installed/ ran AD cert services on it to create my two certs. I also found that IIS checks for certificate revocation and that's why i was getting the unable to reach target URI. Now its actually working ! REGISTRY : HKLM\SYSTEM\CurrentControlSet\Services\HTTP\Parameters\SslBindingInfoDWORD : DefaultSslCertCheckModeValue : 1
- Anonymous
- Anonymous
February 11, 2016
The comment has been removed - Anonymous
February 17, 2016
The comment has been removed - Anonymous
February 17, 2016
The comment has been removed - Anonymous
February 17, 2016
Reporting of SPLA licenses usually was a challenge for big service providers. Some service providers collect the list of needed SPLA licenses manually every month, others use 3rd-party tools like Odin Service Automation to automate this task. But recently - Anonymous
March 16, 2016
Hi,
One note about the IIS installation, you need also to install the "IIS Client Certificate Mapping Authentication" Role to support client certificate .
Best Regards
Cecconello


