WPF Hit Testing with Event Bubbling
I’m currently doing a weeks training course on “WPF Fundamentals” and have just been looking at event bubbling and tunnelling. Whereby the event is either bubbled up the visual tree starting from the target object raising the event through all of its parents. Event tunnelling is the opposite of this the event is first raised on the parent object then tunnels down to the target object being raised at each member of the visual tree.
To test out bubbling and tunnelling, I created a quick application with a number of elements within the visual tree which outputted to the debugging window when the event was raised n that element. The code for this can be seen here:
Window1.xaml
1: <Window x:Class="EventRouting.Window1"
2: xmlns="https://schemas.microsoft.com/winfx/2006/xaml/presentation"
3: xmlns:x="https://schemas.microsoft.com/winfx/2006/xaml"
4: Title="myWindow" x:Name="myWindow" Height="250" Width="300">
5: <Grid x:Name="myGrid">
6: <Border BorderBrush="Green" CornerRadius="25" BorderThickness="4" x:Name="myBorder">
7: <StackPanel Orientation="Horizontal" HorizontalAlignment="Center" x:Name="myStackPanel">
8: <Ellipse Height="100" Width="100" Fill="Red" Margin="10" x:Name="myEllipse"/>
9: <Rectangle Height="100" Width="100" Fill="Blue" Margin="10" x:Name="myRectangle"/>
10: </StackPanel>
11: </Border>
12: </Grid>
13: </Window>
Window1.xaml.cs
1: namespace EventRouting
2: {
3: /// <summary>
4: /// Interaction logic for Window1.xaml
5: /// </summary>
6: public partial class Window1 : Window
7: {
8: public Window1()
9: {
10: InitializeComponent();
11:
12: myWindow.MouseLeftButtonDown += delegate { Debug.WriteLine("Window (Bubble)"); };
13: myGrid.MouseLeftButtonDown += delegate { Debug.WriteLine("Grid (Bubble)"); };
14: myBorder.MouseLeftButtonDown += delegate { Debug.WriteLine("Border (Bubble)"); };
15: myStackPanel.MouseLeftButtonDown += delegate { Debug.WriteLine("Stack Panel (Bubble)"); };
16: myEllipse.MouseLeftButtonDown += delegate { Debug.WriteLine("Ellipse (Bubble)"); };
17: myRectangle.MouseLeftButtonDown += delegate { Debug.WriteLine("Rectangle (Bubble)"); };
18: }
19: }
20: }
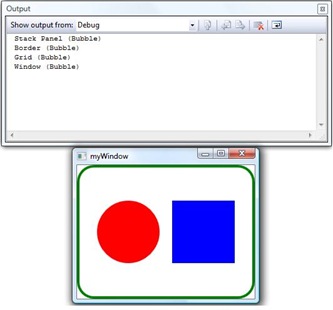
When I ran this application and clicked on the circle or square the event bubbled up the the visual tree from the circle/square and then raised the event on the circle/square, the stack panel, the boarder and the window.
 However, when I pressed in-between the shapes where the margin would be separating the elements within the stack panel the event was only raised on the top level window, when we would be expecting the event to raise first from the stack panel through to the window. To get the program to function as we would have expected we had to add a colour background, this is as the event is only raised if something has been painted within the shape, therefore giving the mouse a pixel to click within the stack panel.
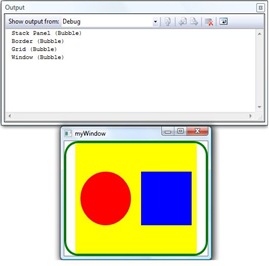
With the background painted yellow the events bubble up from the stack panel as we first expected.
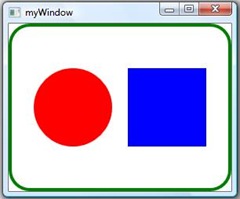
However if we then fill the background of the stack panel with a transparent background colour, we can get the same functionality without any colour being show therefore getting the original look of the application with the desired functionality. This is because a background is still being painted on the stack panel even though nothing is actually displayed.
This is a handy little hack to try out if your events aren’t bubbling or tunnelling as you first expected them to do so.
Technorati Tags: WPF,Routed Events,bubbling events
Comments
- Anonymous
December 08, 2008
PingBack from http://blog.a-foton.ru/index.php/2008/12/09/wpf-hit-testing-with-event-bubbling/

