Create Windows Azure Subscription
This topic explains the basics of Windows Azure subscriptions and describes how a technical staff can create and manage their Azure subscription.
Note - This topic does not explain how to sign up for a Windows Azure subscription or how an organization creates an enrollment for Windows Azure Services. For information about Windows Azure purchase options, see Purchase
Options , Free Trial , and Member Offers (for members of MSDN, Microsoft Partner Network, and BizSpark, and other Microsoft programs).
What is Azure Subscription
A Windows Azure subscription grants you access to Windows Azure services and to the Windows Azure Platform Management Portal.
A Windows Azure subscription has two aspects:
- The Windows Azure account, through which resource usage is reported and services are billed.
- The subscription itself, which governs access to and use of the Windows Azure services that are subscribed to. The subscription holder manages services (Windows Azure , SQL Azure, Storage etc) through the Windows Azure Platform
Management Portal
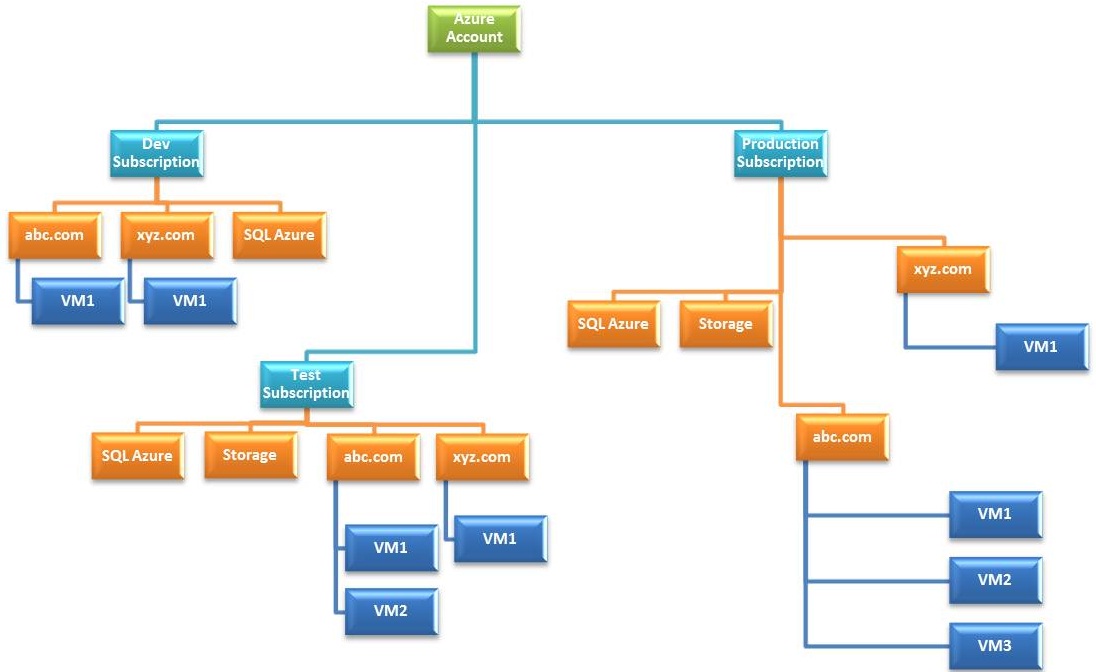
Let’s relate this concept with real world. When our decided to move one of the critical application to Azure following is the model we opted for Azure subscription. We created separate subscription for Dev , Test and Production environment. It helps in multiple ways :-
- I can monitor billing and usage for each of this environment separately
- To ensure security I can have different co-admin for each of this Subscription
You can also think in terms of having separate subscription for HR, Sales and Marketing.
How to Create Azure Subscription
1. Go to https://account.windowsazure.com/Subscriptions. Use your admin account Windlow Live ID for authorization.
2. You will find following screen with list of active subscriptions. To add a new subscription Click on “+ add subscription” button available at the bottom.
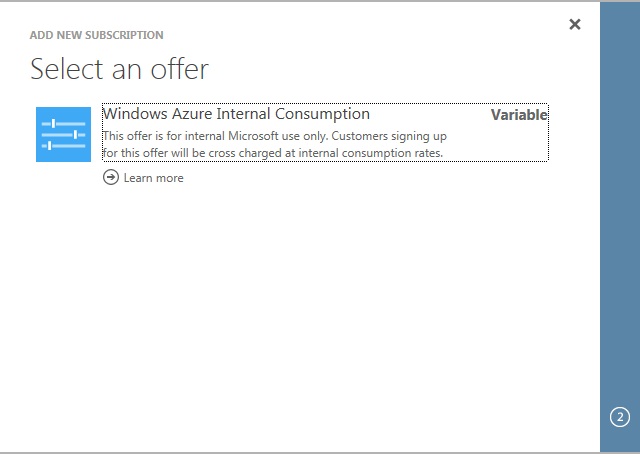
3. You will find "Add New Subscription" pop-up window on the screen , select a subscription offer from available options.
4. Once selected you will find a new window on the screen with details of your new subscription. New Subscription is created using a default name. Click on OK button to exit the window.
5. Once Subscription is created you should able to see following screen. In this case we got a new subscription with name of "Windows Azure Internal Consumption".
6. To Rename new subscription, choose the subscription. And in Summary windows Click on “Edit Subscription Details “ link available in right bottom pane.
Congratulation your subscription is ready. Click on Manage button to start working with subscription.
Please share your comments, you can also contact me at arunrakwal@yahoo.com.
Comments
- Anonymous
October 08, 2013
The comment has been removed - Anonymous
November 04, 2014
Dear Arun,How to add a New Enrollment in Azure under a Partner Managed Account? on Ea.azure.com I can only see Add Account on existing Enrollments but how can I add a New Enrollment that I want to Manage. On top of the Screen I can see Switch Enrollment but I cannot add a New Enrollment.Do you have a solution to this?Regards,GBgirijai@hotmail.com - Anonymous
November 11, 2014
This is the only site I have found that clearly describes what an Azure Subscription is and how to create one. Even the Azure site does not do this.Thanks a lot Arun, this is awesome and hope you keep this upto date when Azure makes changes. - Anonymous
June 03, 2015
The comment has been removed - Anonymous
August 06, 2015
Thank you for your effort! I truly find it strange that Microsoft only foccuses on commercial information and not on information that is actually desired by the developers who have to work with Microsoft Azure on a daily basis. I needed this blog for understanding why I can't produce services on an msdn account and why Microsoft advices to use a regular account. Now I understand, thanks again!


