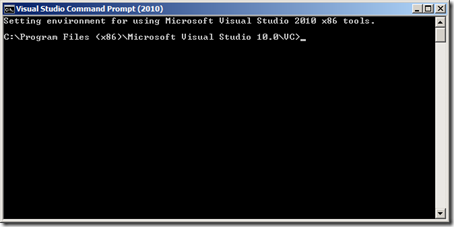
Use the Visual Studio Command Prompt to augment the IDE
Today I’m writing mostly to those of you who do not consider yourself to be power users. And yet deep down inside you suspect you are (or could be) way more powerful than anyone realizes. I’m not talking about receiving an invitation to Hogwarts, nor about pulling a sword from a stone. Rather, I’m talking about that geeky (and perhaps very lonely) feature on your computer known as the Visual Studio Command Prompt.
 |
While it is not much to look at in the conventional sense, the command prompt is truly a thing of beauty if you love speed and efficiency. (Want to see more? Behold this gallery: command prompt .) |
“Healthy laziness” at the keyboard
I love a good shortcut and I believe this is “healthy laziness”; that is, the urge to find ways to reduce or even eliminate time spent on menial tasks. I want to conserve time and energy for analysis (solving problems in my code), creativity (designing something), or for just being able to get home in time for diner.
Back in the day, I used the command prompt a lot more. When I first started using Windows 3.1, I think I actually recall feeling relieved that I wouldn’t have to boot DOS in order to get work done quickly. There is something so satisfying about blasting through a task, fingers never leaving the keyboard to reach for the mouse. In response, your computer rolls those cool cryptic messages upward across a black window.
Another great example of this kind of bliss can be found by using keyboard shortcuts, the most powerful of which are sometimes obscure. Need a calculator? Press START+R, in the Run dialog box type “calc”, and press ENTER. To maximize the vertical screen real estate of a window in Windows 7 or Windows Server 2008 R2, press START+SHIFT+UP_ARROW. Want to put all the windows away, press START+D. How far can you go in your day without reaching for the mouse? I think this is fun stuff, and it saves wear and tear on my mouse arm and hand.
How the VS command prompt can augment the Visual Studio IDE
You don’t have to be an Emacs command-line purist to enjoy the benefits of the command prompt. While I was researching Control Where the Build System Places Your Binaries, I repeatedly needed to test the outcome of a few changes to a few files. For this kind of scenario, you can’t test the outcome of your work locally. Essentially you must:
- Tweak various XML files such as a build process template XAML file and a few VS code project files.
- Check in the modified files.
- Queue your build.
- View your build results.
- Return to step 1 as many times as needed until your build process functions the way you want.
At first I used only the Visual Studio IDE for many cycles of this task. I started to get tired of having to click through the same UI over and over again. It then occurred to me that I could use the command prompt to save some time.
tf checkin /noprompt (check in all the stuff I’ve changed)
When you use the IDE to check-in files, you have to open the window, view the files that have changed, make sure they are selected, and then click the button. But when you are repeatedly changing only a few files and you know you simply want to upload them all, you can simply issue this command:
tf checkin /noprompt
Of course, before you do this you should first really be sure that you really know all the files you’ve changed. Not sure? Well, simply type:
tf checkin
to get a list of the files you’ve changed.
tfsbuild start (queue a build)
Immediately after I checked in my changes, I didn’t even need to leave the command prompt. I simply entered the following command:
tfsbuild start https://contoso-team:8080/tfs/defaultcollection Test "Build My Utilities"
With the tf checkin and the tfsbuild start command invocations stored in the command history buffer, each time I modified a set of files, I was only a five keystrokes away (including the ALT+Tab to switch from the IDE to the command prompt) from testing the latest changes I made.
A few tips for newbs
A few tips that might help if you have not had much experience with the Visual Studio command prompt:
- Launch the Visual Studio Command prompt: Click Start, click All Programs, click Microsoft Visual Studio 2010, click Visual Studio Tools, and then click Visual Studio Command Prompt (2010) .
- Select a workspace for version control commands: In Visual Studio, the Workspace drop-down menu at the top of Source Control Explorer is what determines the workspace you are working in. But in the command prompt, the current directory is what determines the workspace you are working in.
- Get the team project collection URL: Some commands (such as tfsbuild start) require this data, and you can quickly get it in Visual Studio by going to Team Explorer, right-clicking the team project collection, and then clicking Properties. The URL appears in the Properties pane.
- Cycle through the command history buffer: Press the up and down arrow keys to re-use commands you have already entered.
- Auto-complete file or directory names: when a file name or directory is an argument, type a few letters of and then press the Tab key one or more times to cycle through the names that match the letters you typed.
- Get help with a command: Use the /? argument to get brief help within the command line window (e.g., tf checkin /? ). For tf.exe (version control) commands, you can use the msdn argument to display the MSDN help about a command (e.g. tf msdn checkin).