Install the WDK using NuGet
This article describes how to use NuGet to install the Windows Driver Kit on your computer. NuGet is a popular package manager, used for packaging and distributing software. For more information, see What is NuGet?.
Windows Drivers Kit Overview
Windows Driver Kit (WDK) is a software tool set used to develop, test, and deploy Windows drivers. The content included in the WDK can be categorized into five unique types: Headers, Libraries, Samples, Tools, and Templates.
The WDK is released in three different distributions, with different installation options.
Windows Driver Kit (WDK): The WDK is available as a traditional msi based package. It requires Visual Studio to be installed and the WDK is installed to %ProgramFiles(x86)%\Windows Kits\. For information on downloading and installing the WDK, see Download the Windows Driver Kit (WDK).
Enterprise Windows Drivers Kit (EWDK): The EWDK is shipped as a standalone ISO, which includes the command line compiler build tools, the SDK and the WDK. The EWDK is a standalone self-contained command-line environment. To get started, just mount the ISO and run LaunchBuildEnv. For information on how to download and use the EWDK, visit Download the Windows Driver Kit (WDK).
Windows Drivers Kit NuGet Package: The WDK NuGet package consists of essential libraries, headers, DLL, tools, and metadata used for building Windows drivers that are shared and supported by modern CI/CD pipelines. The official release of the WDK NuGet package is now available on nuget.org. The latest release version is 10.0.26100.2454. For information on the latest release of the WDK, SDK, and Visual Studio, see Kit versioning.
Developers can access and integrate Windows Driver Kit (WDK) NuGet packages directly from Visual Studio via the NuGet Package Manager. By utilizing these packages, driver developers can seamlessly install essential build tools into their projects, facilitating a streamlined and efficient process for acquiring WDK. Moreover, the use of WDK NuGet packages allows for more frequent updates and releases, and they can be easily integrated into build systems within CI/CD pipelines. For more information, see Install and manage packages in Visual Studio using the NuGet Package Manager.
Here are the links to the x64 and ARM64 WDK NuGet packages available on nuget.org.
x64: https://www.nuget.org/packages/Microsoft.Windows.WDK.x64/
ARM64: https://www.nuget.org/packages/Microsoft.Windows.WDK.ARM64
Directions for building drivers in automated build systems
For directions on building drivers in large automated system, see Building Locally.
Getting Started with WDK NuGet
Prerequisites
- X64/ARM64 PC with Windows 11 or newer.
Install Visual Studio 2022
The WDK NuGet requires Visual Studio. Download and install Visual Studio 2022 Community, Professional, or Enterprise edition.
When you install Visual Studio 2022, select the Desktop development with C++ workload, then under Individual Components add:
- MSVC v143 - VS 2022 C++ ARM64/ARM64EC Spectre-mitigated libs (Latest)
- MSVC v143 - VS 2022 C++ x64/x86 Spectre-mitigated libs (Latest)
- C++ ATL for latest v143 build tools with Spectre Mitigations (ARM64/ARM64EC)
- C++ ATL for latest v143 build tools with Spectre Mitigations (x86 & x64)
- C++ MFC for latest v143 build tools with Spectre Mitigations (ARM64/ARM64EC)
- C++ MFC for latest v143 build tools with Spectre Mitigations (x86 & x64)
- Windows Driver Kit
How to Install WDK NuGet
Follow the following steps to acquire and install WDK NuGet package in Visual Studio.
Launch Visual Studio.
Create a new driver project, for example a "Kernel Mode Driver (KMDF)" C++ project.
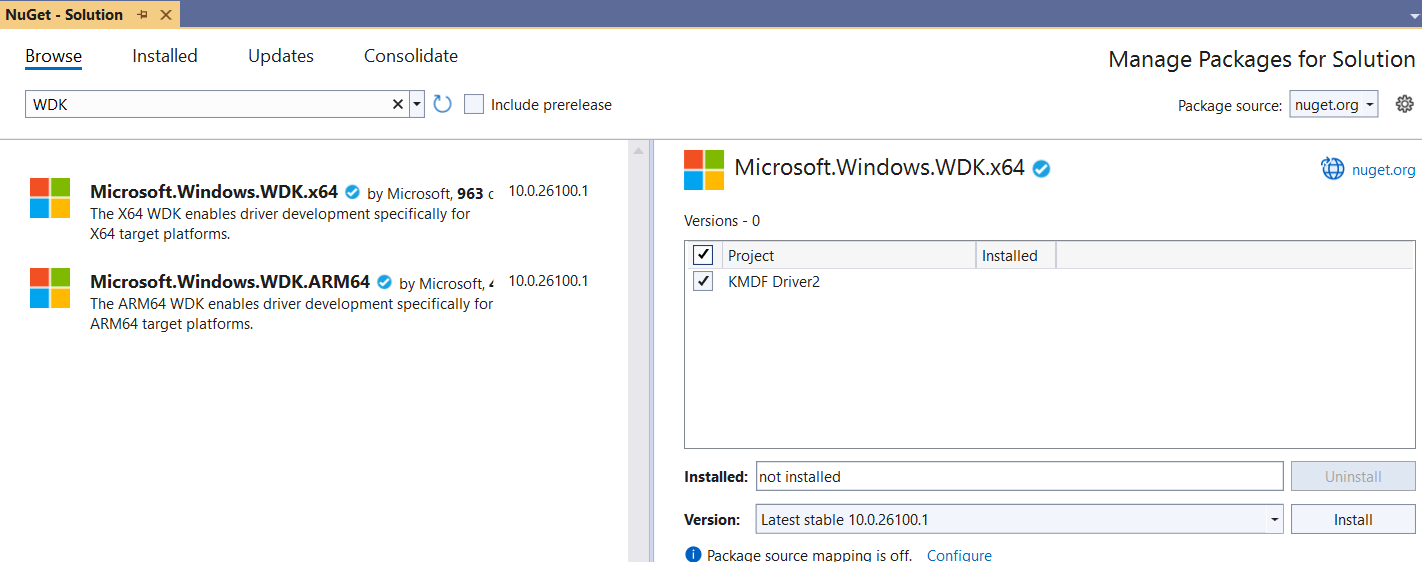
Right-click the driver project solution file, and select Manage NuGet packages.
Select the drop-down menu beside the package source and select
nuget.org.Search for WDK.
Select
Microsoft.Windows.WDK.x64orMicrosoft.Windows.WDK.ARM64based on the platform architecture that you wish to develop for.Leave other checkboxes set at their defaults.
Select Install.

Note
The SDK NuGet package will automatically be installed as part of WDK NuGet installation.
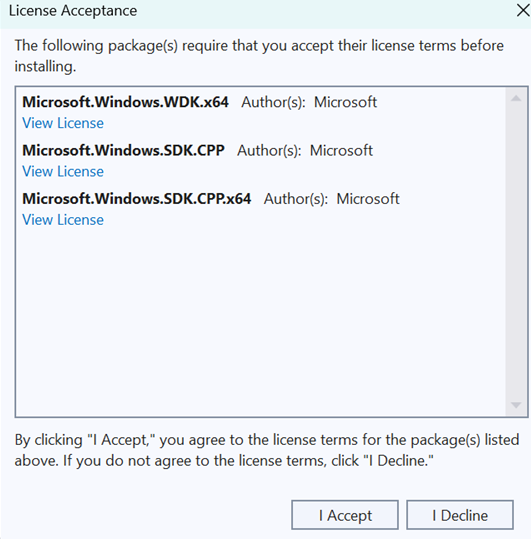
To complete the installation, review and accept the license terms.

Build and test your WDK driver solution.
Note
Use of the dotnet command line doesn't work with WDK, and its use is not recommended.
How to Update WDK NuGet
To update NuGet Packages in existing driver projects, follow these steps.
Open the existing driver project in Visual Studio.
Right-click the driver project solution file, and select Manage NuGet packages.
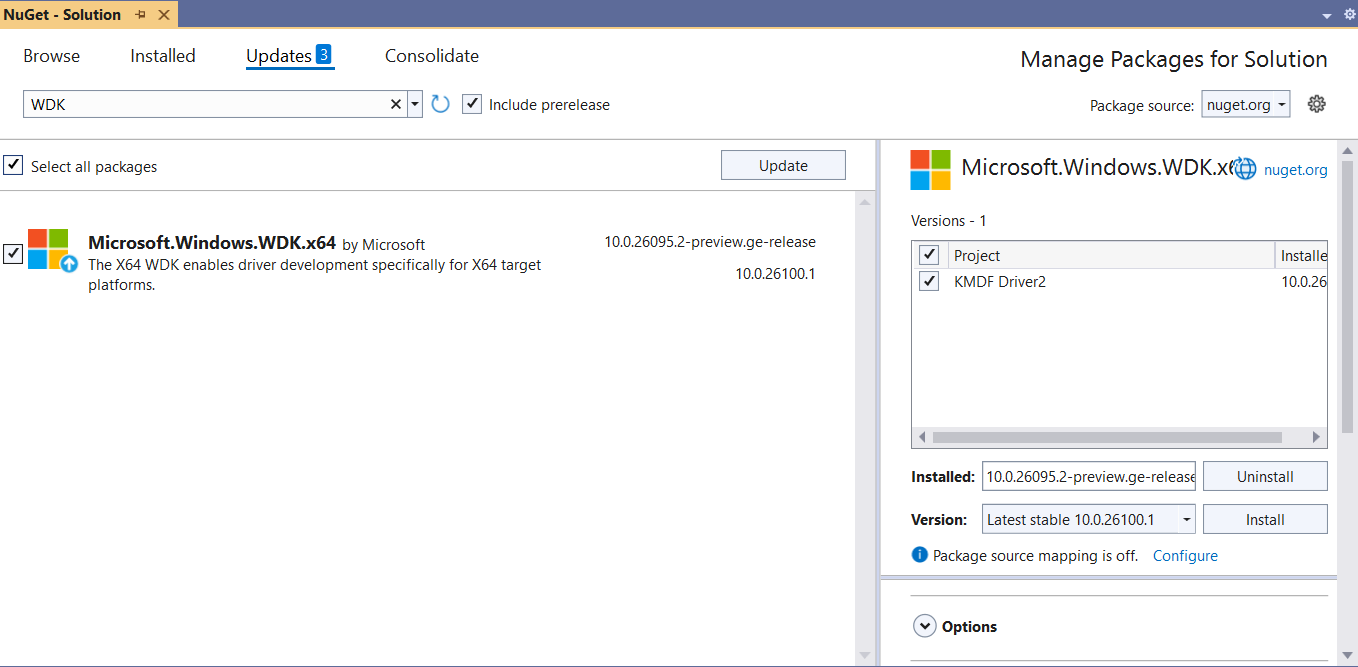
Select the Updates tab.
Select the Include prerelease box, if you wish to use prerelease WDK packages.
Select the packages you wish to update in the list.

Select Install.
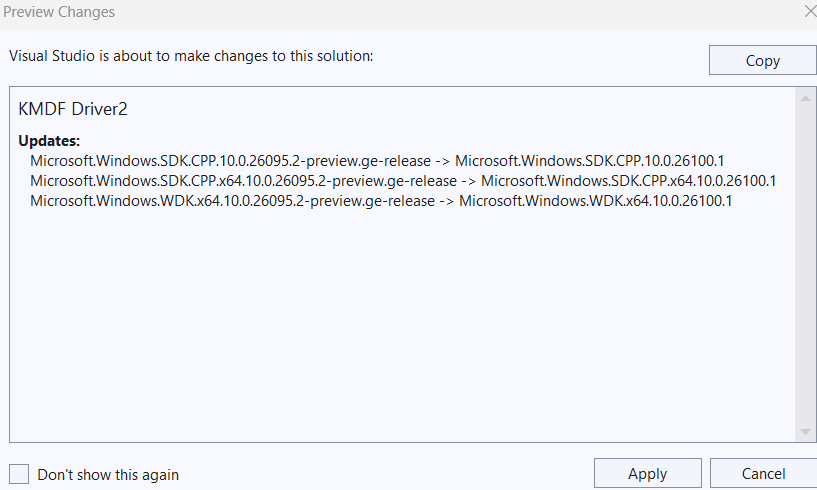
Select Apply.

To complete the installation, review and accept the license terms.
See also
- What is NuGet?
- Use command-line parameters to install, update, and manage Visual Studio
- Download Visual Studio Tools