Troubleshoot issues with table views
This article helps you troubleshoot and resolve issues related to table views.
Issue 1 - Can't see data in certain columns in table views
Cause
This issue is occurring due to mismatch of column names between the layoutxml and fetchxml in the view ODATA file (OrgUrl/api/data/Dynamics 365 version/savedqueries(ViewId)).
Resolution
To resolve this issue, you must remove and add back the column that is causing this issue. This will ensure that the column names in layoutxml and fetchxml are matched.
Note
Before you start resolving the issue, take note of the view for which this issue is occurring.
Go to Settings > Customizations > Customize the System.
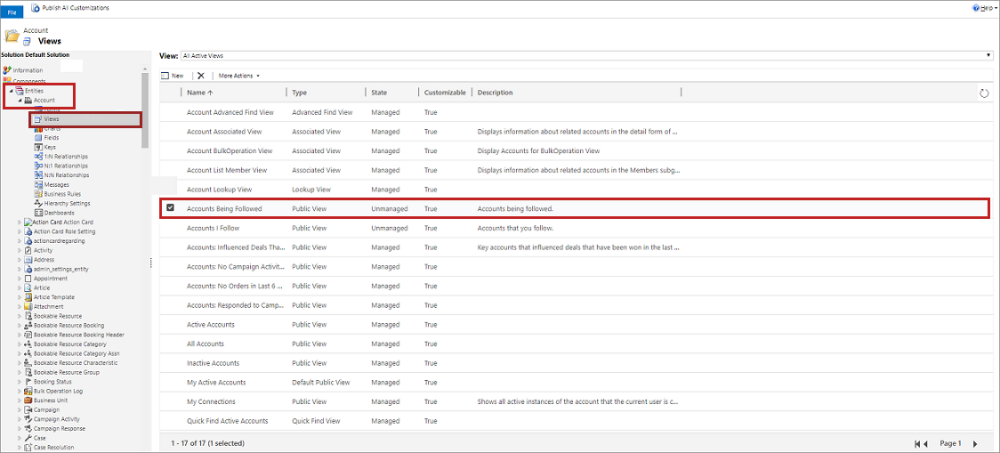
Select the Entity > Views and select the view that has this issue. In this example, we're selecting the table Account and view as Accounts Being Followed.
Select More Actions > Edit.
The view edit page opens.
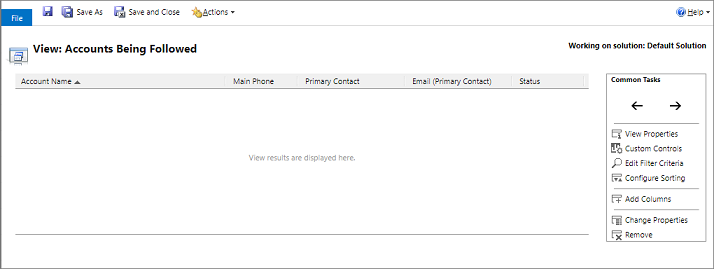
Select the column that is causing the issue and select Remove. In this example, we select the column Email (Primary Contact) to remove.
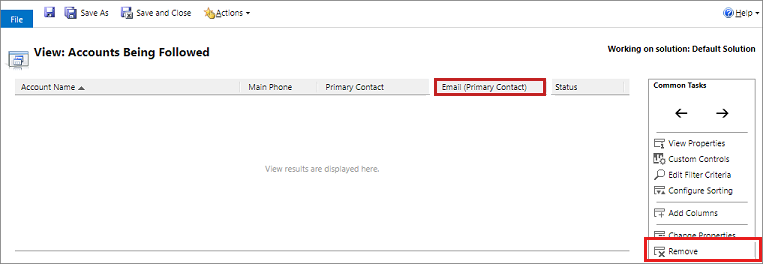
The column is removed from the view.
Add back the column that you've deleted. Select Add Columns and readd the column that you removed. In this example, we're adding the column Email (Primary Contact) that was removed.
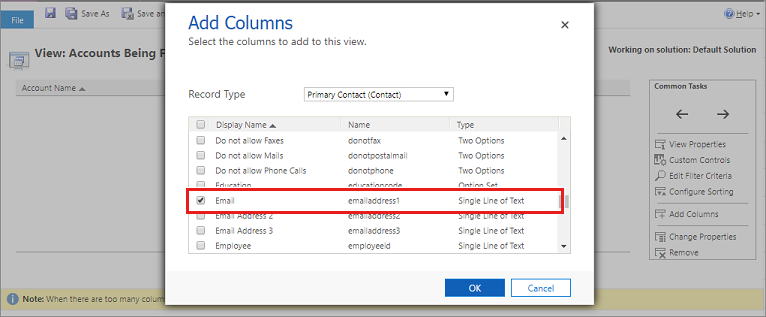
The data in the columns is displayed properly.
Issue 2 - Can't see some records in the table views
Cause
This issue is occurring due to the filtering of data on a view.
Resolution
To resolve this issue, you must edit or remove filters for the view. This will ensure that filters are applied properly for the view.
Note
Before you start resolving the issue, take note of the view for which this issue is occurring.
Go to Settings > Customizations > Customize the System.
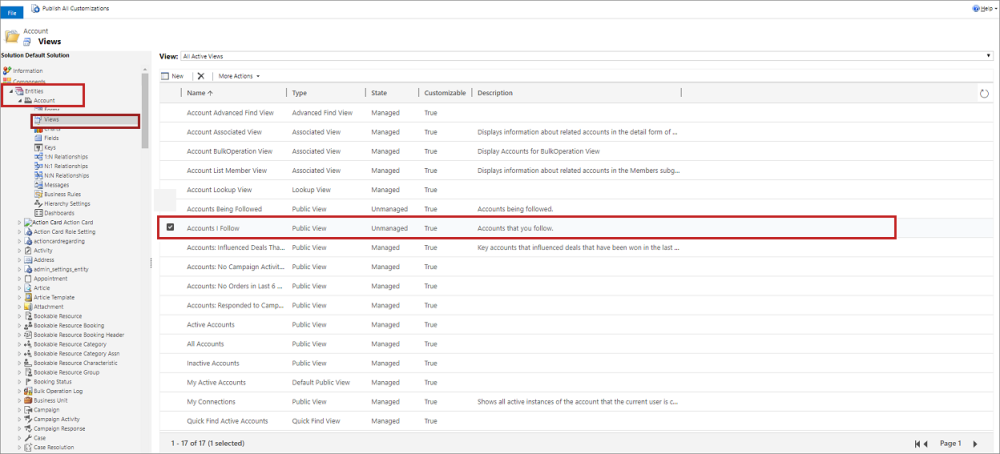
Select the Entity > Views and select the view that has this issue. In this example, we're selecting the table Account and view as Accounts I Follow.
Select More Actions > Edit.
The view edit page opens.
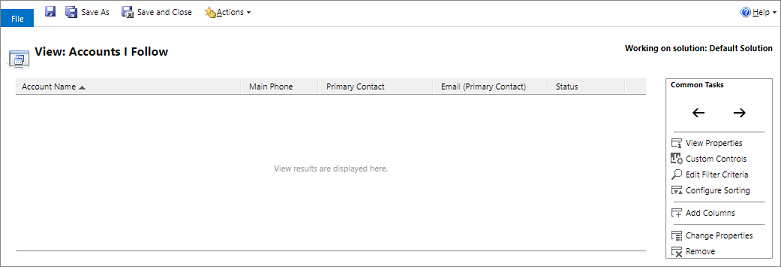
Select Edit Filter Criteria and recheck the filter condition either by updating or deleting.

The records in the views are displayed properly.
Issue 3 - Can't see some records in opportunity, quote, order, or invoice subgrids
While working on opportunity, quote, order, or invoice records, you might observe that some records are missing.
Cause
You might not see some records because of an error that occurred due to customization done to the subgrid.
Resolution
To fix the issue of incorrect customization, follow these steps to make sure your subgrid is configured correctly:
In your app, on the nav bar, select the Settings icon, and then select Advanced Settings.
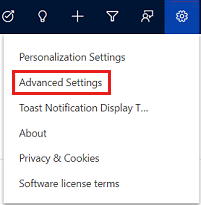
The Business Management settings page opens in a new browser tab.
On the navigation bar, select Settings, and then under Customization, select Customizations.
Select Customize the System.
Under Components in the solution explorer, expand Entities, expand Opportunity, and then select Forms.
Open the Opportunity form of type Main.
Double-click to select the Connections section in the Product Line Items section.
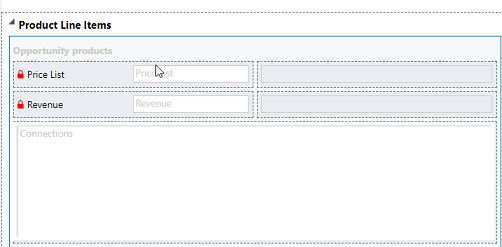
The Set Properties dialog box opens.
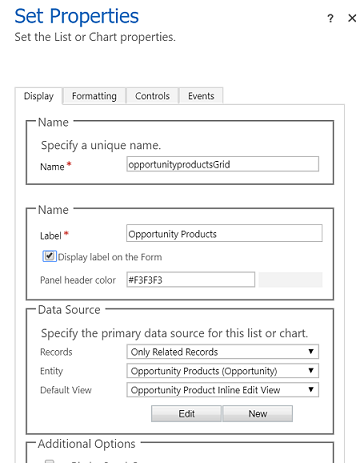
On the Controls tab, double-click to select Editable Grid.
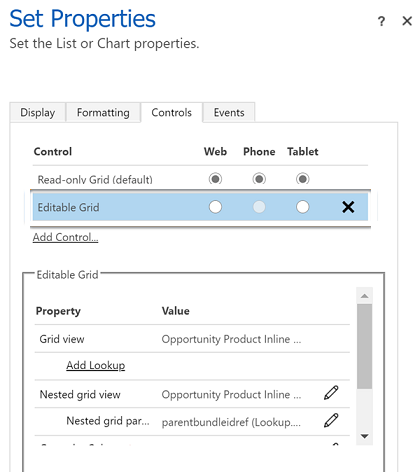
Make sure that all values are set correctly:
Grid View: Opportunity Product Inline Edit View
Nested Grid View: Select the pencil icon and fill in the following details:
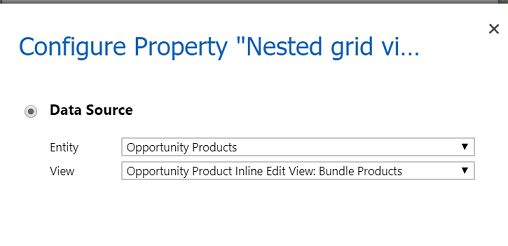
- Table: Opportunity Products
- View: Opportunity Product Inline Edit View: Bundle Products
Nested grid parent ID: parentbundleidref
Group by Column: Enabled (Enum)
Allow filtering: Enabled (Enum)
Hide nested grid column header: Hide Column
Note
If you're using product bundles and edit these bundled line items in the product grid, select Hide nested grid column header as Show Column.
Issue 4 - Can't set a custom view as the default view for the Existing products field in Add products dialog
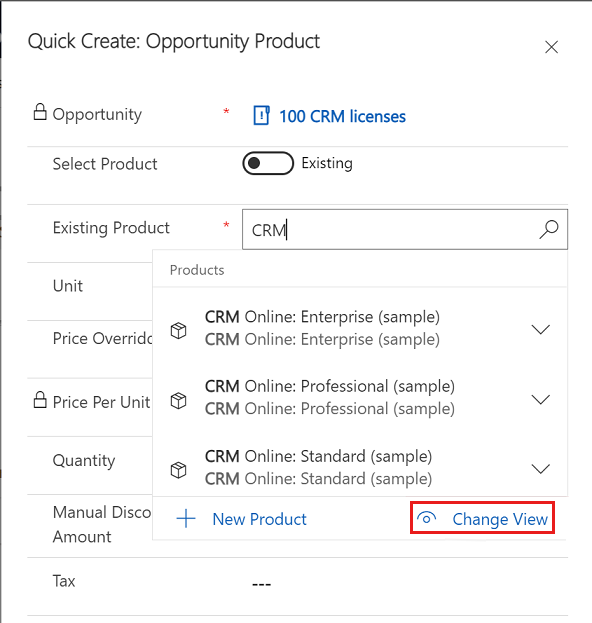
To add products to an opportunity, quote, order, or invoice, you select the products from the Existing product lookup field in the Add products dialog. If you change the default view of the lookup field to a custom view, the field doesn't display products from the custom view.
Cause
To be able to display products from the selected price list, the lookup always defaults to a system view named Products in Parent Price List. So, even if you change the default, the lookup field will set the default back to the Products in Parent Price List view.
Resolution
This behavior is working as designed. Though you can't set a default view, you can manually switch to the view in the Existing products lookup field.
Issue 5 - Can't update nested bundle items on the Product tab
Cause
For an opportunity, when you update nested bundle items on the Product tab, the save icon is disabled. This issue occurs because the header of the nested grid column is hidden under Opportunity Product Inline Edit View in customizations.
Resolution
To resolve this issue, follow these steps to show the header of the nested grid columns for products on the opportunity form.
In your app, on the nav bar, select the Settings icon, and then select Advanced Settings.

The Business Management settings page opens in a new browser tab.
On the navigation bar, select Settings, and then under Customization, select Customizations.
Select Customize the System.
Under Components in the solution explorer, expand Entities, expand Opportunity, and then select Forms.
Open the Opportunity form of form type Main.
In the Product Line Items section, double-click to select the Opportunity products section.
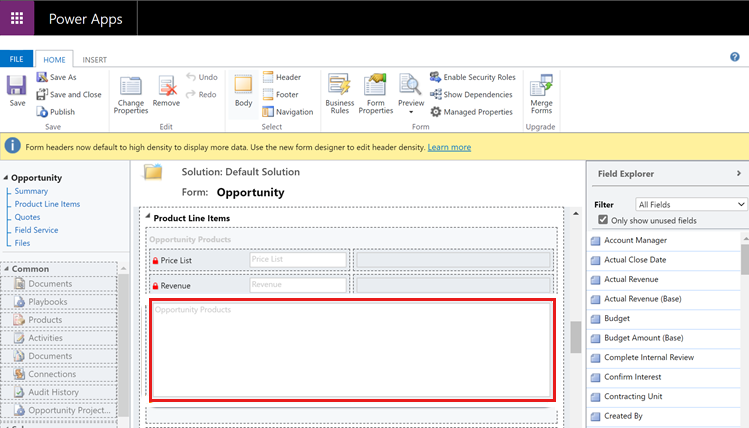
The Set Properties dialog box opens.

On the Controls tab, double-click to select Editable Grid.

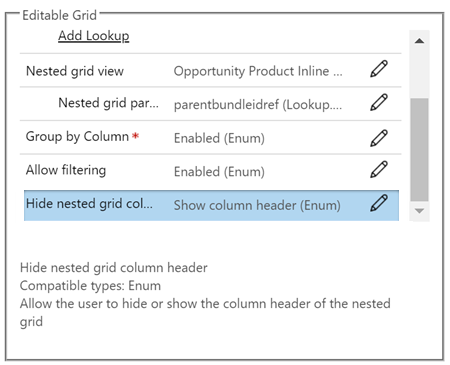
In the Editable Grid section, select the pencil icon next to Hide nested grid column header.
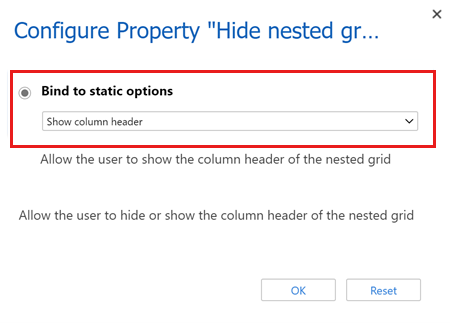
In the Configure Property dialog box, under Bind to static options, select Show column header.
Save and publish the configuration.
Issue 6 - Can't see opportunity records in the legacy web client when you select Opportunities from the site map but you can see them in Unified Interface
Cause
Records are shown in the list based on table views. The issue might occur when there's no public view marked as the default view for a table.
Resolution
Select one of the public views of the table as default. This ensures the views are displayed as expected. To learn how to make a view as your default view, see Specify a model-driven app default view
Note
If you still can't see the records, clear the browser cache and try again.
