Custom classifications in Microsoft Purview
This article describes how you can create custom classifications to define data types in your data estate that are unique to your organization. It also describes the creation of custom classification rules that let you find specified data throughout your data estate.
Important
To create a custom classification you need either data curator or data source administrator permission on a domain or collection. Permissions at any collection level are sufficient. For more information about permissions, see: Microsoft Purview data governance permissions.
Default system classifications
The Microsoft Purview Data Map provides a large set of default system classifications that represent typical personal data types that you might have in your data estate. For the entire list of available system classifications, see: Supported classifications in Microsoft Purview.
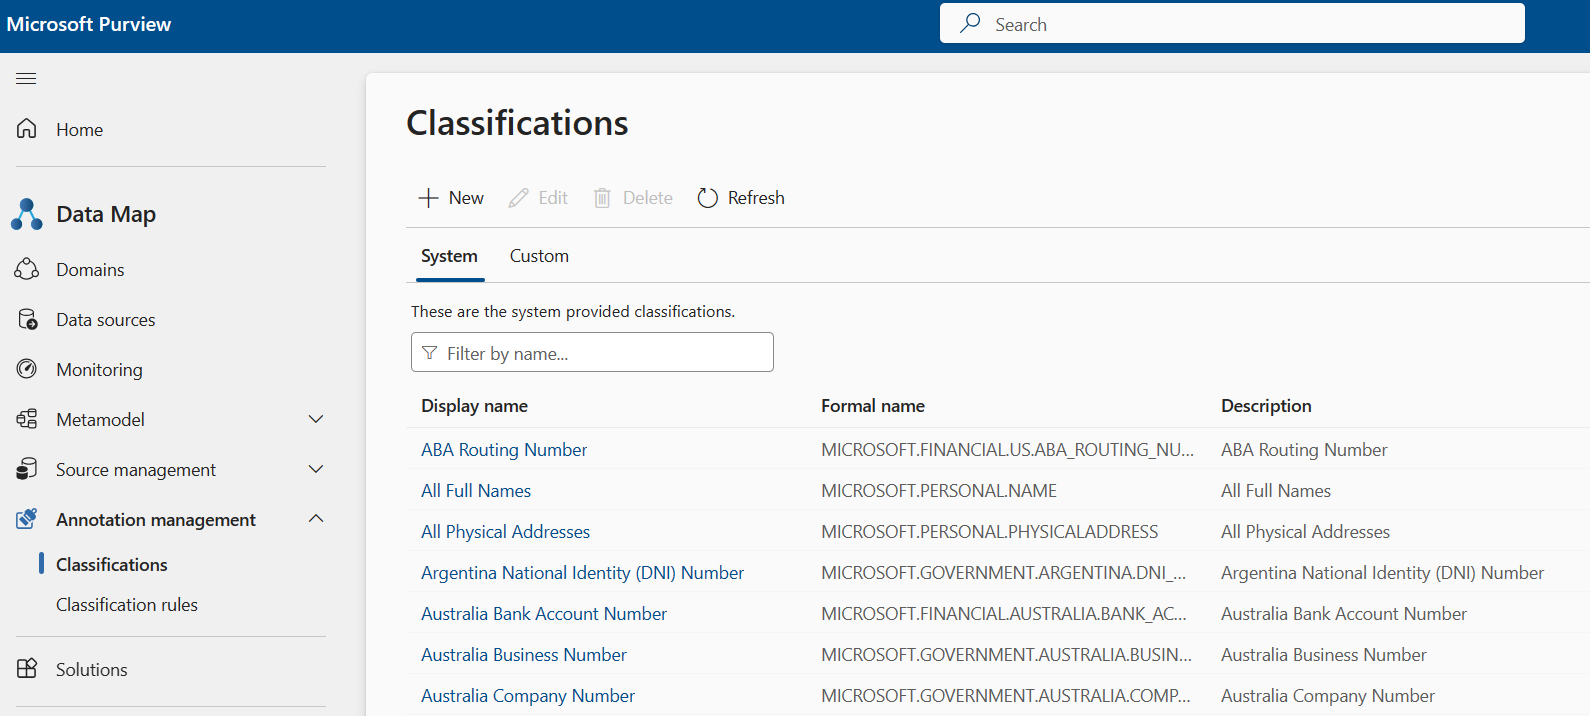
You also have the ability to create custom classifications, if any of the default classifications don't meet your needs.
Note
- Our data sampling rules are applied to both system and custom classifications.
- Custom classifications are only applied to structured data sources like SQL and CosmosDB, and to structured file types like CSV, JSON, and Parquet. Custom classification isn't applied to unstructured data file types like DOC, PDF, and XLSX.
Steps to create a custom classification
To create a custom classification, follow these steps:
You'll need data curator or data source administrator permissions on any collection to be able to create a custom classification.
In the Microsoft Purview portal, open the Data map solution.
Select Annotation management select Classifications.
Select + New.
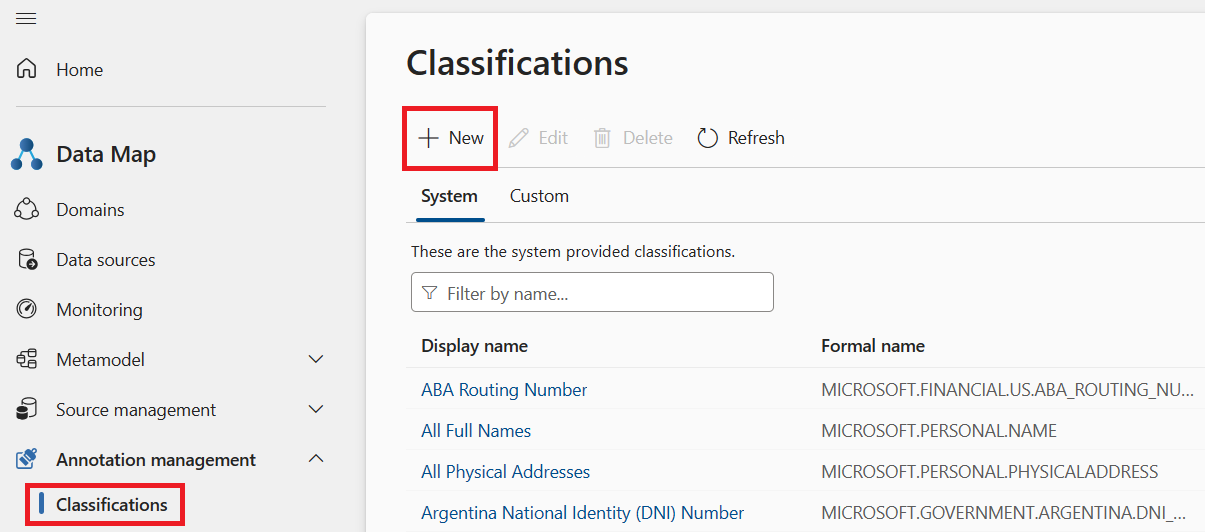
The Add new classification pane opens, where you can give your
classification a name and a description. It's good practice to use a name-spacing convention, such as your company name.classification name.
The Microsoft system classifications are grouped under the reserved MICROSOFT. namespace. An example is MICROSOFT.GOVERNMENT.US.SOCIAL_SECURITY_NUMBER.
The name of your classification must start with a letter followed by a sequence of letters, numbers, and period (.) or underscore characters. As you type, the UX automatically generates a friendly name. This friendly name is what users see when you apply it to an asset in the catalog.
To keep the name short, the system creates the friendly name based on the following logic:
All but the last two segments of the namespace are trimmed.
The casing is adjusted so that the first letter of each word is capitalized.
All underscores (_) are replaced with spaces.
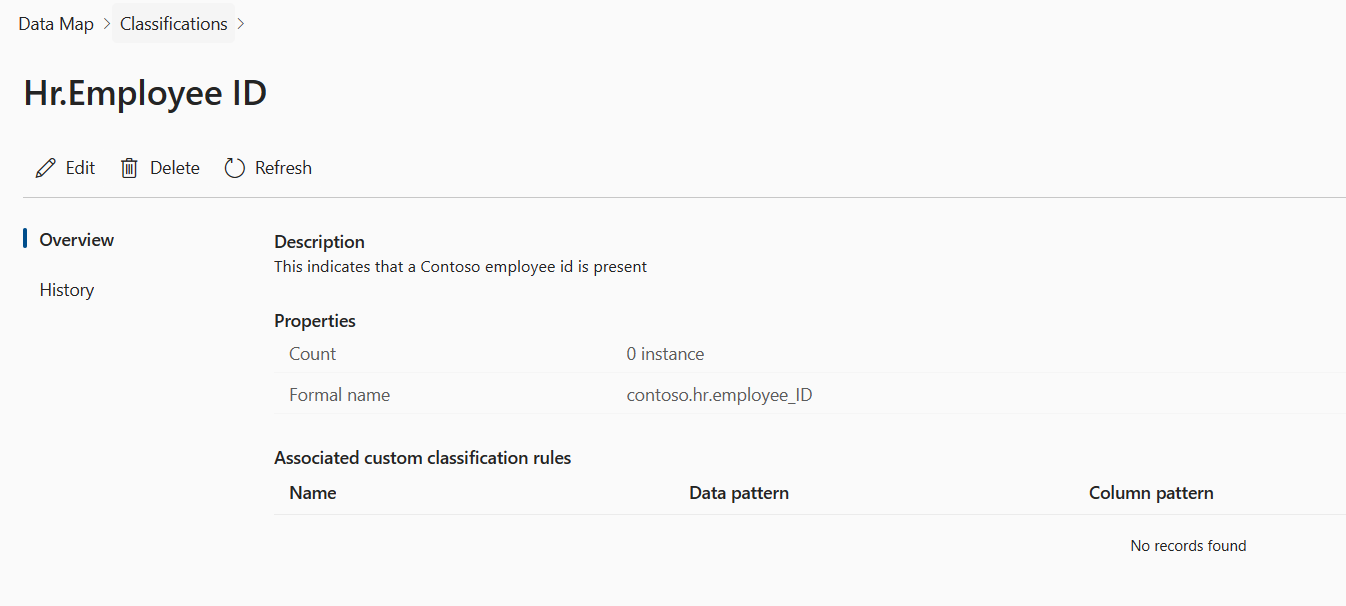
As an example, if you named your classification contoso.hr.employee_ID, the friendly name is stored in the system as Hr.Employee ID.

Select OK, and your new classification is added to your Custom classification list.

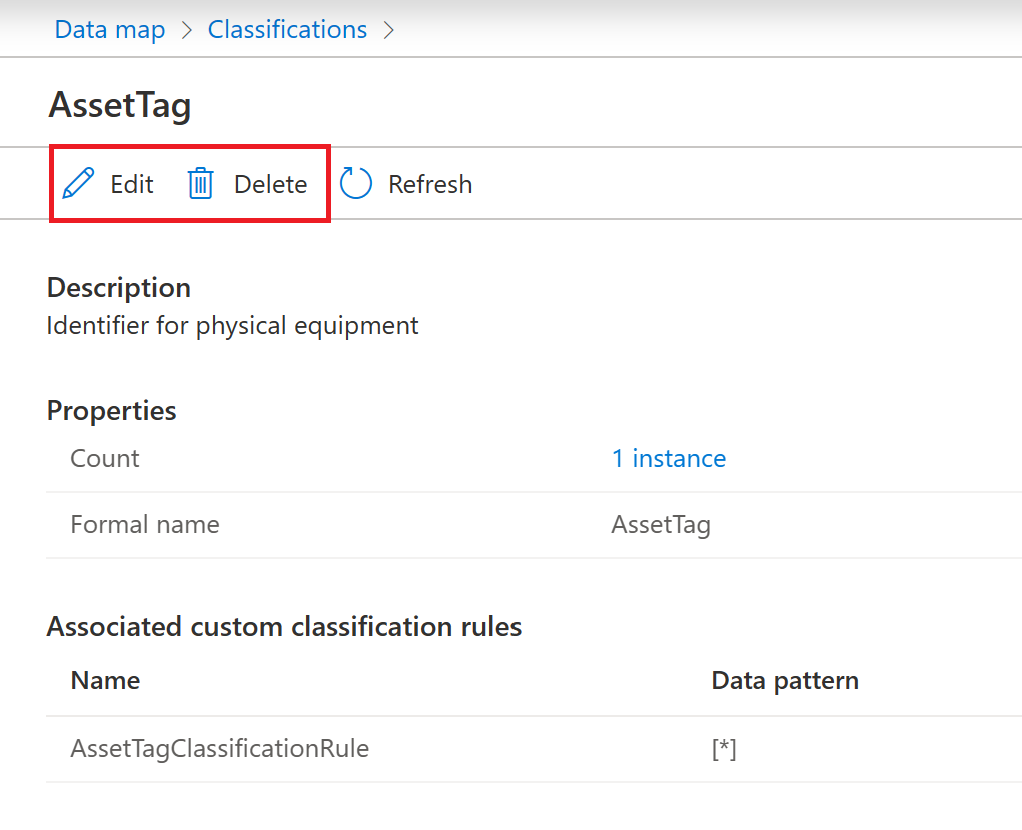
Selecting the classification in the list opens the classification details page. Here, you find all the details about the classification.
These details include the count of how many instances there are, the formal name, associated classification rules (if any), and the owner name.
Custom classification rules
The data map provides a set of default classification rules that are used by the scanner to automatically detect certain data types. You can also add your own custom classification rules to detect other types of data that you might be interested in finding across your data estate. This capability can be powerful when you're trying to find data within your data estate.
Note
Custom classification rules are only supported in the English language.
As an example, let's say that a company named Contoso has employee IDs that are standardized throughout the company with the word "Employee" followed by a GUID to create EMPLOYEE{GUID}. For example, one instance of an employee ID looks like EMPLOYEE9c55c474-9996-420c-a285-0d0fc23f1f55.
Contoso can configure the scanning system to find instances of these IDs by creating a custom classification rule. They can supply a regular expression that matches the data pattern, in this case, \^Employee\[A-Za-z0-9\]{8}-\[A-Za-z0-9\]{4}-\[A-Za-z0-9\]{4}-\[A-Za-z0-9\]{4}-\[A-Za-z0-9\]{12}\$. Optionally, if the data usually is in a column that they know the name of, such as Employee_ID or EmployeeID, they can add a column pattern regular expression to make the scan even more accurate. An example regex is Employee_ID|EmployeeID.
The scanning system can then use this rule to examine the actual data in the column and the column name to try to identify every instance of where the employee ID pattern is found.
Steps to create a custom classification rule
Create a custom classification that following the instructions in the previous section. You'll add this custom classification in the classification rule configuration so that the system applies it when it finds a match in the column.
In the Microsoft Purview portal, open the Data map solution.
Under Annotation management, select the Classifications rules section.
Select New.
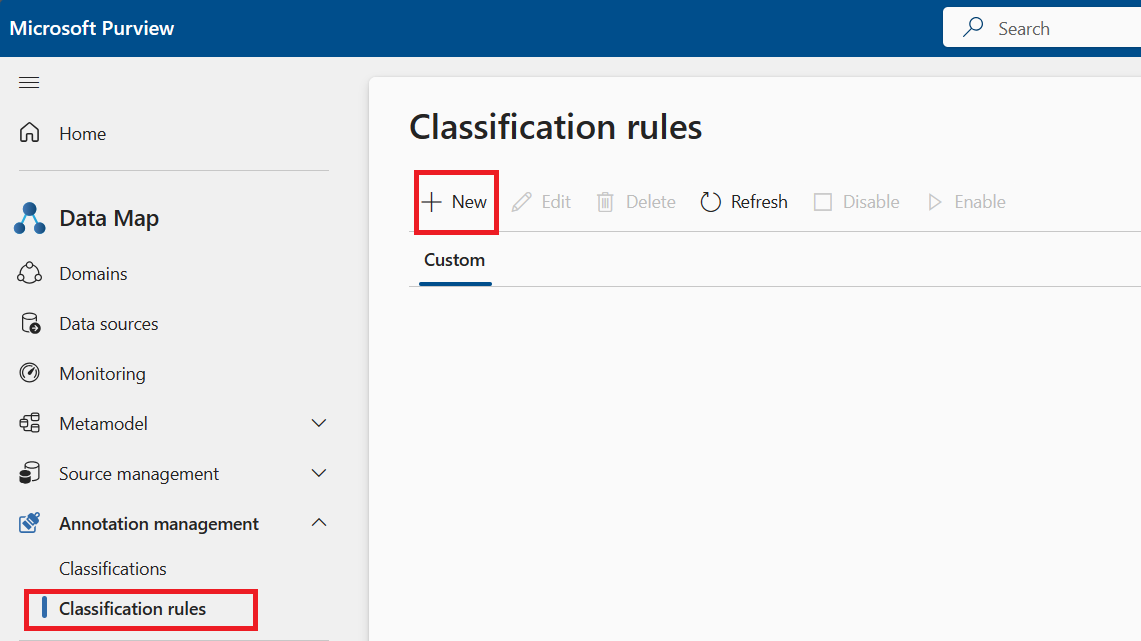
The New classification rule dialog box opens. Fill in the fields and decide whether to create a regular expression rule or a dictionary rule.
Field Description Name Required. The maximum is 100 characters. Description Optional. The maximum is 256 characters. Classification Name Required. Select the name of the classification from the drop-down list to tell the scanner to apply it if a match is found. State Required. The options are enabled or disabled. Enabled is the default. 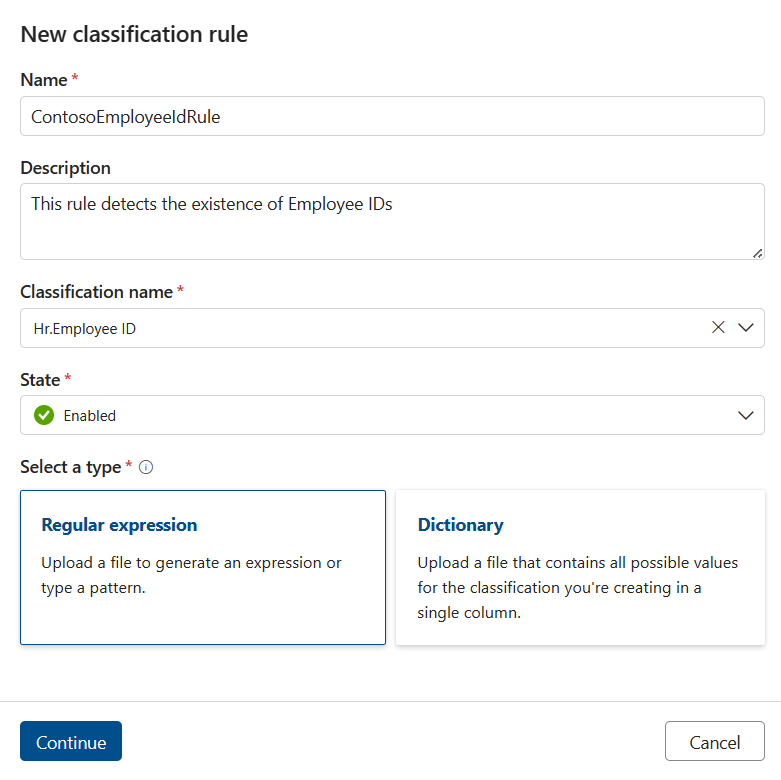
Creating a Regular Expression Rule
Important
Regular expressions in custom classifications are case insensitive.
If creating a regular expression rule, you'll see the following screen. You could optionally upload a file that will be used to generate suggested regex patterns for your rule. Only English language rules are supported.
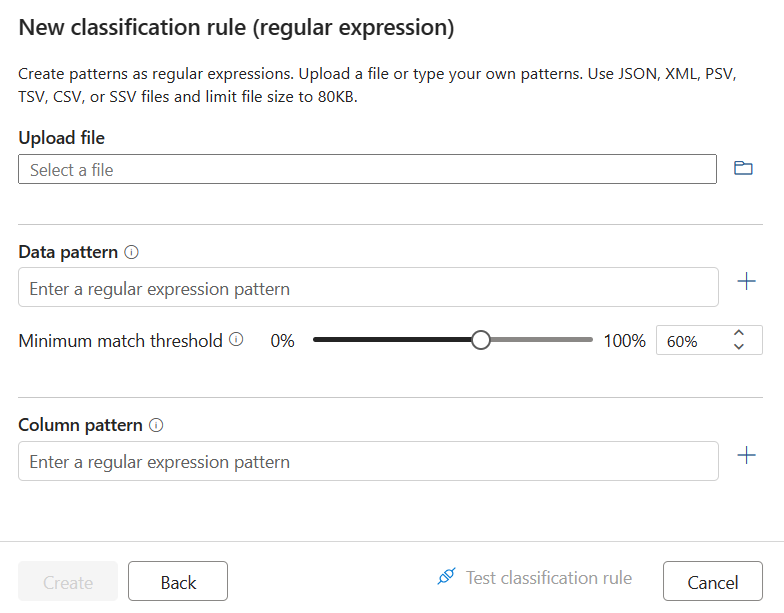
If you decide to generate a suggested regex pattern, after uploading a file, select one of the suggested patterns and select Add to Patterns to use the suggested data and column patterns. You can tweak the suggested patterns or you may also type your own patterns without uploading a file.
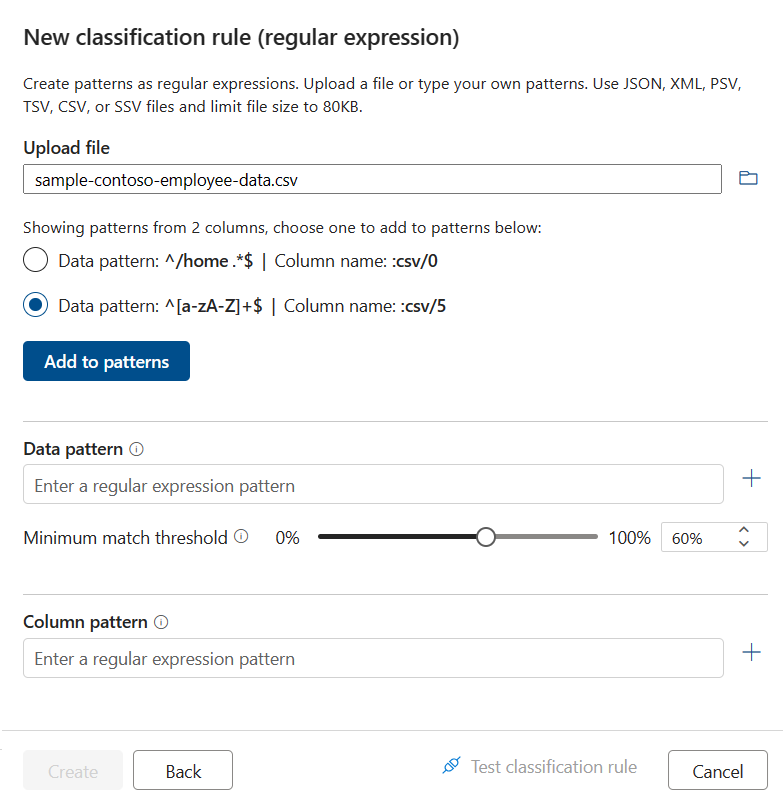
Field Description Data Pattern Optional. A regular expression that represents the data that's stored in the data field. The limit is large. In the previous example, the data patterns test for an employee ID that's literally the word Employee{GUID}.Column Pattern Optional. A regular expression that represents the column names that you want to match. The limit is large. Under Data Pattern you can use the Minimum match threshold to set the minimum percentage of the distinct data value matches in a column that must be found by the scanner for the classification to be applied. The suggested value is 60%. If you specify multiple data patterns, this setting is disabled and the value is fixed at 60%.
Note
The Minimum match threshold must be at least 1%.
You can now verify your rule and create it.
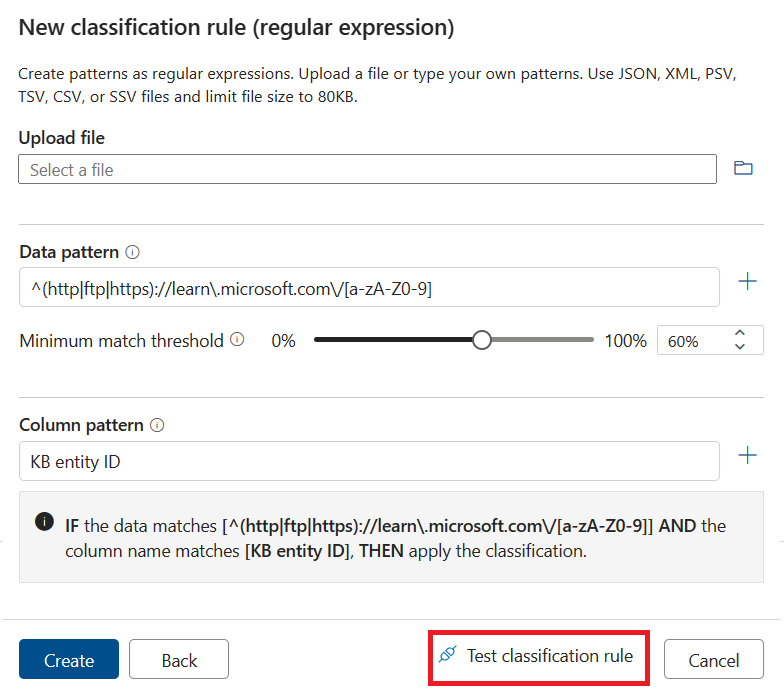
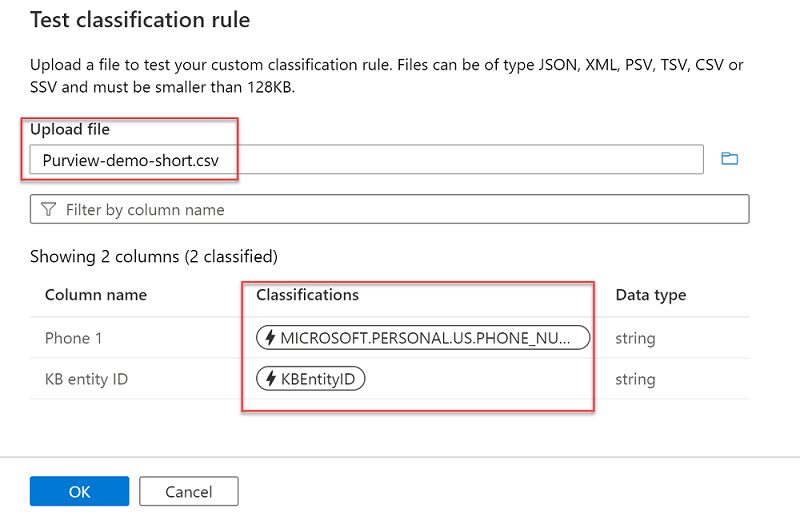
Test the classification rule before completing the creation process to validate that it will apply tags to your assets. The classifications in the rule will be applied to the sample data uploaded just as it would in a scan. This means all of the system classifications and your custom classification will be matched to the data in your file.
Input files could include delimited files (CSV, PSV, SSV, TSV), JSON, or XML content. The content will be parsed based on the file extension of the input file. Delimited data might have a file extension that matches any of the mentioned types. For example, TSV data can exist in a file named MySampleData.csv. Delimited content must also have a minimum of three columns.
Creating a Dictionary Rule
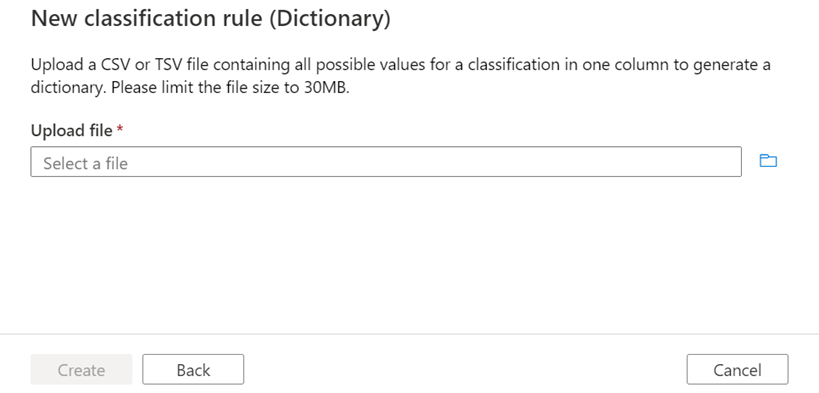
If creating a dictionary rule, you'll see the following screen. Upload a file that contains all possible values for the classification you're creating in a single column. Only English language rules are supported.
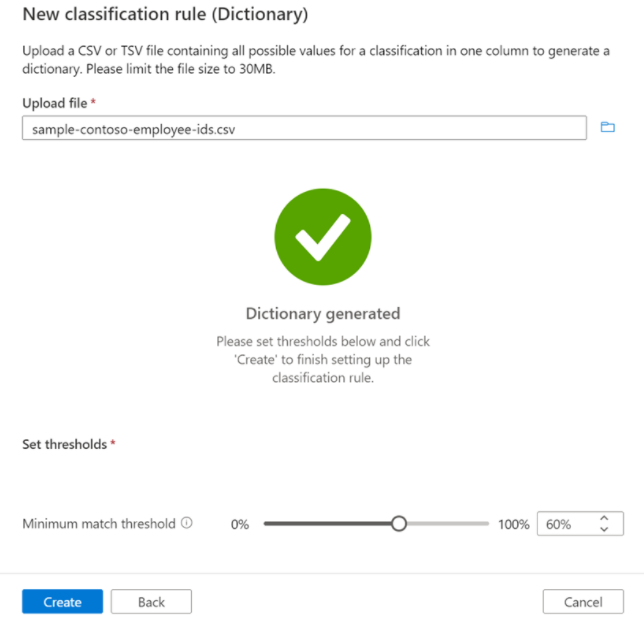
After the dictionary is generated, you can adjust the minimum match threshold and submit the rule.
Edit or delete a custom classification
To update or edit a custom classification, follow these steps:
In the Microsoft Purview portal, open the Data map solution.
Under Annotation management select Classifications.
Select the Custom tab.
Select the classification you want to edit, then select the Edit button.
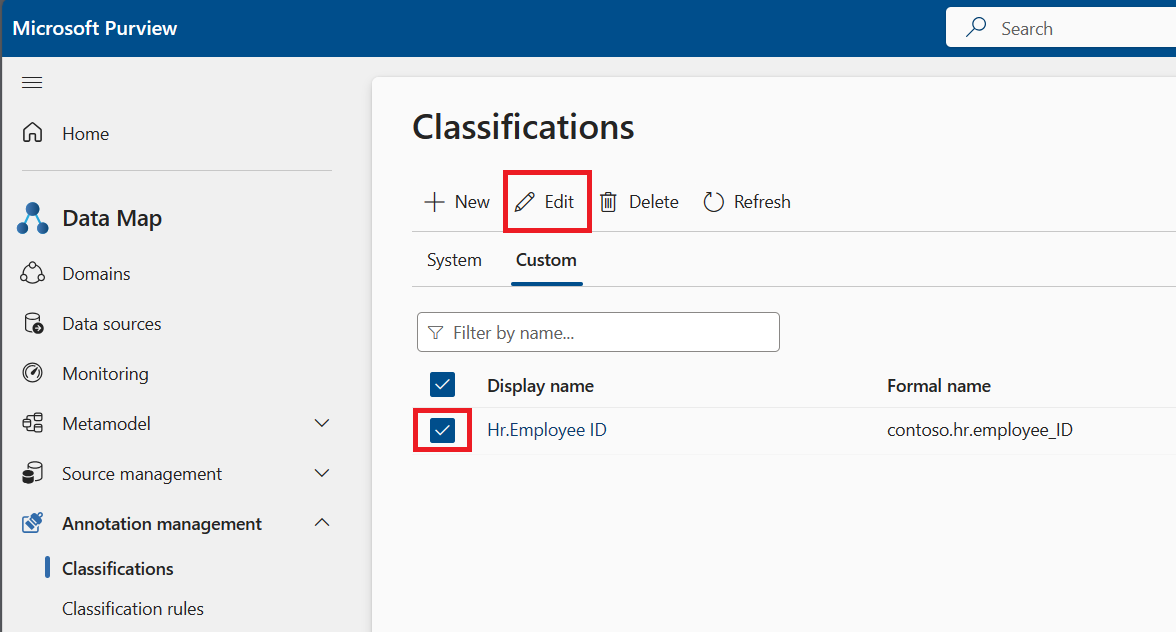
Now can edit the description of this custom classification. Select the Ok button when you're finished to save your changes.
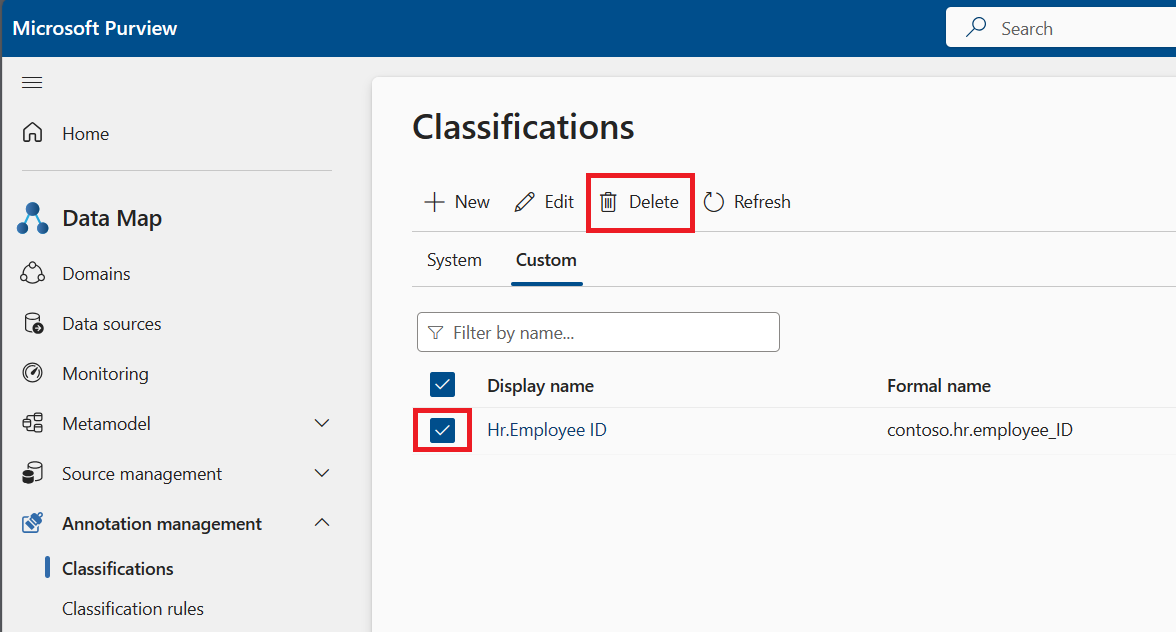
To delete a custom classification:
- After opening the Data map, and then Classifications, select the Custom tab.
- Select the classification you want to delete, or multiple classifications you want to delete, and then select the Delete button.
You can also edit or delete a classification from inside the classification itself. Just select your classification, then select the Edit or Delete buttons in the top menu.
Enable or disable classification rules
In your Microsoft Purview account, select the Data map, and then Classification rules.
Select the Custom tab.
You can check the current status of a classification rule by looking at the Status column in the table.
Select the classification rule, or multiple classification rules, that you want to enable or disable.
Select either the Enable or Disable buttons in the top menu.
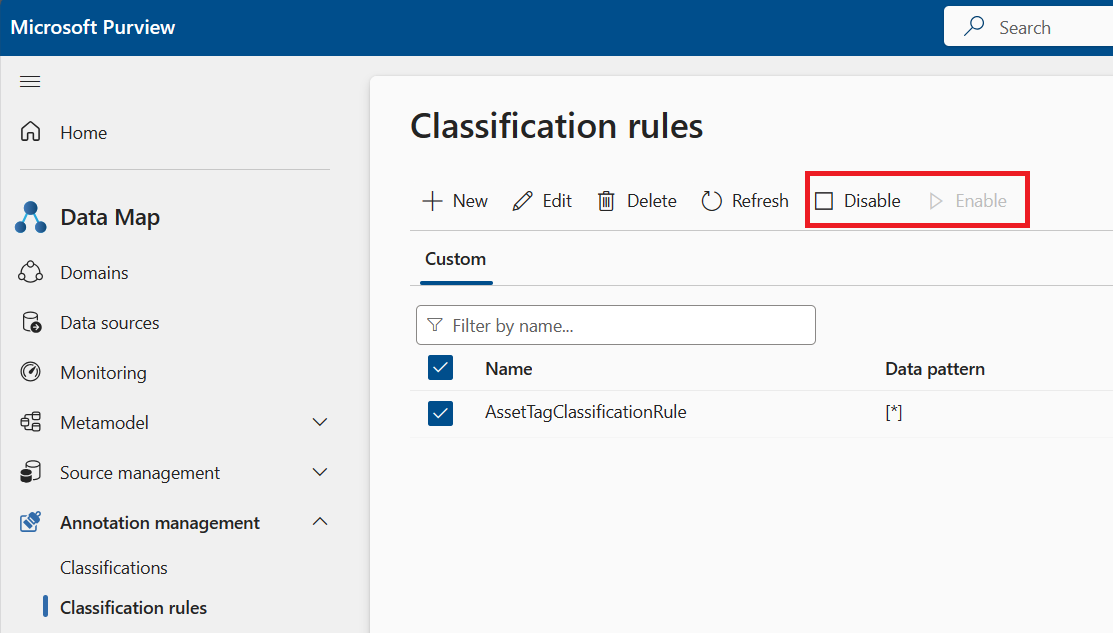
You can also update the status of a rule when editing the rule.
Edit or delete a classification rule
To update or edit a custom classification rule, follow these steps:
In your Microsoft Purview account, select the Data map, and then Classification rules.
Select the Custom tab.
Select the classification rule you want to edit, then select the Edit button.
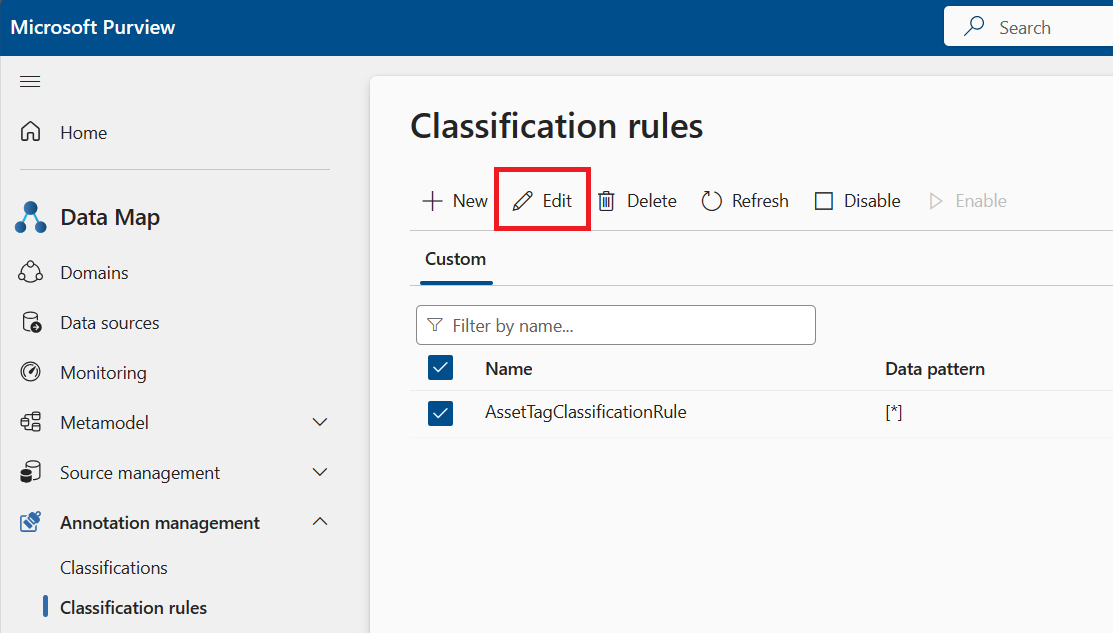
Now you can edit the state, the description, and the associated classification rule.
Select the Continue button.
You can upload a new file for your regular expression or dictionary rule to match against, and update your match threshold and column pattern match.
Select Apply to save your changes. Scans will need to be rerun with the new rule to apply changes across your assets.
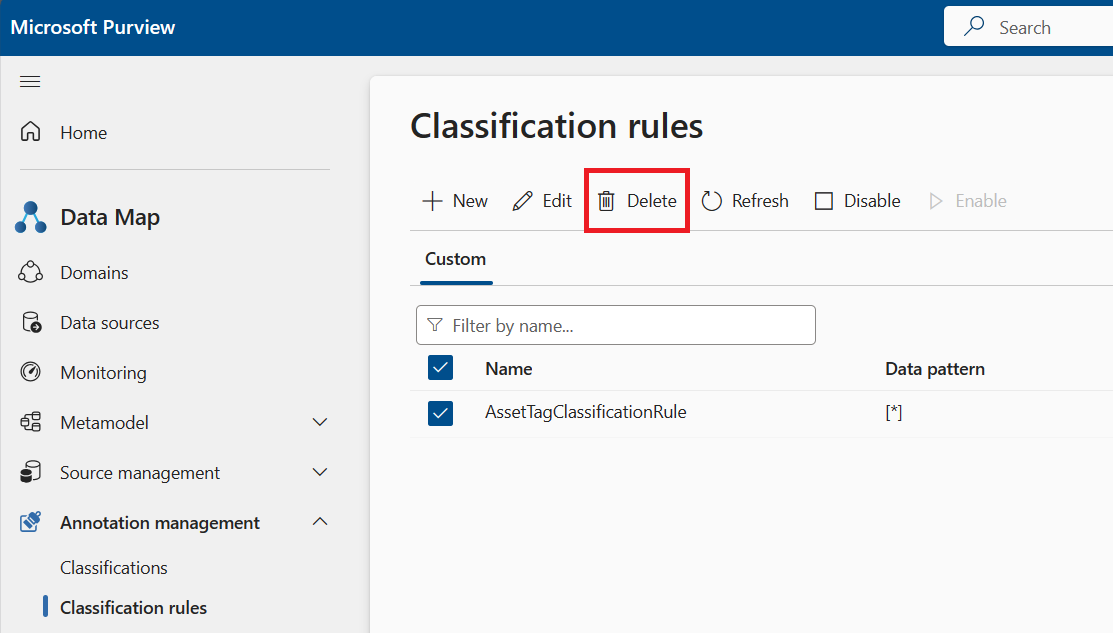
To delete a custom classification:
After opening the Data map, and then Classification rules, select the Custom tab.
Select the classification rule you want to delete, and then select the Delete button.
Next steps
Now that you've created your classification rule, it's ready to be added to a scan rule set so that your scan uses the rule when scanning. For more information, see Create a scan rule set.