Annotations and Overlays in Xamarin.iOS
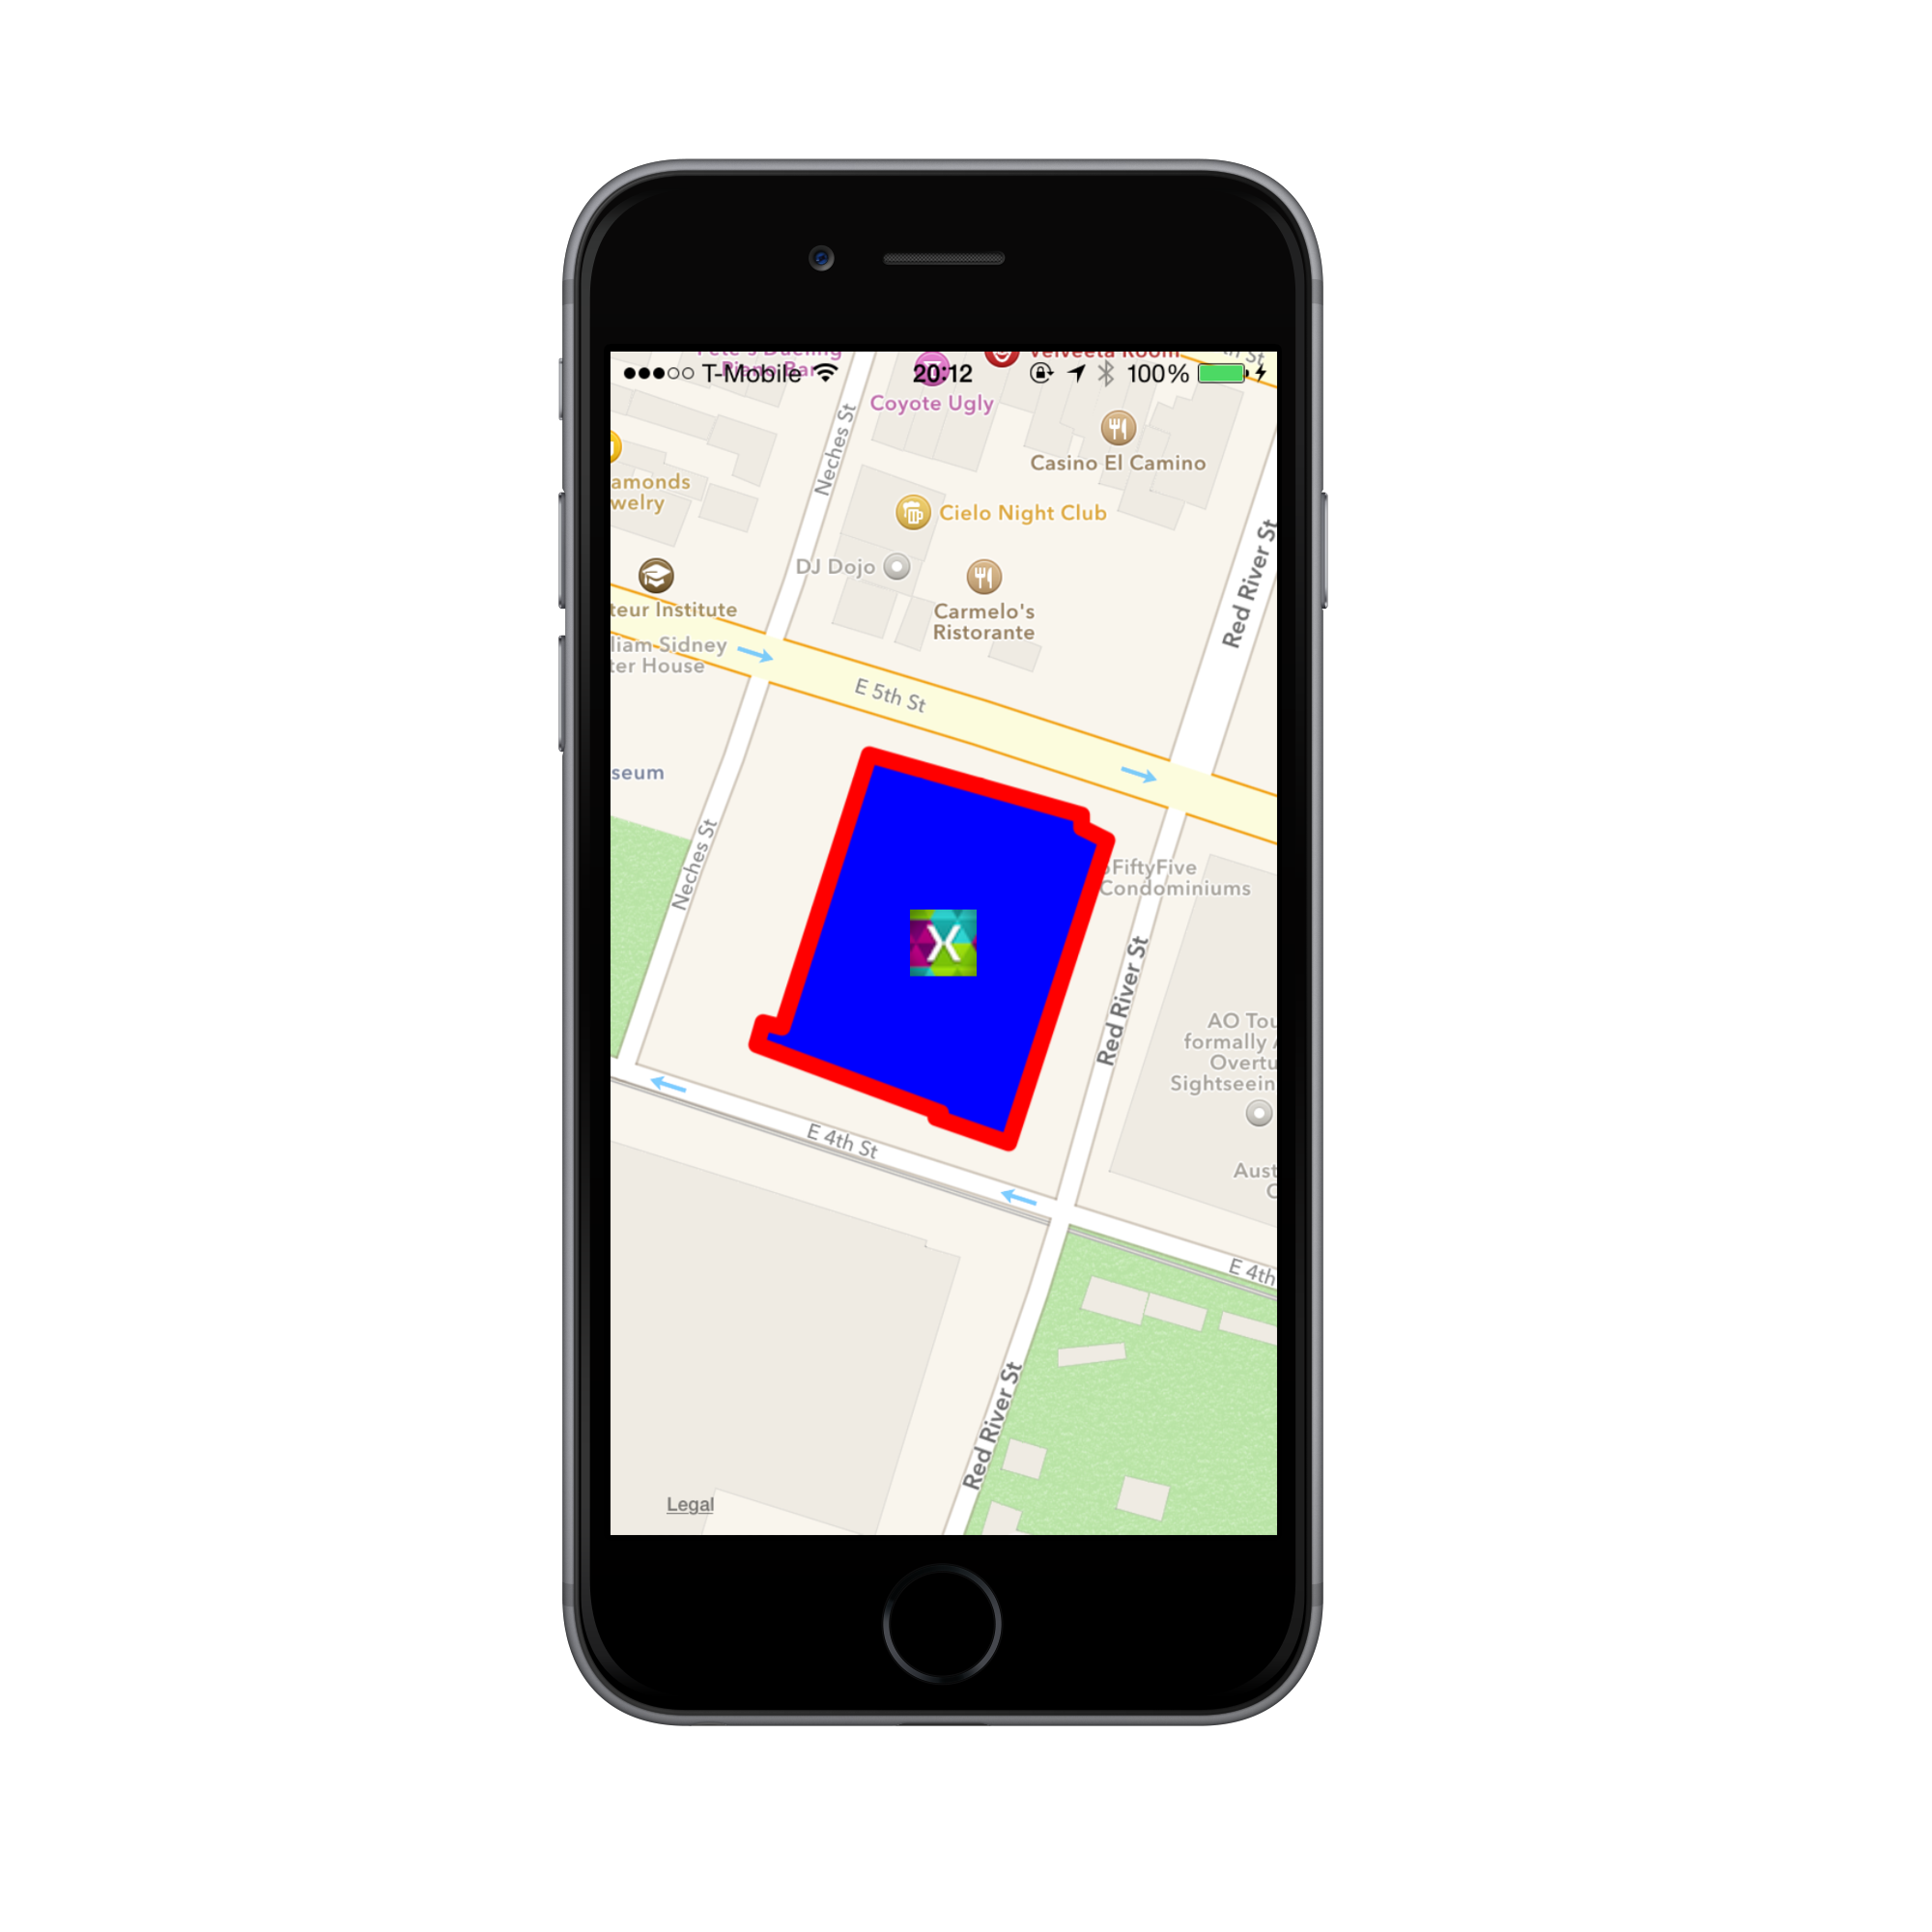
The application we’re going to build in this walkthrough is shown below:
Let's begin by creating a new iOS Empty Project, and giving it a relevant name. We'll start by adding code to our View Controller to display the MapView, and will then create new classes for our MapDelegate, and the custom annotations. Follow the steps below to achieve this:
ViewController
Add the following namespaces to the
ViewController:using MapKit; using CoreLocation; using UIKit using CoreGraphicsAdd an
MKMapViewinstance variable to the class, along with aMapDelegateinstance. We'll create theMapDelegateshortly:public partial class ViewController : UIViewController { MKMapView map; MapDelegate mapDelegate; ...In the controller's
LoadViewmethod, add anMKMapViewand set it to theViewproperty of the controller:public override void LoadView () { map = new MKMapView (UIScreen.MainScreen.Bounds); View = map; }Next, we'll add code to initialize the map in the `ViewDidLoad`` method.
In
ViewDidLoadadd code to set the map type, show the user location and allow zooming and panning:// change map type, show user location and allow zooming and panning map.MapType = MKMapType.Standard; map.ShowsUserLocation = true; map.ZoomEnabled = true; map.ScrollEnabled = true;Next, add code to center the map and set it's region:
double lat = 30.2652233534254;
double lon = -97.73815460962083;
CLLocationCoordinate2D mapCenter = new CLLocationCoordinate2D (lat, lon);
MKCoordinateRegion mapRegion = MKCoordinateRegion.FromDistance (mapCenter, 100, 100);
map.CenterCoordinate = mapCenter;
map.Region = mapRegion;
Create a new instance of
MapDelegateand assign it to theDelegateof theMKMapView. Again, we'll implement theMapDelegateshortly:mapDelegate = new MapDelegate (); map.Delegate = mapDelegate;As of iOS 8, you should be requesting authorization from your user to use their location, so let's add this to our sample. First, define a
CLLocationManagerclass-level variable:CLLocationManager locationManager = new CLLocationManager();In the
ViewDidLoadmethod, we want to check if the device running the application is using iOS 8, and if it is we will request authorization when the app is in use:if (UIDevice.CurrentDevice.CheckSystemVersion(8,0)){ locationManager.RequestWhenInUseAuthorization (); }Finally, we need to edit the Info.plist file to advise users of the reason for requesting their location. In the Source menu of the Info.plist, add the following key:
NSLocationWhenInUseUsageDescriptionand string:
Maps Walkthrough Docs Sample.
ConferenceAnnotation.cs – A class for custom Annotations
We're going to use a custom class for the annotation called
ConferenceAnnotation. Add the following class to the project:using System; using CoreLocation; using MapKit; namespace MapsWalkthrough { public class ConferenceAnnotation : MKAnnotation { string title; CLLocationCoordinate2D coord; public ConferenceAnnotation (string title, CLLocationCoordinate2D coord) { this.title = title; this.coord = coord; } public override string Title { get { return title; } } public override CLLocationCoordinate2D Coordinate { get { return coord; } } } }
ViewController - Adding the annotation and overlay
With the
ConferenceAnnotationin place we can add it to the map. Back in theViewDidLoadmethod of theViewController, add the annotation at the map's center coordinate:map.AddAnnotations (new ConferenceAnnotation ("Evolve Conference", mapCenter));We also want to have an overlay of the hotel. Add the following code to create the
MKPolygonusing the coordinates for the hotel provided, and add it to the map by callAddOverlay:// add an overlay of the hotel MKPolygon hotelOverlay = MKPolygon.FromCoordinates( new CLLocationCoordinate2D[]{ new CLLocationCoordinate2D(30.2649977168594, -97.73863627705), new CLLocationCoordinate2D(30.2648461170005, -97.7381627734755), new CLLocationCoordinate2D(30.2648355402574, -97.7381750192576), new CLLocationCoordinate2D(30.2647791309417, -97.7379872505988), new CLLocationCoordinate2D(30.2654525150319, -97.7377341711021), new CLLocationCoordinate2D(30.2654807195004, -97.7377994819399), new CLLocationCoordinate2D(30.2655089239607, -97.7377994819399), new CLLocationCoordinate2D(30.2656428950368, -97.738346460207), new CLLocationCoordinate2D(30.2650364981811, -97.7385709662122), new CLLocationCoordinate2D(30.2650470749025, -97.7386199493406) }); map.AddOverlay (hotelOverlay);
This completes the code in ViewDidLoad. Now we need to implement our MapDelegate class to handle creating the annotation and overlay views respectively.
MapDelegate
Create a class called
MapDelegatethat inherits fromMKMapViewDelegateand include anannotationIdvariable to use as a reuse identifier for the annotation:class MapDelegate : MKMapViewDelegate { static string annotationId = "ConferenceAnnotation"; ... }We only have one annotation here so the reuse code isn't strictly necessary, but it's a good practice to include it.
Implement the
GetViewForAnnotationmethod to return a view for theConferenceAnnotationusing the conference.png image included with this walkthrough:public override MKAnnotationView GetViewForAnnotation (MKMapView mapView, NSObject annotation) { MKAnnotationView annotationView = null; if (annotation is MKUserLocation) return null; if (annotation is ConferenceAnnotation) { // show conference annotation annotationView = mapView.DequeueReusableAnnotation (annotationId); if (annotationView == null) annotationView = new MKAnnotationView (annotation, annotationId); annotationView.Image = UIImage.FromFile ("images/conference.png"); annotationView.CanShowCallout = true; } return annotationView; }When the user taps on the annotation, we want to display an image showing the city of Austin. Add the following variables to the
MapDelegatefor the image and the view to display it:UIImageView venueView; UIImage venueImage;Next, to show the image when the annotation is tapped, implement the
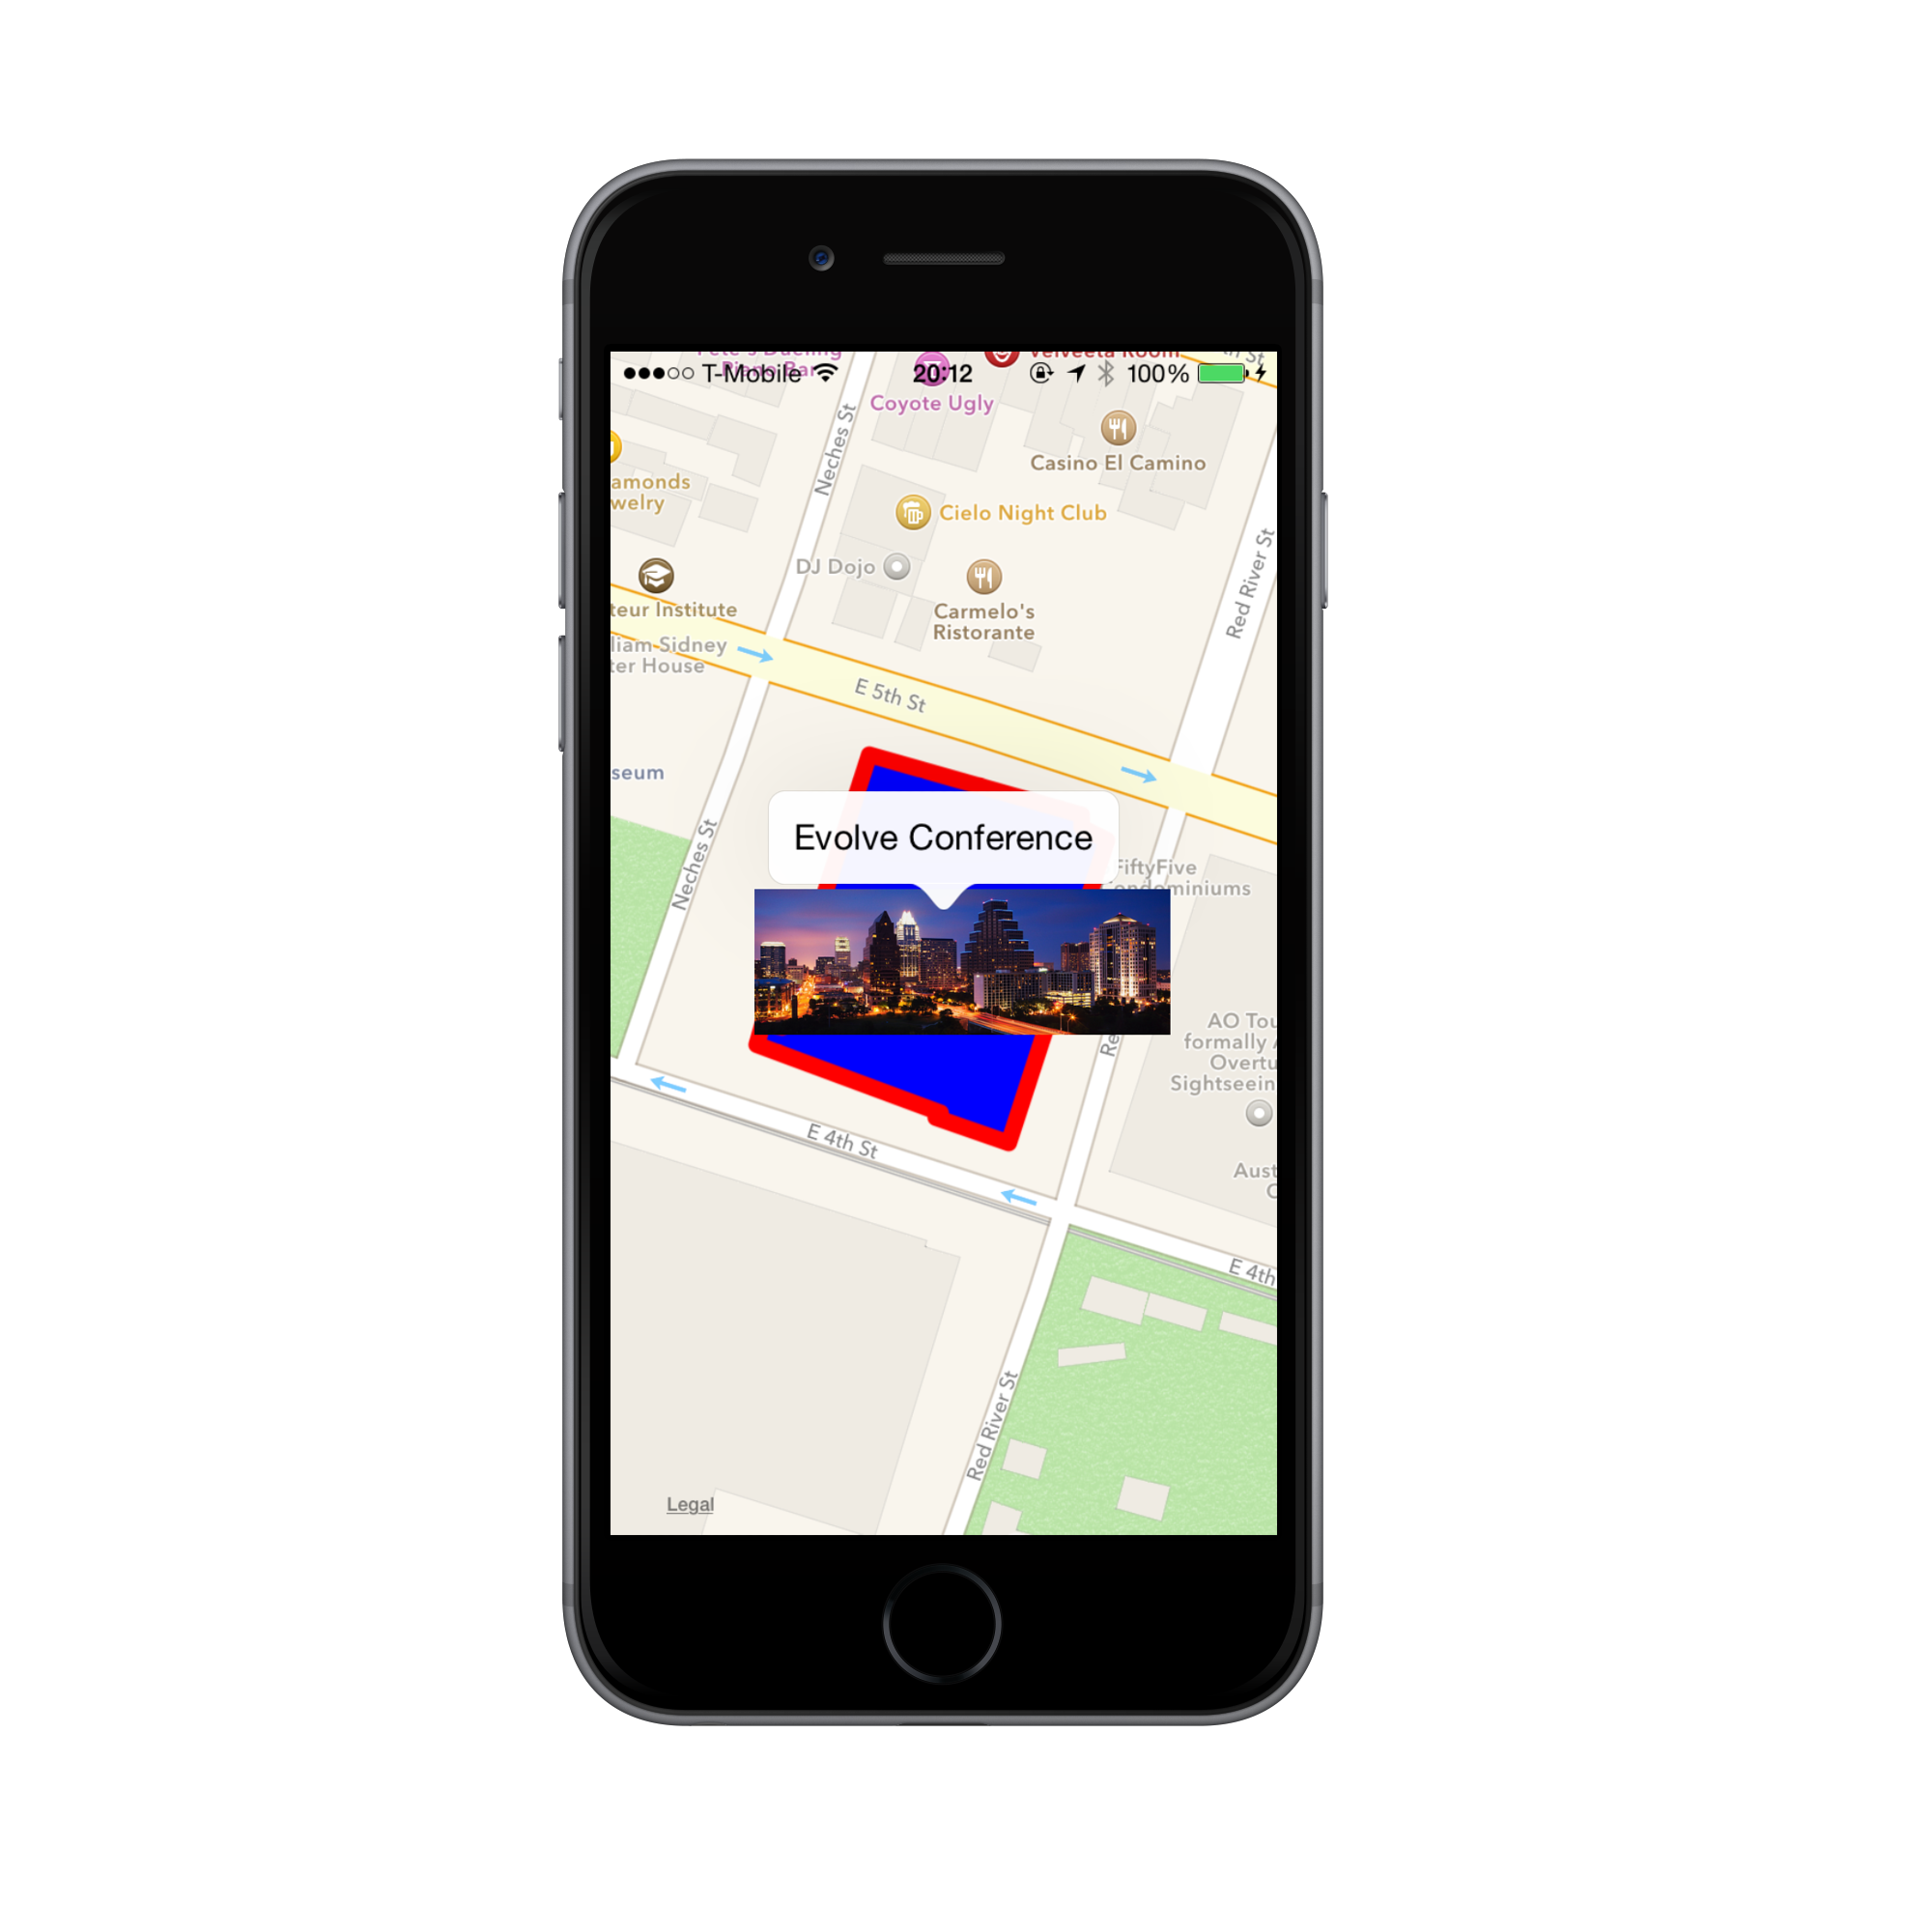
DidSelectAnnotationmethod as follows:public override void DidSelectAnnotationView (MKMapView mapView, MKAnnotationView view) { // show an image view when the conference annotation view is selected if (view.Annotation is ConferenceAnnotation) { venueView = new UIImageView (); venueView.ContentMode = UIViewContentMode.ScaleAspectFit; venueImage = UIImage.FromFile ("image/venue.png"); venueView.Image = venueImage; view.AddSubview (venueView); UIView.Animate (0.4, () => { venueView.Frame = new CGRect (-75, -75, 200, 200); }); } }To hide the image when the user deselects the annotation by tapping anywhere else on the map, implement the
DidDeselectAnnotationViewmethod as follows:public override void DidDeselectAnnotationView (MKMapView mapView, MKAnnotationView view) { // remove the image view when the conference annotation is deselected if (view.Annotation is ConferenceAnnotation) { venueView.RemoveFromSuperview (); venueView.Dispose (); venueView = null; } }We now have the code for the annotation in place. All that is left is to add code to the
MapDelegateto create the view for the hotel overlay.Add the following implementation of
GetViewForOverlayto theMapDelegate:public override MKOverlayView GetViewForOverlay (MKMapView mapView, NSObject overlay) { // return a view for the polygon MKPolygon polygon = overlay as MKPolygon; MKPolygonView polygonView = new MKPolygonView (polygon); polygonView.FillColor = UIColor.Blue; polygonView.StrokeColor = UIColor.Red; return polygonView; }
Run the application. We now have an interactive map with a custom annotation and an overlay! Tap on the annotation and the image of Austin is displayed, as shown below:
Summary
In this article we looked at how to add an annotation to a map as well as how to add an overlay for a specified polygon. We also demonstrated how to add touch support to the annotation to animate an image over a map.

