Tab bars and tab bar controllers in Xamarin.iOS
Tabbed applications are used in iOS to support user interfaces where multiple
screens can be accessed in no particular order. Through the UITabBarController class, applications can easily include support
for such multi-screen scenarios. UITabBarController takes care of
the multi-screen management, allowing the application developer to focus on the
details of each screen.
Usually, tabbed applications are built with the UITabBarController being the RootViewController of the
main window. However, with a bit of additional code, tabbed applications can
also be used in succession to some other initial screen, such as the scenario
where an application first presents a login screen, followed by the tabbed
interface.
This page discusses both scenarios: when the tabs are at the root of the application view hierarchy
and also in the non-RootViewController scenario.
Introducing UITabBarController
The UITabBarController supports tabbed application development
by the following:
- Allowing multiple controllers to be added to it.
- Providing a tabbed user interface, via the
UITabBarclass, to allow a user to switch between controllers and their views.
Controllers are added to the UITabBarController via its ViewControllers property, which is a UIViewController
array. The UITabBarController itself handles loading the proper
controller and presenting its view based upon the selected tab.
The tabs are instances of the UITabBarItem class, which are
contained in a UITabBar instance. Each UITabBar
instance is accessible through the TabBarItem property of the
controller in each tab.
To get an understanding of how to work with the UITabBarController, let’s walk through building a simple
application that uses one.
Tabbed application walkthrough
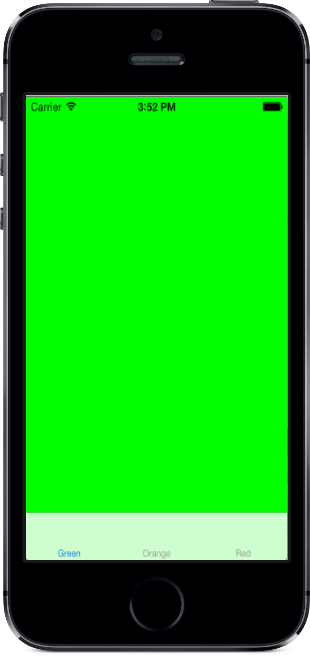
For this walkthrough we’re going to create the following application:
Although there is already a tabbed application template available in Visual Studio for Mac, for this example, these instructions work from an empty project to gain a better understanding of how the application is constructed.
Creating the application
Start by creating a new application.
Select the File > New > Solution menu item in
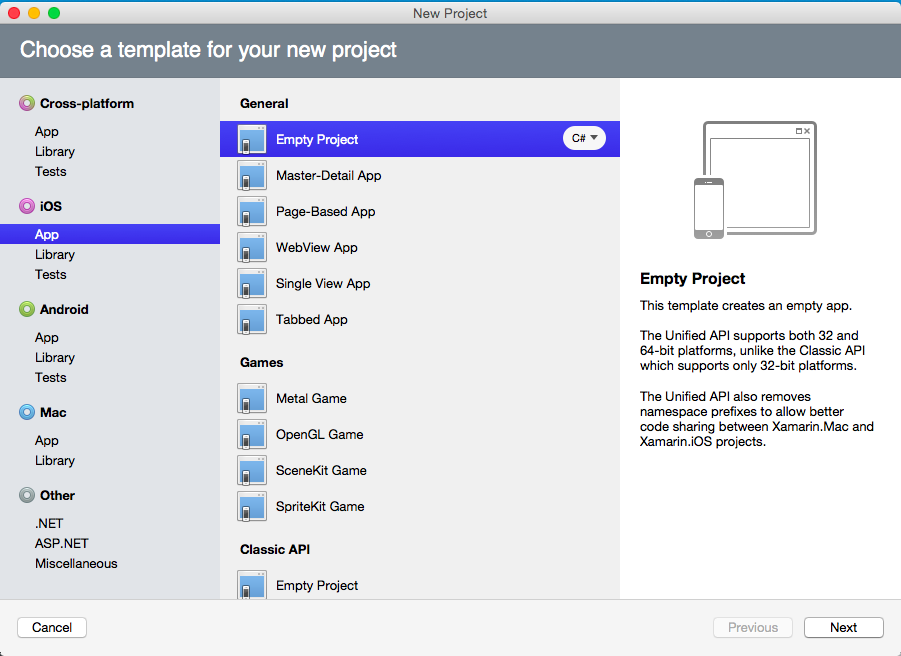
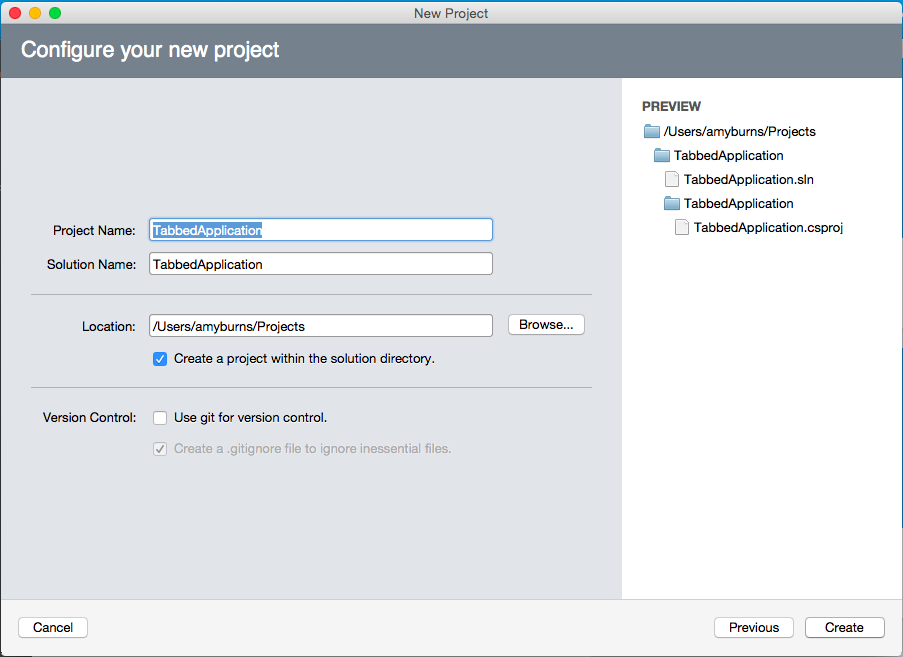
Visual Studio for Mac and select a iOS > App > Empty Project template, Name the project TabbedApplication, as shown below:
Adding the UITabBarController
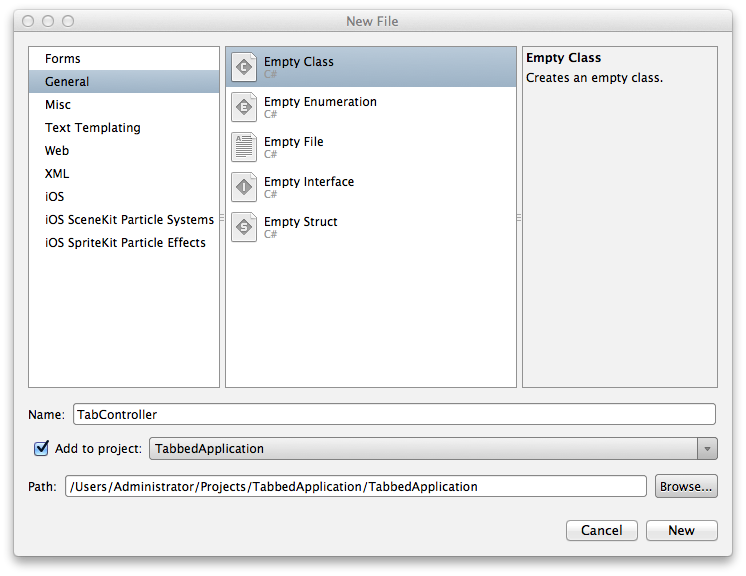
Next, add an empty class by selecting File > New
File and choosing the General : Empty Class template. Name the file TabController as shown below:
The TabController class will contain the implementation of the UITabBarController that will manage an array of UIViewControllers. When the user selects a tab, the UITabBarController will take care of presenting the view for the
appropriate view controller.
To implement the UITabBarController we need to do the
following:
- Set the base class of
TabControllertoUITabBarController. - Create
UIViewControllerinstances to add to theTabController. - Add the
UIViewControllerinstances to an array assigned to theViewControllersproperty of theTabController.
Add the following code to the TabController class to achieve
these steps:
using System;
using UIKit;

namespace TabbedApplication {
    public class TabController : UITabBarController {

        UIViewController tab1, tab2, tab3;

        public TabController ()
        {
            tab1 = new UIViewController();
            tab1.Title = "Green";
            tab1.View.BackgroundColor = UIColor.Green;

            tab2 = new UIViewController();
            tab2.Title = "Orange";
            tab2.View.BackgroundColor = UIColor.Orange;

            tab3 = new UIViewController();
            tab3.Title = "Red";
            tab3.View.BackgroundColor = UIColor.Red;

            var tabs = new UIViewController[] {
                tab1, tab2, tab3
            };

            ViewControllers = tabs;
        }
    }
}
Notice that for each UIViewController instance, we set the Title property of the UIViewController. When the
controllers are added to the UITabBarController, the UITabBarController will read the Title for each
controller and display it on the associated tab’s label as shown below:
Setting the TabController as the RootViewController
The order that the controllers are placed in the tabs corresponds to the
order they are added to the ViewControllers array.
To get the UITabController to load as the first screen, we need
to make it the window’s RootViewController, as shown in the
following code for the AppDelegate:
[Register ("AppDelegate")]
public partial class AppDelegate : UIApplicationDelegate
{
    UIWindow window;
    TabController tabController;

    public override bool FinishedLaunching (UIApplication app, NSDictionary options)
    {
        window = new UIWindow (UIScreen.MainScreen.Bounds);

        tabController = new TabController ();
        window.RootViewController = tabController;

        window.MakeKeyAndVisible ();

        return true;
    }
}
If we run the application now, the UITabBarController will load
with the first tab selected by default. Selecting any of the other tabs results
in the associated controller’s view being presented by the UITabBarController, as shown below where the end user has selected
the second tab:

Modifying TabBarItems
Now that we have a running tab application, let’s modify the TabBarItem to change the image and text that is displayed, as well as to add a badge to one of the tabs.
Setting a system item
First, let’s set the first tab to use a system item. In the constructor of
the TabController, remove the line that sets the controller’s Title for the tab1 instance and replace it with the
following code to set the controller’s TabBarItem property:
tab1.TabBarItem = new UITabBarItem (UITabBarSystemItem.Favorites, 0);
When creating the UITabBarItem using a UITabBarSystemItem, the title and image are provided automatically
by iOS, as seen in the screenshot below showing the Favorites
icon and title on the first tab:

Setting the image
In addition to using a system item, the title and image of a UITabBarItem can be set to custom values. For example, change the
code that sets the TabBarItem property of the controller named tab2 as follows:
tab2 = new UIViewController ();
tab2.TabBarItem = new UITabBarItem ();
tab2.TabBarItem.Image = UIImage.FromFile ("second.png");
tab2.TabBarItem.Title = "Second";
tab2.View.BackgroundColor = UIColor.Orange;
The above code assumes an image named second.png has been added
to the root of the project (or a Resources directory). To support all screen densities, you need three images, as shown below:

The recommended size varies based on the style of the image (circular, square, wide, or tall).
The Image property only needs to be set to the second.png filename, iOS will automatically load the higher resolution files when needed. You can read more about this in the Working with Images guides. By default tab bar items are grey, with a blue tint when selected.
Overriding the title
When the Title property is set directly on the TabBarItem, it will override any value set for Title on the controller itself.
The second (middle) tab in this screenshot shows a custom title and image:

Setting the badge value
A tab can also display a badge. For example, add the following line of code to set a badge on the third tab:
tab3.TabBarItem.BadgeValue = "Hi";
Running this results in a red label with the string “Hi” in the upper left corner of the tab as shown below:

The badge is often used to display a number indication unread, new items. To
remove the badge, set the BadgeValue to null as shown below:
tab3.TabBarItem.BadgeValue = null;
Tabs in non-RootViewController scenarios
In the example above, we showed how to work with a UITabBarController when it is the RootViewController
of the window. In this example we will examine how to use a UITabBarController
when it is not the RootViewController and show how this is created use Storyboards.
Initial screen example
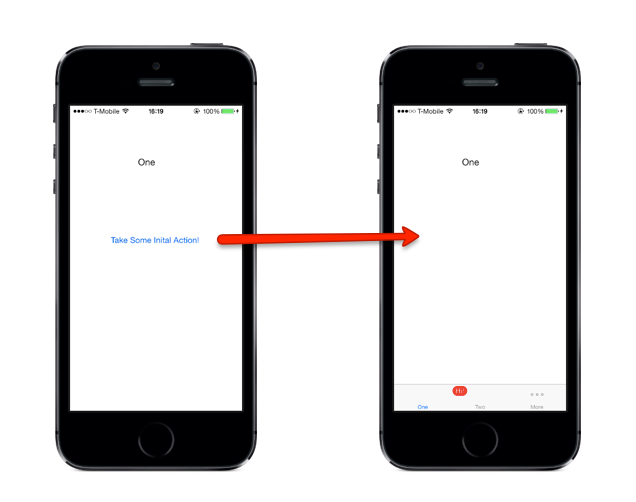
For this scenario, the initial screen loads from a controller that is not a UITabBarController. When the user interacts with the screen by
tapping a button, the same View Controller will be loaded into a UITabBarController, which is then presented to the user. The
following screenshot shows the application flow:
Let’s start a new application for this example. Again, we’ll use the iPhone > App > Empty Project (C#) template,
this time naming the project InitialScreenDemo.
In this example, a storyboard is used to lay out view controllers. To add a storyboard:
Right-click on the Project name, and select Add > New File.
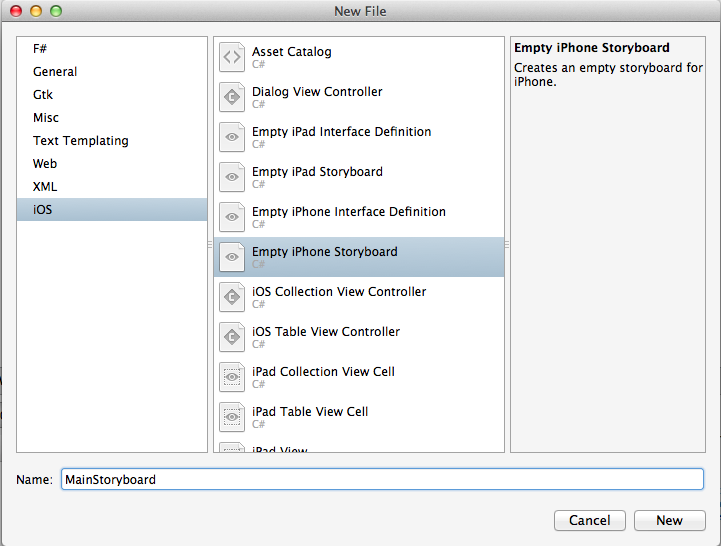
When the New File dialog appears, navigate to iOS > Empty iPhone Storyboard.
Let's call this new Storyboard MainStoryboard , as illustrated below:
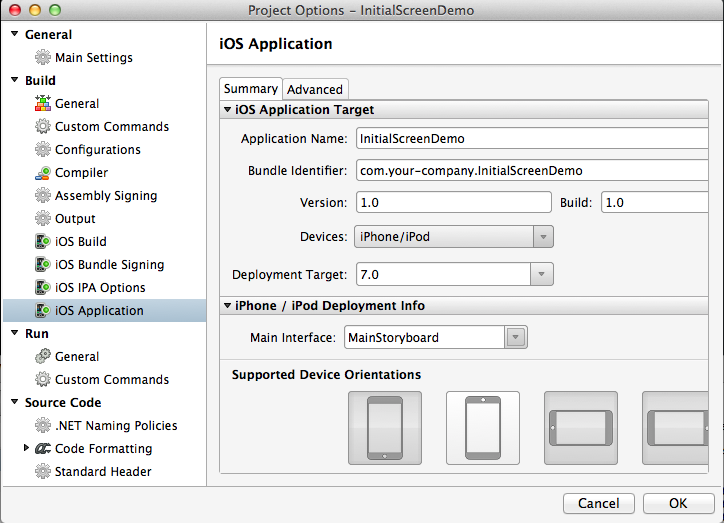
There are a few important steps to note when adding a Storyboard to a previously non-storyboard file, which are covered in the Introduction to Storyboards guide. These are:
Add your Storyboard name to the Main Interface section of the
Info.plist:In your
App Delegate, override the Window method, with the following code:public override UIWindow Window { get; set; }
We are going to need three View Controllers for this example. One, named ViewController1, will be used as our Initial View Controller and in the first tab. The other two, named ViewController2 and ViewController3, which will be used in the second and third tabs respectively.
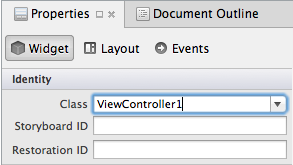
Open the Designer by double clicking the MainStoryboard.storyboard file, and drag three View Controllers on to the design surface. We want each of these View Controllers to have their own class corresponding to the name above, So, under Identity > Class, type in its name, as illustrated in the screenshot below:
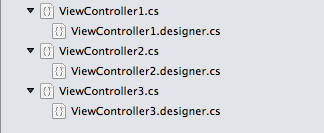
Visual Studio for Mac will automatically generate the classes and designer files needed, this can be seen in the Solution Pad, as illustrated below:
Creating the UI
Next, we’ll create a simple user interface for each of the ViewController's views, using the Xamarin iOS Designer.
We want to drag a Label and a Button onto ViewController1 from the ToolBox on the right hand side. Next we'll use the Properties Pad to edit the name and text of the controls to the following:
- Label :
Text= One - Button :
Title= User Takes Some Initial Action
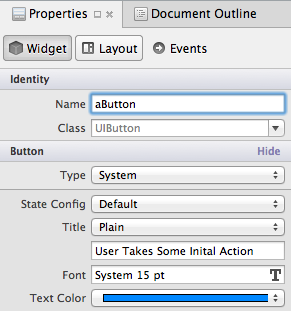
We will be controlling the visibility of our button in a TouchUpInside event, and we need to refer to it in the code behind. Let's identify it with the Name aButton in the Properties Pad, as depicted in the following screenshot:
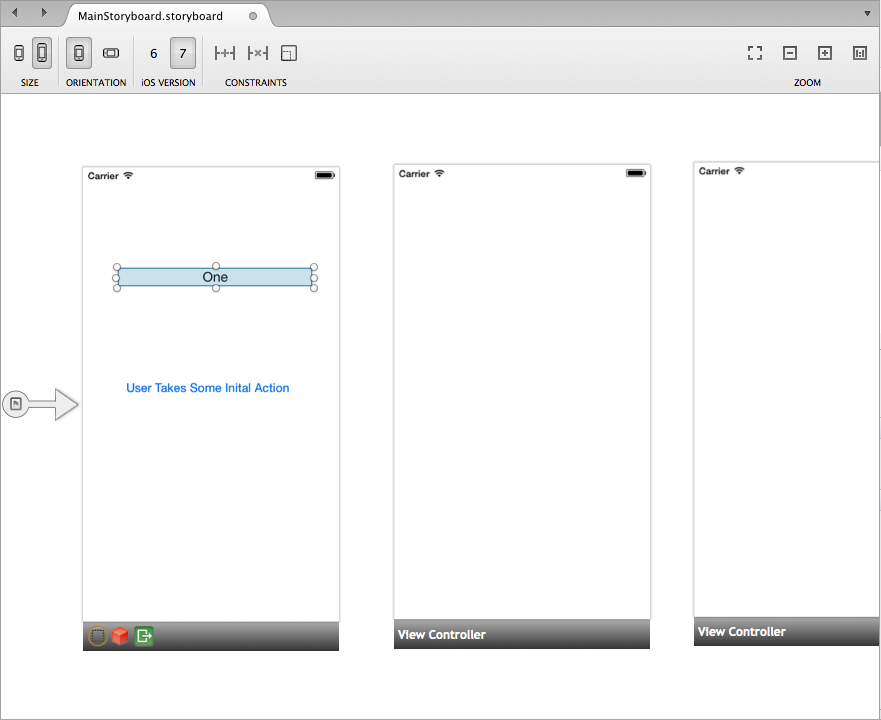
Your Design Surface should now look similar to the screenshot below:
Let's add a little more detail to ViewController2 and ViewController3, by adding a label to each, and changing the text to 'Two' and 'Three' respectively. This highlights to the user which tab/View we are looking at.
Wiring up the button
We’re going to load ViewController1 when the application first starts. When the user taps the button, we’ll hide the button and load a UITabBarController with the ViewController1 instance
in the first tab.
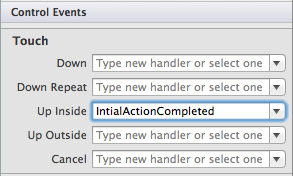
When the user releases the aButton, we want a TouchUpInside event to be triggered. Let's select the button, and in the Events Tab of the Properties pad, declare the event handler – InitialActionCompleted – so it can be referred to in code. This is illustrated in the screenshot below:
We now need to tell the View Controller to hide the button when the event fires InitialActionCompleted. In ViewController1, add the following partial method:
partial void InitialActionCompleted (UIButton sender)
{
    aButton.Hidden = true;
}
Save the file, and run the application. We should see screen one appear and the button disappear on Touch Up.
Adding the tab bar controller
We now have our Initial view working as expected. Next, we want to add it to a UITabBarController, along with Views 2 and 3. Let's open the Storyboard in the Designer.
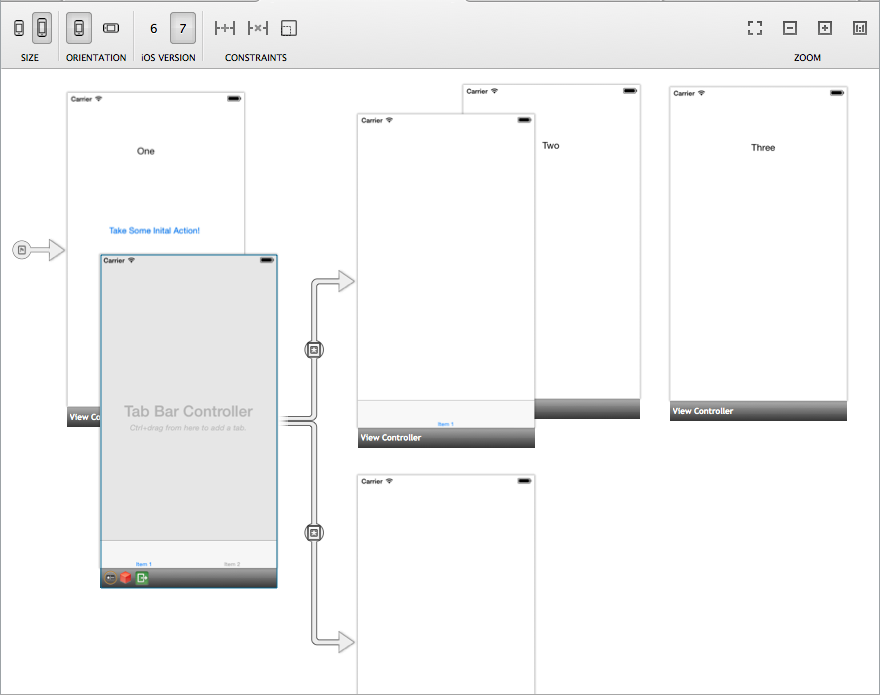
In the Toolbox, search for the Tab Bar Controller under Controllers & Objects and drag this onto the Design Surface. As you can see in the screenshot below, the Tab Bar Controller is UI-less and therefore brings two View Controllers with it by default:
Delete these new View controllers by selecting the black bar at the bottom and pressing delete.
In our Storyboard, we can use Segues to handle the transitions between the TabBarController and our View Controllers. After interacting with the Initial View, we want to load it into the TabBarController presented to the user. Let's set this up in the designer.
Ctrl-Click and Drag from the button to the TabBarController. On mouse-up, a context menu will appear. We want to use a modal segue.
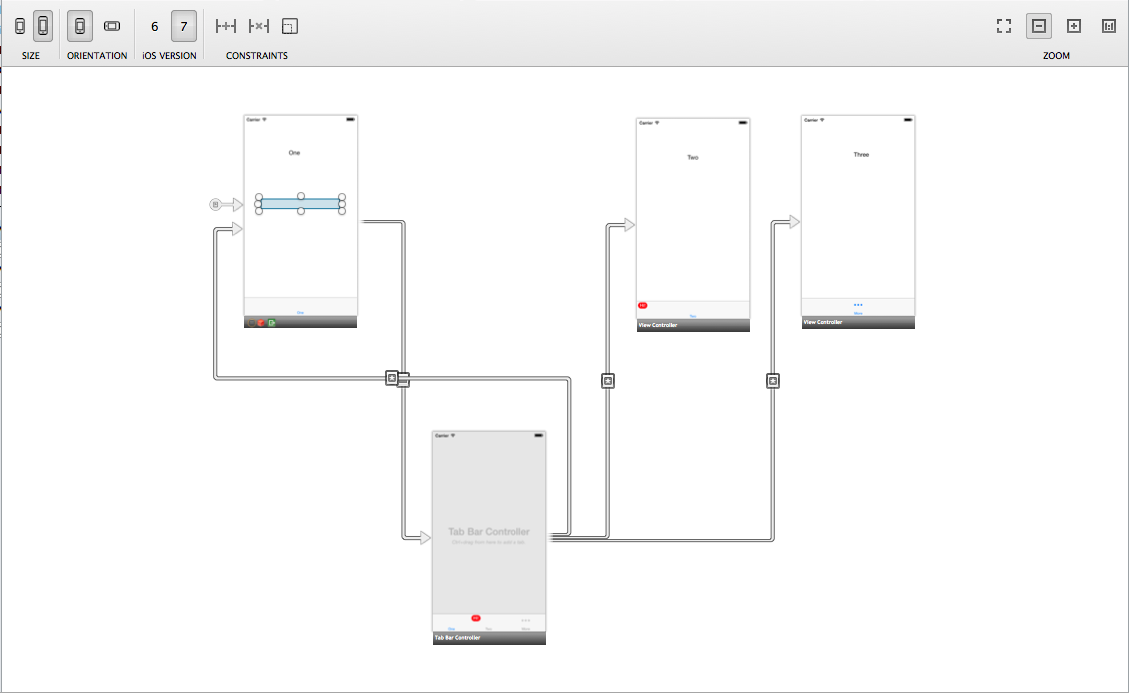
To set up each of our tabs, Ctrl-Click from the TabBarController to each of our View Controllers in order from one to three, and select the Relationship Tab from the context menu, as illustrated below:
Your Storyboard should resemble the screenshot below:
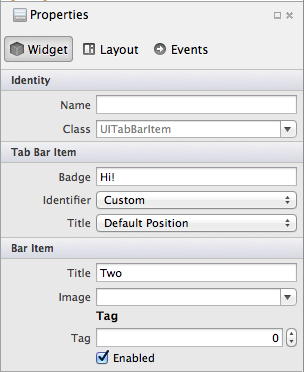
If we click on one of the tab bar items and explore the properties panel, you can see a number of different options, as illustrated below:
We can use this to edit certain attributes such as the badge, the title and the iOS identifier, among others.
If we save and run the application now, we'll find that the button reappears when the ViewController1 instance is loaded into the TabBarController. Let's fix this by checking to see if the current View has a parent View Controller. If it does, we know we are inside the TabBarController, and therefore the button should be hidden. Let's add the code below to the ViewController1 class:
public override void ViewDidLoad ()
{
    if (ParentViewController != null){
        aButton.Hidden = true;
    }
}
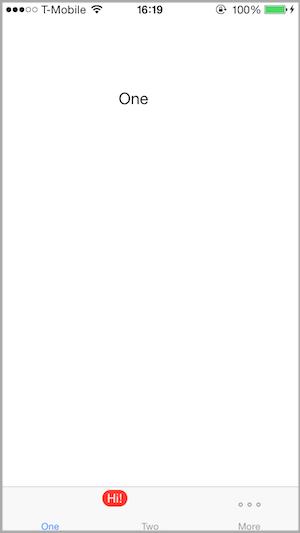
When the application runs and the user taps the button on the first screen, the UITabBarController is loaded, with the view from the first screen placed in the first tab as shown below:
Summary
This article covered how to use a UITabBarController in an
application. We walked through how to load controllers into each tab as well as
how to set properties on tabs such the title, image and badge. We then examined, using storyboards,
how to load a UITabBarController at runtime when it is not the RootViewController of the window.
