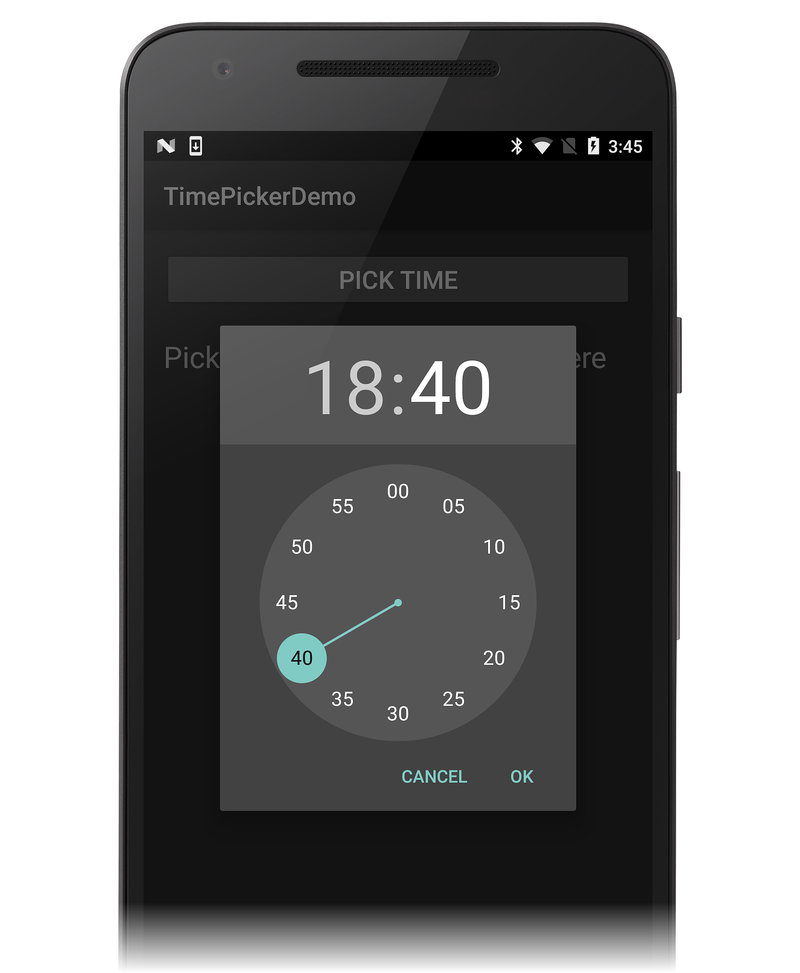
Android Time Picker
To provide a way for the user to select a time, you can use
TimePicker. Android apps
typically use TimePicker with
TimePickerDialog for
selecting a time value – this helps to ensure a consistent
interface across devices and applications. TimePicker allows users to
select the time of day in either 24-hour or 12-hour AM/PM mode.
TimePickerDialog is a helper class that encapsulates the TimePicker
in a dialog.
Overview
Modern Android applications display the TimePickerDialog in a
DialogFragment. This makes
it possible for an application to display the TimePicker as a popup
dialog or embed it in an Activity. In addition, the DialogFragment
manages the lifecycle and display of the dialog, reducing the amount of
code that must be implemented.
This guide demonstrates how to use the TimePickerDialog, wrapped in a
DialogFragment. The sample application displays the
TimePickerDialog as a modal dialog when the user clicks a button on
an Activity. When the time is set by the user, the dialog exits and a
handler updates a TextView on the Activity screen with the time that
was selected.
Requirements
The sample application for this guide targets Android 4.1 (API level 16) or higher, but is can be used with Android 3.0 (API level 11 or higher). It is possible to support older versions of Android with the addition of the Android Support Library v4 to the project and some code changes.
Using the TimePicker
This example extends DialogFragment; the subclass implementation
of DialogFragment (called TimePickerFragment below) hosts
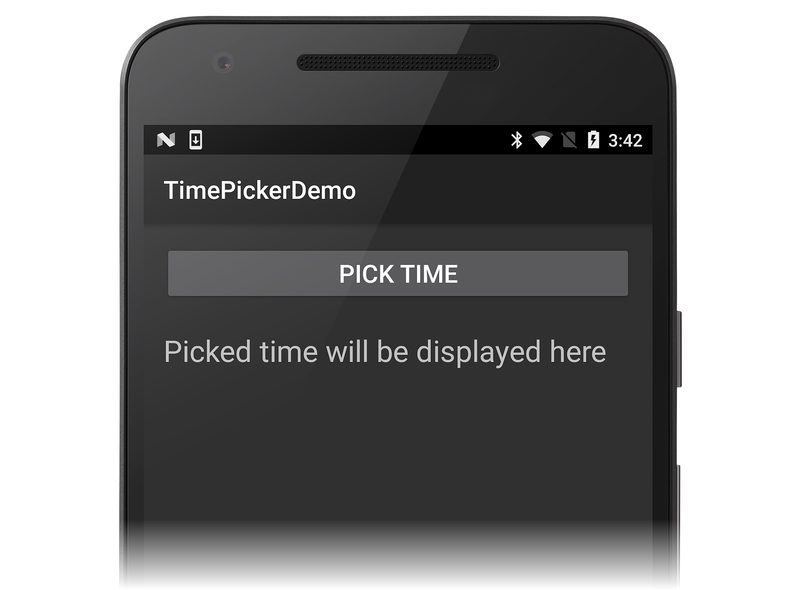
and displays a TimePickerDialog. When the sample app is first
launched, it displays a PICK TIME button above a TextView that
will be used to display the selected time:
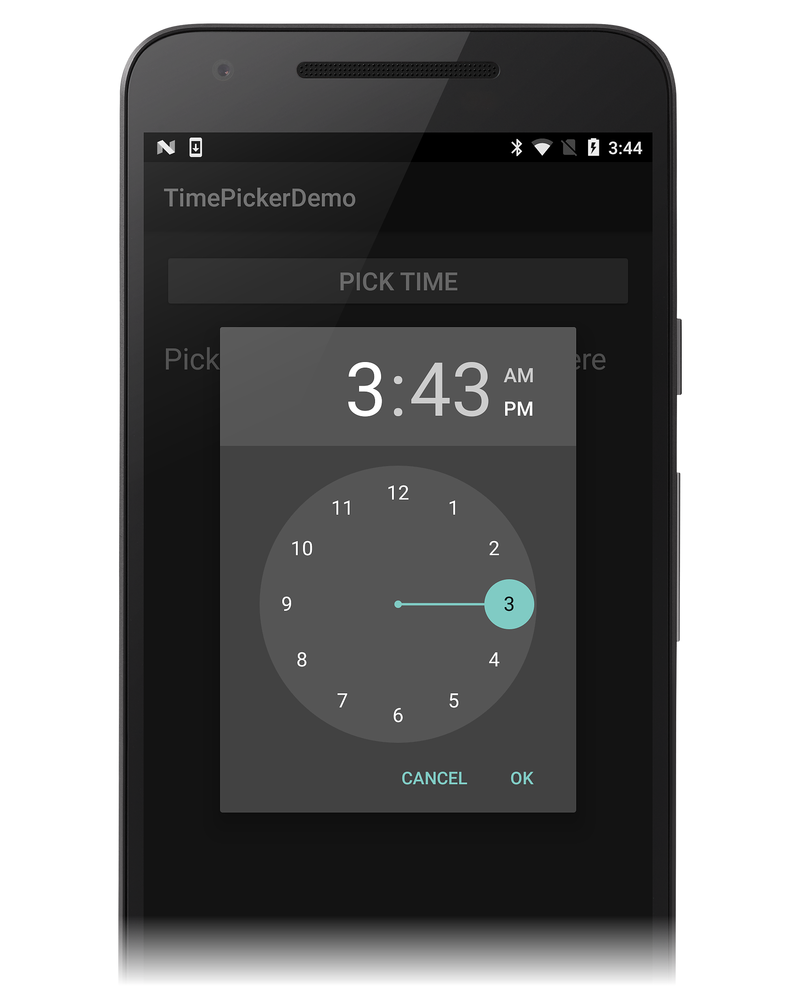
When you click the PICK TIME button, the example app launches the
TimePickerDialog as seen in this screenshot:
In the TimePickerDialog, selecting a time and clicking the OK
button causes the TimePickerDialog to invoke the method
IOnTimeSetListener.OnTimeSet.
This interface is implemented by the hosting DialogFragment
(TimePickerFragment, described below). Clicking the Cancel
button causes the fragment and dialog to be dismissed.
DialogFragment returns the selected time to the hosting Activity in
one of three ways:
Invoking a method or setting a property – The Activity can provide a property or method specifically for setting this value.
Raising an event – The
DialogFragmentcan define an event that will be raised whenOnTimeSetis invoked.Using an
Action– TheDialogFragmentcan invoke anAction<DateTime>to display the time in the Activity. The Activity will provide theAction<DateTimewhen instantiating theDialogFragment.
This sample will use the third technique, which requires that the
Activity supply an Action<DateTime> handler to the DialogFragment.
Start an App Project
Start a new Android project called TimePickerDemo (if you are not familiar with creating Xamarin.Android projects, see Hello, Android to learn how to create a new project).
Edit Resources/layout/Main.axml and replace its contents with the following XML:
<?xml version="1.0" encoding="utf-8"?>
<LinearLayout xmlns:android="http://schemas.android.com/apk/res/android"
    android:orientation="vertical"
    android:layout_width="match_parent"
    android:layout_height="match_parent"
    android:layout_gravity="center_horizontal"
    android:padding="16dp">
    <Button
        android:id="@+id/select_button"
        android:paddingLeft="24dp"
        android:paddingRight="24dp"
        android:layout_width="match_parent"
        android:layout_height="wrap_content"
        android:text="PICK TIME"
        android:textSize="20dp" />
    <TextView
        android:id="@+id/time_display"
        android:layout_height="wrap_content"
        android:layout_width="match_parent"
        android:paddingTop="22dp"
        android:text="Picked time will be displayed here"
        android:textSize="24dp" />
</LinearLayout>
This is a basic
LinearLayout with a
TextView that displays the time
and a
Button that opens the
TimePickerDialog. Note that this layout uses hard-coded strings and
dimensions to make the app simpler and easier to understand – a
production app normally uses resources for these values (as can be seen
in the
DatePicker
code example).
Edit MainActivity.cs and replace its contents with the following code:
using Android.App;
using Android.Widget;
using Android.OS;
using System;
using Android.Util;
using Android.Text.Format;

namespace TimePickerDemo
{
    [Activity(Label = "TimePickerDemo", MainLauncher = true, Icon = "@drawable/icon")]
    public class MainActivity : Activity
    {
        TextView timeDisplay;
        Button timeSelectButton;

        protected override void OnCreate(Bundle bundle)
        {
            base.OnCreate(bundle);
            SetContentView(Resource.Layout.Main);
            timeDisplay = FindViewById<TextView>(Resource.Id.time_display);
            timeSelectButton = FindViewById<Button>(Resource.Id.select_button);
        }
    }
}
When you build and run this example, you should see an initial screen similar to the following screen shot:
Clicking the PICK TIME button does nothing because the
DialogFragment has not yet been implemented to display the TimePicker.
The next step is to create this DialogFragment.
Extending DialogFragment
To extend DialogFragment for use with TimePicker, it is necessary
to create a subclass that is derived from DialogFragment and
implements TimePickerDialog.IOnTimeSetListener. Add the following
class to MainActivity.cs:
public class TimePickerFragment : DialogFragment, TimePickerDialog.IOnTimeSetListener
{
    public static readonly string TAG = "MyTimePickerFragment";
    Action<DateTime> timeSelectedHandler = delegate { };

    public static TimePickerFragment NewInstance(Action<DateTime> onTimeSelected)
    {
        TimePickerFragment frag = new TimePickerFragment();
        frag.timeSelectedHandler = onTimeSelected;
        return frag;
    }

    public override Dialog OnCreateDialog (Bundle savedInstanceState)
    {
        DateTime currentTime = DateTime.Now;
        bool is24HourFormat = DateFormat.Is24HourFormat(Activity);
        TimePickerDialog dialog = new TimePickerDialog
            (Activity, this, currentTime.Hour, currentTime.Minute, is24HourFormat);
        return dialog;
    }

    public void OnTimeSet(TimePicker view, int hourOfDay, int minute)
    {
        DateTime currentTime = DateTime.Now;
        DateTime selectedTime = new DateTime(currentTime.Year, currentTime.Month, currentTime.Day, hourOfDay, minute, 0);
        Log.Debug(TAG, selectedTime.ToLongTimeString());
        timeSelectedHandler (selectedTime);
    }
}
This TimePickerFragment class is broken down into smaller pieces and
explained in the next section.
DialogFragment Implementation
TimePickerFragment implements several methods: a factory method, a
Dialog instantiation method, and the OnTimeSet handler method
required by TimePickerDialog.IOnTimeSetListener.
TimePickerFragmentis a subclass ofDialogFragment. It also implements theTimePickerDialog.IOnTimeSetListenerinterface (that is, it supplies the requiredOnTimeSetmethod):public class TimePickerFragment : DialogFragment, TimePickerDialog.IOnTimeSetListenerTAGis initialized for logging purposes (MyTimePickerFragment can be changed to whatever string you want to use). ThetimeSelectedHandlerAction is initialized to an empty delegate to prevent null reference exceptions:public static readonly string TAG = "MyTimePickerFragment"; Action<DateTime> timeSelectedHandler = delegate { };The
NewInstancefactory method is called to instantiate a newTimePickerFragment. This method takes anAction<DateTime>handler that is invoked when the user clicks the OK button in theTimePickerDialog:public static TimePickerFragment NewInstance(Action<DateTime> onTimeSelected) { TimePickerFragment frag = new TimePickerFragment(); frag.timeSelectedHandler = onTimeSelected; return frag; }When the fragment is to be displayed, Android calls the
DialogFragmentmethod OnCreateDialog. This method creates a newTimePickerDialogobject and initializes it with the Activity, the callback object (which is the current instance of theTimePickerFragment), and the current time:public override Dialog OnCreateDialog (Bundle savedInstanceState) { DateTime currentTime = DateTime.Now; bool is24HourFormat = DateFormat.Is24HourFormat(Activity); TimePickerDialog dialog = new TimePickerDialog (Activity, this, currentTime.Hour, currentTime.Minute, is24HourFormat); return dialog; }When the user changes the time setting in the
TimePickerdialog, theOnTimeSetmethod is invoked.OnTimeSetcreates aDateTimeobject using the current date and merges in the time (hour and minute) selected by the user:public void OnTimeSet(TimePicker view, int hourOfDay, int minute) { DateTime currentTime = DateTime.Now; DateTime selectedTime = new DateTime(currentTime.Year, currentTime.Month, currentTime.Day, hourOfDay, minute, 0);This
DateTimeobject is passed to thetimeSelectedHandlerthat is registered with theTimePickerFragmentobject at creation time.OnTimeSetinvokes this handler to update the Activity's time display to the selected time (this handler is implemented in the next section):timeSelectedHandler (selectedTime);
Displaying the TimePickerFragment
Now that the DialogFragment has been implemented, it is time to
instantiate the DialogFragment using the NewInstance factory method
and display it by invoking
DialogFragment.Show:
Add the following method to MainActivity:
void TimeSelectOnClick (object sender, EventArgs eventArgs)
{
    TimePickerFragment frag = TimePickerFragment.NewInstance (
        delegate (DateTime time)
        {
            timeDisplay.Text = time.ToShortTimeString();
        });

    frag.Show(FragmentManager, TimePickerFragment.TAG);
}
After TimeSelectOnClick instantiates a TimePickerFragment, it
creates and passes in a delegate for an anonymous method that updates
the Activity's time display with the passed-in time value. Finally, it
launches the TimePicker dialog fragment (via DialogFragment.Show)
to display the TimePicker to the user.
At the end of the OnCreate method, add the following line to attach
the event handler to the PICK TIME button that launches the dialog:
timeSelectButton.Click += TimeSelectOnClick;
When the PICK TIME button is clicked, TimeSelectOnClick will be
invoked to display the TimePicker dialog fragment to the user.
Try It!
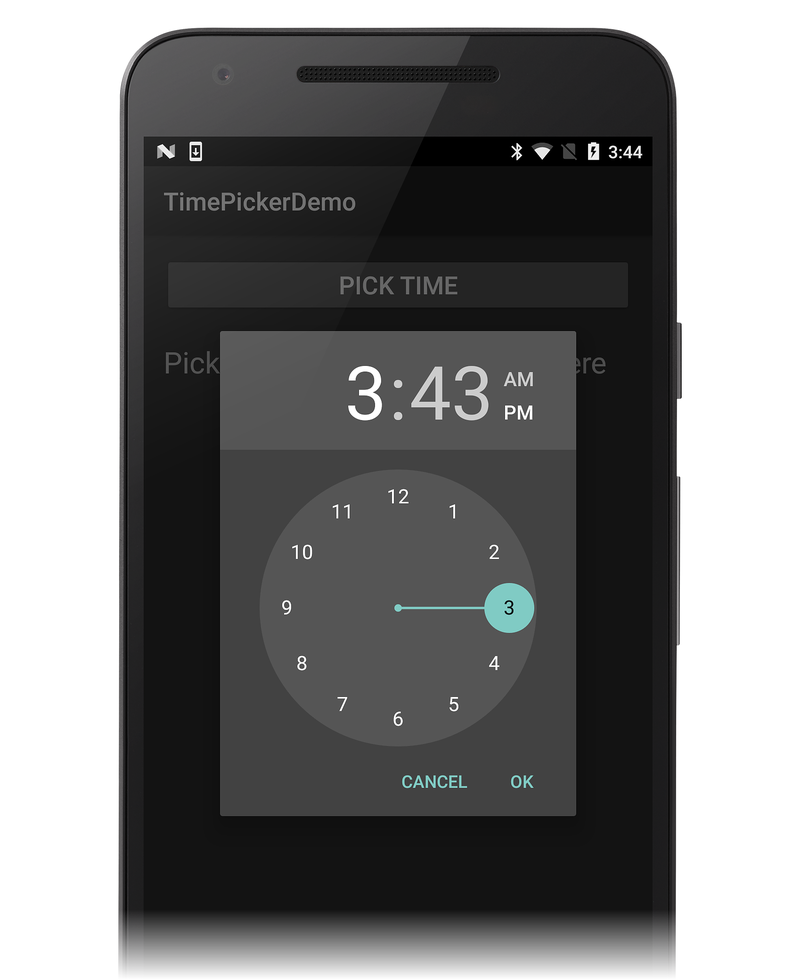
Build and run the app. When you click the PICK TIME button, the
TimePickerDialog is displayed in the default time format for
the Activity (in this case, 12-hour AM/PM mode):
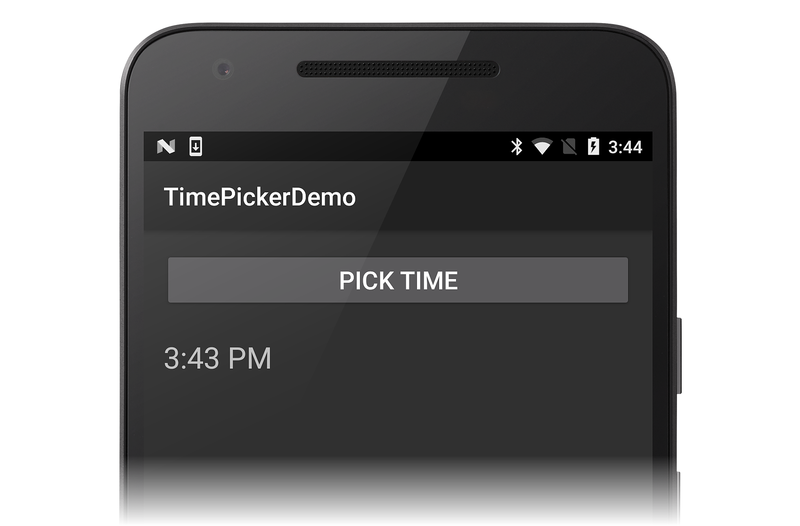
When you click OK in the TimePicker dialog, the handler updates the
Activity's TextView with the chosen time and then exits:
Next, add the following line of code to OnCreateDialog immediately
after is24HourFormat is declared and initialized:
is24HourFormat = true;
This change forces the flag passed to the TimePickerDialog constructor
to be true so that 24-hour mode is used instead of the time format
of the hosting Activity. When you build and run the app again, click
the PICK TIME button, the TimePicker dialog is now displayed in 24
hour format:
Because the handler calls
DateTime.ToShortTimeString
to print the time to the Activity's TextView, the time is still printed
in the default 12-hour AM/PM format.
Summary
This article explained how to display a TimePicker widget as a popup
modal dialog from an Android Activity. It provided a sample
DialogFragment implementation and discussed the IOnTimeSetListener
interface. This sample also demonstrated how the DialogFragment can
interact with the host Activity to display the selected time.
