Walkthrough - Using local notifications in Xamarin.Android
This walkthrough demonstrates how to use local notifications in Xamarin.Android applications. It demonstrates the basics of creating and publishing a local notification. When the user clicks the notification in the notification area, it starts up a second Activity.
Overview
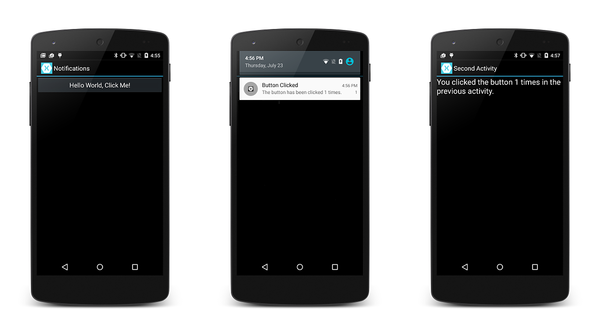
In this walkthrough, we will create an Android application that raises a notification when the user clicks a button in an Activity. When the user clicks the notification, it launches a second Activity that displays the number of times the user had clicked the button in the first Activity.
The following screenshots illustrate some examples of this application:
Note
This guide focuses on the NotificationCompat APIs from the Android support library. These APIs will ensure maximum backwards compatibility to Android 4.0 (API level 14).
Creating the project
To begin, let's create a new Android project using the Android App template. Let's call this project LocalNotifications. (If you are not familiar with creating Xamarin.Android projects, see Hello, Android.)
Edit the resource file values/Strings.xml so that it contains two extra string resources that will be used when it is time to create the notification channel:
<?xml version="1.0" encoding="utf-8"?>

<resources>
  <string name="Hello">Hello World, Click Me!</string>
  <string name="ApplicationName">Notifications</string>

  <string name="channel_name">Local Notifications</string>
  <string name="channel_description">The count from MainActivity.</string>
</resources>
Add the Android.Support.V4 NuGet package
In this walkthrough, we are using NotificationCompat.Builder to build
our local notification. As explained in
Local Notifications,
we must include the
Android Support Library v4
NuGet in our project to use NotificationCompat.Builder.
Next, let's edit MainActivity.cs and add the following using
statement so that the types in Android.Support.V4.App are available
to our code:
using Android.Support.V4.App;
Also, we must make it clear to the compiler that we are using the
Android.Support.V4.App version of TaskStackBuilder rather than the
Android.App version. Add the following using statement to resolve
any ambiguity:
using TaskStackBuilder = Android.Support.V4.App.TaskStackBuilder;
Create the notification channel
Next, add a method to MainActivity that will create a notification channel (if necessary):
void CreateNotificationChannel()
{
    if (Build.VERSION.SdkInt < BuildVersionCodes.O)
    {
        // Notification channels are new in API 26 (and not a part of the
        // support library). There is no need to create a notification
        // channel on older versions of Android.
        return;
    }

    var name = Resources.GetString(Resource.String.channel_name);
    var description = GetString(Resource.String.channel_description);
    var channel = new NotificationChannel(CHANNEL_ID, name, NotificationImportance.Default)
                  {
                      Description = description
                  };

    var notificationManager = (NotificationManager) GetSystemService(NotificationService);
    notificationManager.CreateNotificationChannel(channel);
}
Update the OnCreate method to call this new method:
protected override void OnCreate(Bundle bundle)
{
    base.OnCreate(bundle);
    SetContentView(Resource.Layout.Main);

    CreateNotificationChannel();
}
Define the notification ID
We will need a unique ID for our notification and notification channel. Let's edit
MainActivity.cs and add the following static instance variable to
the MainActivity class:
static readonly int NOTIFICATION_ID = 1000;
static readonly string CHANNEL_ID = "location_notification";
internal static readonly string COUNT_KEY = "count";
Add code to generate the notification
Next, we need to create a new event handler for the button Click
event. Add the following method to MainActivity:
void ButtonOnClick(object sender, EventArgs eventArgs)
{
    // Pass the current button press count value to the next activity:
    var valuesForActivity = new Bundle();
    valuesForActivity.PutInt(COUNT_KEY, count);

    // When the user clicks the notification, SecondActivity will start up.
    var resultIntent = new Intent(this, typeof(SecondActivity));

    // Pass some values to SecondActivity:
    resultIntent.PutExtras(valuesForActivity);

    // Construct a back stack for cross-task navigation:
    var stackBuilder = TaskStackBuilder.Create(this);
    stackBuilder.AddParentStack(Class.FromType(typeof(SecondActivity)));
    stackBuilder.AddNextIntent(resultIntent);

    // Create the PendingIntent with the back stack:
    var resultPendingIntent = stackBuilder.GetPendingIntent(0, (int) PendingIntentFlags.UpdateCurrent);

    // Build the notification:
    var builder = new NotificationCompat.Builder(this, CHANNEL_ID)
                  .SetAutoCancel(true) // Dismiss the notification from the notification area when the user clicks on it
                  .SetContentIntent(resultPendingIntent) // Start up this activity when the user clicks the intent.
                  .SetContentTitle("Button Clicked") // Set the title
                  .SetNumber(count) // Display the count in the Content Info
                  .SetSmallIcon(Resource.Drawable.ic_stat_button_click) // This is the icon to display
                  .SetContentText($"The button has been clicked {count} times."); // the message to display.

    // Finally, publish the notification:
    var notificationManager = NotificationManagerCompat.From(this);
    notificationManager.Notify(NOTIFICATION_ID, builder.Build());

    // Increment the button press count:
    count++;
}
The OnCreate method of MainActivity must make the call to create the notification channel and assign the ButtonOnClick method to the
Click event of the button (replace the delegate event handler
provided by the template):
protected override void OnCreate(Bundle bundle)
{
    base.OnCreate(bundle);
    SetContentView(Resource.Layout.Main);

    CreateNotificationChannel();

    // Display the "Hello World, Click Me!" button and register its event handler:
    var button = FindViewById<Button>(Resource.Id.MyButton);
    button.Click += ButtonOnClick;
}
Create a second activity
Now we need to create another activity that Android will display when the user clicks our notification. Add another Android Activity to your project called SecondActivity. Open SecondActivity.cs and replace its contents with this code:
using System;
using Android.App;
using Android.OS;
using Android.Widget;

namespace LocalNotifications
{
    [Activity(Label = "Second Activity")]
    public class SecondActivity : Activity
    {
        protected override void OnCreate(Bundle bundle)
        {
            base.OnCreate(bundle);

            // Get the count value passed to us from MainActivity:
            var count = Intent.Extras.GetInt(MainActivity.COUNT_KEY, -1);

            // No count was passed? Then just return.
            if (count <= 0)
            {
                return;
            }

            // Display the count sent from the first activity:
            SetContentView(Resource.Layout.Second);
            var txtView = FindViewById<TextView>(Resource.Id.textView1);
            txtView.Text = $"You clicked the button {count} times in the previous activity.";
        }
    }
}
We must also create a resource layout for SecondActivity. Add a new Android Layout file to your project called Second.axml. Edit Second.axml and paste in the following layout code:
<?xml version="1.0" encoding="utf-8"?>
<LinearLayout xmlns:android="http://schemas.android.com/apk/res/android"
    android:orientation="vertical"
    android:layout_width="fill_parent"
    android:layout_height="fill_parent"
    android:minWidth="25px"
    android:minHeight="25px">
    <TextView
        android:text=""
        android:textAppearance="?android:attr/textAppearanceLarge"
        android:layout_width="fill_parent"
        android:layout_height="wrap_content"
        android:id="@+id/textView1" />
</LinearLayout>
Add a notification icon
Finally, add a small icon that will appear in the notification area when the notification is launched. You can copy the following icon to your project or create your own custom icon:

Name the icon file ic_stat_button_click.png and copy it to the Resources/drawable folder. Remember to use Add > Existing Item ... to include this icon file in your project.
Run the application
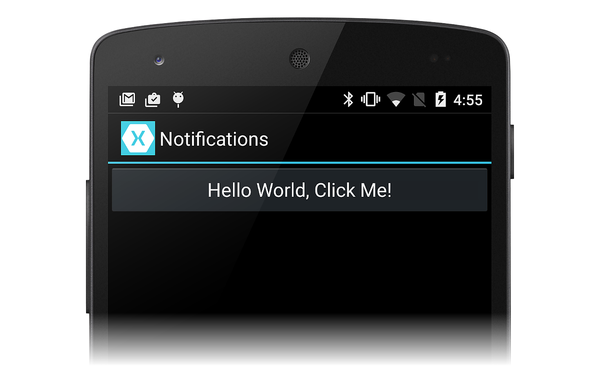
Build and run the application. You should be presented with the first activity, similar to the following screenshot:
As you click the button, you should notice that the small icon for the notification appears in the notification area:
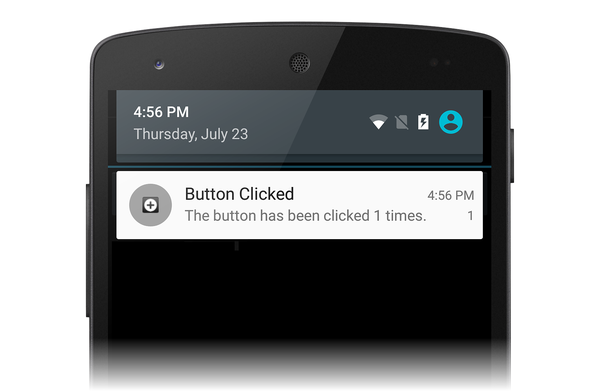
If you swipe down and expose the notification drawer, you should see the notification:
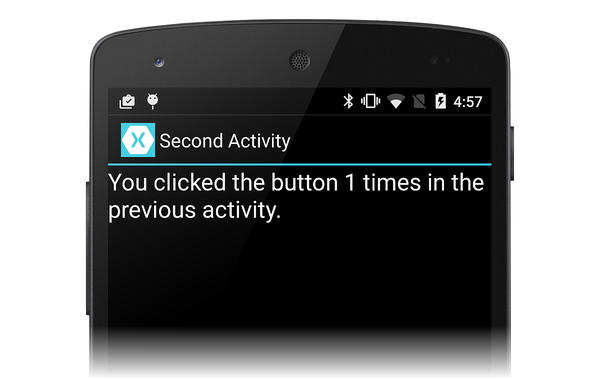
When you click the notification, it should disappear, and our other activity should be launched – looking somewhat like the following screenshot:
Congratulations! At this point you have completed the Android local notification walkthrough and you have a working sample that you can refer to. There is a lot more to notifications than we have shown here, so if you want more information, take a look at Google's documentation on notifications.
Summary
This walkthrough used NotificationCompat.Builder to create and
display notifications. It showed a basic example of how to start up a
second Activity as a way to respond to user interaction with the
notification, and it demonstrated the transfer of data from the first
Activity to the second Activity.


