Manage roll out of the new web form
TFS 2017
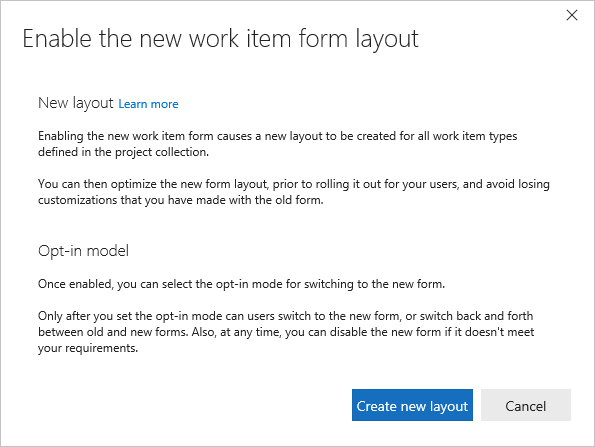
Enabling the new form initiates a transformation of the form definitions for all work item types (WITs) defined in your project collection. You start the rollout process by first enabling the new form. You can then review the transformed web form layouts and adjust as desired or add additional customizations.
When you're ready to rollout the new form, you choose the opt-in model which enables your users to begin using the new form. Lastly, if you need to revert to the old web forms, you can do that.
Important
Feature availability: The new form and its corresponding features are available for the web portal for TFS 2017 and later versions.
- For on-premises TFS 2017 and later versions, the new form is automatically available when you add projects to a collection. For existing projects, an admin is required to enable the new form as described in this article. (The reason the new form isn't automatically enabled for existing projects is to prevent overwriting customizations made to existing work item types.)
- For TFS 2015 and earlier versions, the new form isn't available. You must upgrade to TFS 2017 or a later version to access the new form.
Enable the new form
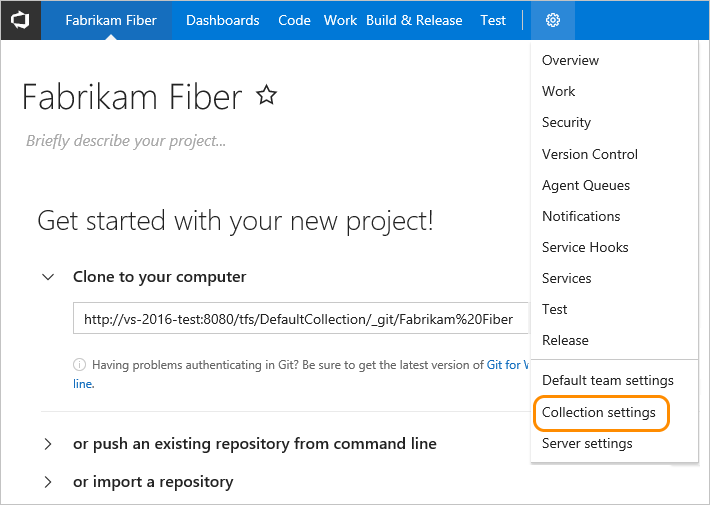
You enable the new form from the project collection admin page.
To start, choose the
 gear Settings icon to open the admin context for the project collection.
From the collection admin page, click Enable the new work item form.
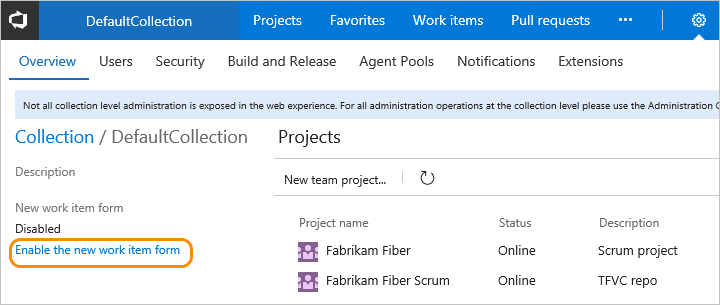
If you don't see the option to enable, you aren't a member of the Project Collection Administrators group. To get added as one, see Change project collection-level permissions.
Choose Create new layout to initiate the process of transforming the WIT definitions.
Review the new web forms
The default opt-in model is to enable the new forms for members of the Project Administrators group for all projects. Before you change the opt-in model, review the web forms to ensure they represent the fields and functions needed.
Open a work item of each type to review the new form layout. Here, we open a user story. Switch to show the new form.
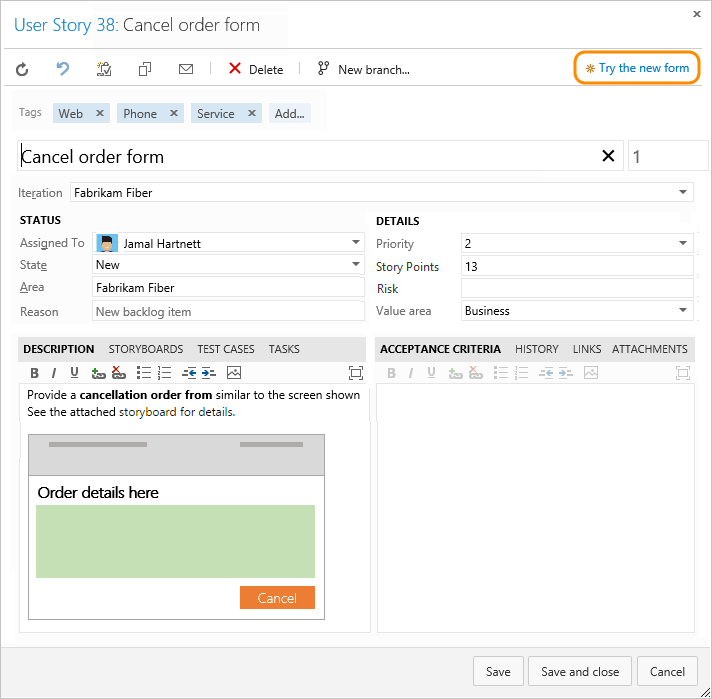
Once you switch, all work item types for this project will display in the new form (unless you decide to switch back).
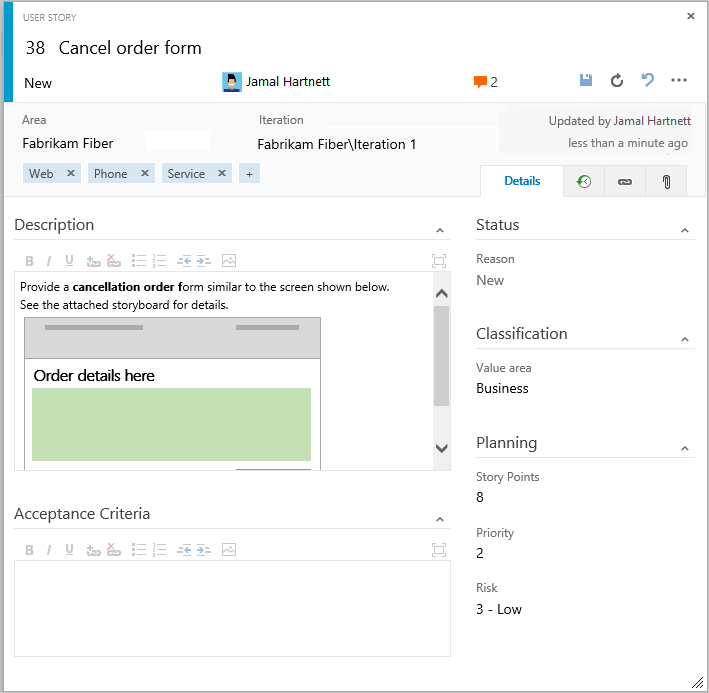
If the work item is already open, refresh your browser to see the changes.
To customize the layout, see Customize the new form.
Choose the opt-in model for rollout
Once the new form layouts preview as expected, you can begin rollout.
Choose the opt-in model that supports your needs.
- Choose Enable opt-in for all users when you want to enable the opt-in feature and allow users to switch back to the old form
- Choose the New form only option when you want all users to begin using the new form immediately.
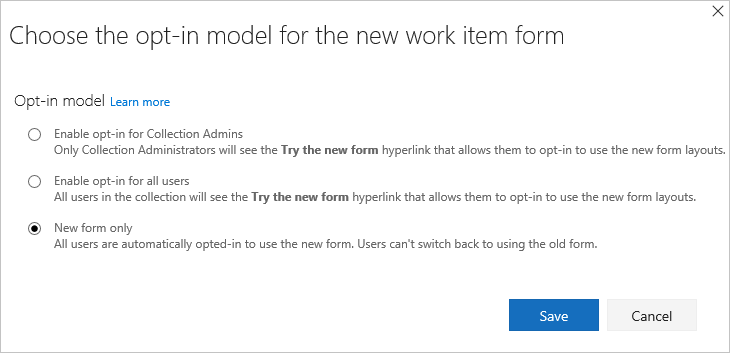
If you choose Enable opt-in for all users, users will be able to choose when they convert to the new form view.

As this switch is set on a per-user basis, other account users will continue to see the old form until they also choose to switch. After they make the switch, they can switch back.
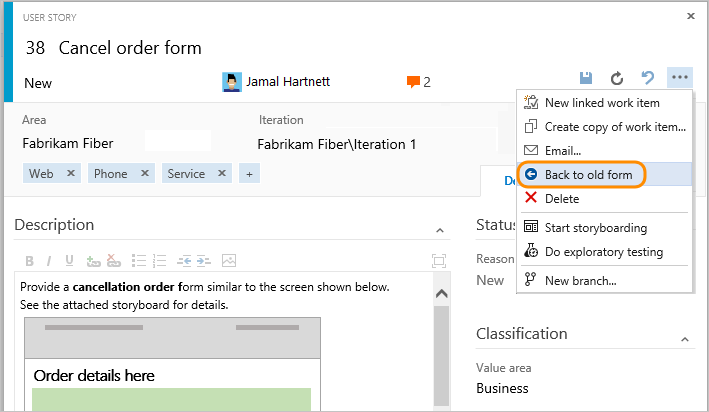
All work items automatically display using the new web form layout.
Share the New work item experience article with your users so they can better understand the new controls and layout available to them.
Disable the new form
If you find that you need to revert to the old WIT forms, you can do so.
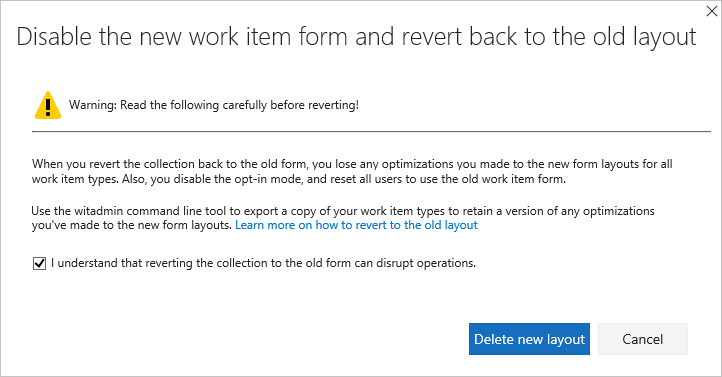
Disabling the new form will remove the WebLayout section from the XML definition files for all WITs defined within all projects in the collection.
Related articles
Best-effort transformation
A best-effort transformation is made to maintain the field groupings and layout of your customized WIT definitions. The following types of transformations are made:
Transformed or added elements
- If you have a Layout with
Target=Web, it is transformed to the WebLayout definition - If you simply have a single Layout section, a new section with the WebLayout definition is added
- All parent Tabs are converted to a Page
- All non-nested Groups within a Tab are converted to a Group; if you have more than four of these groups, some are combined into a single Group
- All nested Groups within a Group remain a Group
- All HTMLFieldControl and WebPageControl elements are moved to the first Section within a Page.
Removed elements and attributes
All Splitter elements are removed
All elements within the form header and Control elements with the following type designations are removed from the WebLayout section:
AttachmentsControlLinksControlWorkItemClassificationControlWorkItemLogControl
They aren't required as the system now manages these elements, automatically adding them to the header section area within each work item form.
The following attributes are removed from each Control and Group elements:
ControlSpacingFixedWidthLabelSpacingMarginMinimumSizePaddingPercentWidth
Revert process
When you revert the process, the XML definitions for all WITs revert back to their original definitions. All users will only be able to see the old form layouts.