Deploy frontline dynamic teams at scale
Overview
Frontline teams are a collection of people, content, and tools within an organization for different frontline worker locations. Membership of frontline dynamic teams is determined and managed by a set of Microsoft Entra attributes. Learn more about Microsoft Entra attributes.
In the setup process, you define the following information with Microsoft Entra attributes:
- Who your frontline workers are
- What locations they work at
- Department and job titles of your frontline workers (optional)
You also determine team structure and team owners.
Then, you can choose which locations you want to create dynamic frontline teams for.
Team membership is automatically managed over time through the power of dynamic teams. As frontline workers are onboarded and offboarded, and as they change locations, their memberships in these teams are updated accordingly.
Check out this Microsoft Mechanics video for an overview of how to set up and deploy your frontline dynamic teams.
Note
If you would like to provide feedback and improve this feature, please fill out this form.
Before you begin
Prerequisites
- Users must have a Microsoft 365 F3, F1, E3, or E5 license. If a user doesn't have one of these licenses, they need a Microsoft Entra ID P1 add-on license to use dynamic teams. Learn more about frontline licensing.
- Ensure you can define your frontline workers and their work locations through data available in Microsoft Entra ID. If you don't have this data in Microsoft Entra ID, you can sync it through a human capital management (HCM) connector or use the PowerShell solution to create static teams at scale.
- If you want to enable targeted communications, ensure you can map the attributes of your frontline workers through data available in Microsoft Entra ID. If user profile information doesn’t yet include job title or department, you can add it. Learn more about how to add or update a user’s profile information in Microsoft Entra ID.
Admin role to run the deployment
To complete the steps in this article, you must be a Global Administrator or a Teams Administrator who is assigned a custom role (as described in this section) in Microsoft Entra ID with specific permissions.
Important
Microsoft recommends that you use roles with the fewest permissions. This helps improve security for your organization. Global Administrator is a highly privileged role that should be limited to emergency scenarios when you can't use a less-privileged role.
To give Teams Administrators the ability to complete setup and deploy frontline dynamic teams, follow these steps to create the custom role and assign it to Teams Administrators.
Create the custom role
Sign in to the Microsoft Entra admin center as at least a Privileged Role Administrator.
Go to the Roles and administrators page, and then select New custom role.
On the Basics tab:
- Provide a name for the role. Optionally, enter a description.
- Make sure Baseline permissions is set to Start from scratch (the default setting).
On the Permissions tab, select the following permissions:
- microsoft.directory/groups/create
- microsoft.directory/groups/dynamicMembershipRule/update
- microsoft.directory/servicePrincipals/create
On the Review + create tab, review the role definition, and then choose Create.
Assign the custom role
Sign in to the Microsoft Entra admin center as at least a Privileged Role Administrator.
Go to the Roles and administrators page, and then select the name of the new custom role you created.
Choose Add assignments.
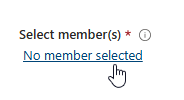
Under Select member(s), choose No member selected.
Select the Teams Administrators to which you want to assign the custom role. Choose Next.
On the Setting tab, set Assignment type as Active.
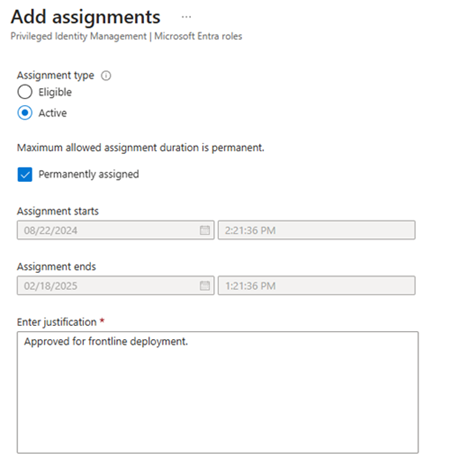
Provide a justification, and then choose Assign.
Set up your frontline dynamic teams
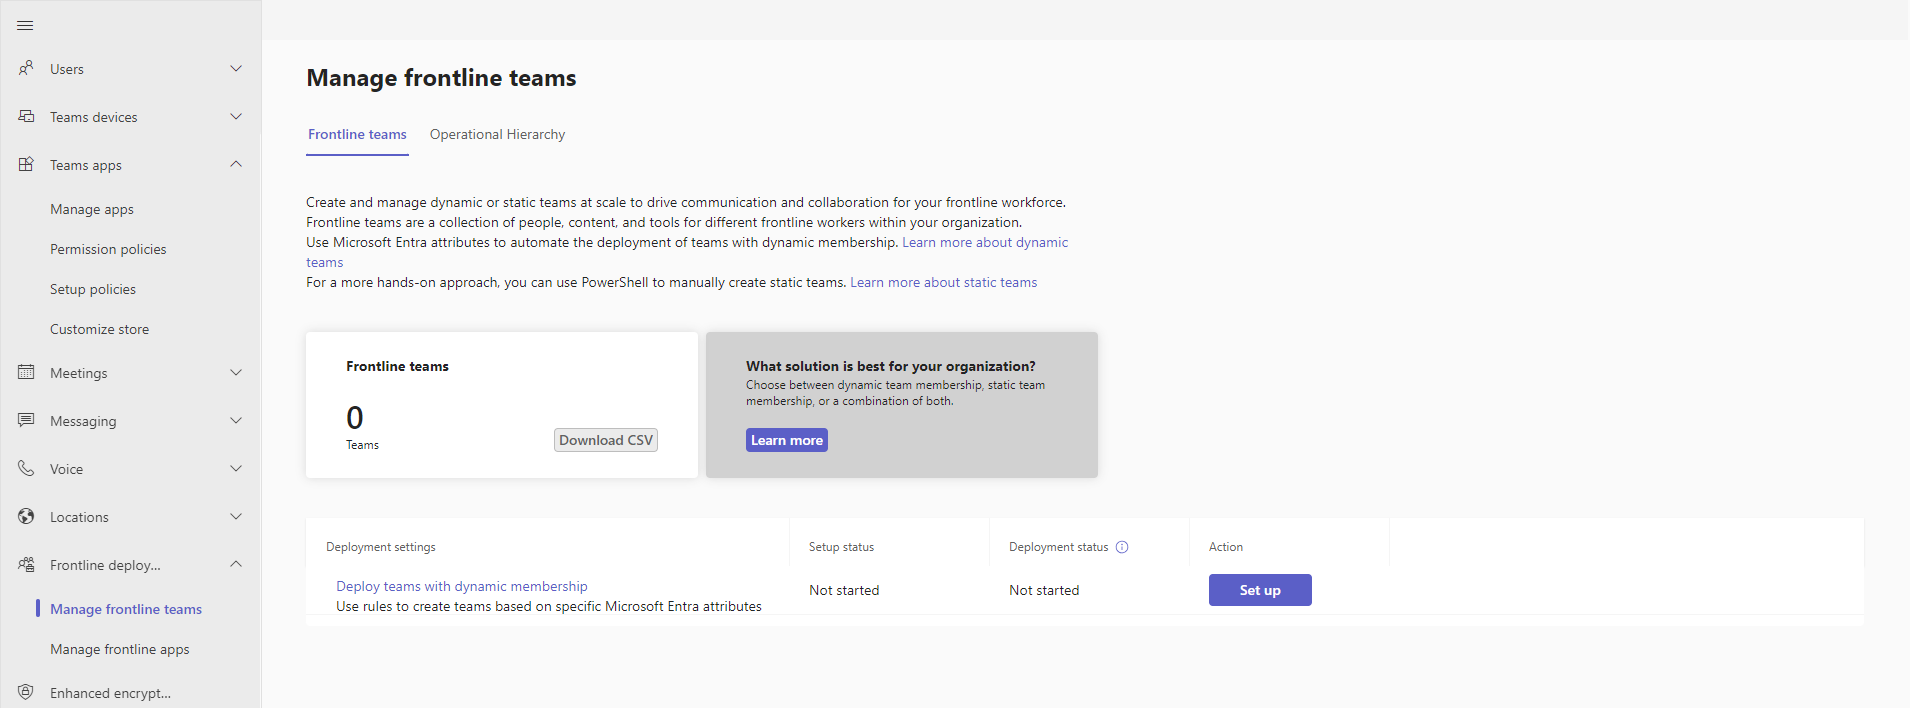
In the left navigation of the Teams admin center, choose Frontline deployment > Manage frontline teams.
In the table, choose Set up.
Review the setup and prerequisites information.
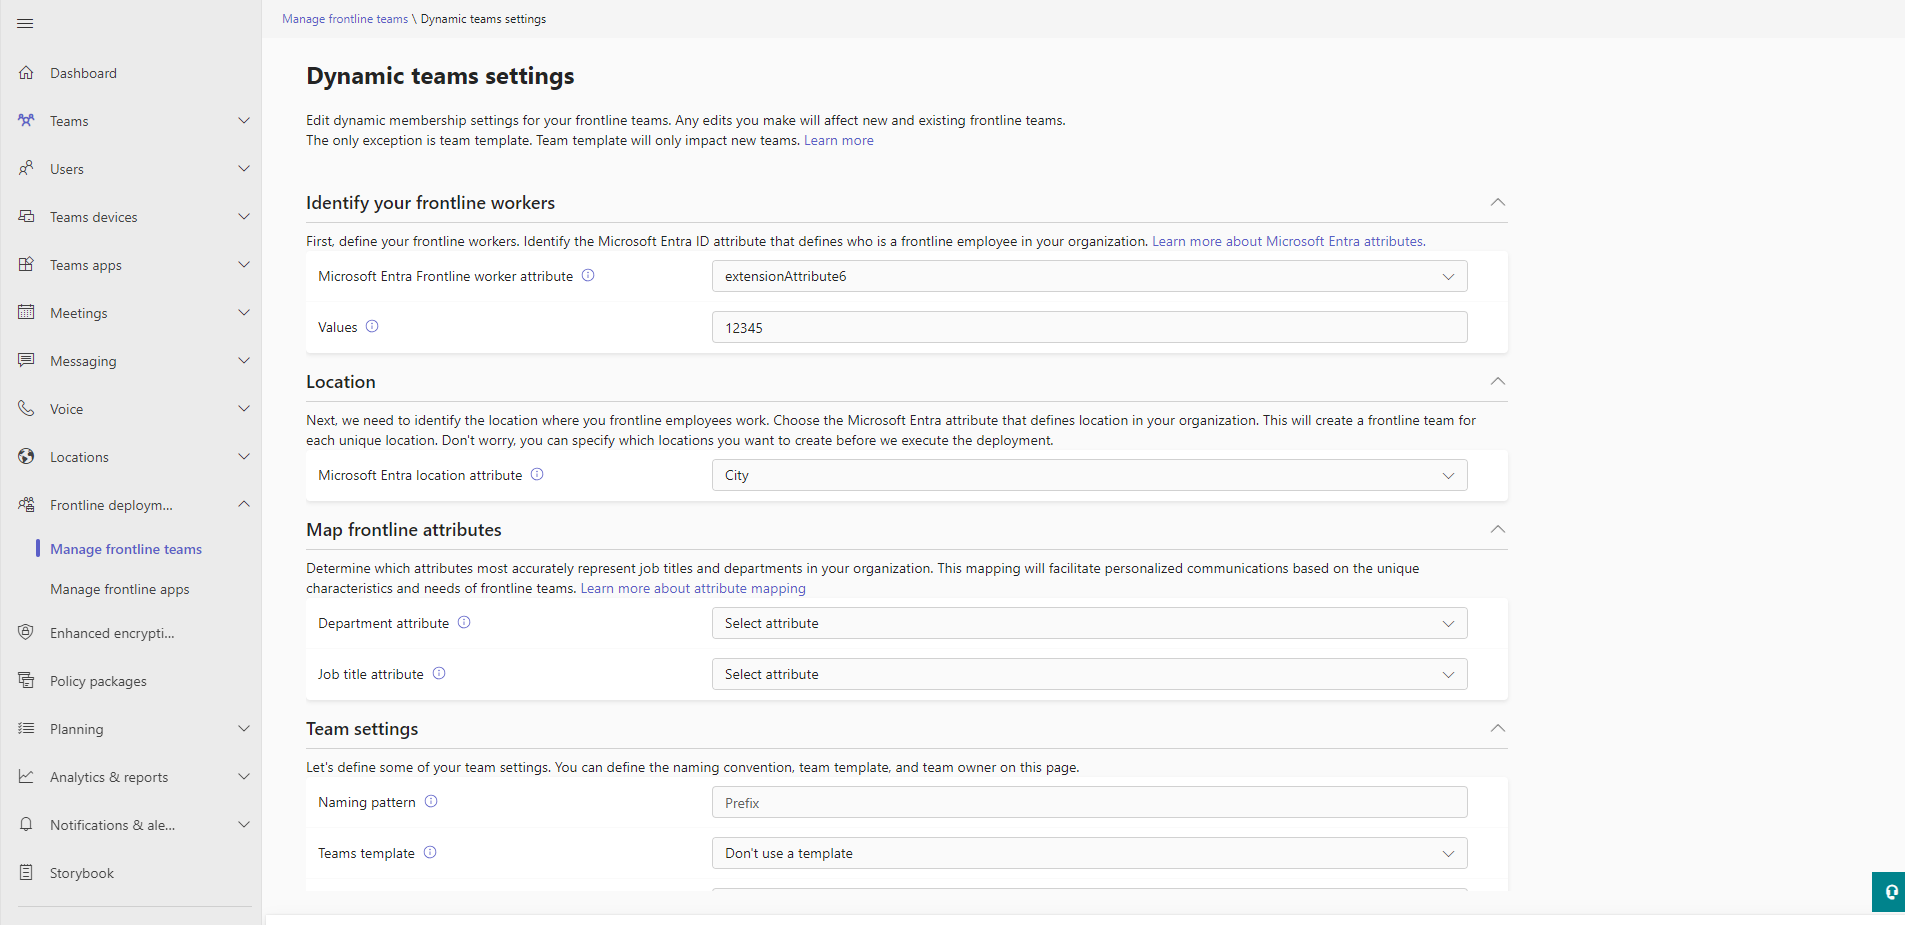
On the Identify your frontline workers page, select the Microsoft Entra attribute that defines your frontline workers. You can only choose one Microsoft Entra attribute, but you can define multiple values by separating them with commas.
On the Location page, select a Microsoft Entra attribute or a custom user attribute that defines the location your frontline employees work in. You can only choose one location attribute.
All custom attributes are case sensitive and must start with an "extension_" prefix. Only custom attributes of the String data type are supported.
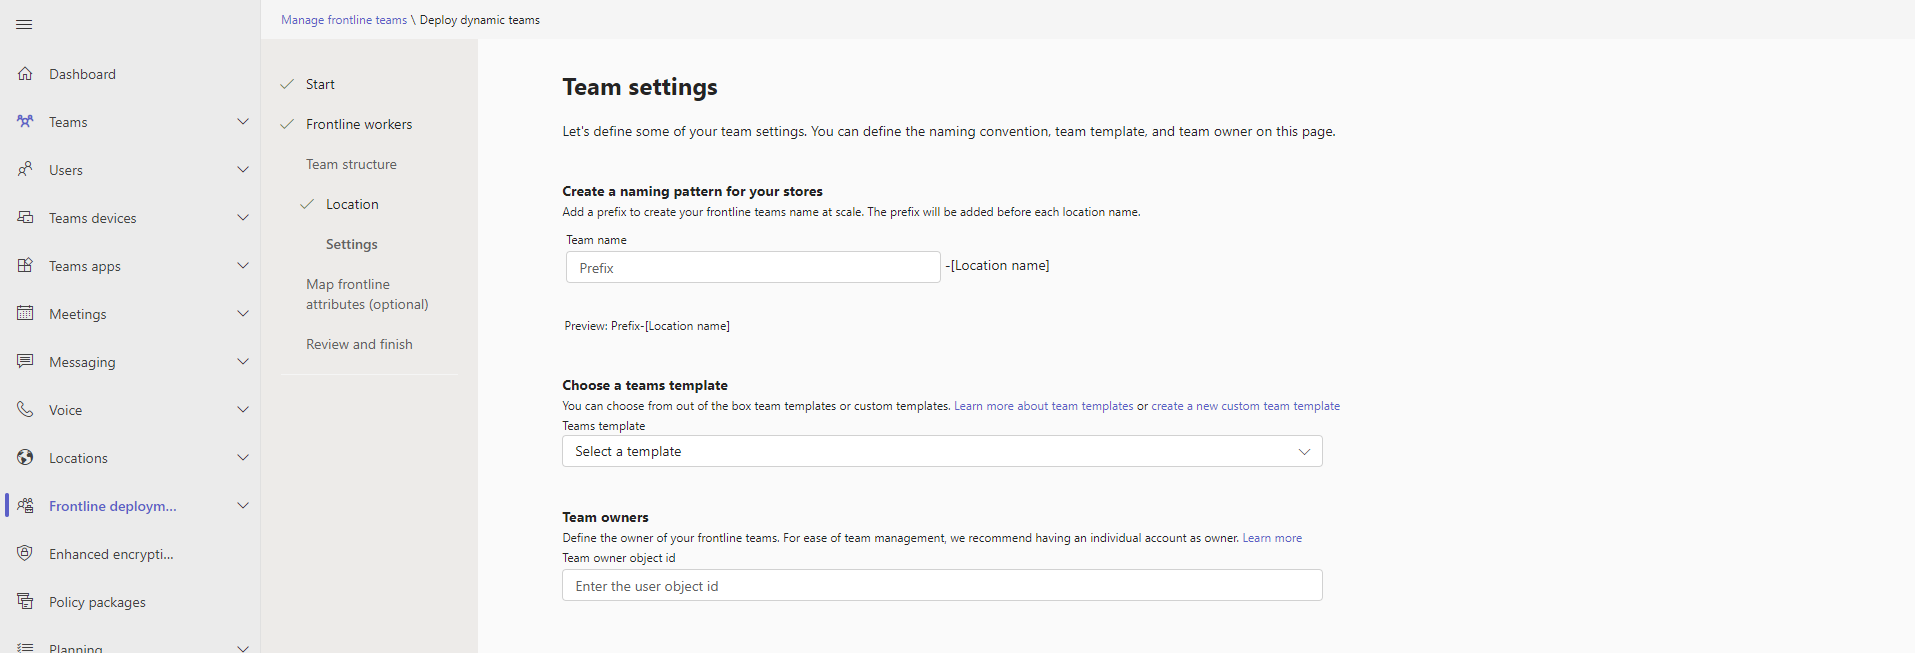
On the Team settings page, define a naming pattern for your teams by choosing a prefix. The prefix is applied using the "prefix-location" format to all your teams.
Optionally, choose a team template. The team template you choose defines the channel structure for all your frontline teams. Learn more about team templates.
Note
Currently, only team templates that are set to the English (United States) locale are supported. Keep in mind that the locale doesn't affect translation of the template or data residency. The locale setting is used only to distinguish between templates that have the same name that are created in different languages.
Enter the object ID of the user account who you want as the team owner. This account will be the owner of all frontline teams. We recommend you choose a shared account rather than an individual person.
- To get a user's object ID, go to the Azure portal.
- Select Microsoft Entra ID.
- Select Users, and then choose your user.
- Copy the user's object ID.
Note
After your teams are deployed, you can also add more team owners through the PowerShell solution or by using any other manual methods.
On the Map frontline attributes page, select the Microsoft Entra attributes that most accurately reflect the departments and job titles in your organization. You can set the Department attribute, Job title attribute, or both.
Note
This step is optional. If you choose not to map frontline attributes, leave the values as None. You can always come back and map them later on the Dynamic teams settings page.
These attributes map departments and job titles in your organization, which allows you to deliver targeted communications features, such as automatic tags, to your frontline. Your frontline workers can quickly and easily reach the right group of people through tags that are automatically created based on the attribute mappings. Learn more about attribute mapping and targeted communications.
Review your settings, and then choose Finish setup.
Note
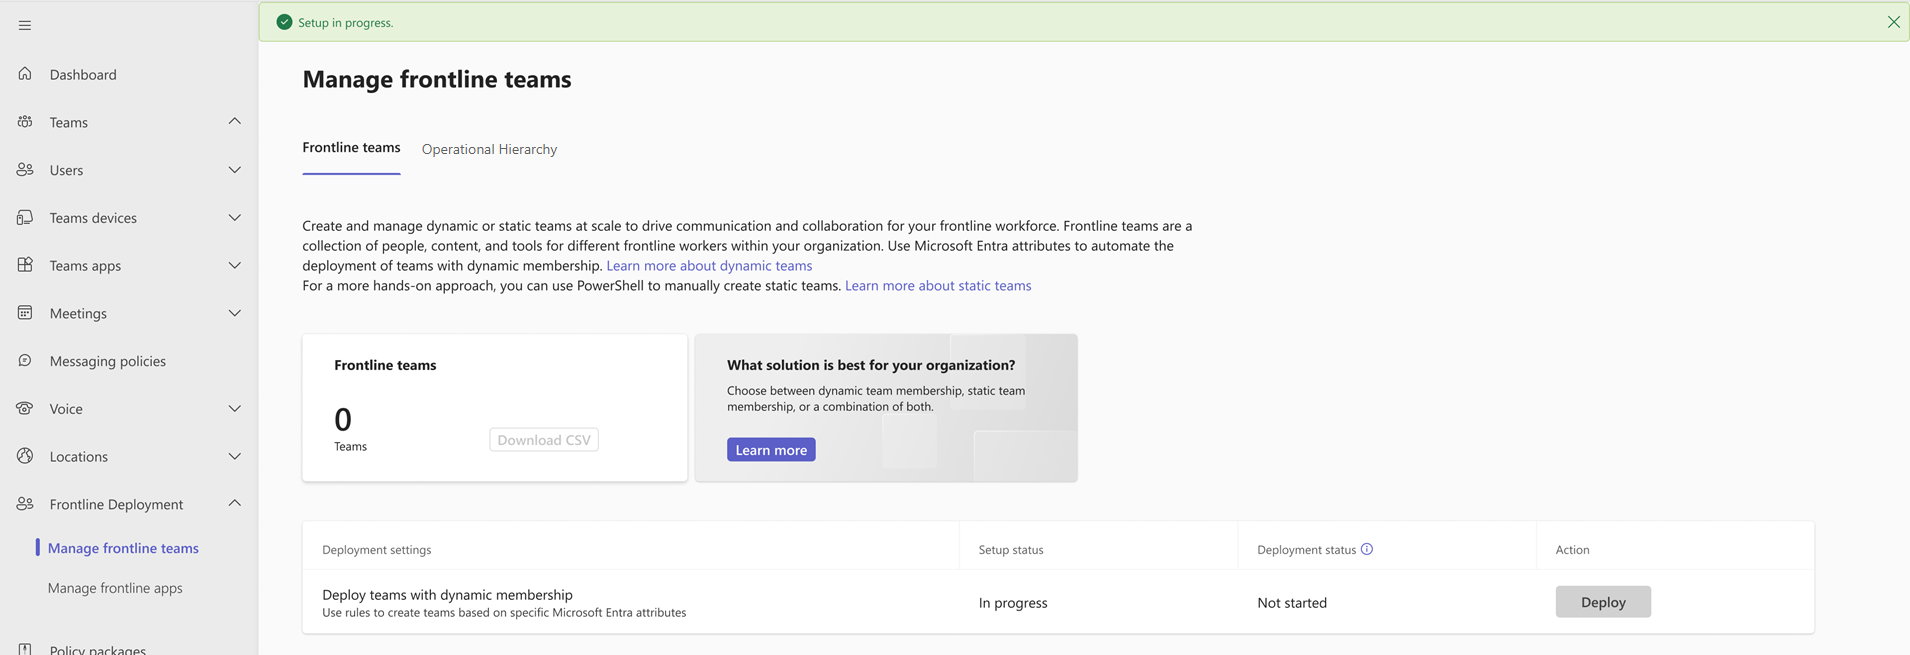
Setup can take several hours to run. Refresh the Manage frontline teams page to get the latest status.
Deploy your frontline dynamic teams
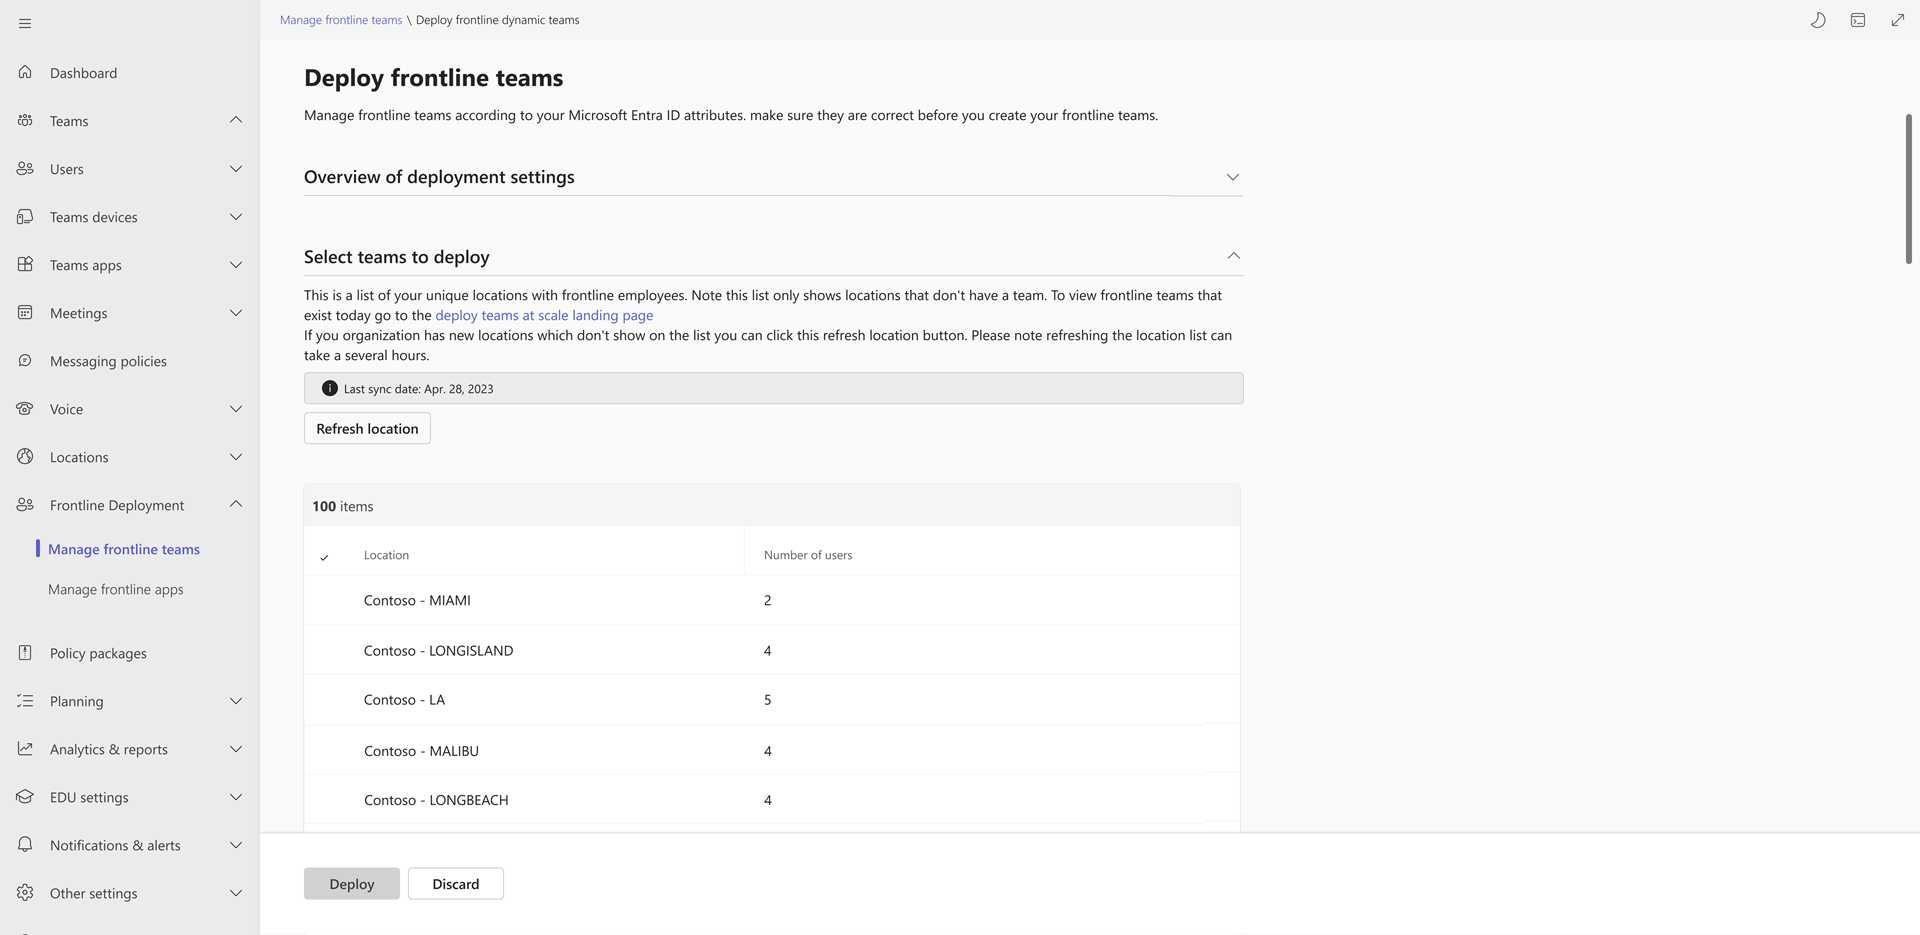
After setup is completed, go to the Manage frontline teams page, and then select the Deploy button.
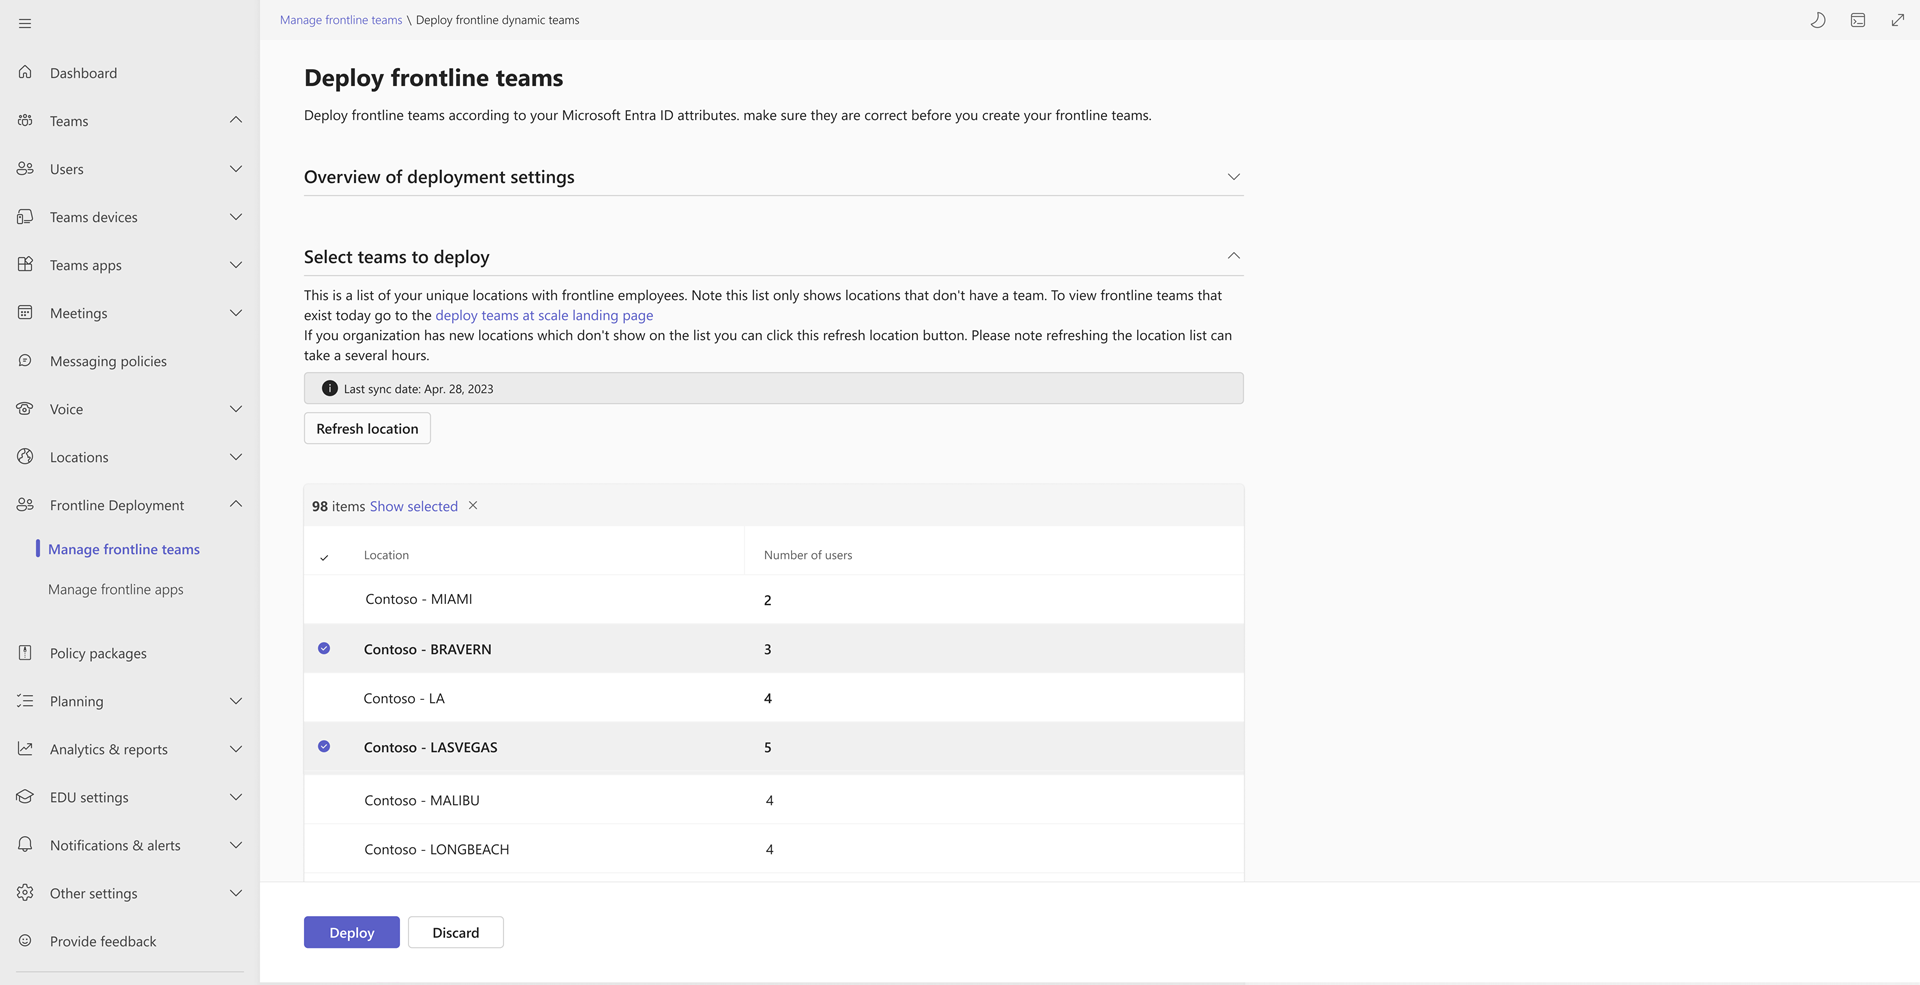
From here, you can review your settings and view the list of locations that don't yet have a frontline dynamic team created.
In the table, select the locations that you want to create teams for.
Select Deploy. This process can take several hours depending on how many teams you're creating.
After deployment is completed, you'll see the number of deployed frontline teams in the Frontline teams card. You can also download a CSV file with a list of those teams.
If an error occurred during the deployment process, you can download the error CSV file on the Last deployment health card. Use the information in it to help resolve the errors, and then rerun the deployment experience
You can repeat this process for any frontline locations that don't have a team.
Managing your frontline dynamic teams
You can manage your teams when changes happen in your organization.
Create new teams for newly opened locations
In the left navigation of the Teams admin center, choose Frontline deployment > Manage frontline teams.
In the table, choose Deploy.
Select the Refresh location button, and then proceed when prompted by the dialog box. This process can take several hours depending on your number of new locations.
After the refresh is completed, your setup status shows as Complete. You can proceed to deploy your new teams. Deployment can take several hours depending on how many new teams you're deploying.
Edit your frontline team settings
In the left navigation of the Teams admin center, choose Frontline deployment > Manage frontline teams.
In the Deployment settings column, choose Deploy teams with dynamic membership.
On the Dynamic teams settings page, edit your settings, and then select Apply. Your settings might take several hours to update.
See the following table for the effects of updating your settings.
Setting Effect on existing frontline teams Effect on new frontline teams Define your frontline worker attribute. All existing frontline teams will be members that have the new Microsoft Entra attribute defined. All new frontline teams members will have the new Microsoft Entra attribute defined. Choose the values applicable to your frontline Microsoft Entra attribute. All existing frontline team members will reflect your updated values. All new teams will be populated with members who have the updated Microsoft Entra attributes that you defined. Map your frontline attributes for department and job title. All existing frontline team members will reflect the Microsoft Entra attribute you defined for department and job title. All new frontline team members will use the Microsoft Entra attribute you defined for department and job title. Define your frontline locations. Existing teams will continue to persist. If a team is no longer tied to a location, there will be no users in that team, and users are put in their respective location teams. You can create new frontline teams based on the locations defined by your new Microsoft Entra attribute. Set your team name prefix. All existing team names will be updated to reflect the prefix and location name if that was changed. All new teams will have the updated naming convention. Select your team template. No updates to the team structure will occur. All new teams will use the updated team template. Select your team owner. The team owner will be updated for all existing teams. Team owners that were added through PowerShell or any other manual methods won't be removed. All new teams will have the updated team owner.
Get analytics on frontline teams usage
The Teams frontline usage report on the usage dashboard of the Manage frontline teams page gives you an overview of usage activity in Teams for each of your frontline locations. You can view data, such as the number of active users and last activity date, to quickly see how many users at your frontline locations are using Teams to communicate and collaborate.
Frequently asked questions
Why are channels missing when I create my teams?
It can take time for channels to propagate in Teams. The General channel is created first and the remaining channels are added over time. All channels should be available within 24 hours of team creation.
How do I delete a frontline team?
You can delete a team by using the Teams client, Teams admin center, PowerShell, or Graph.
Keep in mind that it can take up to 24 hours for a team and the Microsoft 365 group associated with the team to be fully deleted.
If you need to redeploy a frontline location team that was deleted, follow these steps:
- Refresh locations.
- After the refresh is completed, choose the location you want to deploy.
- Select Deploy.

