Mesh 101 Tutorial Chapter 5: Make your environment available for testing
You've completed adding all the features you need for your Mesh experience using Mesh Interactables, Physics and Scripting. So far, we've been working in a Unity project; now you'll turn the StartingPoint scene into a Mesh Environment and upload it to the Collections page in Mesh on the web. At that point, your Environment is ready for you to test so you can move ahead with confidence as you prepare to schedule an Event.
Important
A Teams Premium license is required for using the Mesh application for custom immersive spaces in Mesh on PC and Quest. A license isn't required to develop with the Mesh toolkit, but you'll be blocked from building and publishing Environments to Mesh and organizing or joining events in Mesh if you and your users don't have Teams Premium licenses. For more information, see Set up M365 for Microsoft Mesh.
Sign in to the Mesh Uploader
- On the menu bar, select Mesh Toolkit > Environments.
- In the Mesh Environments window, select Sign In.
- Sign in with your account.
Create your environment
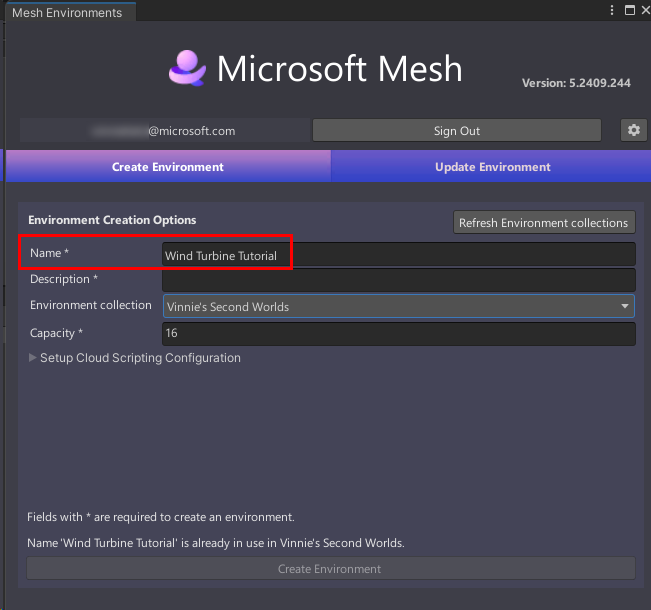
Make sure you're in the Create Environment tab, and then, in the Internal Name field, type "Wind Turbine Tutorial."
In the Description field, type "An interactive Mesh experience that teaches you about wind turbines."
Note
For future projects, keep in mind that the Internal Name field has a maximum of 40 characters, and the Description field has a maximum of 70 characters.
To ensure you have the latest Collections that are available in Mesh on the web, select the Refresh Environment collections button.
Select the Environment collection drop down, and then select the Environment Collection you want to upload your Environment to if it's not already selected.
In the Capacity field, enter the capacity for your Environment. The maximum is 16.
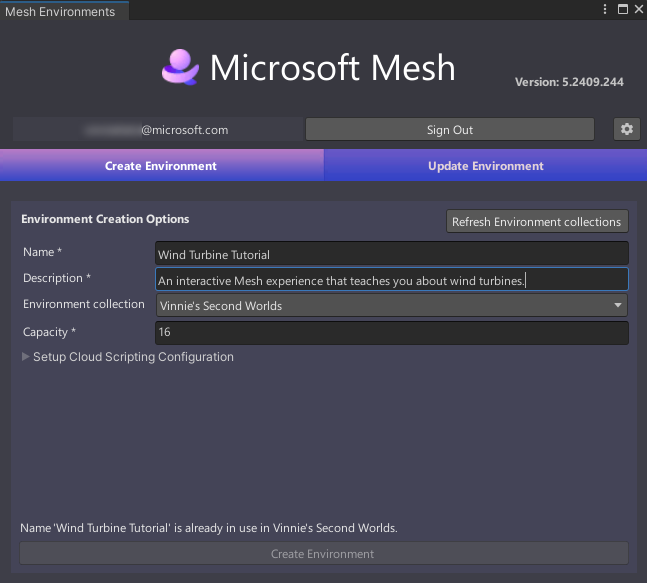
Select Create Environment to create the Environment that you'll be uploading to Mesh on the web.
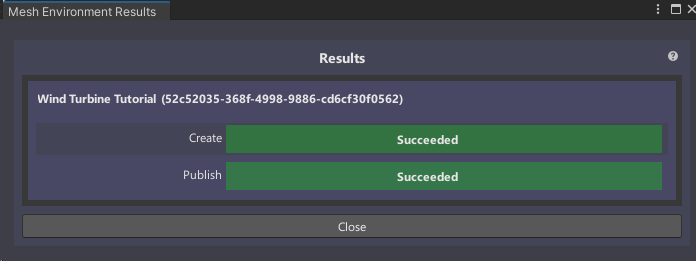
You'll receive a confirmation dialogue as shown below. Select Close.
Build and publish your environment
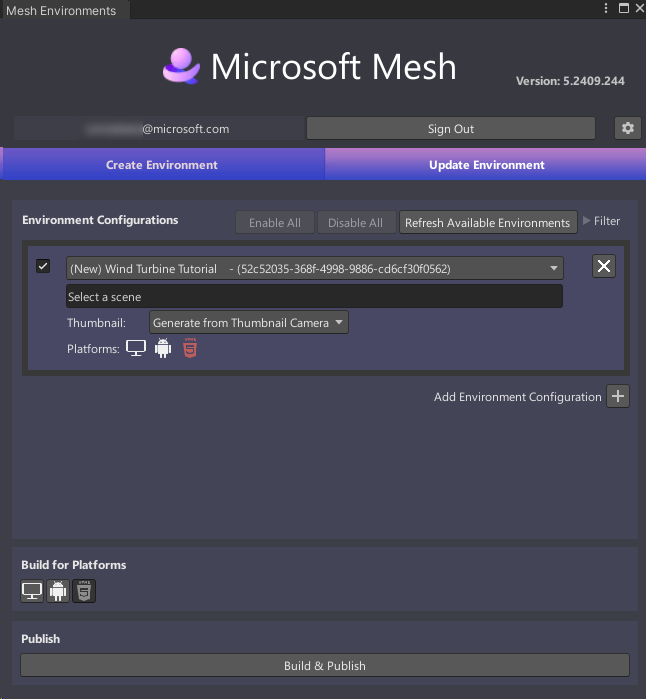
You should now be in the Update Environment tab of the Mesh Environments window.
Note
In the Environment Configurations section, a new Environment configuration has been created that displays the name you added in the Create Environment tab: Wind Turbine Tutorial. If you see any other Environment configuration sections, close them.
Building for single and multiple platforms
For the general developer audience, Mesh experiences can be built for two different platforms: desktop PC and Android, which powers the Meta Quest headset.
Note: Starting sometime in mid-August 2024, TAP participants will also be able to build their experiences to the WebGL platform; this enables event organizers to create events for both Windows and Mac users that run in the Mesh app for Teams. For this tutorial, we won't consider the WebGL option.
Since desktop PCs typically have far more power than mobile devices using Android, when you're creating your own project, there are several potential scenarios to consider: build and publish your scene for PC only, Android only, or both PC and Android. For this tutorial, we'll build for both PC and Android. To learn more about building for single and multiple platforms, see our article titled Build for single and multiple platforms.
Update your Environment
In the Update Environment tab, click the Select a scene field, and then, in the Select SceneAsset dialog, select StartingPoint.
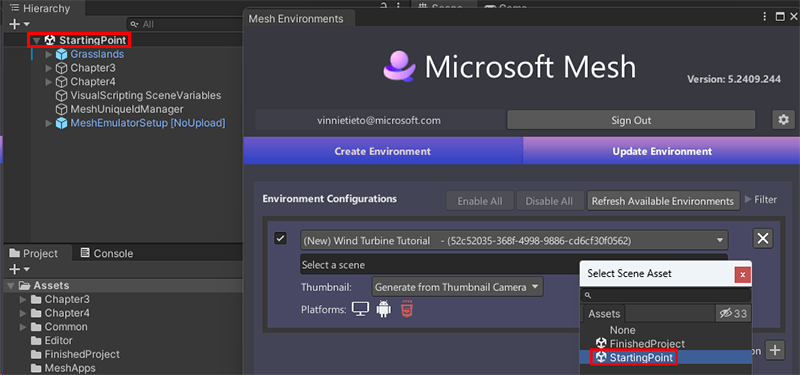
In the Build for Platforms section, you choose which platforms to build for. Note that when a button background is gray, the button is "on"; when the background is black, the button is "off." We're building for both PC and Android, so make sure that both buttons are "on."

Build and publish
Select the Build & Publish button.

If the Environment builds and uploads successfully, the Build and Upload Results dialog appears and confirms the results.
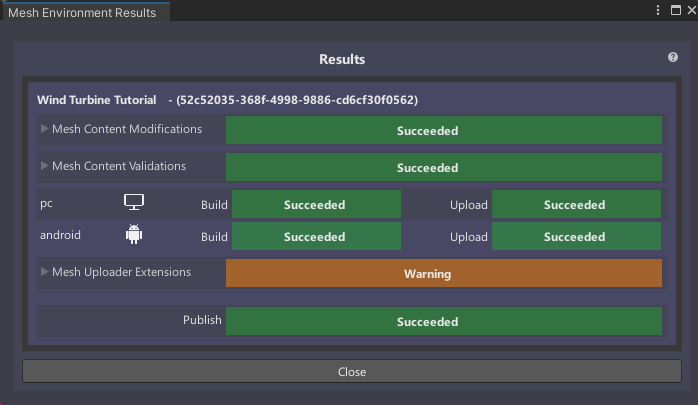
If the build and upload process fails, this is confirmed in the Build and Upload Results dialog.
View your Environment in Mesh on the web
If you navigate to the Environments page for your Environment collection in Mesh on the web, you'll see that your Environment has been saved there.
Go to Mesh on the web and then, in the left-side toolbar, select Collections.
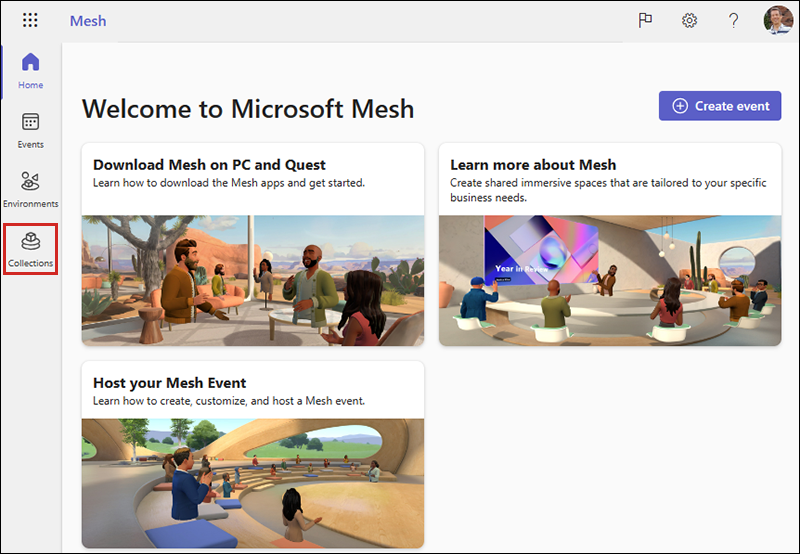
On the Collections page, select your Collection.
On the next page, your Environment should be displayed in the Environments tab.

Your saved custom Environment is now ready for you to test in the Mesh app on your desktop PC or Quest headset to be sure it will look and perform exactly as you expect.
Summary
In this chapter, you learned how to create an Environment based on your scene and then build it and publish it to your Environment Collection in Mesh on the web.