Process invoices with data capture
Important
Some or all of this functionality is available as part of a preview release. The content and the functionality are subject to change.
Important
Before enabling this solution in your environment, ensure that you have an active Power Automate trial or license with Dataverse capacity.
Data capture helps you to train and use optical character recognition (OCR) models for processing and ingesting scope 2 purchased energy invoices. Data capture uses Microsoft Power Platform's AI Builder and document intelligence solutions.
Train a model with AI Builder
To train an invoice processing model in AI Builder, follow these steps:
Sign in to Power Apps or Power Automate.
Select AI models on the left navigation and initiate a trial by starting with step 3 of Activate an AI Builder trial license. You'll need to wait for your database to finish building before continuing on to the next step.
Note
If you've already used AI Builder and have exhausted the trial period, you'll need to either extend your AI Builder trial or purchase additional credits to use this feature. For more information about AI Builder licenses, go to AI Builder paid licenses FAQ.
Copy the following link and replace {environment_Id} with your environment's ID:
https://make.powerapps.com/environment/{environment_Id}/aibuilder/createModel?templateName=DocumentScanning&modelNameSeed=Purchased%20Energy%20AI%20Builder%20Model&context.fields=Quantity,Quantity%20Unit,Consumption%20Start%20Date,Consumption%20End%20DateNote
To find your environment ID, go to the Environments tab in the Power Platform admin center and select your current environment.
Open the link. A new Extract custom information from documents AI Builder model initiates for you with the necessary purchased energy fields.
On the Select the type of documents your model will process page, select Structured documents, and then select Next.
On the Choose information to extract page, the following required fields are prepopulated for you:
- Quantity
- Quantity Unit
- Consumption Start Date
- Consumption End Date
Important
Don't remove or modify any of the pre-populated fields.
Select Next.
On the Add collections of documents page, select New collection. We recommend that you use one collection per purchased energy provider for best results.
Note
You can rename collections to reflect the content they represent.
Upload at least five invoices with the same structure to the collection, and then select Next.
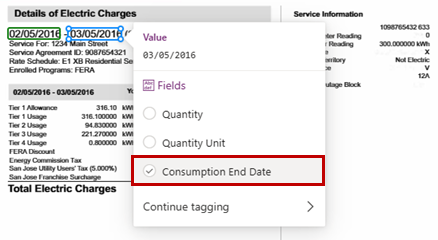
Tag the required fields for each document. Select the document in the collect, select a field in the document, and then select the field.

Tag all fields in the invoice, select the next document, and continue until you tag the fields in all documents in the collection. Select Next.
Repeat steps 4-9 for all other collections.
Select Next to review your model. On the Model summary page, select Train. After training completes, select Go to models to view the overall accuracy score and other details related to training success.
(Optional): To verify the accuracy score, perform a test run with an invoice of the same structure and provider.
Important
If the structure of an invoice type for which you've trained a model for changes, you must update the relevant collection by uploading at least one invoice that contains the new structure.
Configure the data capture solution
In Power Apps, select Solutions in the left navigation. To complete the next step, you need to navigate between the Microsoft Sustainability Manager Data Capture and Document Intelligence Core solutions.
For each solution, go to Cloud flows and turn on the following flows, in this order:
- Emit Notification
- Pre Pipeline
- Post Pipeline
- Format Invoice Date
- Delocalize
- Pre Pipeline step
- Post Pipeline step
- Get Pipeline details
- Format Extracted Data
- Document Intelligence AI Builder step
- Purchased Energy Invoice Enrichment
- Purchased Energy Invoice Pipeline
- Create PE record
- DI Main Pipeline
In the Objects panel on the left, select Step field definition.
Open each of the following step field definitions and validate that the External name matches the Display name:
- Consumption Start Date
- Consumption End Date
- Quantity
- Quantity Unit
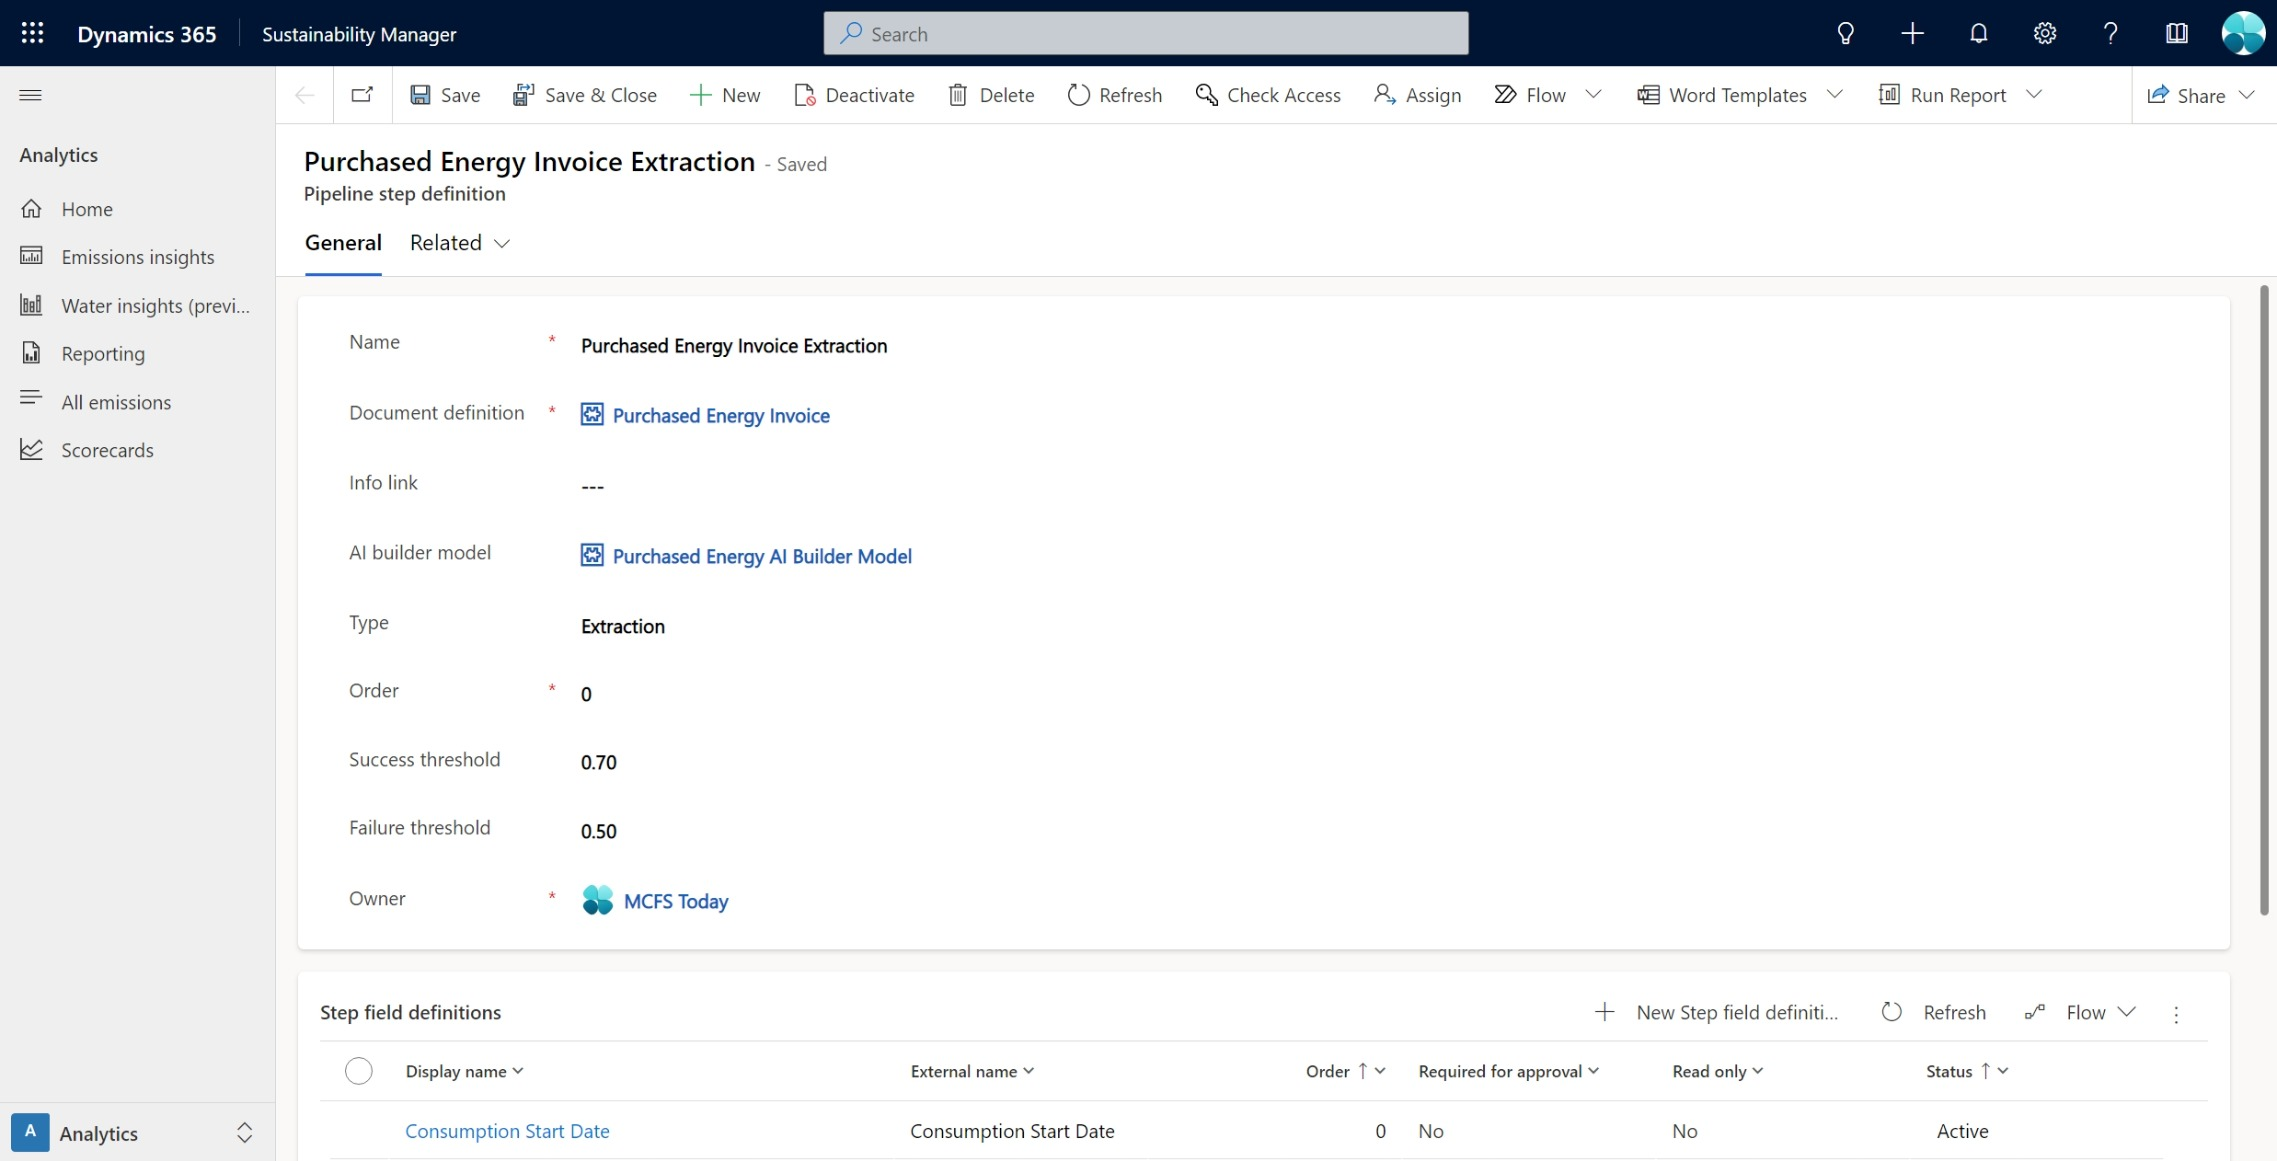
In the Objects panel on the left, select Pipeline step definition.
Select Purchased Energy Invoice Extraction and wait to be redirected to Microsoft Sustainability Manager.
Select your AI Builder model from the dropdown in the AI Builder model field and save.
Note
You can also change the failure and success thresholds in this step.
Return to Power Apps and select Done to complete the process.
Support custom dates
If a document type that is used to train the model has a date format that Dataverse doesn't support by default, you can customize a data capture flow to support it:
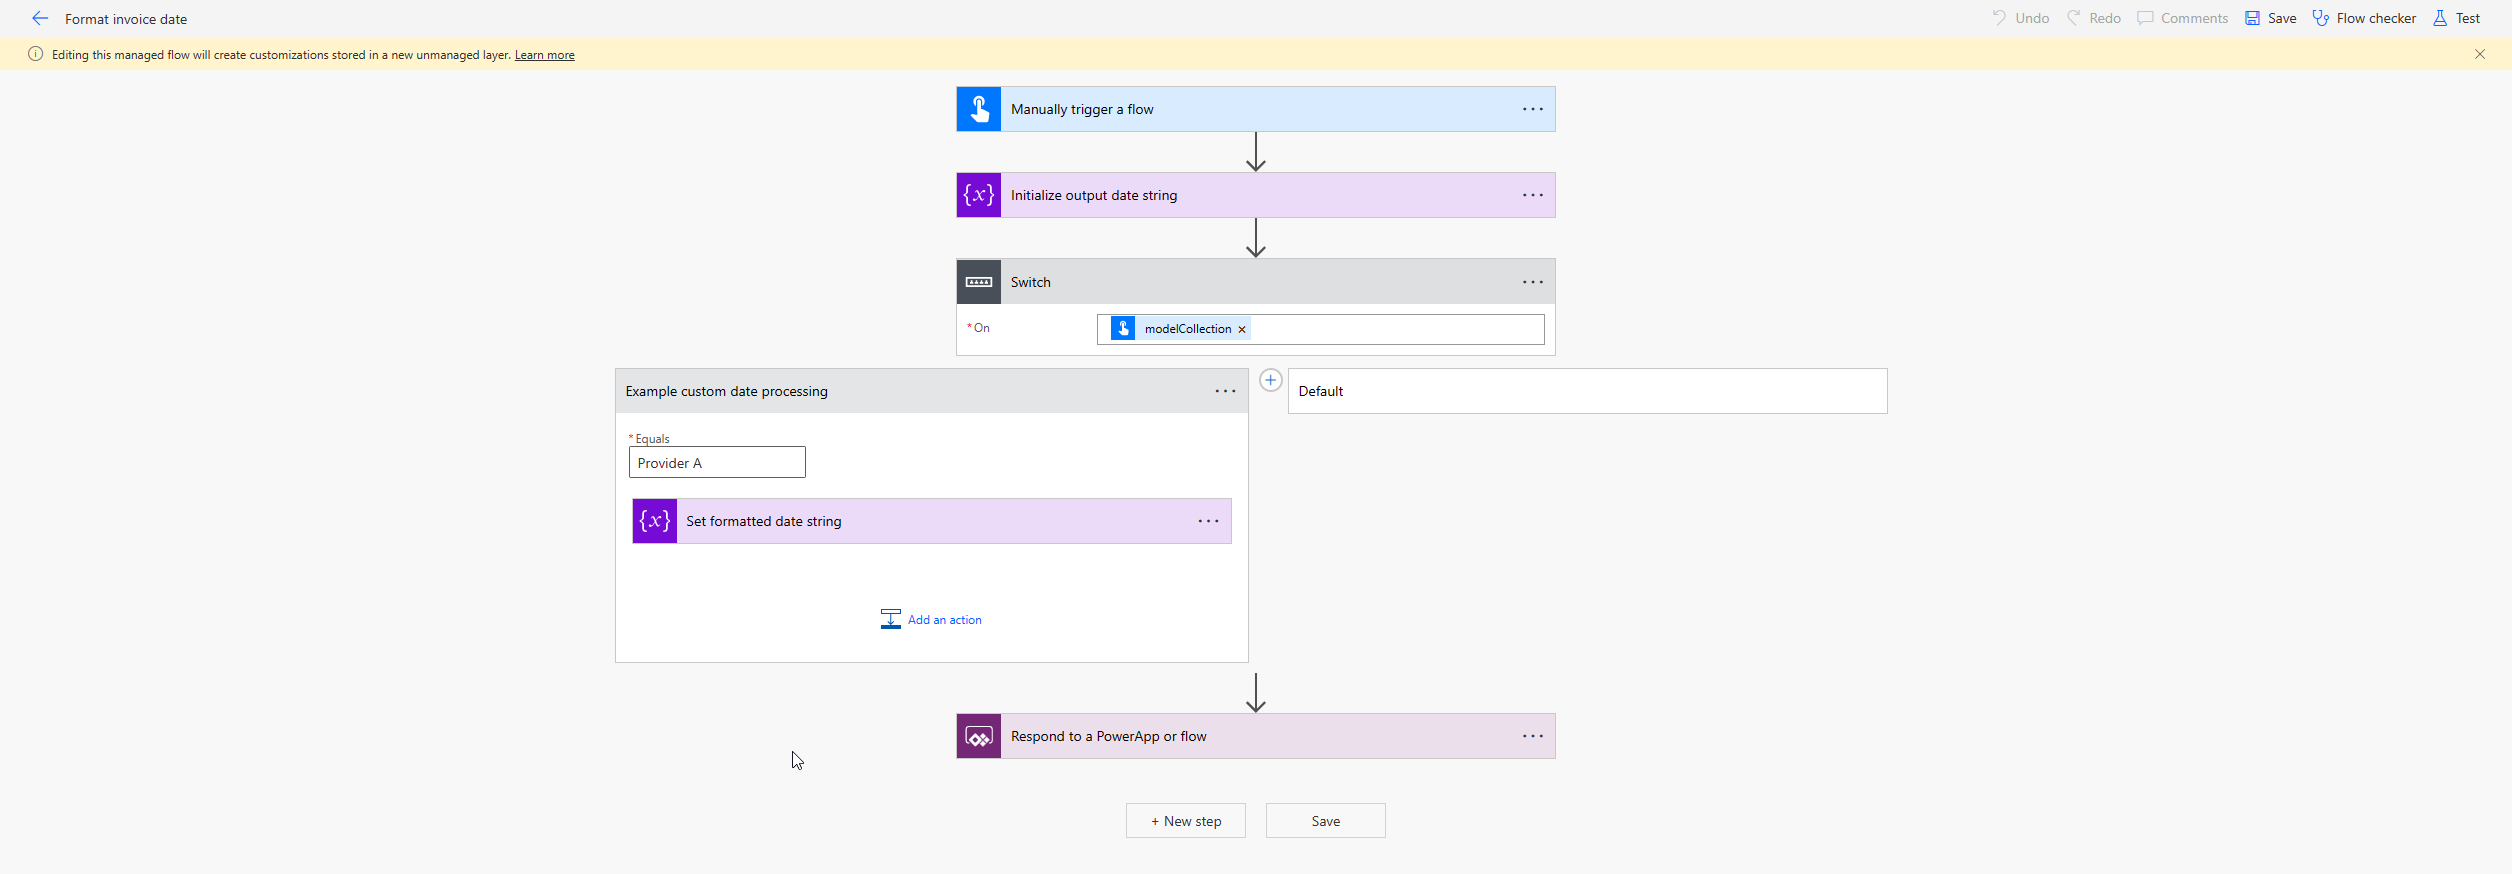
In Power Apps, select Flows from the side navigation pane.
Select the Format invoice date workflow.
Add a new option in the conditional statement for the name of the collection that has documents with nonsupported date formats.
Add an action to parse the date string to a supported format.
Upload and process an invoice
After you configure your AI Builder model, you can begin using it to upload purchased energy invoices within Microsoft Sustainability Manager.
In the Data area of the left navigation, select Data capture (preview).
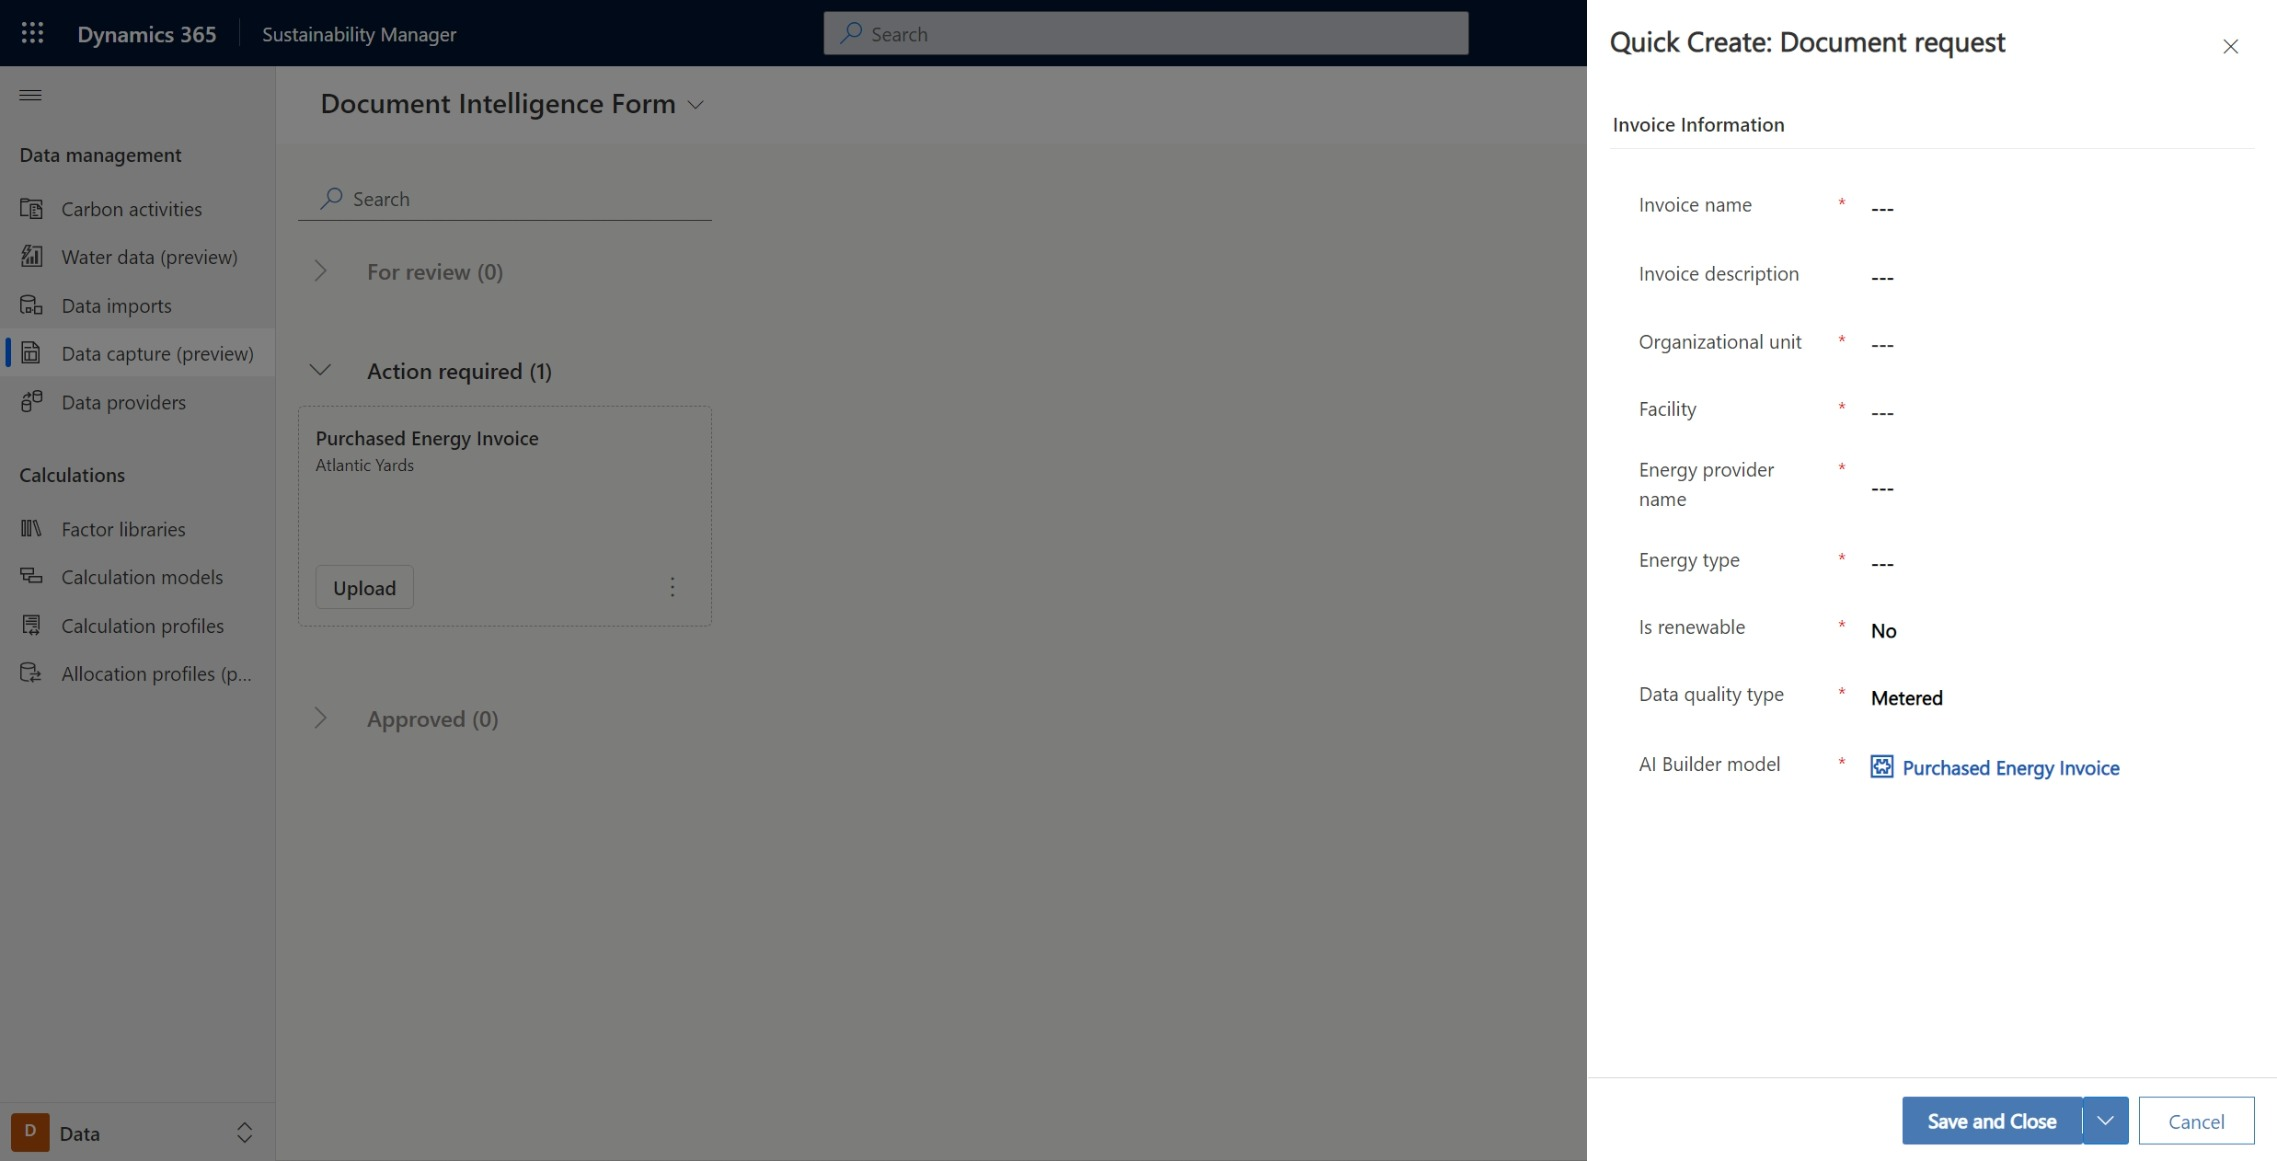
Select Add document request.
On the Document Intelligence Form page, enter information for the following required fields, and then select Save and Close.
- Invoice name
- Organizational unit
- Facility
- Energy provider name
- Energy type
- AI Builder model
Note
Optionally, you can include an Invoice description.
The new request displays as a tile under Action required.
Select Upload, and then select an invoice to upload.
After it uploads, the invoice will be sent to AI Builder for field extraction. This process takes a few moments.
Select Review. Select the Extracted details tab to review the extracted fields and verify the fields entered in step 3.
Based on extraction accuracy, select Approve or Reject.
The invoice completes ingestion and goes into the appropriate scope 2 category as purchased energy data.
(Optional): If you rejected an invoice, you can select Reupload to upload it again, or you can select the ellipses (...) and then select Remove request to remove the request.
Repeat steps 1-6 for all further invoices.


