Troubleshoot on-premises application provisioning
Troubleshoot test connection issues
After you configure the provisioning agent and the Extensible Connectivity(ECMA) host, it's time to test connectivity from the Microsoft Entra provisioning service to the provisioning agent, the ECMA host, and the application. To perform this end-to-end test, select Test connection in the application in the Azure portal. Be sure to wait 10 to 20 minutes after assigning an initial agent or changing the agent before testing the connection. If after this time the test connection fails, try the following troubleshooting steps:
Check that the agent and ECMA host are running:
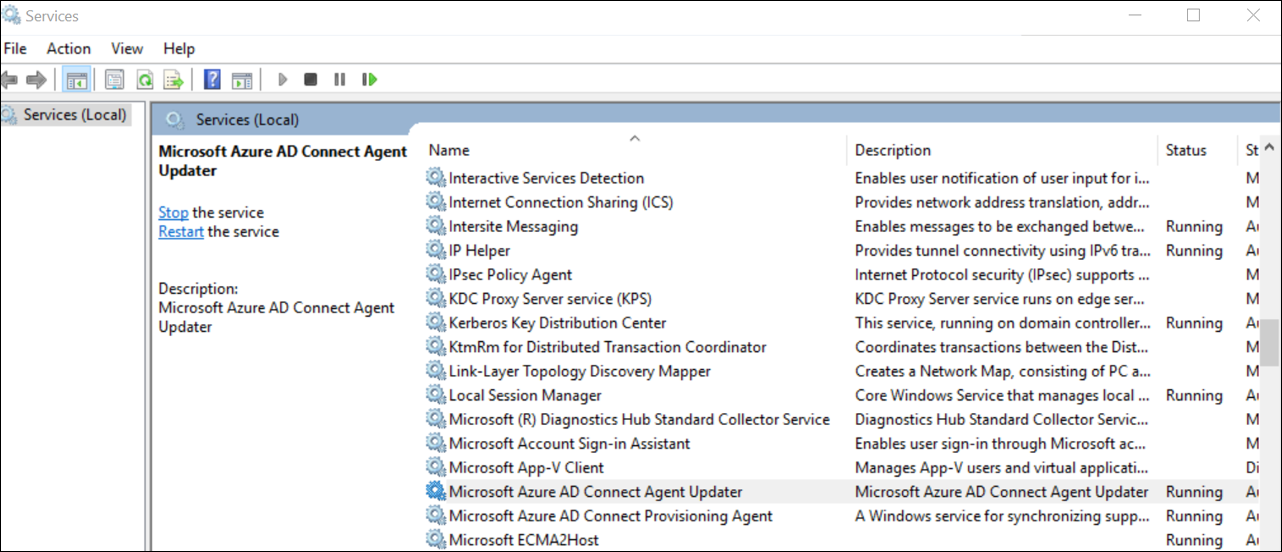
On the server with the agent installed, open Services by going to Start > Run > Services.msc.
Under Services, make sure the Microsoft Entra Connect Provisioning Agent, and Microsoft ECMA2Host services are present and their status is Running.

Check that the ECMA Connector Host service is responding to requests.
- On the server with the agent installed, launch PowerShell.
- Change to the folder where the ECMA host was installed, such as
C:\Program Files\Microsoft ECMA2Host. - Change to the subdirectory
Troubleshooting. - Run the script
TestECMA2HostConnection.ps1in that directory. Provide as arguments the connector name and the secret token when prompted.PS C:\Program Files\Microsoft ECMA2Host\Troubleshooting> .\TestECMA2HostConnection.ps1 Supply values for the following parameters: ConnectorName: CORPDB1 SecretToken: ************ - This script sends a SCIM GET or POST request to validate that the ECMA Connector Host is operating and responding to requests. If the output does not show that an HTTP connection was successful, then check that the service is running and that the correct secret token was provided.
Ensure that the agent is active by going to your application in the Azure portal, selecting admin connectivity, selecting the agent dropdown list, and ensuring your agent is active.
Check if the secret token provided is the same as the secret token on-premises. Go to on-premises, provide the secret token again, and then copy it into the Azure portal.
Ensure that you've assigned one or more agents to the application in the Azure portal.
After you assign an agent, you need to wait 10 to 20 minutes for the registration to complete. The connectivity test won't work until the registration completes.
Ensure that you're using a valid certificate that has not expired. Go to the Settings tab of the ECMA host to view the certificate expiration date. If the certificate has expired, click
Generate certificateto generate a new certificate.Restart the provisioning agent by going to the taskbar on your VM by searching for the Microsoft Entra Connect provisioning agent. Right-click Stop, and then select Start.
If you continue to see
The ECMA host is currently importing data from the target applicationeven after restarting the ECMA Connector Host and the provisioning agent, and waiting for the initial import to complete, then you may need to cancel and start over configuring provisioning to the application in the Azure portal.When you provide the tenant URL in the Azure portal, ensure that it follows the following pattern. You can replace
localhostwith your host name, but it isn't required. ReplaceconnectorNamewith the name of the connector you specified in the ECMA host. The error message 'invalid resource' generally indicates that the URL does not follow the expected format.https://localhost:8585/ecma2host_connectorName/scimNavigate to the following folder to review the provisioning agent logs: C:\ProgramData\Microsoft\Azure AD Connect Provisioning Agent\Trace
- If you see the following error, please add the service account "NT SERVICE\AADConnectProvisioningAgent" to the local group called "Performance Log Users". This eliminates the "Unable to initialize metrics collector" exception error by allowing the account to access the desired registry key: HKLM\SOFTWARE\Microsoft\Windows NT\CurrentVersion\Perflib
Unable to initialize metrics collector, exception: 'System.UnauthorizedAccessException: Access to the registry key 'Global' is denied.
- When configuring the ECMA host, ensure that you provide a certificate with a subject that matches the hostname of your windows server. The certificate that is generated by the ECMA host will do this for you automatically, but should only be used for testing purposes.
Error code: SystemForCrossDomainIdentityManagementCredentialValidationUnavailable

Details: We received this unexpected response from your application: Received response from Web resource. Resource: https://localhost/Users?filter=PLACEHOLDER+eq+"8646d011-1693-4cd3-9ee6-0d7482ca2219" Operation: GET Response Status Code: InternalServerError Response Headers: Response Content: An error occurred while sending the request. Please check the service and try again.
Unable to configure the ECMA host, view logs in Event Viewer, or start the ECMA host service
To resolve the following issues, run the ECMA host configuration wizard as an administrator:
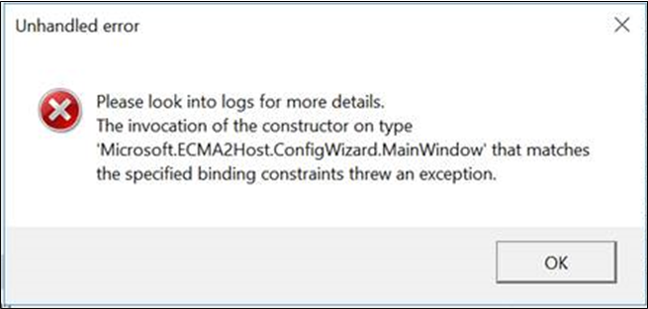
I get an error when I open the ECMA host wizard.

I can configure the ECMA host wizard, but I can't see the ECMA host logs. In this case, you need to open the ECMA Host configuration wizard as an administrator and set up a connector end to end. This step can be simplified by exporting an existing connector and importing it again.

I can configure the ECMA host wizard, but I can't start the ECMA host service.

Turn on verbose logging
By default, switchValue for the ECMA Connector Host is set to Verbose. This setting will emit detailed logging that will help you troubleshoot issues. You can change the verbosity to Error if you would like to limit the number of logs emitted to only errors. Wen using the SQL connector without Windows Integrated Auth, we recommend setting the switchValue to Error as it will ensure that the connection string is not emitted in the logs. In order to change the verbosity to error, update the switchValue to "Error" in both places as shown below.
The file location for verbose service logging is C:\Program Files\Microsoft ECMA2Host\Service\Microsoft.ECMA2Host.Service.exe.config.
<?xml version="1.0" encoding="utf-8"?>
<configuration>
    <startup>
        <supportedRuntime version="v4.0" sku=".NETFramework,Version=v4.6" />
    </startup>
    <appSettings>
      <add key="Debug" value="true" />
    </appSettings>
    <system.diagnostics>
      <sources>
    <source name="ConnectorsLog" switchValue="Error">
          <listeners>
            <add initializeData="ConnectorsLog" type="System.Diagnostics.EventLogTraceListener, System, Version=2.0.0.0, Culture=neutral, PublicKeyToken=b77a5c561934e089" name="ConnectorsLog" traceOutputOptions="LogicalOperationStack, DateTime, Timestamp, Callstack">
              <filter type=""/>
            </add>
          </listeners>
        </source>
        <!-- Choose one of the following switchTrace:  Off, Error, Warning, Information, Verbose -->
        <source name="ECMA2Host" switchValue="Error">
          <listeners>
            <add initializeData="ECMA2Host" type="System.Diagnos
The file location for wizard logging is C:\Program Files\Microsoft ECMA2Host\Wizard\Microsoft.ECMA2Host.ConfigWizard.exe.config.
      <source name="ConnectorsLog" switchValue="Error">
        <listeners>
          <add initializeData="ConnectorsLog" type="System.Diagnostics.EventLogTraceListener, System, Version=2.0.0.0, Culture=neutral, PublicKeyToken=b77a5c561934e089" name="ConnectorsLog" traceOutputOptions="LogicalOperationStack, DateTime, Timestamp, Callstack">
            <filter type=""/>
          </add>
        </listeners>
      </source>
      <!-- Choose one of the following switchTrace:  Off, Error, Warning, Information, Verbose -->
      <source name="ECMA2Host" switchValue="Error">
        <listeners>
          <add initializeData="ECMA2Host" type="System.Diagnostics.EventLogTraceListener, System, Version=4.0.0.0, Culture=neutral, PublicKeyToken=b77a5c561934e089" name="ECMA2HostListener" traceOutputOptions="LogicalOperationStack, DateTime, Timestamp, Callstack" />
Query the ECMA Host Cache
The ECMA Host has a cache of users in your application that is updated according to the schedule you specify in the properties page of the ECMA Host wizard. In order to query the cache, perform the steps below:
Set the Debug flag to
true.Please be aware that setting the debug flag to
truedisables authentication on the ECMA Host. You will need to set it back tofalseand restart the ECMA Host service once you are done querying the cache.The file location for verbose service logging is
C:\Program Files\Microsoft ECMA2Host\Service\Microsoft.ECMA2Host.Service.exe.config.<?xml version="1.0" encoding="utf-8"?> <configuration> <startup> <supportedRuntime version="v4.0" sku=".NETFramework,Version=v4.6" /> </startup> <appSettings> <add key="Debug" value="true" /> </appSettings>Restart the
Microsoft ECMA2Hostservice.Wait for the ECMA Host to connect to the target systems and re-read its cache from each of the connected systems. If there are many users in those connected systems, this import process could take several minutes.
Query this endpoint from the server the ECMA Host is installed on, replacing
{connector name}with the name of your connector, specified in the properties page of the ECMA Host:https://localhost:8585/ecma2host_{connectorName}/scim/cache.- On the server with the agent installed, launch PowerShell.
- Change to the folder where the ECMA host was installed, such as
C:\Program Files\Microsoft ECMA2Host. - Change to the subdirectory
Troubleshooting. - Run the script
TestECMA2HostConnection.ps1in that directory, and provide as arguments the connector name and theObjectTypePathvaluecache. When prompted, type the secret token configured for that connector.PS C:\Program Files\Microsoft ECMA2Host\Troubleshooting> .\TestECMA2HostConnection.ps1 -ConnectorName CORPDB1 -ObjectTypePath cache Supply values for the following parameters: SecretToken: ************ - This script sends a SCIM GET request to validate that the ECMA Connector Host is operating and responding to requests. If the output does not show that an HTTP connection was successful, then check that the service is running and that the correct secret token was provided.
Set the Debug flag back to
falseor remove the setting once you are done querying the cache.Restart the
Microsoft ECMA2Hostservice.
Target attribute is missing
The provisioning service automatically discovers attributes in your target application. If you see that a target attribute is missing in the target attribute list in the Azure portal, perform the following troubleshooting step:
- Review the Select Attributes page of your ECMA host configuration to check that the attribute has been selected, so that it will be exposed to the Azure portal.
- Ensure that the ECMA host service is running.
- After assigning the agent(s) to the enterprise application, completing the test connection step, and saving the admin credentials, refresh the browser. This will force the provisioning service to make a /schemas request and discover the target attributes.
- Review the ECMA host logs to check that a /schemas request was made, and review the attributes in the response. This information will be valuable for support to troubleshoot the issue.
Collect logs from Event Viewer as a zip file
You can use an included script to capture the event logs in a zip file and export them.
- On the server with the agent installed, right click on PowerShell in the Start menu and select to
Run as administrator. - Change to the folder where the ECMA host was installed, such as
C:\Program Files\Microsoft ECMA2Host. - Change to the subdirectory
Troubleshooting. - Run the script
CollectTroubleshootingInfo.ps1in that directory. - The script will create a ZIP file in that directory containing the event logs.
Review events in Event Viewer
After the ECMA Connector Host schema mapping has been configured, start the service so it will listen for incoming connections. Then, monitor for incoming requests.
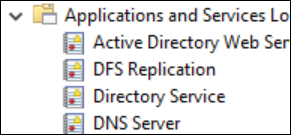
- Select the Start menu, enter event viewer, and select Event Viewer.
- In Event Viewer, expand Applications and Services logs, and select Microsoft ECMA2Host Logs.
- As changes are received by the connector host, events will be written to the application log.
Common errors
| Error | Resolution |
|---|---|
| Could not load file or assembly 'file:///C:\Program Files\Microsoft ECMA2Host\Service\ECMA\Cache\8b514472-c18a-4641-9a44-732c296534e8\Microsoft.IAM.Connector.GenericSql.dll' or one of its dependencies. Access is denied. | Ensure that the network service account has 'full control' permissions over the cache folder. If the account has permissions but .NET is attempting to create a copy of the connector DLL, then it may be necessary to add the DLL to the Global Assembly Cache. |
Invalid LDAP style of object's DN. DN: username@domain.com" or Target Site: ValidByLdapStyle |
Ensure the 'DN is Anchor' checkbox is not checked in the 'connectivity' page of the ECMA host. Ensure the 'autogenerated' checkbox is selected in the 'object types' page of the ECMA host. For more information, see About anchor attributes and distinguished names. |
| ExportErrorCustomContinueRun. objectClass: value number invalid per syntax | Ensure that the provisioning attribute mapping to the objectClass attribute includes only names of object classes recognized by the directory server. |
Understand incoming SCIM requests
Requests made by Microsoft Entra ID to the provisioning agent and connector host use the SCIM protocol. Requests made from the host to apps use the protocol the app supports. The requests from the host to the agent to Microsoft Entra ID rely on SCIM. You can learn more about the SCIM implementation in Tutorial: Develop and plan provisioning for a SCIM endpoint in Microsoft Entra ID.
The Microsoft Entra provisioning service generally makes a get-user call to check for a dummy user in three situations: at the beginning of each provisioning cycle, before performing on-demand provisioning and when test connection is selected. This check ensures the target endpoint is available and returning SCIM-compliant responses to the Microsoft Entra provisioning service.
How do I troubleshoot the provisioning agent?
You might experience the following error scenarios.
Agent failed to start
You might receive an error message that states:
"Service 'Microsoft Entra Connect Provisioning Agent' failed to start. Check that you have sufficient privileges to start the system services."
This problem is typically caused by a group policy that prevented permissions from being applied to the local NT Service sign-in account created by the installer (NT SERVICE\AADConnectProvisioningAgent). These permissions are required to start the service.
To resolve this problem:
- Sign in to the server with an administrator account.
- Open Services by either navigating to it or by going to Start > Run > Services.msc.
- Under Services, double-click Microsoft Entra Connect Provisioning Agent.
- On the Log On tab, change This account to a domain admin. Then restart the service.
This test verifies that your agents can communicate with Azure over port 443. Open a browser, and go to the previous URL from the server where the agent is installed.
Agent times out or certificate is invalid
You might get the following error message when you attempt to register the agent.

This problem is usually caused by the agent being unable to connect to the Hybrid Identity Service and requires you to configure an HTTP proxy. To resolve this problem, configure an outbound proxy.
The provisioning agent supports use of an outbound proxy. You can configure it by editing the agent config file C:\Program Files\Microsoft Azure AD Connect Provisioning Agent\AADConnectProvisioningAgent.exe.config.
Add the following lines into it, toward the end of the file just before the closing </configuration> tag.
Replace the variables [proxy-server] and [proxy-port] with your proxy server name and port values.
    <system.net>
        <defaultProxy enabled="true" useDefaultCredentials="true">
            <proxy
                usesystemdefault="true"
                proxyaddress="http://[proxy-server]:[proxy-port]"
                bypassonlocal="true"
            />
        </defaultProxy>
    </system.net>
Agent registration fails with security error
You might get an error message when you install the cloud provisioning agent.
This problem is typically caused by the agent being unable to execute the PowerShell registration scripts because of local PowerShell execution policies.
To resolve this problem, change the PowerShell execution policies on the server. You need to have Machine and User policies set as Undefined or RemoteSigned. If they're set as Unrestricted, you'll see this error. For more information, see PowerShell execution policies.
Log files
By default, the agent emits minimal error messages and stack trace information. You can find trace logs in the folder C:\ProgramData\Microsoft\Azure AD Connect Provisioning Agent\Trace.
To gather more information for troubleshooting agent-related problems:
Install the
AADCloudSyncToolsPowerShell module as described inAADCloudSyncToolsPowerShell module for Microsoft Entra Connect cloud sync.Use the
Export-AADCloudSyncToolsLogsPowerShell cmdlet to capture the information. Use the following switches to fine-tune your data collection. Use:- SkipVerboseTrace to only export current logs without capturing verbose logs (default = false).
- TracingDurationMins to specify a different capture duration (default = 3 mins).
- OutputPath to specify a different output path (default = user's documents).
By using Microsoft Entra ID, you can monitor the provisioning service in the cloud and collect logs on-premises. The provisioning service emits logs for each user that was evaluated as part of the synchronization process. Those logs can be consumed through the Azure portal UI, APIs, and log analytics. The ECMA host also generates logs on-premises. It shows each provisioning request that was received and the response that was sent to Microsoft Entra ID.
Agent installation fails
The error
System.ComponentModel.Win32Exception: The specified service already existsindicates that the previous ECMA host was unsuccessfully uninstalled. Uninstall the host application. Go to program files, and remove the ECMA host folder. You might want to store the configuration file for backup.The following error indicates a prerequisite wasn't fulfilled. Ensure that you have .NET 4.7.1 installed.
  Method Name : <>c__DisplayClass0_1 :
  RegisterNotLoadedAssemblies Error during load assembly: System.Management.Automation.resources.dll
  --------- Outer Exception Data ---------
  Message: Could not load file or assembly 'file:///C:\Program Files\Microsoft ECMA2Host\Service\ECMA\System.Management.Automation.resources.dll' or one of its dependencies. The system cannot find the file specified.
I am getting an Invalid LDAP style DN error when trying to configure the ECMA Connector Host with SQL
By default, the generic SQL connector expects the DN to be populated using the LDAP style (when the 'DN is anchor' attribute is left unchecked in the first connectivity page). In the error message Invalid LDAP style DN or Target Site: ValidByLdapStyle, you may see that the DN field contains a user principal name (UPN), rather than an LDAP style DN that the connector expects.
To resolve this error message, ensure that Autogenerated is selected on the object types page when you configure the connector.
For more information, see About anchor attributes and distinguished names.