Manage incidents in Microsoft Defender
Incident management is critical to ensuring that incidents are named, assigned, and tagged to optimize time in your incident workflow and more quickly contain and address threats.
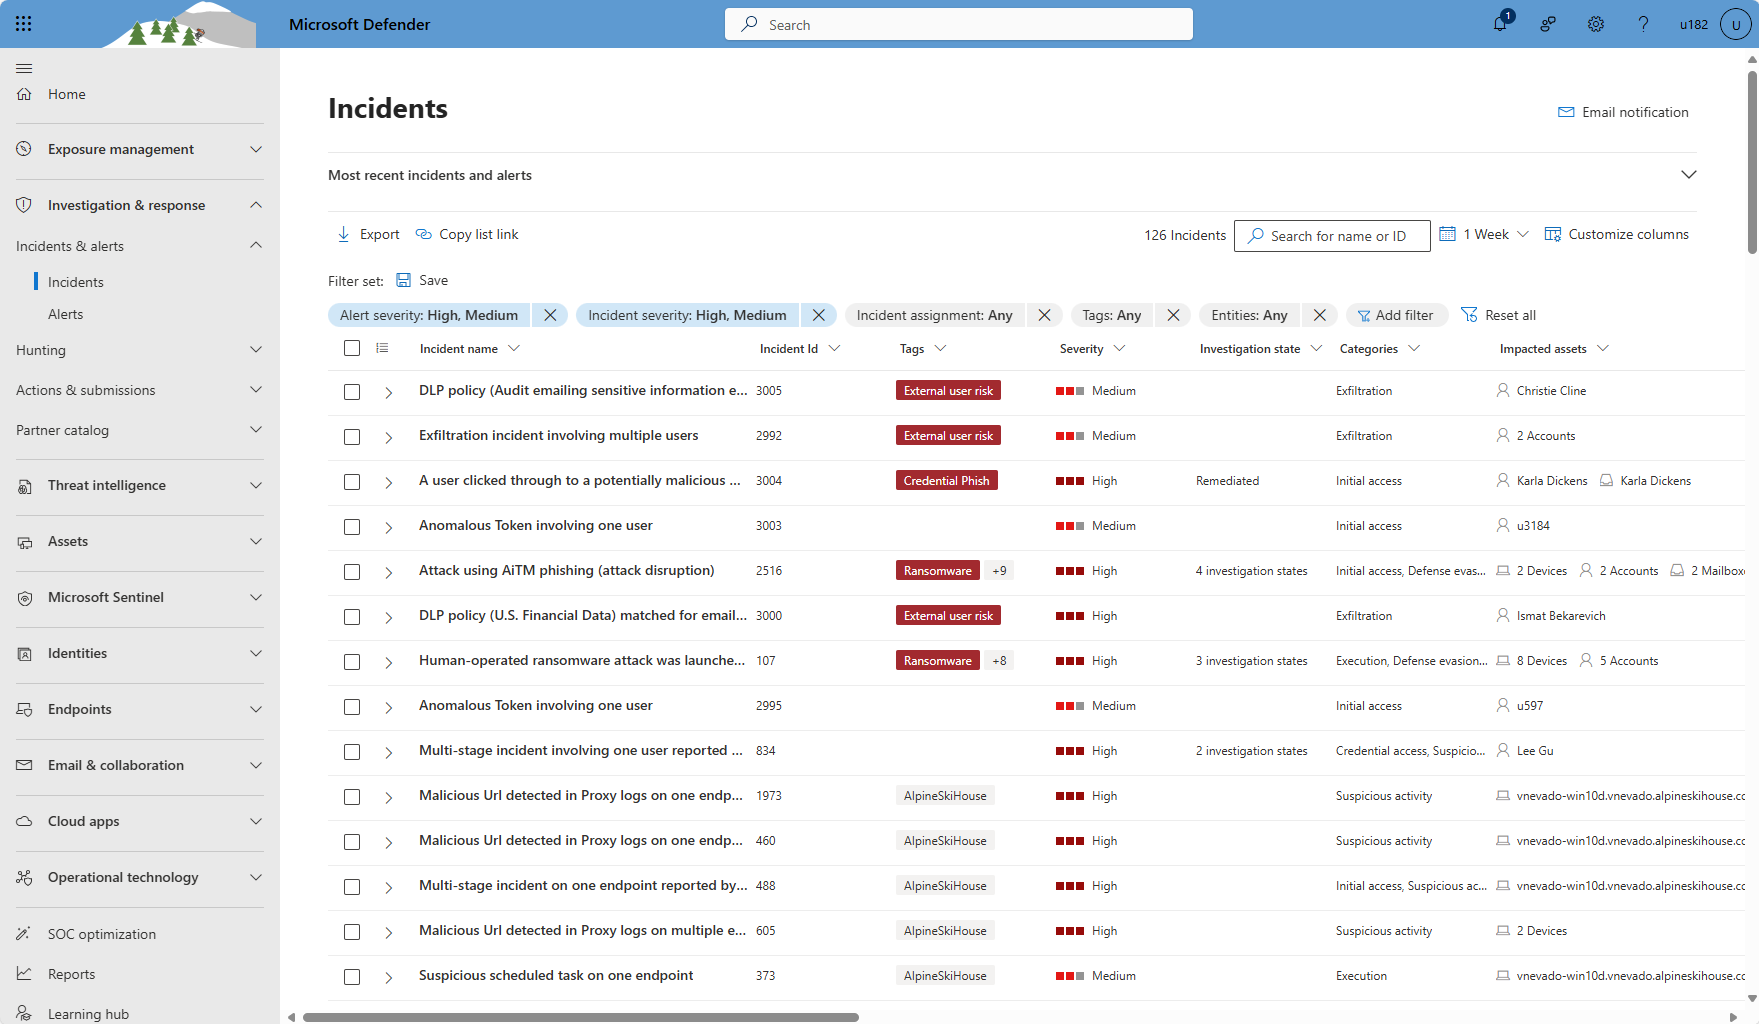
Manage your incidents from Investigation & response > Incidents & alerts > Incidents on the quick launch of the Microsoft Defender portal (security.microsoft.com). Here's an example.
This article shows you how to perform various incident management tasks associated with different stages in an incident's lifecycle.
- Assign the incident to an owner.
- Assign or change severity.
- Add incident tags.
- Change the incident status.
Incident investigation and resolution:
Incident logging and reporting:
- Edit the incident name.
- Assess the activity audit and add comments in the Activity log.
- Export incident data to PDF.
Tip
Defender Boxed, a series of cards showcasing your organization's security successes, improvements, and response actions in the past six months/year, appears for a limited time during January and July of each year. Learn how you can share your Defender Boxed highlights.
Access the Manage incident pane
Most of these tasks are accessible from the Manage incident pane for an incident. You can reach this pane from any of several locations.
From the incident queue
Select Investigation & response > Incidents & alerts > Incidents on the quick launch of the Microsoft Defender portal.
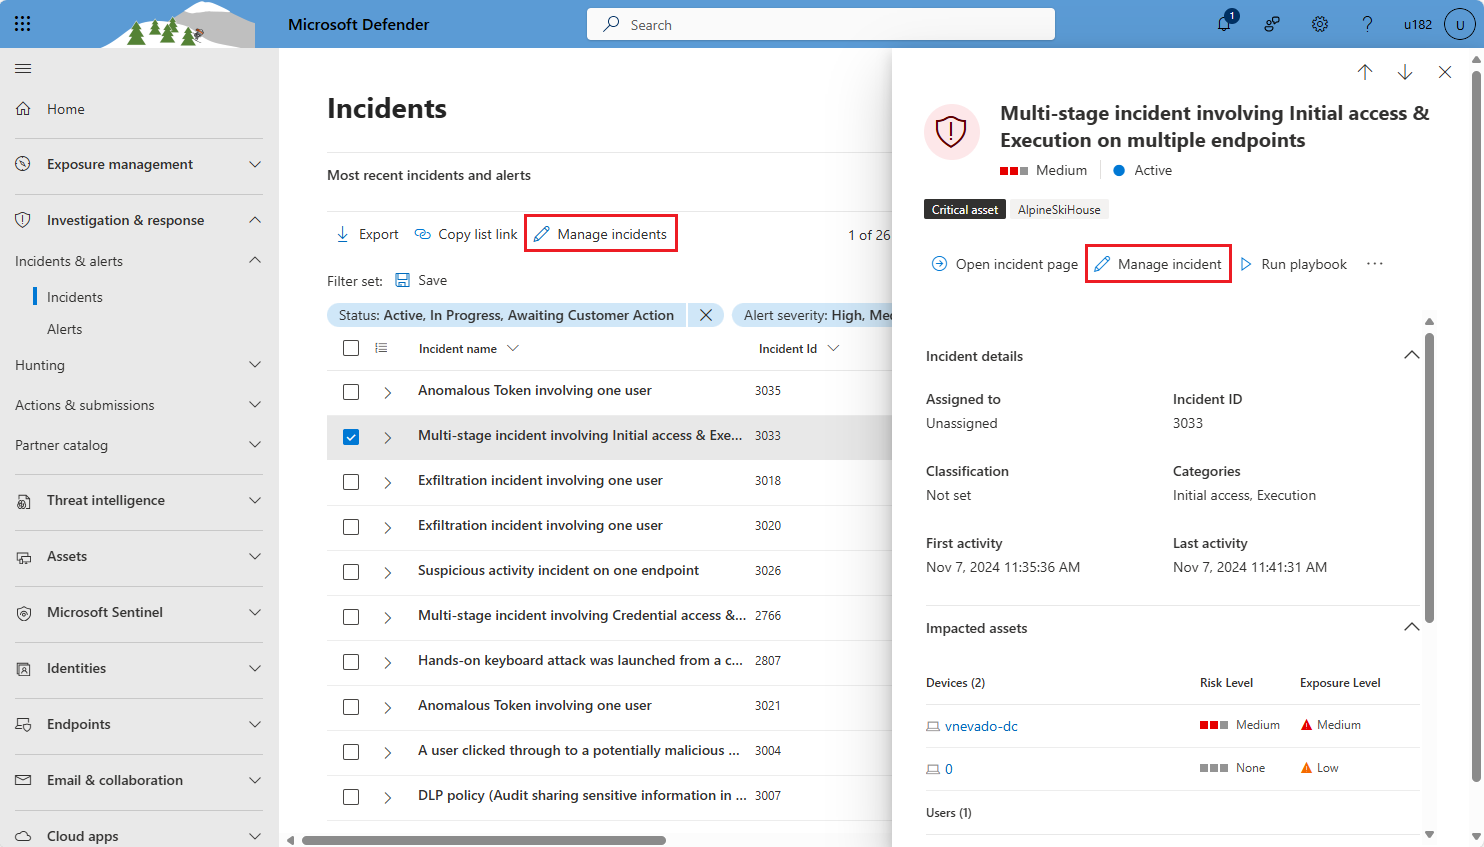
From the incident queue, access the Manage incident pane in one of two ways:
Select the check box of an incident, and select Manage incidents from the toolbar above the filters. Manage many incidents at once by selecting multiple check boxes.
Select the row of an incident (without selecting the incident name), so that the incident details pane appears, and select Manage incident from the incident details pane.
From the incident page
Select Investigation & response > Incidents & alerts > Incidents on the quick launch of the Microsoft Defender portal.
Select the name of an incident from the queue. Or, select the row of an incident in the queue and then select Open incident page from the incident details pane.
From the incident page, select Manage incident from the top panel.
If Manage incident isn't visible, select the three dots in the upper right corner (visible in the following screenshot next to "Manage incident"), and select it from the menu that appears.
Incident triage
The following management tasks are closely associated with incident triage, though they can be performed at any time.
- Assign the incident to an owner.
- Assign or change severity.
- Add incident tags.
- Change the incident status.
Assign an incident to an owner
By default, new incidents are created with no owner. Ideally, your SecOps team should have mechanisms and procedures in place to automatically assign incidents to owners. You might need to reassign an incident in the case of escalation or mistaken original assignment.
Assign an owner
To manually assign a new owner to an incident, take the following steps:
Follow the instructions in the opening section to Access the Manage incident pane.
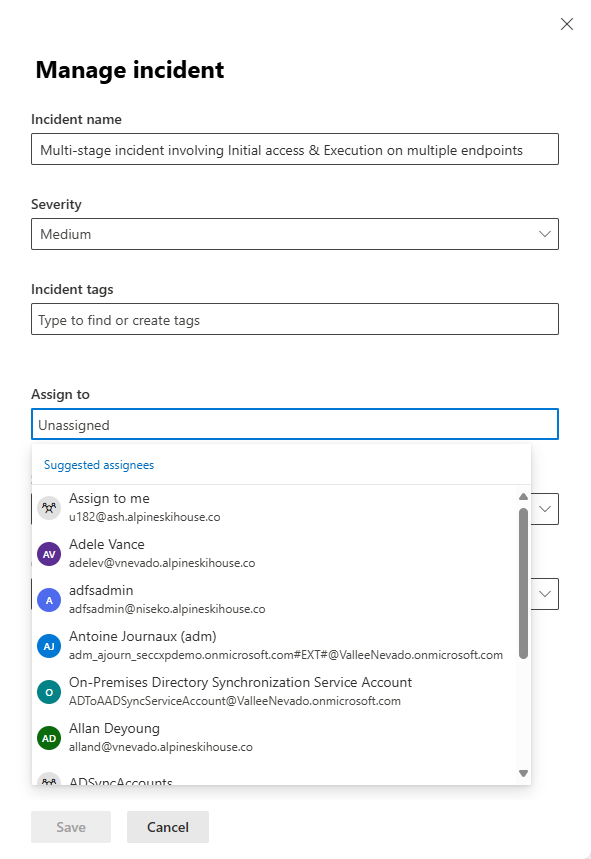
Select the Assign to box. A drop-down list of suggested assignees appears.
If you see the user or group account you want to assign the incident to, select it.
Otherwise, begin typing the name or account ID of the desired user or group in the text box at the top of the list. The list is dynamically updated, filtered by what you type. When you see the user or group you want, select it.
To remove an existing assignment, including any you just added, select the X next to the account name. Then, select the Assign to box if you want to add another assignment.
Only one user or group account can be assigned to an incident.
Select Save.
Assigning ownership of an incident assigns the same ownership to all the alerts associated with it.
View incidents assigned to a particular owner
To see the list of incidents assigned to a particular user or group, filter the incident queue:
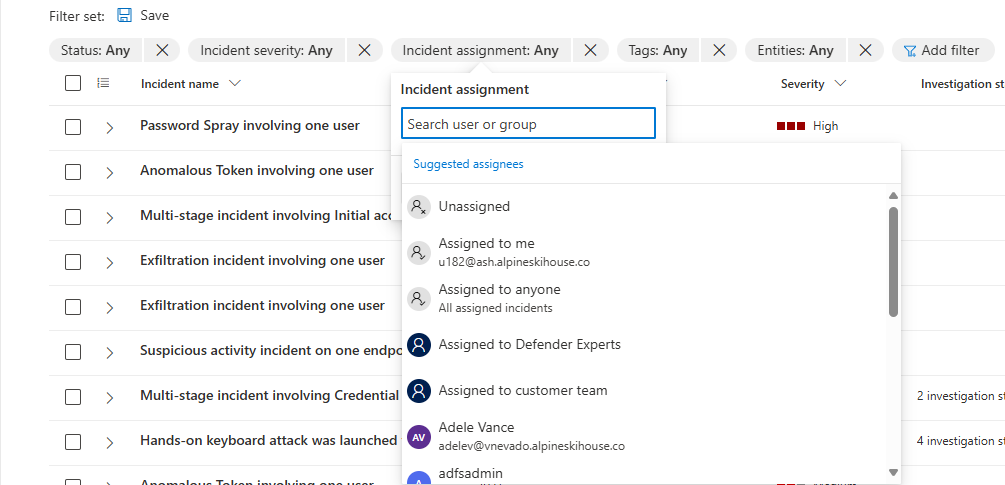
From the incident queue, select the Incident assignment filter. A drop-down list of suggested assignees appears.
If you don't see Incident assignment among the filters, select Add filter, select Incident assignment from the drop-down list, and select Add.
If you see the user account whose assigned incidents you want to display, select it.
Otherwise, begin typing the name or account ID of the desired user or group in the text box at the top of the list. The list is dynamically updated, filtered by what you type. When you see the user or group you want, select it.
Unlike assigning incidents, here you can select more than one assignee to filter the list by. To add another user or group account to the filter, select the text box (next to the existing account in the filter), and the list of suggested assignees appears again.
Select Apply.
To save a link to the incident queue with the current filters applied, select Copy list link from the toolbar on the incident queue page. Create a shortcut in your favorites or on your desktop and paste the link into it.
Assign or change incident severity
The severity of an incident is determined by the highest severity of the alerts associated with it. The severity of an incident can be set to high, medium, low, or informational.
To manually assign or change the severity of an incident, take the following steps:
Follow the instructions in the opening section to Access the Manage incident pane.
Select the severity value you want to apply from the Severity drop-down on the Manage incident pane.
Select Save.
Add incident tags
Custom tags add information to lend context to an incident. For example, a tag can label a group of incidents with a common characteristic. Tags are a criteria for filtering, so you can later filter the incident queue for all incidents that contain a specific tag. To apply a tag to an incident:
Follow the instructions in the opening section to Access the Manage incident pane.
In the Incident tags field, begin typing the name of the tag you want to apply. As you type, a list of previously used and selected tags appears. If you see the tag you want to apply in the list, select it.
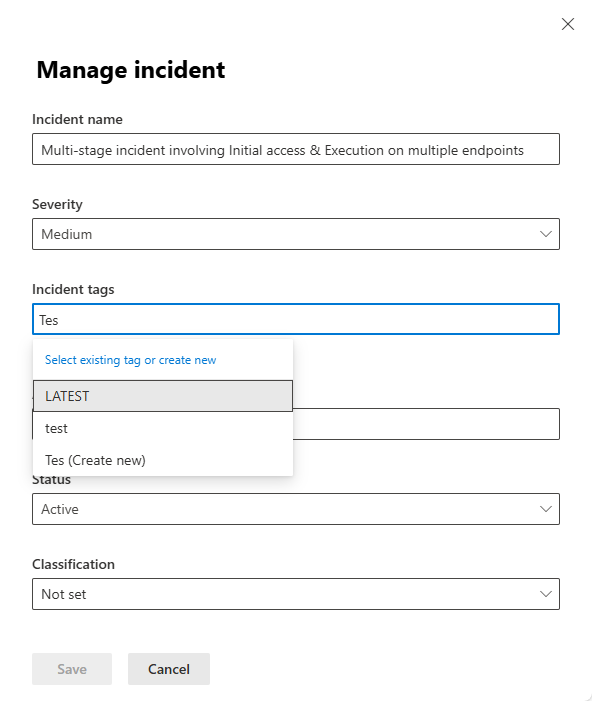
If you typed a tag name that hasn't been used before, select the last entry in the list, which is the text you typed followed by "(Create new)."

The tag then appears as a label inside the Incident tags field. Repeat this step to add more tags as you like.

Select Save.
An incident can have system tags and/or custom tags with certain color backgrounds. Custom tags use the white background while system tags typically use red or black background colors. System tags identify the following in an incident:
- A type of attack, like credential phishing or BEC fraud
- Automatic actions, like automatic investigation and response and automatic attack disruption
- Defender Experts handling an incident
- Critical assets involved in the incident
Tip
Microsoft's Security Exposure Management, based on predefined classifications, automatically tags devices, identities, and cloud resources as a critical asset. This out-of-the-box capability ensures the protection of an organization's valuable and most important assets. It also helps security operations teams to prioritize investigation and remediation. Know more about critical asset management.
Change the incident status
Incidents begin life with a status of Active. When you're working on an incident, change the Status to In progress.
Incident investigation and resolution
The following management tasks are closely associated with incident investigation and resolution, though they can be performed at any time.
Resolve an incident
When an incident is remediated and resolved, take the following actions to record the resolution:
Follow the instructions in the opening section to Access the Manage incident pane.
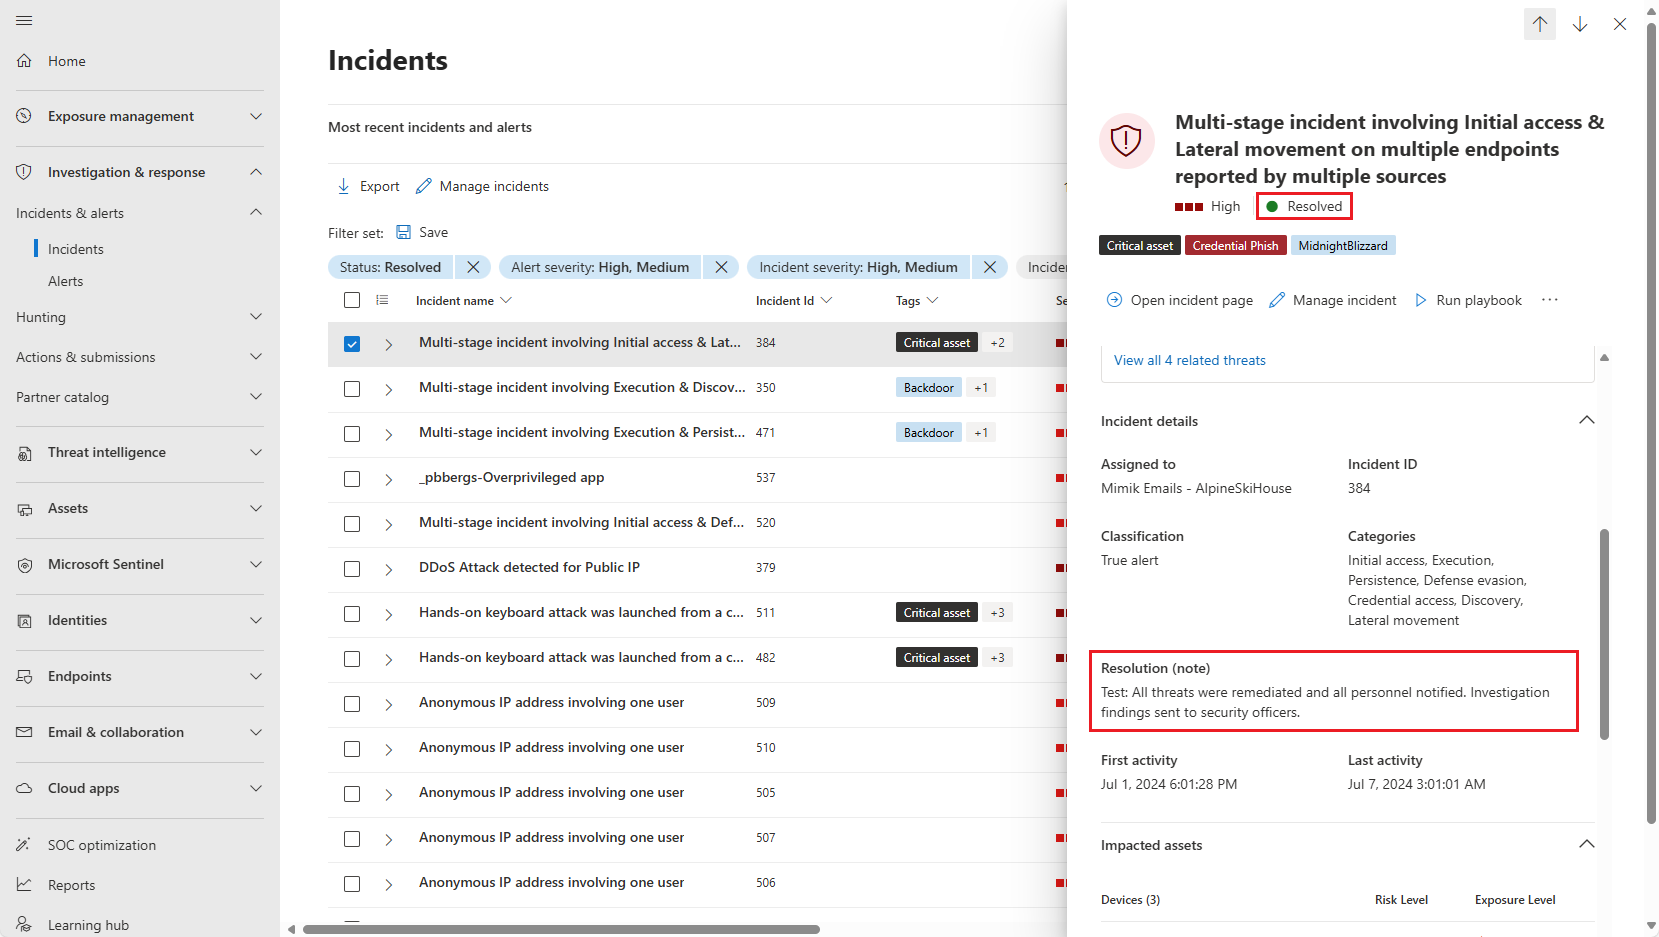
Change the status. Select Resolved from the Status drop-down list. When you change an incident's status to Resolved, a new field is displayed immediately following the Status field.
Enter a note in this field that explains why you consider the incident resolved. This note is visible in the activity log of the incident, near the entry recording the incident's resolution.
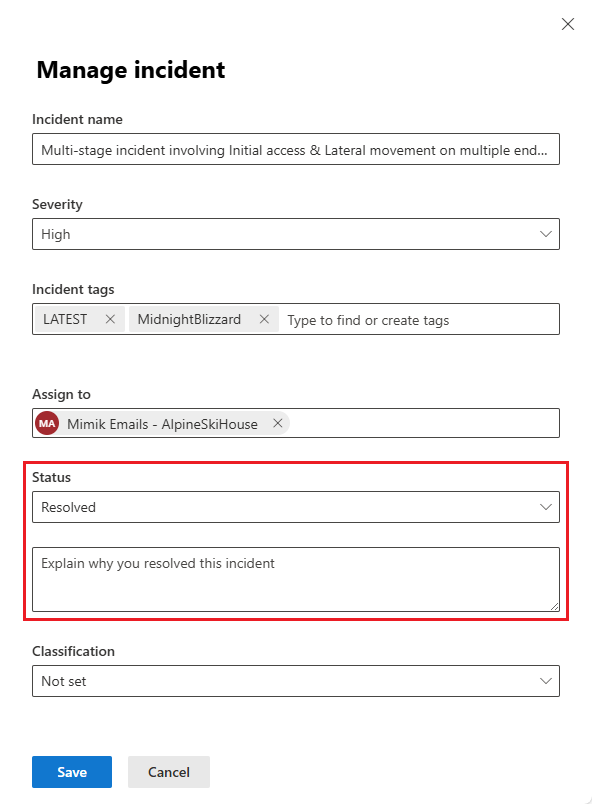
The resolution note is also visible in the Incident details panel on both the incidents queue page and the incident page of a resolved incident.
Select Save.
Resolving an incident also resolves all the linked and active alerts related to the incident. An incident that isn't resolved displays as Active.
Specify the incident's classification
When you resolve an incident, or at any point in an incident's investigation, as soon as you become aware of how the incident should be classified, set the Classification field accordingly.
Follow the instructions in the opening section to Access the Manage incident pane.
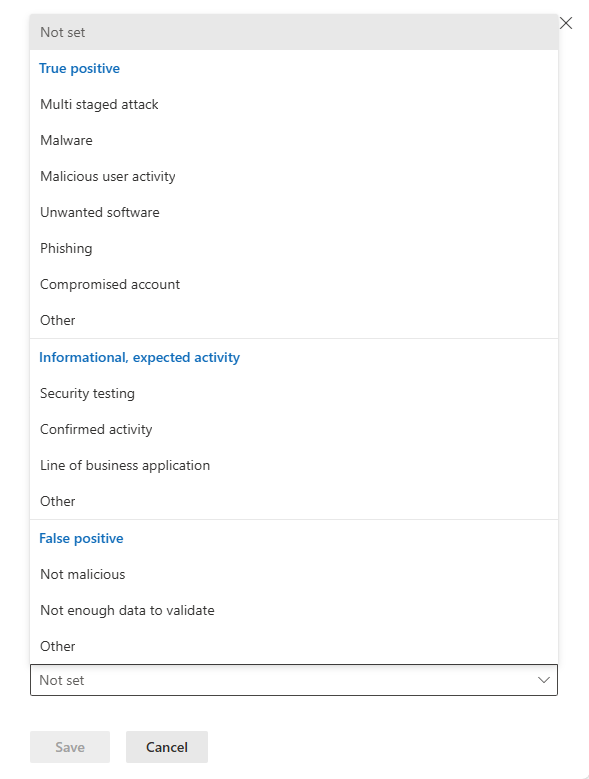
Choose the appropriate value from the Classification drop-down list:
- Not set (the default).
- True positive with a type of threat. Use this classification for incidents that accurately indicate a real threat. Specifying the threat type helps your security team see threat patterns and act to defend your organization from them.
- Informational, expected activity with a type of activity. Use the options in this category to classify incidents for security tests, red team activity, and expected unusual behavior from trusted apps and users.
- False positive for types of incidents that you determine can be ignored because they're technically inaccurate or misleading.
See the available types of activities and threats for each of these classifications in the following screenshot.
Select Save.
Classifying incidents and specifying their status and type helps tune Microsoft Defender to provide better detection determination over time.
Add comments to an incident
Over the course of investigating and incident, add comments to record your activities, insights, and conclusions.
Open the incident's activity log. From the incident page, or from the incident details panel on the incident queue page, select the three dots in the upper right corner, and from the resulting menu, select Activity log.
Type your comment in the text field. The comment field supports text and formatting, links, and images. Each comment is limited to 30,000 characters.
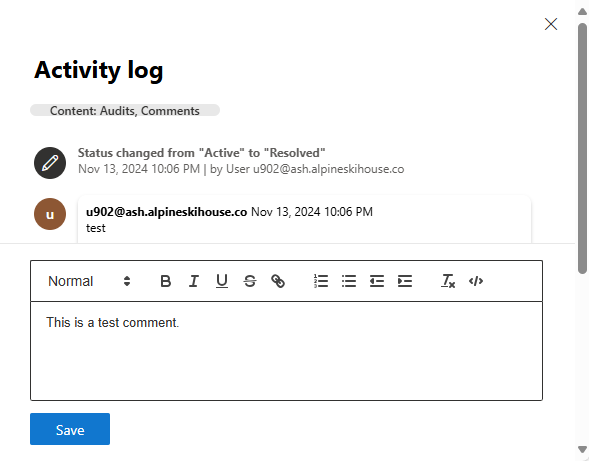
Select Save.
All comments are added to the historical events of the incident. You can see the comments and history of an incident from the Comments and history link on the Summary page.
Incident logging and reporting
The following management tasks can be associated with auditing and reporting on incident investigations, though they can be performed at any time.
- Edit the incident name.
- Assess the activity audit and add comments in the Activity log.
- Export incident data to PDF.
Edit the incident name
Microsoft Defender automatically assigns a name based on alert attributes such as the number of endpoints affected, users affected, detection sources or categories. The incident name allows you to quickly understand the scope of the incident. For example: Multi-stage incident on multiple endpoints reported by multiple sources.
To edit the incident name, take the following steps:
Follow the instructions in the opening section to Access the Manage incident pane.
Type a new name in the Incident name field on the Manage incident pane.
Select Save.
Note
Incidents that existed before the rollout of the automatic incident naming feature retain their names.
If another incident is merged into a renamed incident, Defender gives the incident a new name, overwriting any custom name you gave it beforehand.
View the activity log of an incident
When doing a postmortem of an incident, view the incident's Activity log to see the history of actions performed on the incident (called "Audits") and any comments recorded. All changes made to the incident, whether by a user or by the system, are recorded in the activity log.
Open the incident's activity log. From the incident page, or from the incident details panel on the incident queue page, select the three dots in the upper right corner, and from the resulting menu, select Activity log.
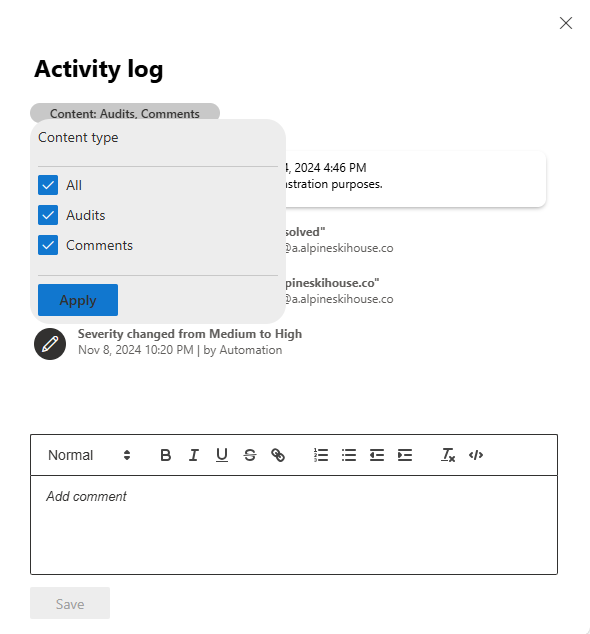
Filter the activities within the log by comments and actions. Select Content: Audits, Comments then select the content type to filter activities. Here's an example.
Select Apply.
You can also add your own comments using the comment box available within the activity log. The comment box accepts text and formatting, links, and images.
Important
Some information in this article relates to prereleased product which may be substantially modified before it's commercially released. Microsoft makes no warranties, express or implied, with respect to the information provided here.
Export incident data to PDF
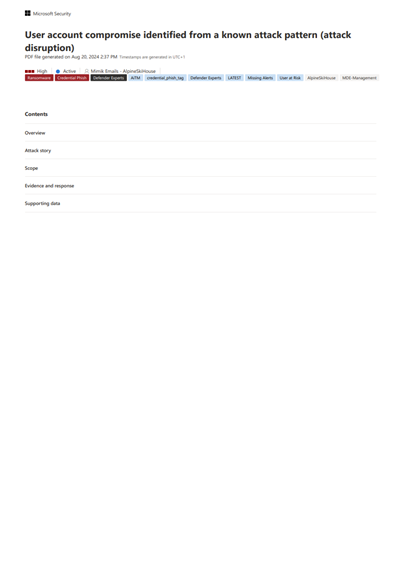
You can export an incident's data to PDF through the Export incident as PDF function and save it into PDF format. This function allows security teams to review an incident's details offline at any given time.
The incident data exported includes the following information:
- An overview containing the incident details
- The attack story graph and threat categories
- The impacted assets, covering up to 10 assets for each asset type
- The evidence list covering up to 100 items
- Supporting data, including all related alerts and activities recorded in the activity log
Here's an example of the exported PDF:
If you have the Copilot for Security license, the exported PDF contains the following additional incident data:
The export to PDF function is also available in the Copilot side panel. When you select the More actions ellipsis (...) on the upper right corner of the incident report results card, you can choose Export incident as PDF.
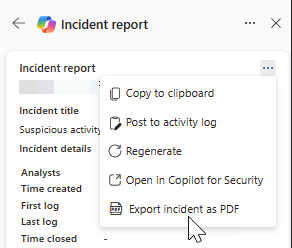
To generate the PDF, perform the following steps:
Open an incident page. Select the More actions ellipsis (...) on the upper right corner and choose Export incident as PDF.
In the dialog box that appears next, confirm the incident information that you want to include or exclude in the PDF. All incident information is selected by default. Select Export PDF to proceed.
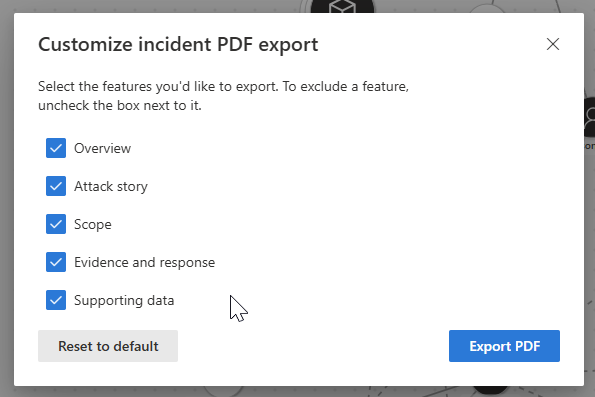
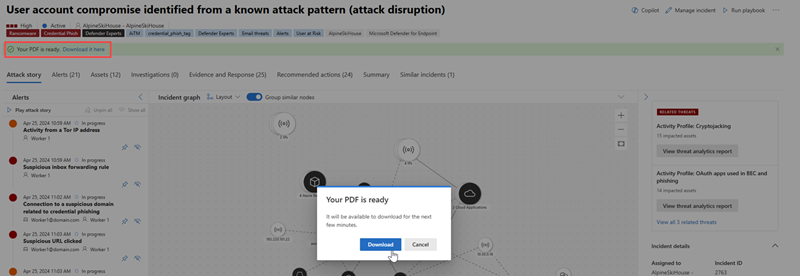
A status message indicating the current state of the download appears below the incident title. The export process may take a few minutes depending on the incident's complexity and the amount of data to be exported.
Another dialog box appears indicating that the PDF is ready. Select Download from the dialog box to save the PDF to your device. The status message below the incident title also updates to indicate that the download is available.
The report is cached for a couple of minutes. The system provides the previously generated PDF if you try to export the same incident again within a short time frame. To generate a newer version of the PDF, wait for a few minutes for the cache to expire.
Next steps
For new and in-process incidents, continue your incident investigation.
For resolved incidents, perform a post-incident review.
See also
Tip
Do you want to learn more? Engage with the Microsoft Security community in our Tech Community: Microsoft Defender XDR Tech Community.
