Use a custom connector from a Power Apps app
Note
This topic is part of a tutorial series on creating and using custom connectors in Azure Logic Apps, Power Automate, and Power Apps. Make sure you read the custom connector overview to understand the process.
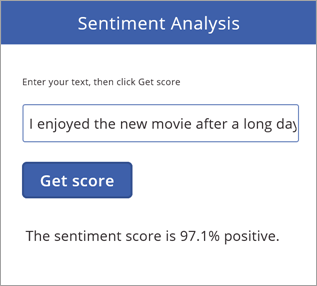
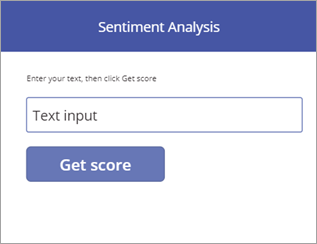
In this topic, you build a basic app that uses the custom connector you created in a previous topic. The app takes text input, then uses the custom connector to call the Cognitive Services Text Analytics API. The connector returns the sentiment score (0 to 1) for the text, and the app displays it as a percentage. The following image shows the finished app:
Prerequisites
- A Power Apps subscription.
- Basic experience building apps in Power Apps. For more information, see Create an app from scratch.
- The custom connector that you created in one of these topics:
Create the app and add the custom connector
The first thing you do is create an app from blank, then connect to the custom connector that you created in a previous topic.
In make.powerapps.com, choose Start from blank >
 (phone) > Make this app.
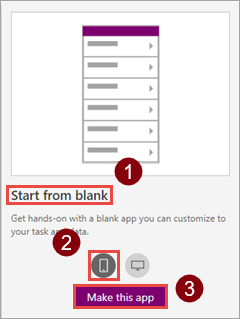
On the app canvas, choose connect to data.
On the Data panel, choose the connection you created in a previous topic (such as "SentimentDemo").
Save the app with the name
Sentiment Analysis.
Add controls to the app
You now build out the UI for the app, so that you can enter text, submit that text to the API, and get a response.
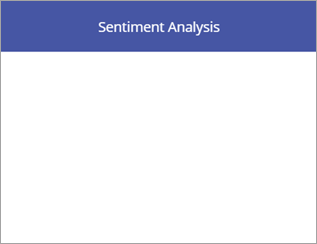
Add a rectangle icon as a title bar, then add the label "Sentiment Analysis".
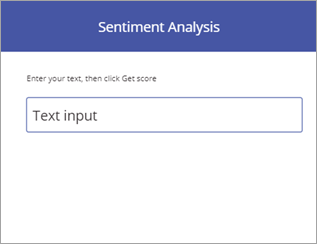
Add the label "Enter your text, then click Get score", then add a text input control.
Add a button with the text "Get score".
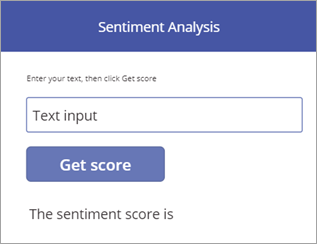
Add the label "The sentiment score is". In the next section, you add a formula to complete this label.
Add formulas to drive behavior
With the data connection and UI in place, now you add Power Apps formulas that drive the behavior of the app. The formulas call the API through the custom connector, store the result in a collection (a tabular variable), then display the formatted result in the app.
Choose the button you created, then set the OnSelect property of the button to the name of the connector (including the period).
SentimentDemo.Power Apps gives you an auto-complete option of
DetectSentimentbecause the custom connector makes this available.Now set the OnSelect property of the button to the following formula.
ClearCollect(sentimentCollection, SentimentDemo.DetectSentiment(
    {id:"1", language:"en", text:TextInput1.Text}).documents.score)
This formula gets the sentiment score from the API, and stores it in a collection:
The formula calls the
DetectSentimentfunction with the three parameters exposed by the custom connector:id,language, andtext. We specify values for the first two right in the formula, and get the value forTextfrom the text input control (you could also pull the first two values from somewhere else in an app).The function returns a
scorefor each document that you send; in our examples, we send one document at a time. The score ranges from 0 (negative) to 1 (positive).The formula then calls the
ClearCollectfunction to remove any existing values from thesentimentCollectionand add the value fromscore.
Choose the label that you created, then set the Text property of the label to the following formula.
"The sentiment score is " & Round(First(sentimentCollection).score, 3) * 100 & "%"This formula gets the sentiment score from the collection, and formats and displays it:
The
First()function returns the first (and in this case only) record insentimentCollect, and displays thescorefield (the only field) associated with that record.The
Round()function rounds the score to 3 places; the rest of the formula formats the result as a percentage and adds some information for context.
Test the app
Now run the completed app to make sure it works as expected.
Choose
 in the top right to run the app.
Enter a phrase in the text input control, and choose Get score. The sentiment score should be displayed within a few seconds.
The finished app looks like the following image:

It's a simple app, but it gains powerful functionality by being able to call Cognitive Services through a custom connector.
Next steps
Share the connector within your organization and/or get the connector certified so that people outside your organization can use it:
Provide feedback
We greatly appreciate feedback on issues with our connector platform, or new feature ideas. To provide feedback, go to Submit issues or get help with connectors and select your feedback type.