Configure Windows update settings for Azure Update Manager
Azure Update Manager relies on the Windows Update client to download and install Windows updates. There are specific settings that are used by the Windows Update client when connecting to Windows Server Update Services (WSUS) or Windows Update. Many of these settings can be managed by:
- Local Group Policy Editor
- Group Policy
- PowerShell
- Directly editing the Registry
The Update Manager respects many of the settings specified to control the Windows Update client. If you use settings to enable non-Windows updates, the Update Manager will also manage those updates. If you want to enable downloading of updates before an update deployment occurs, update deployment can be faster, more efficient, and less likely to exceed the maintenance window.
For additional recommendations on setting up WSUS in your Azure subscription and to secure your Windows virtual machines up to date, review Plan your deployment for updating Windows virtual machines in Azure using WSUS.
Pre-download updates
Pre-download of updates isn't supported in Azure Update Manager. Don't use pre-download functionality through AUOptions while using Azure Update Manager default/advanced patching mechanisms which sets NoAutoUpdate=1.
Configure reboot settings
The registry keys listed in Configuring Automatic Updates by editing the registry and Registry keys used to manage restart can cause your machines to reboot, even if you specify Never Reboot in the Update Deployment settings. Configure these registry keys to best suit your environment.
Enable updates for other Microsoft products
By default, the Windows Update client is configured to provide updates only for Windows operating system. In Windows update, select Check online for Windows updates. It will check updates for other Microsoft products to enable the Give me updates for other Microsoft products when I update Windows to receive updates for other Microsoft products, including security patches for Microsoft SQL Server and other Microsoft software.
Use one of the following options to perform the settings change at scale:
For Servers configured to patch on a schedule from Update Manager (that has the VM PatchSettings set to AutomaticByPlatform = Azure-Orchestrated), and for all Windows Servers running on an earlier operating system than server 2016, Run the following PowerShell script on the server you want to change.
$ServiceManager = (New-Object -com "Microsoft.Update.ServiceManager")
$ServiceManager.Services
$ServiceID = "7971f918-a847-4430-9279-4a52d1efe18d"
$ServiceManager.AddService2($ServiceId,7,"")
For servers running Server 2016 or later which aren't using Update Manager scheduled patching (that has the VM PatchSettings set to AutomaticByOS = Azure-Orchestrated) you can use Group Policy to control this by downloading and using the latest Group Policy Administrative template files.
Configure a Windows server for Microsoft updates
The Windows update client on Windows servers can get their patches from either of the following Microsoft hosted patch repositories:
- Windows update - hosts operating system patches.
- Microsoft update - hosts operating system and other Microsoft patches. For example MS Office, SQL Server and so on.
Note
For the application of patches, you can choose the update client at the time of installation, or later using Group policy or by directly editing the registry. To get the non-operating system Microsoft patches or to install only the OS patches, we recommend you to change the patch repository as this is an operating system setting and not an option that you can configure within Azure Update Manager.
Edit the registry
If scheduled patching is configured on your machine using the Azure Update Manager, the Auto update on the client is disabled. To edit the registry and configure the setting, see First party updates on Windows.
Patching using group policy on Azure Update Manager
If your machine is patched using Azure Update Manager, and has Automatic updates enabled on the client, you can use the group policy to have complete control. To patch using group policy, follow these steps:
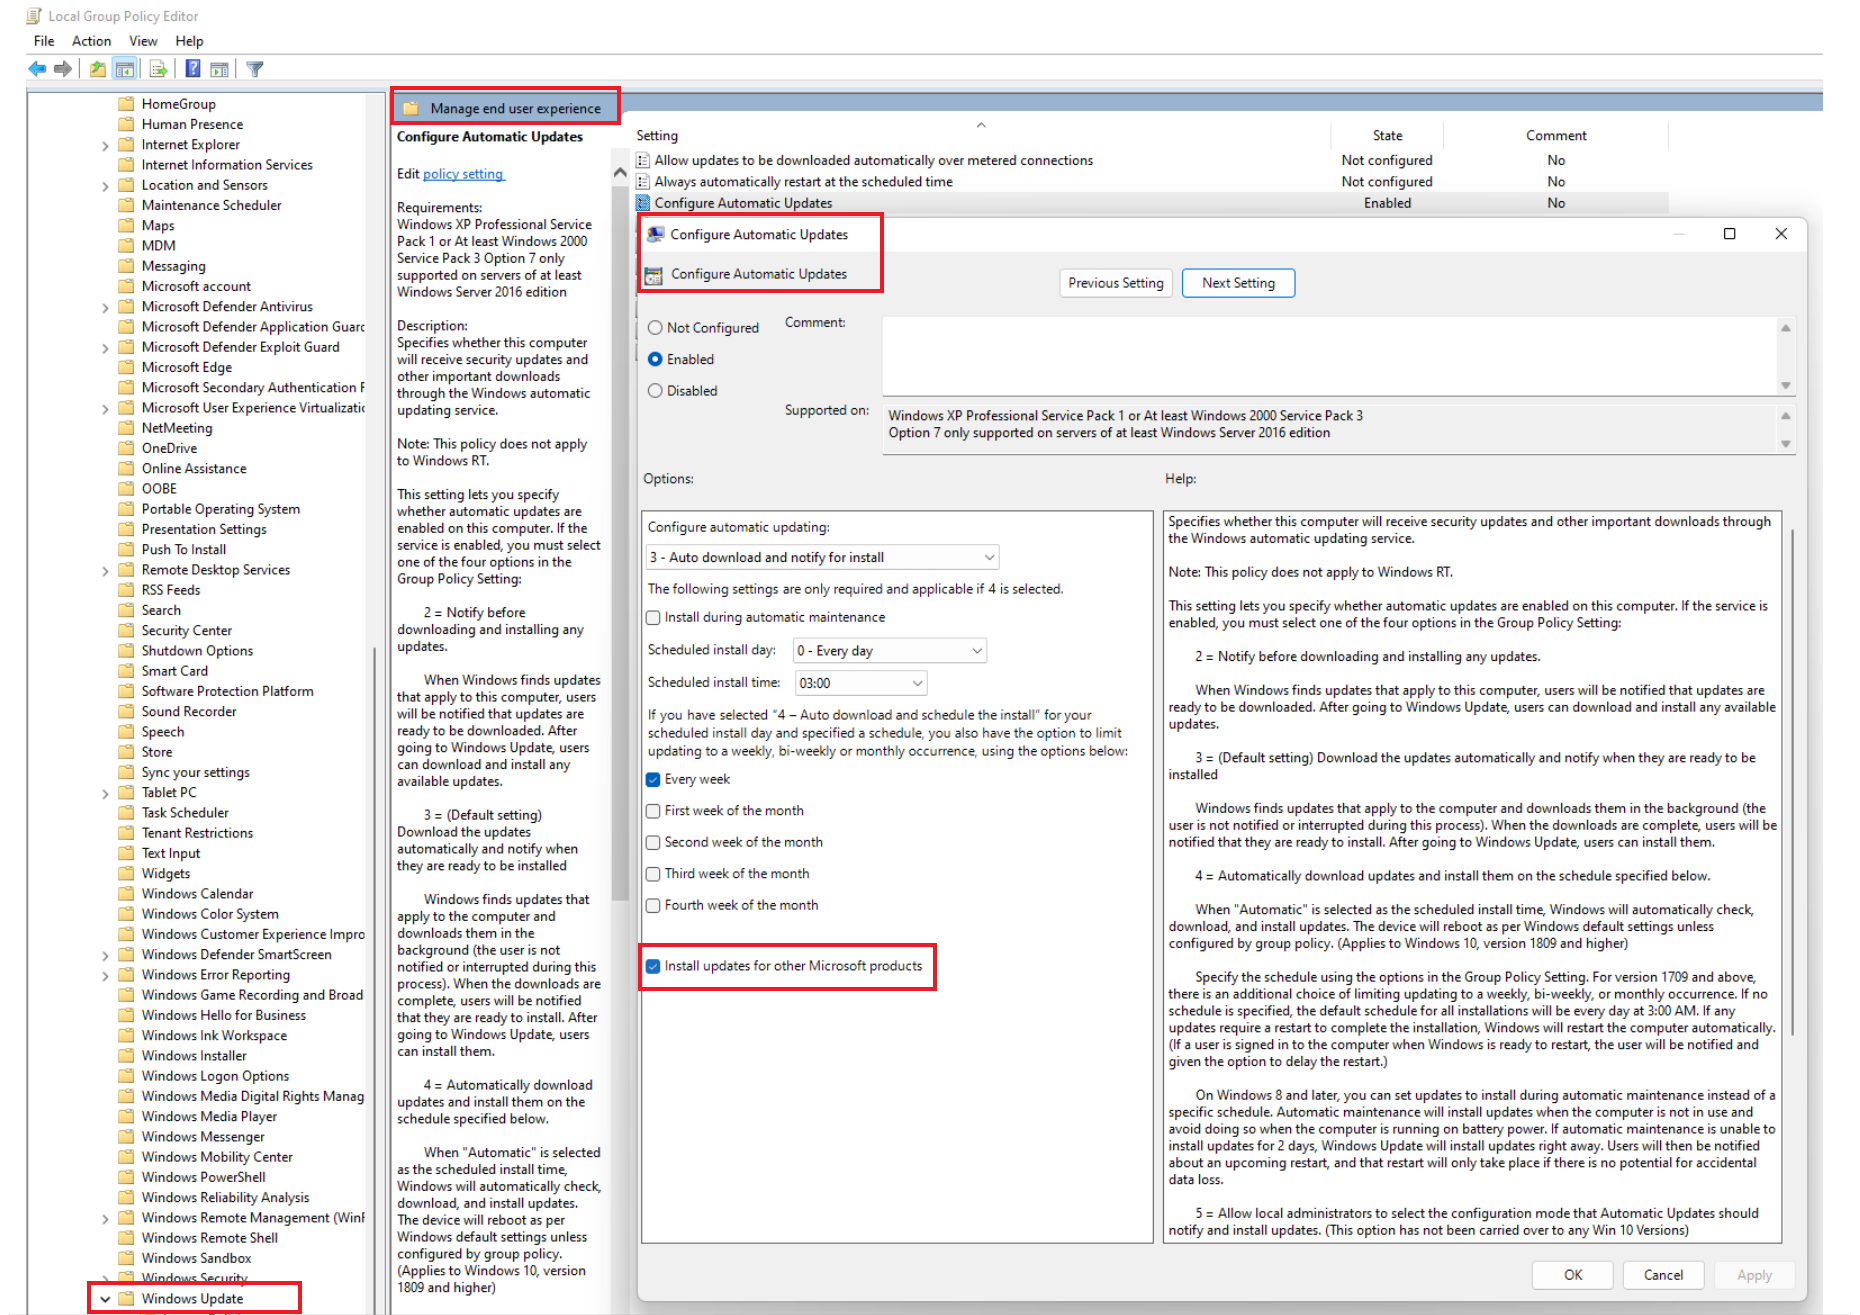
Go to Computer Configuration > Administrative Templates > Windows Components > Windows Update > Manage end user experience.
Select Configure Automatic Updates.
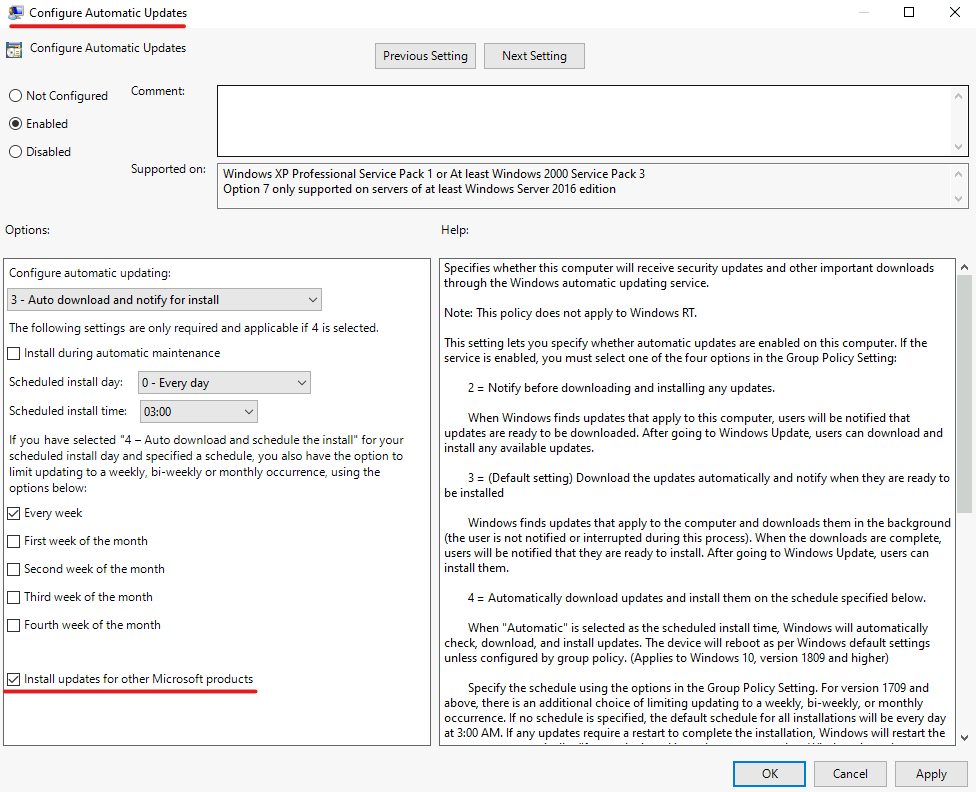
Select or deselect the Install updates for other Microsoft products option.
For Windows Server 2022:
Go to Computer Configuration > Administrative Templates > Windows Components > Windows Update > Configure Automatic Updates.
Select Configure Automatic Updates.
Select or deselect the Install updates for other Microsoft products option.

Make WSUS configuration settings
Update Manager supports WSUS settings. You can specify sources for scanning and downloading updates using instructions in Specify intranet Microsoft Update service location. By default, the Windows Update client is configured to download updates from Windows Update. When you specify a WSUS server as a source for your machines, the update deployment fails, if the updates aren't approved in WSUS.
To restrict machines to the internal update service, see do not connect to any Windows Update Internet locations.
Next steps
Configure an update deployment by following instructions in Deploy updates.
