Use Azure DevOps to create a CI/CD pipeline for a Stream Analytics job
In this article, you learn how to create Azure DevOps build and release pipelines using Azure Stream Analytics CI/CD tools.
Commit your Stream Analytics project
Before you begin, commit your complete Stream Analytics projects as source files to an Azure DevOps repository. You can reference this sample repository and Stream Analytics project source code in Azure Pipelines.
The steps in this article use a Stream Analytics Visual Studio Code project. If you're using a Visual Studio project, follow the steps in Automate builds, tests, and deployments of an Azure Stream Analytics job using CI/CD tools.
Create a build pipeline
In this section, you learn how to create a build pipeline.
Open a web browser and navigate to your project in Azure DevOps.
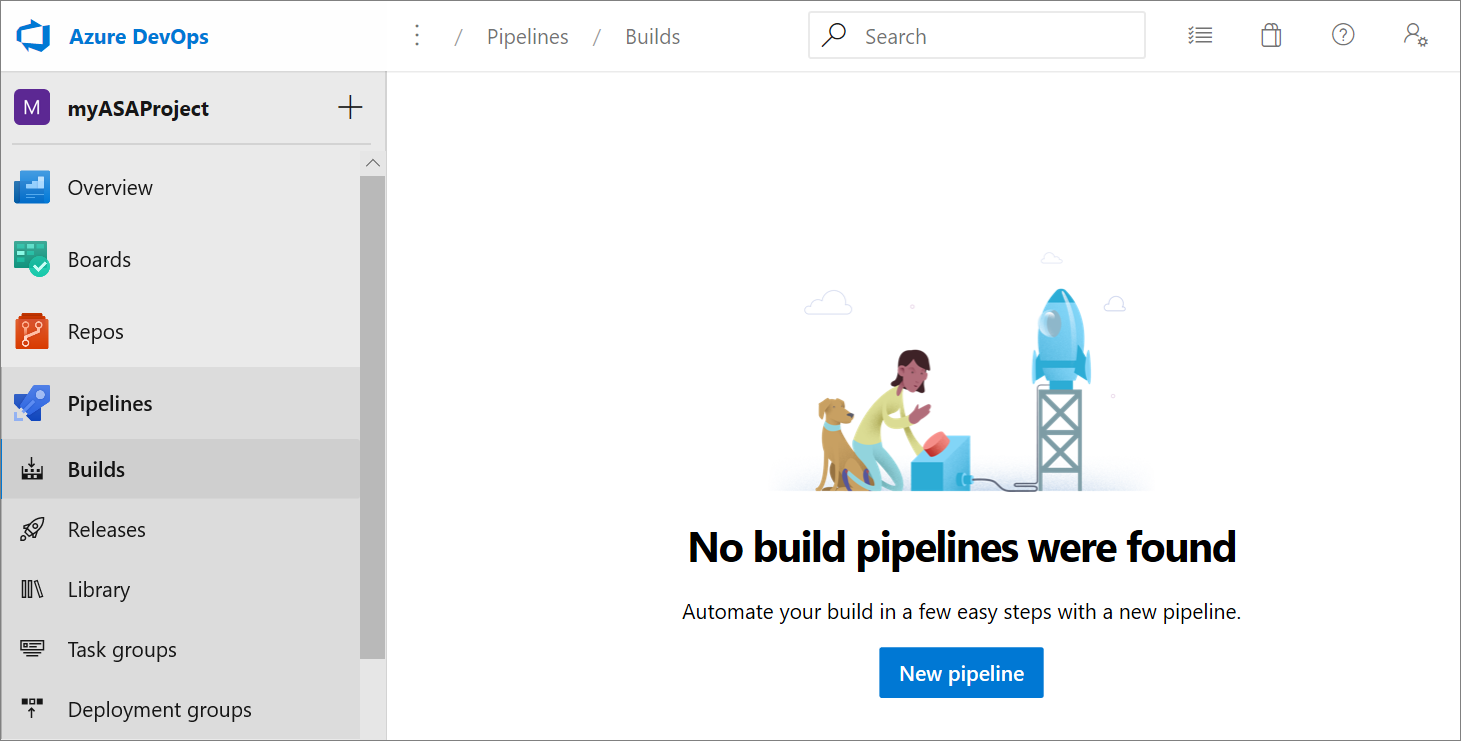
Under Pipelines in the left navigation menu, select Builds. Then, select New pipeline.
Select Use the classic editor to create a pipeline without YAML.
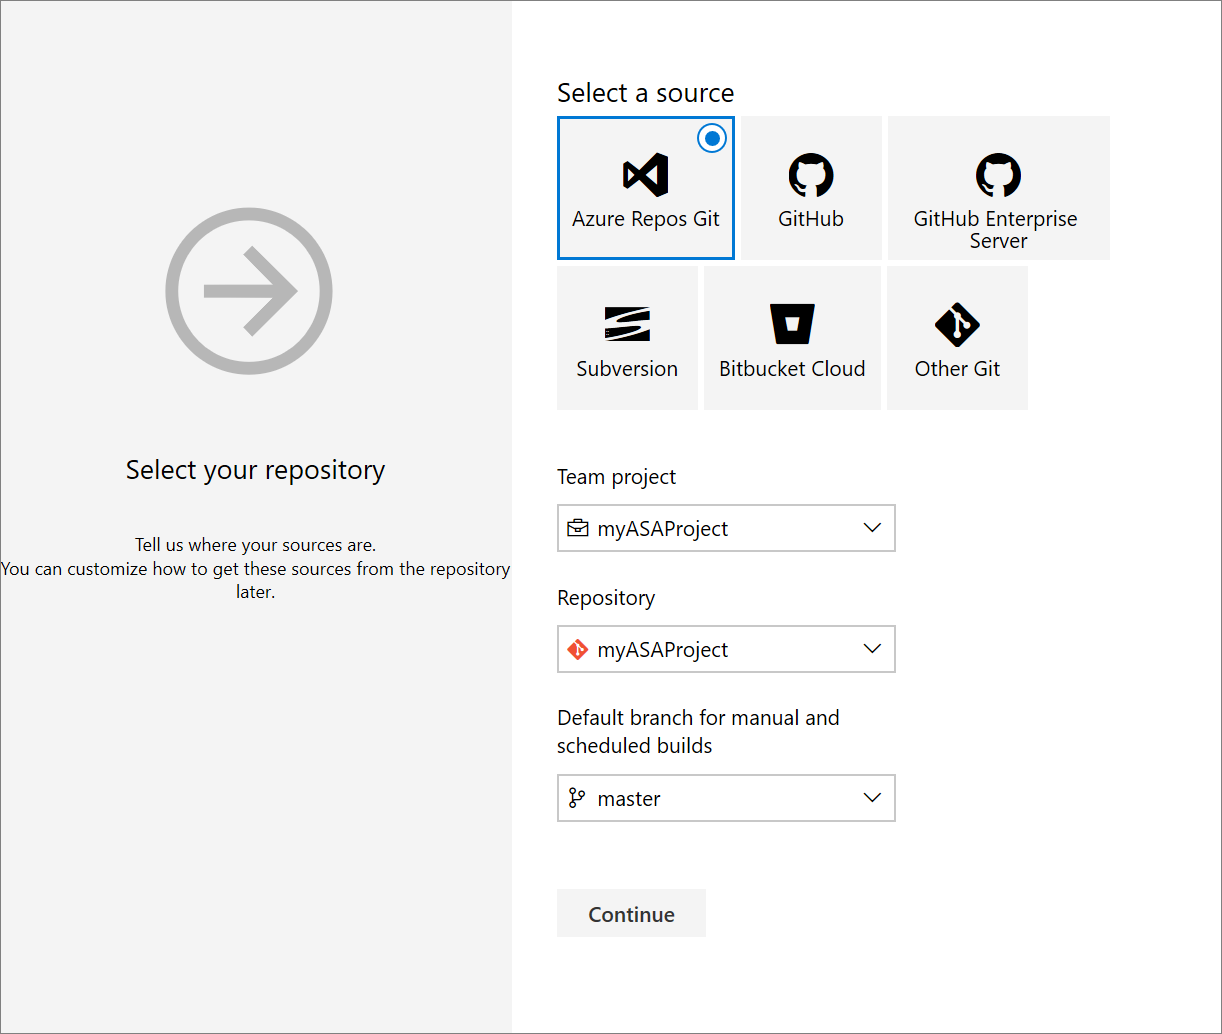
Select your source type, team project, and repository. Then, select Continue.
On the Choose a template page, select Empty job.
Install npm package
On the Tasks page, select the plus sign next to Agent job 1. Enter npm in the task search and select npm.
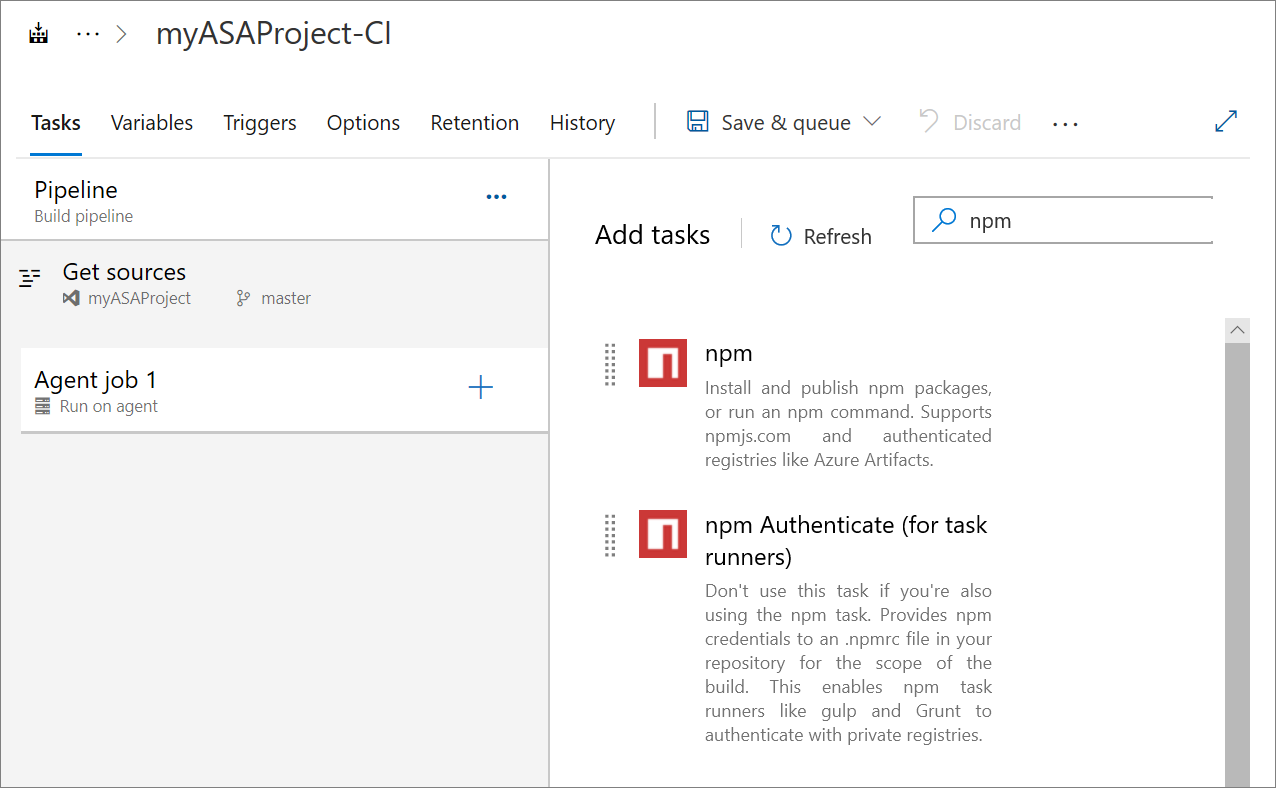
Give the task a Display name. Change the Command option to custom and enter the following command in Command and arguments. Leave the remaining default options.
install -g azure-streamanalytics-cicd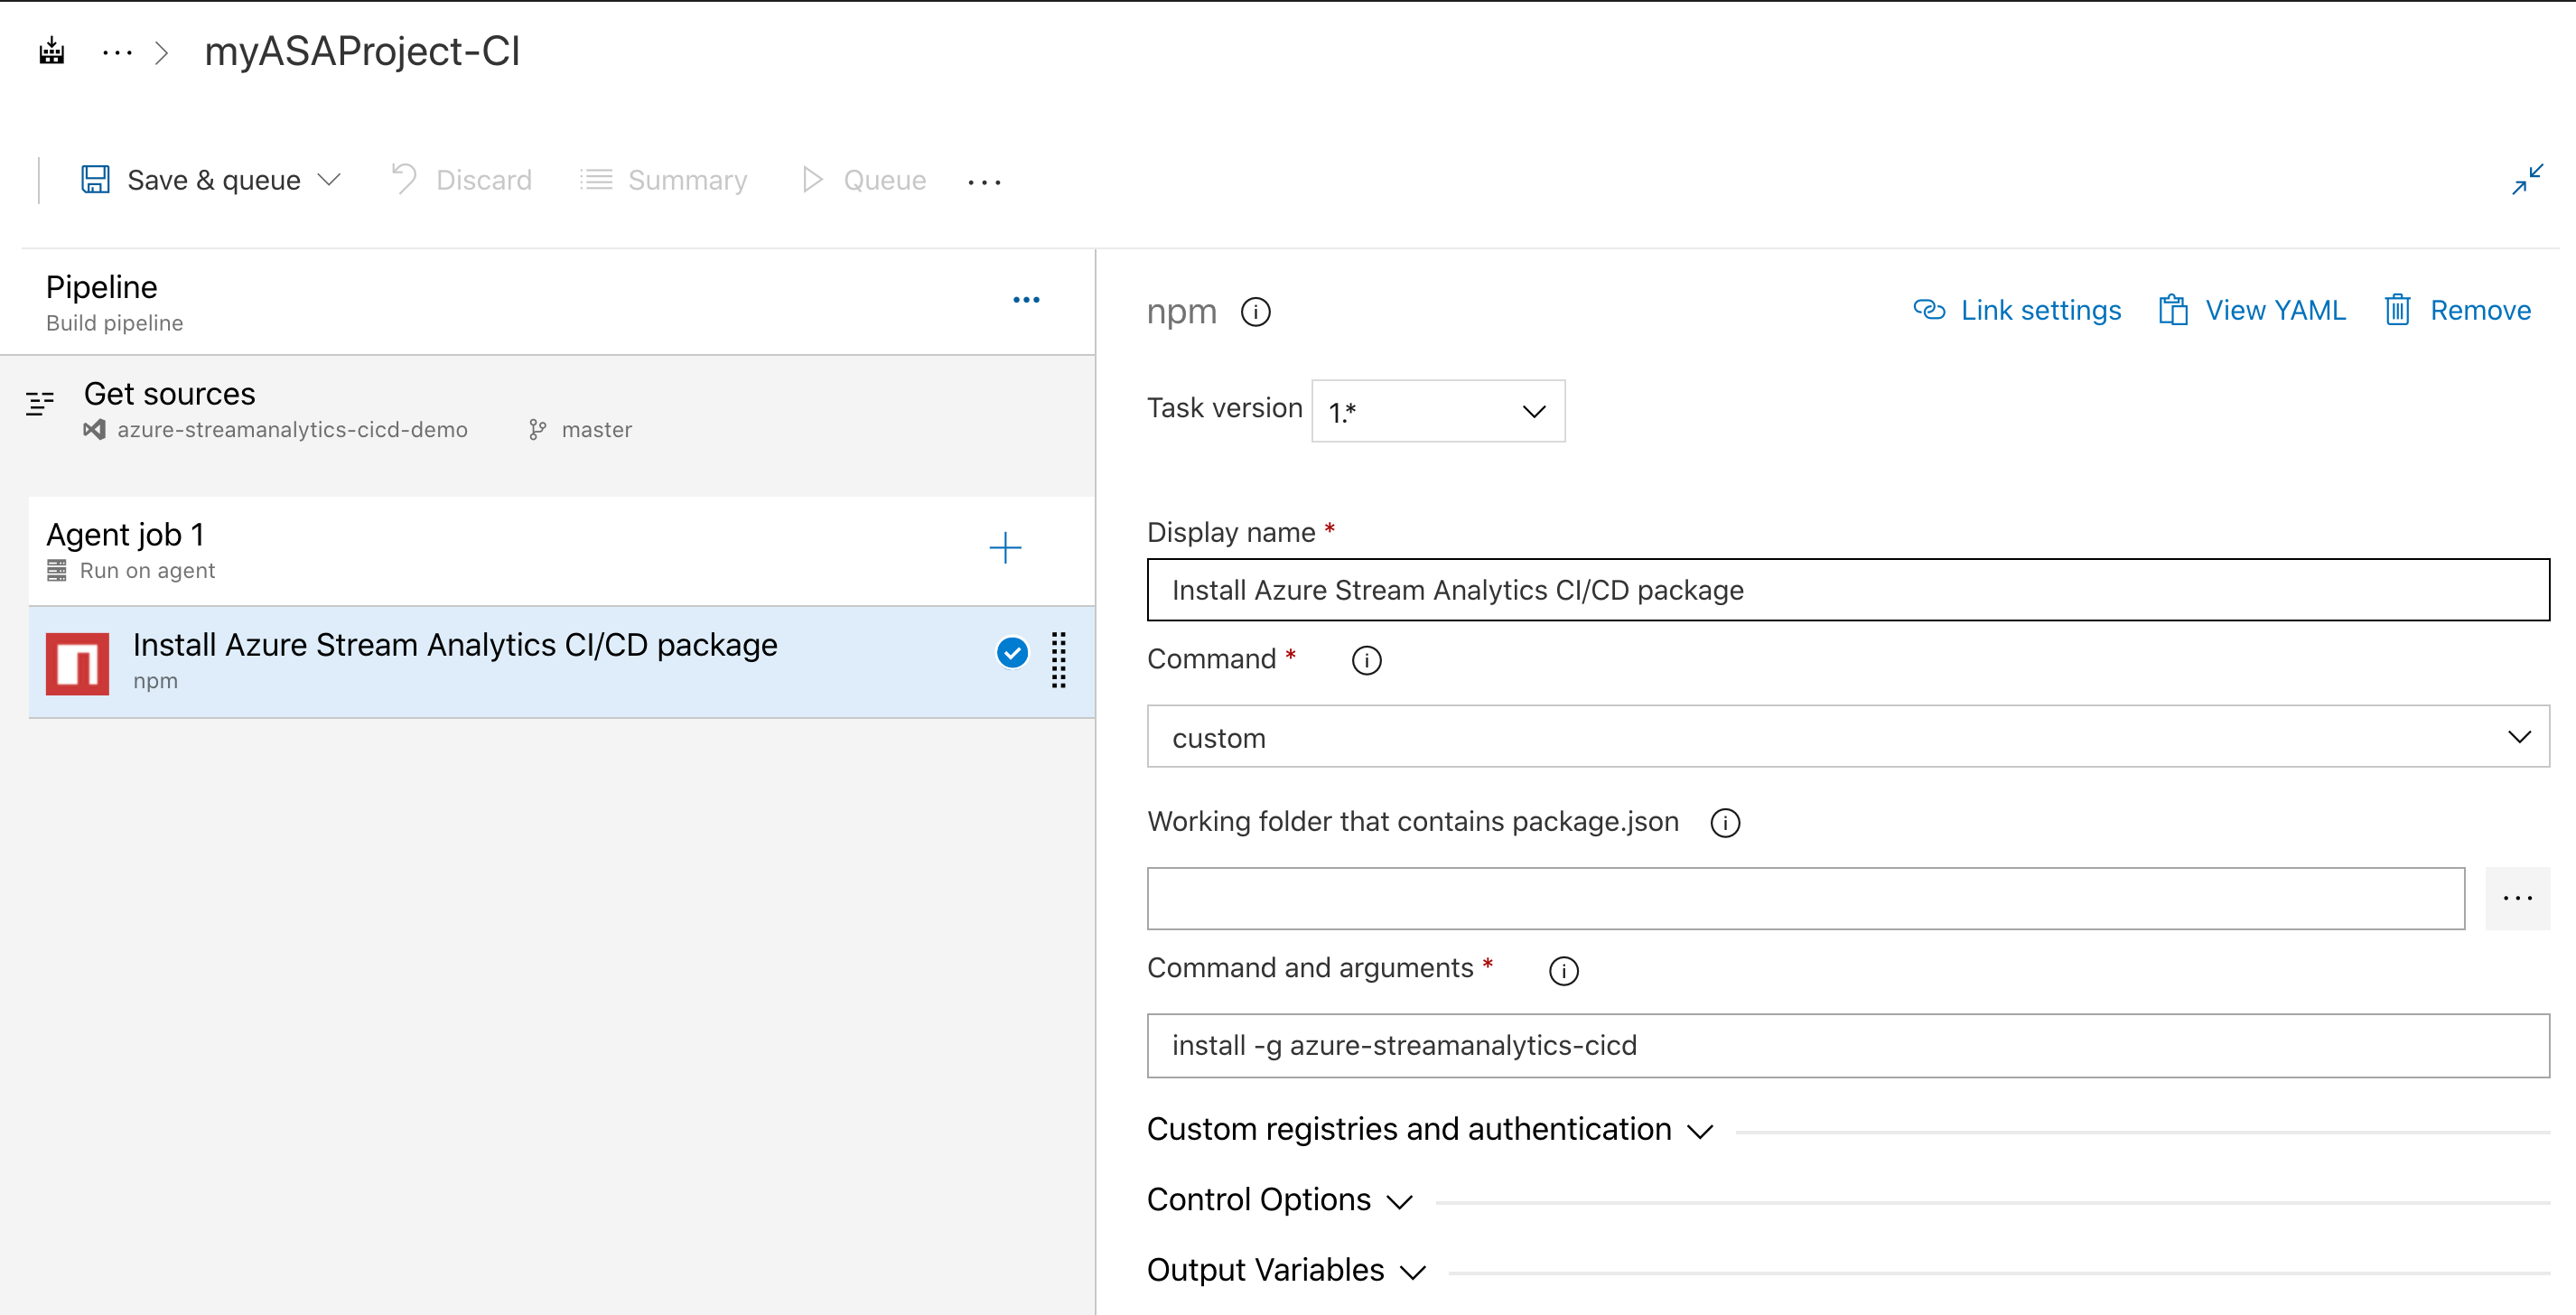
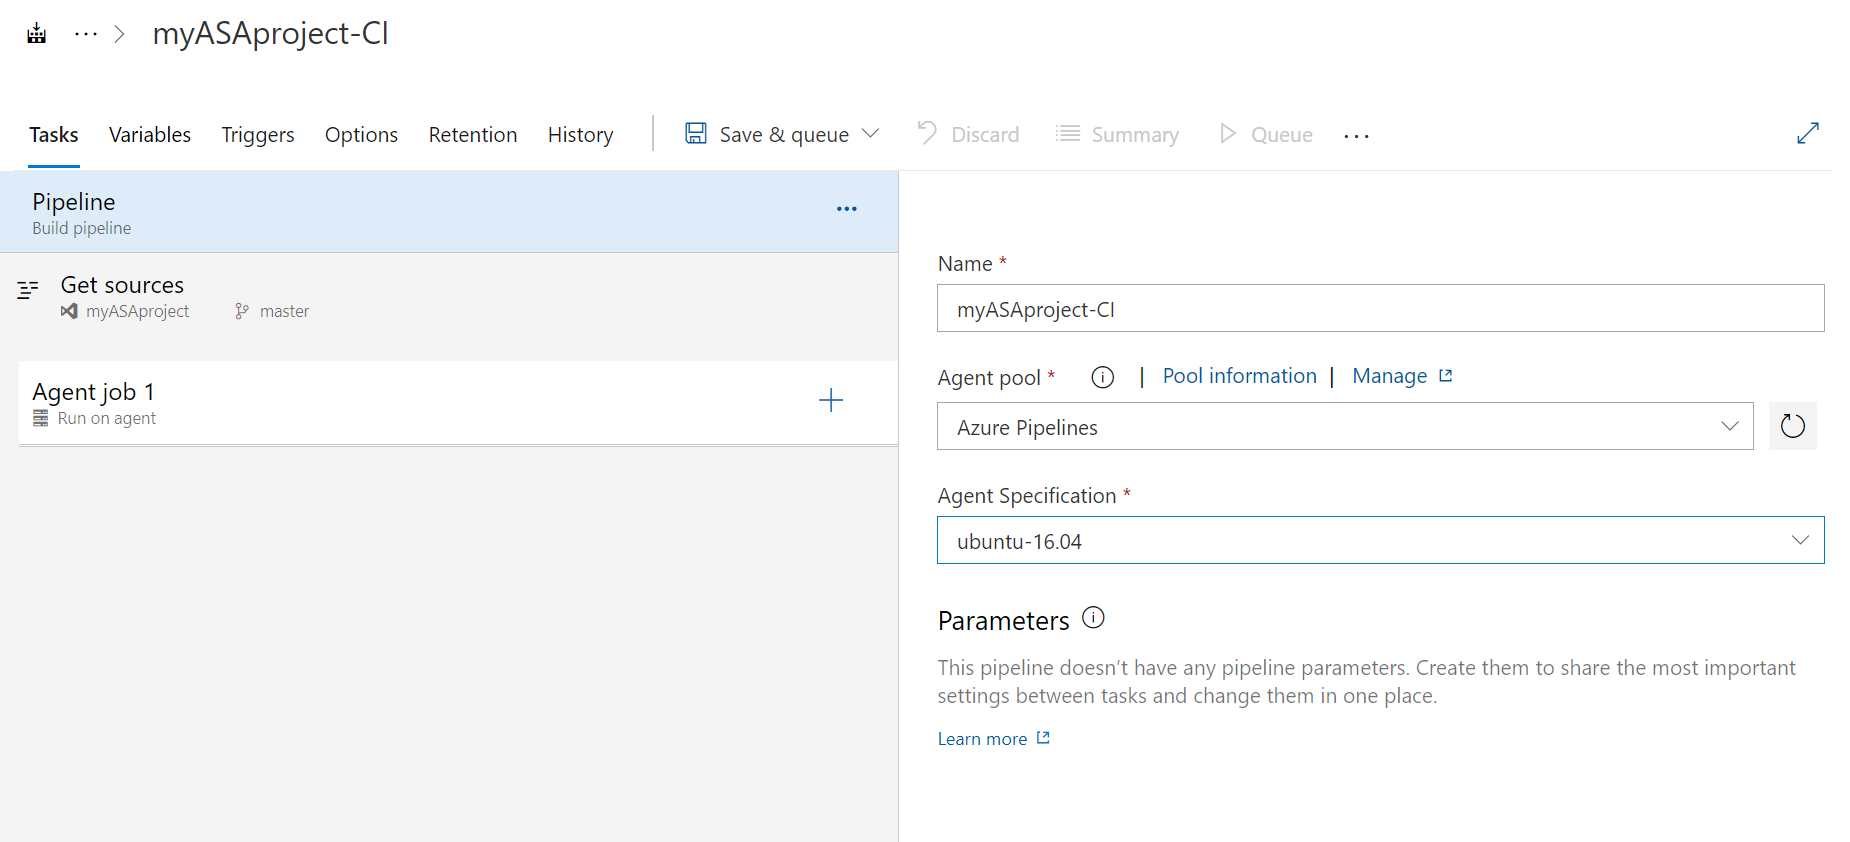
Use following steps if you need to use hosted-Linux agent:
Select your Agent Specification
On the Tasks page, select the plus sign next to Agent job 1. Enter command line in the task search and select Command line.

Give the task a Display name. enter the following command in Script. Leave the remaining default options.
sudo npm install -g azure-streamanalytics-cicd --unsafe-perm=true --allow-root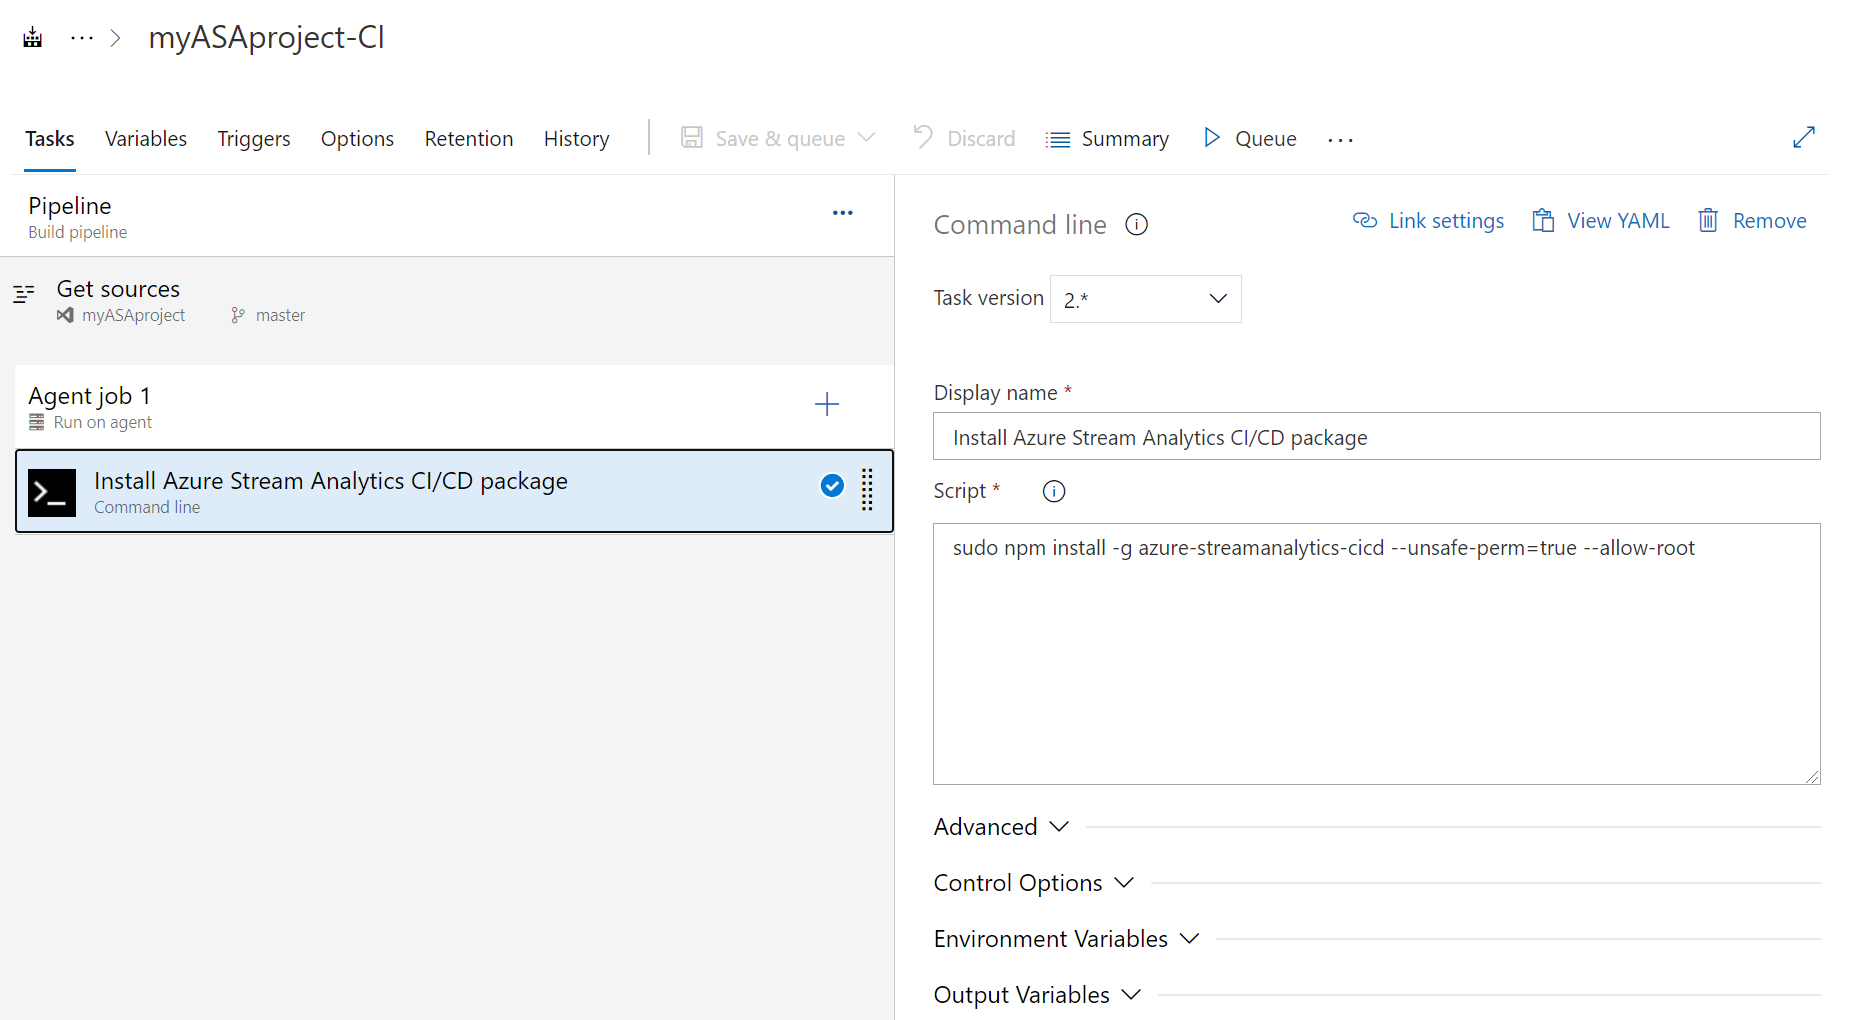
Add a Build task
On the Variables page, select + Add in Pipeline variables. Add the following variables. Set the following values according to your preference:
Variable name Value projectRootPath [YourProjectName] outputPath Output deployPath Deploy On the Tasks page, select the plus sign next to Agent job 1. Search for Command line.
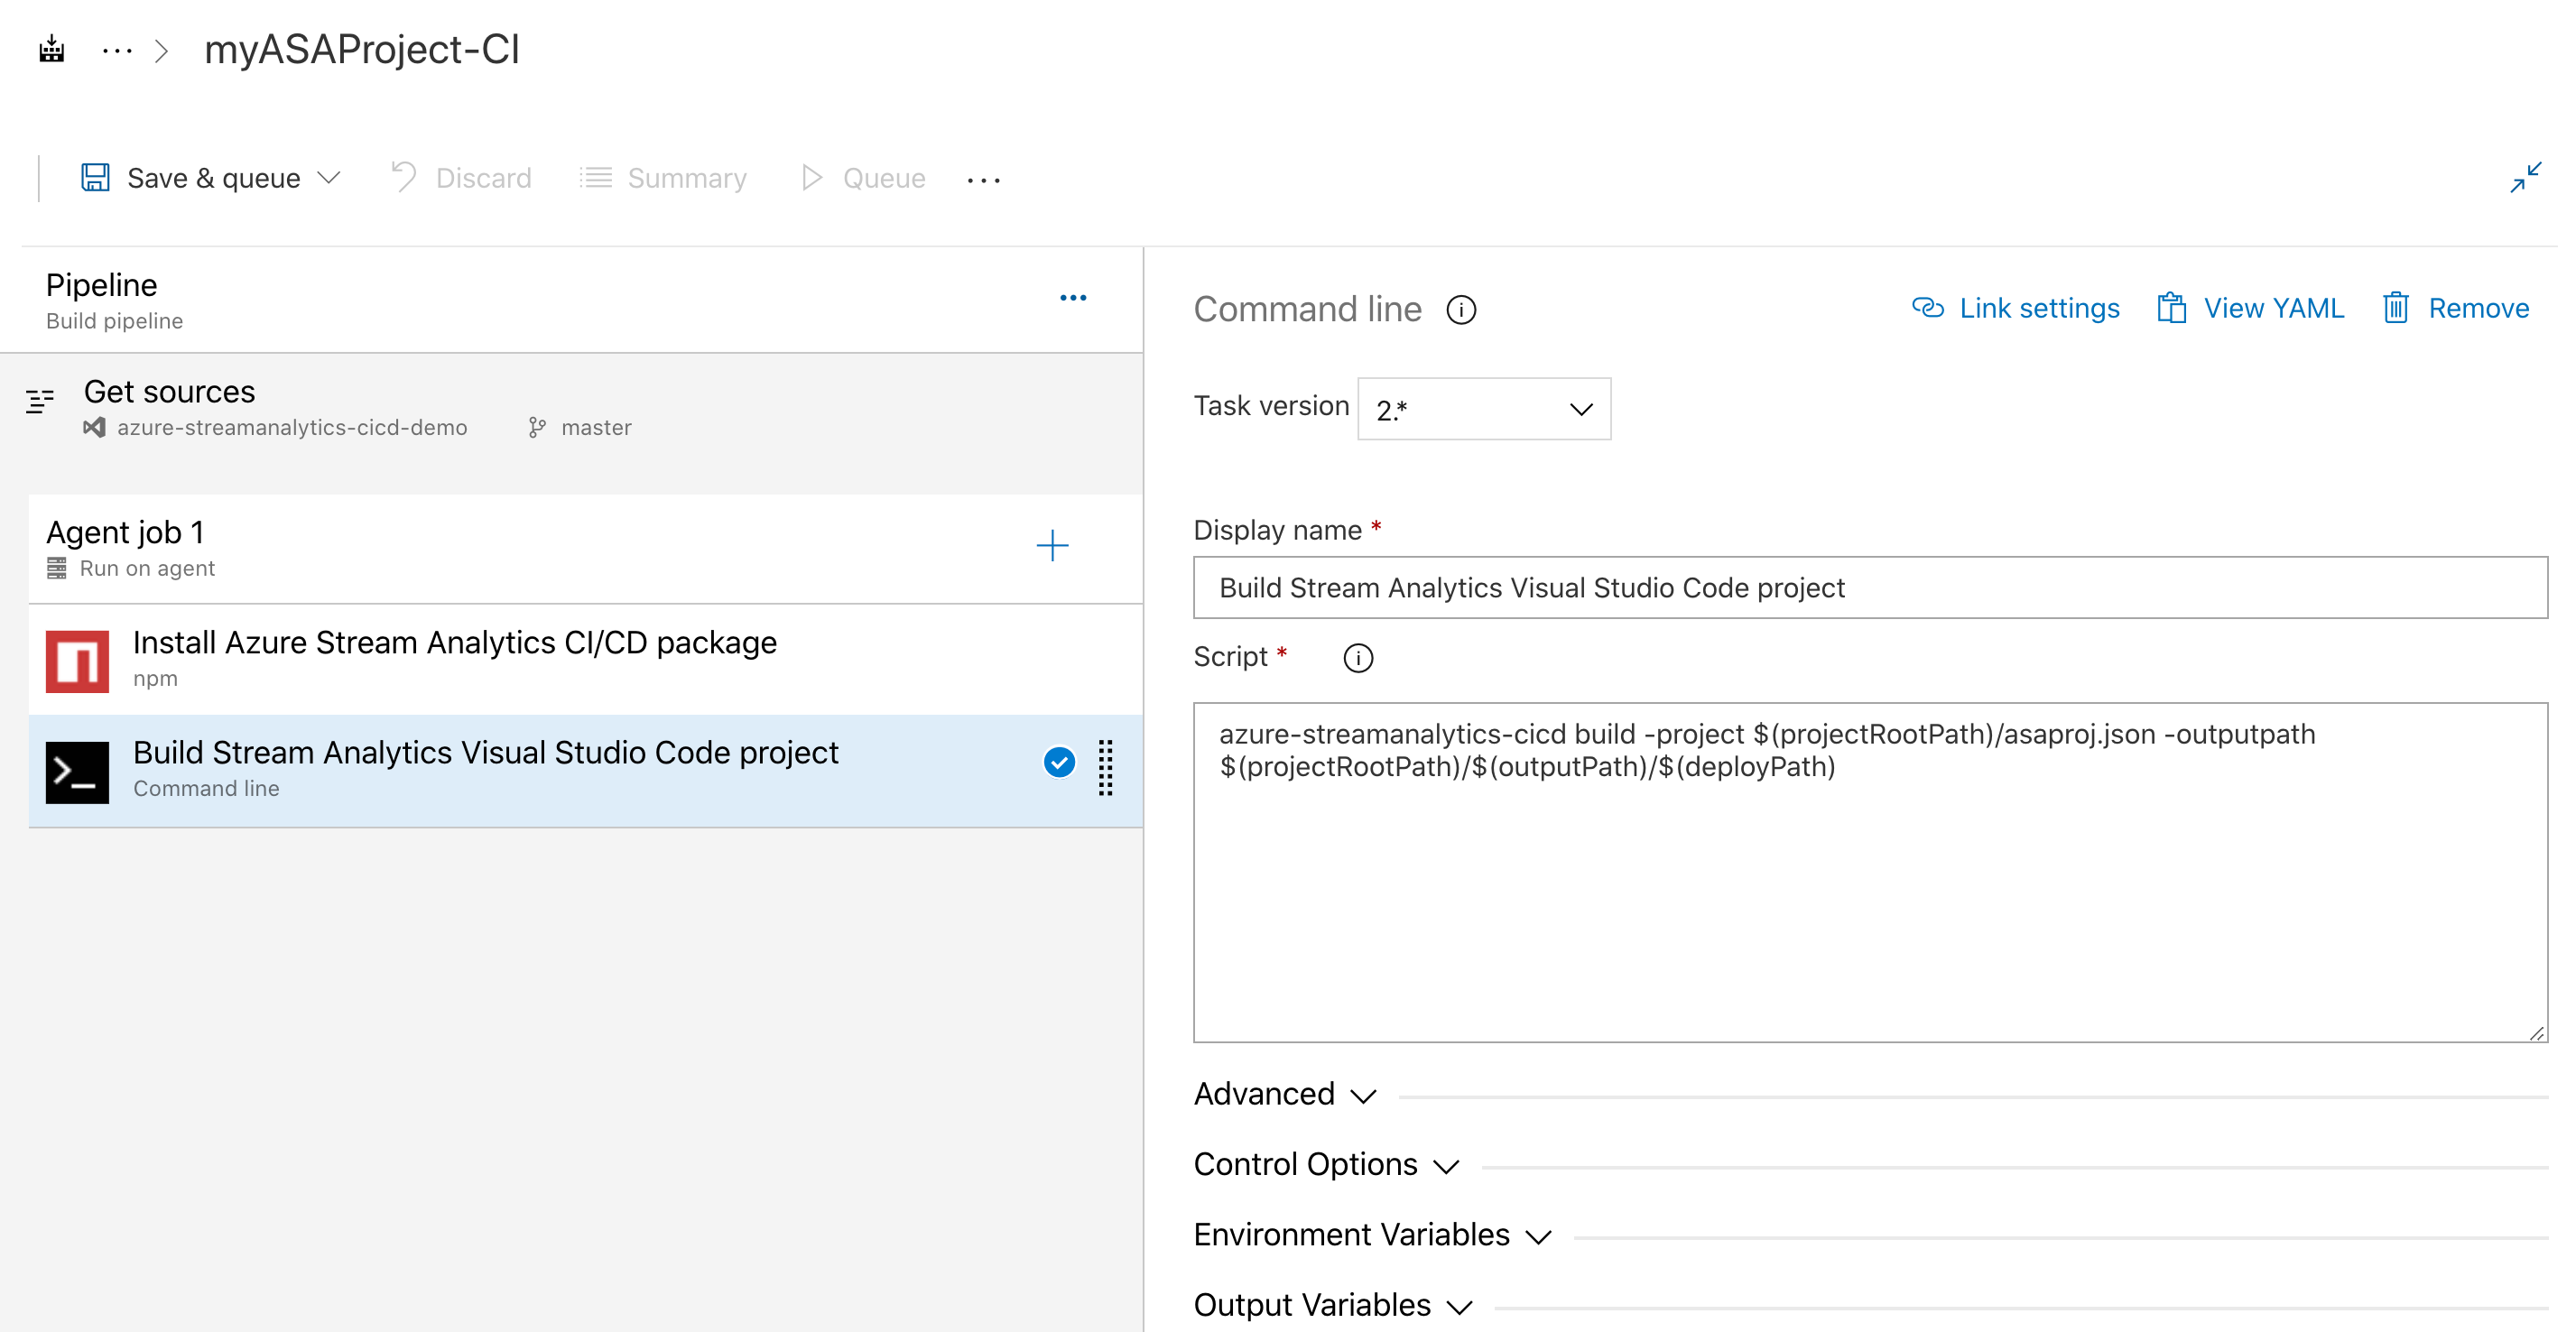
Give the task a Display name and enter the following script. Modify the script with your repository name and project name.
Note
It's highly recommended to use the
build --v2to generate ARM template for deployment. The new ARM template has fewer parameters while preserving the same functionality as the previous version.Please note that the older ARM template will soon be deprecated, only templates created using
build --v2will receive updates and bug fixes.azure-streamanalytics-cicd build --v2 -project $(projectRootPath)/asaproj.json -outputpath $(projectRootPath)/$(outputPath)/$(deployPath)The image uses a Stream Analytics Visual Studio Code project as an example.
Add a Test task
On the Variables page, select + Add in Pipeline variables. Add the following variables. Modify the values with your output path and repository name.
Variable name Value testPath Test 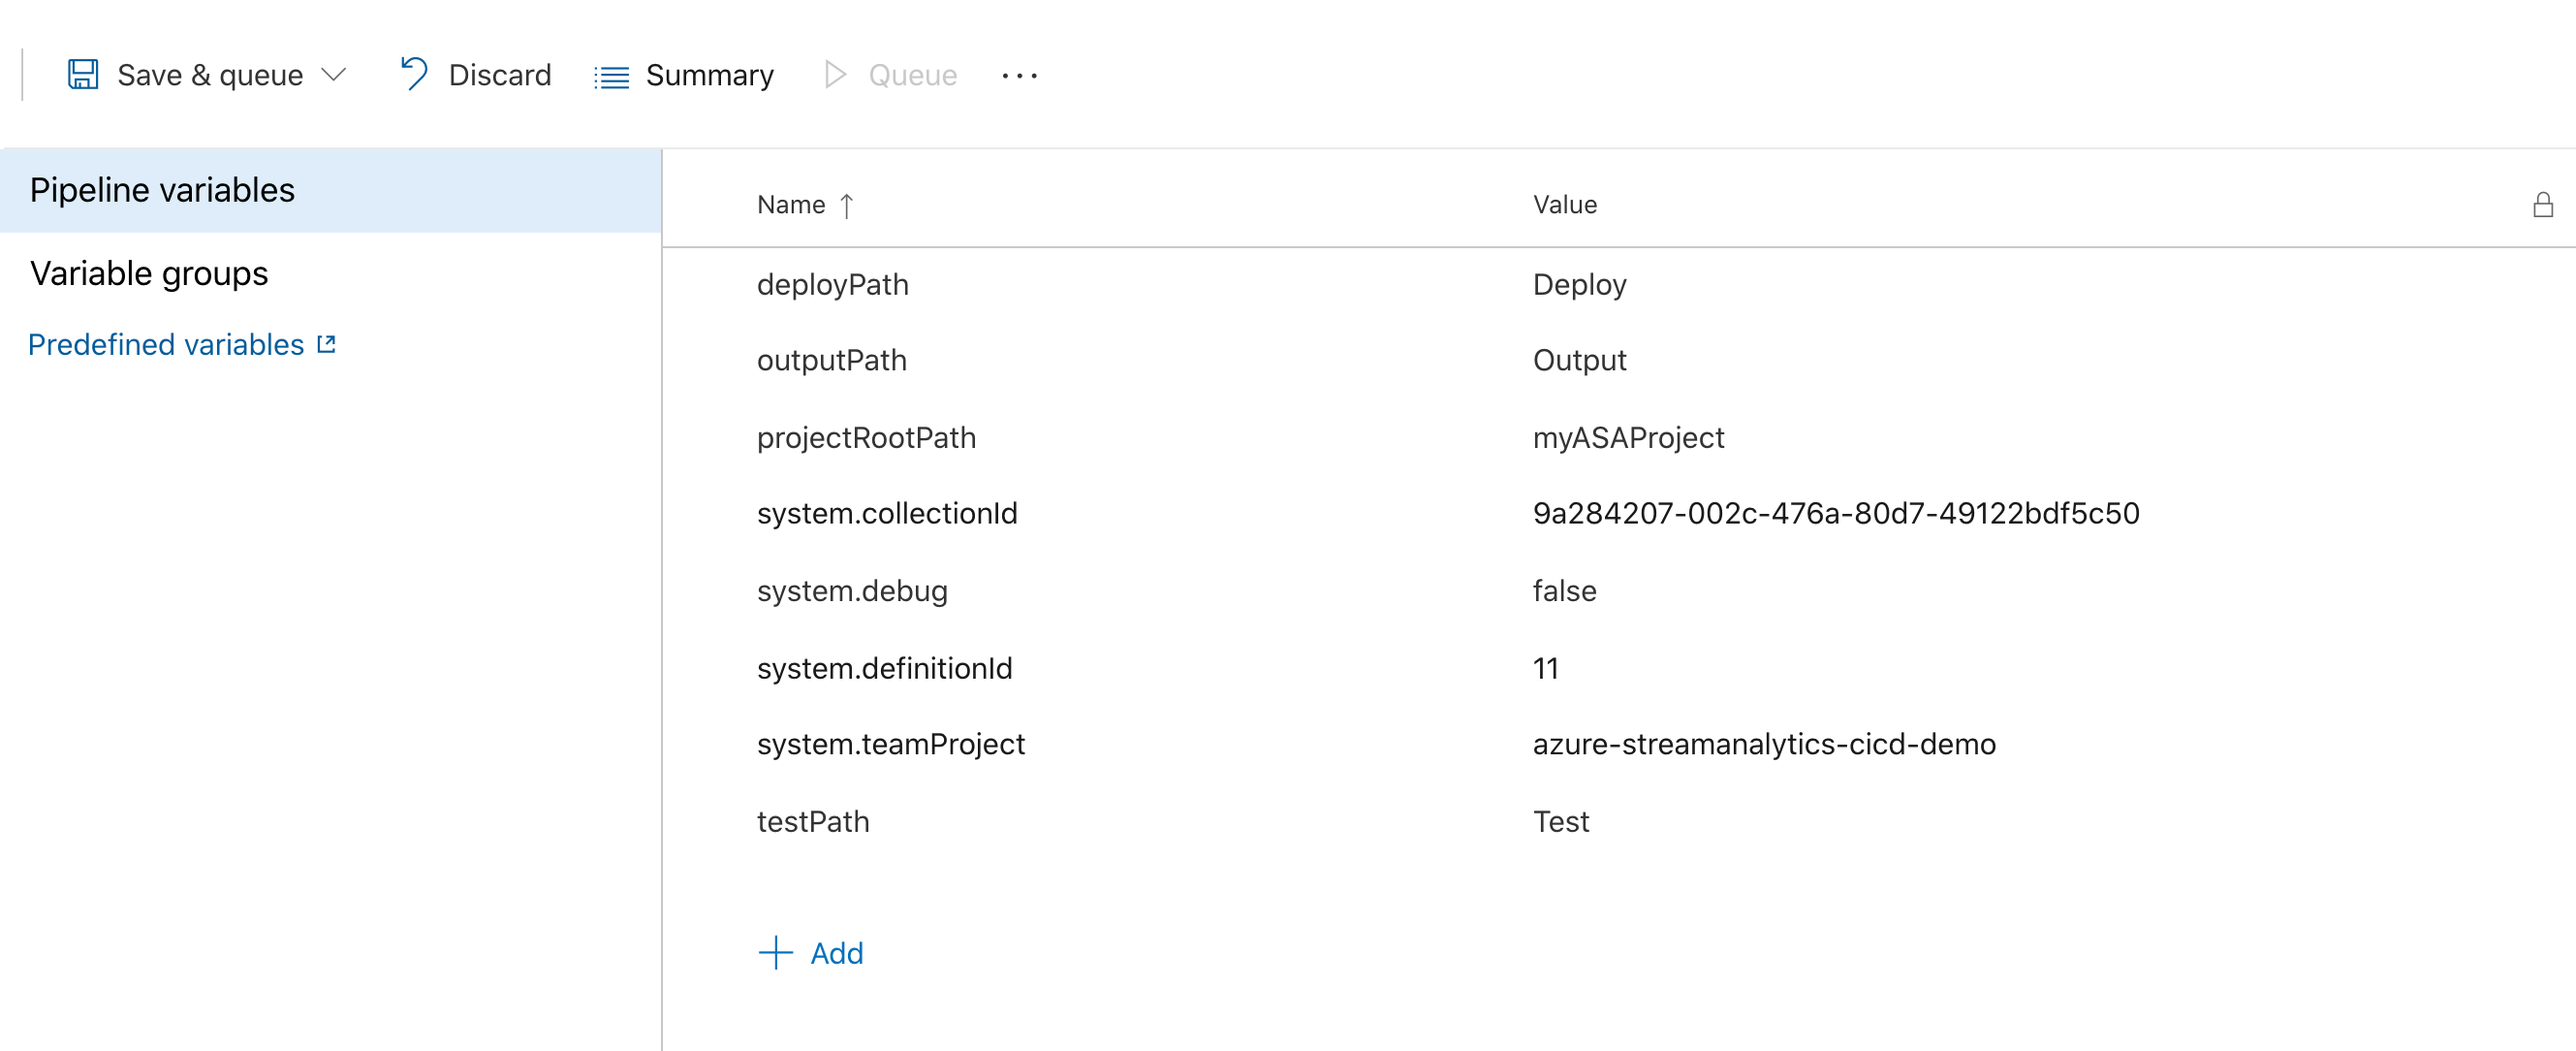
On the Tasks page, select the plus sign next to Agent job 1. Search for Command line.
Give the task a Display name and enter the following script. Modify the script with your project file name and the path to the test configuration file.
See automated test instructions for details on how to add and configure test cases.
azure-streamanalytics-cicd test -project $(projectRootPath)/asaproj.json -outputpath $(projectRootPath)/$(outputPath)/$(testPath) -testConfigPath $(projectRootPath)/test/testConfig.json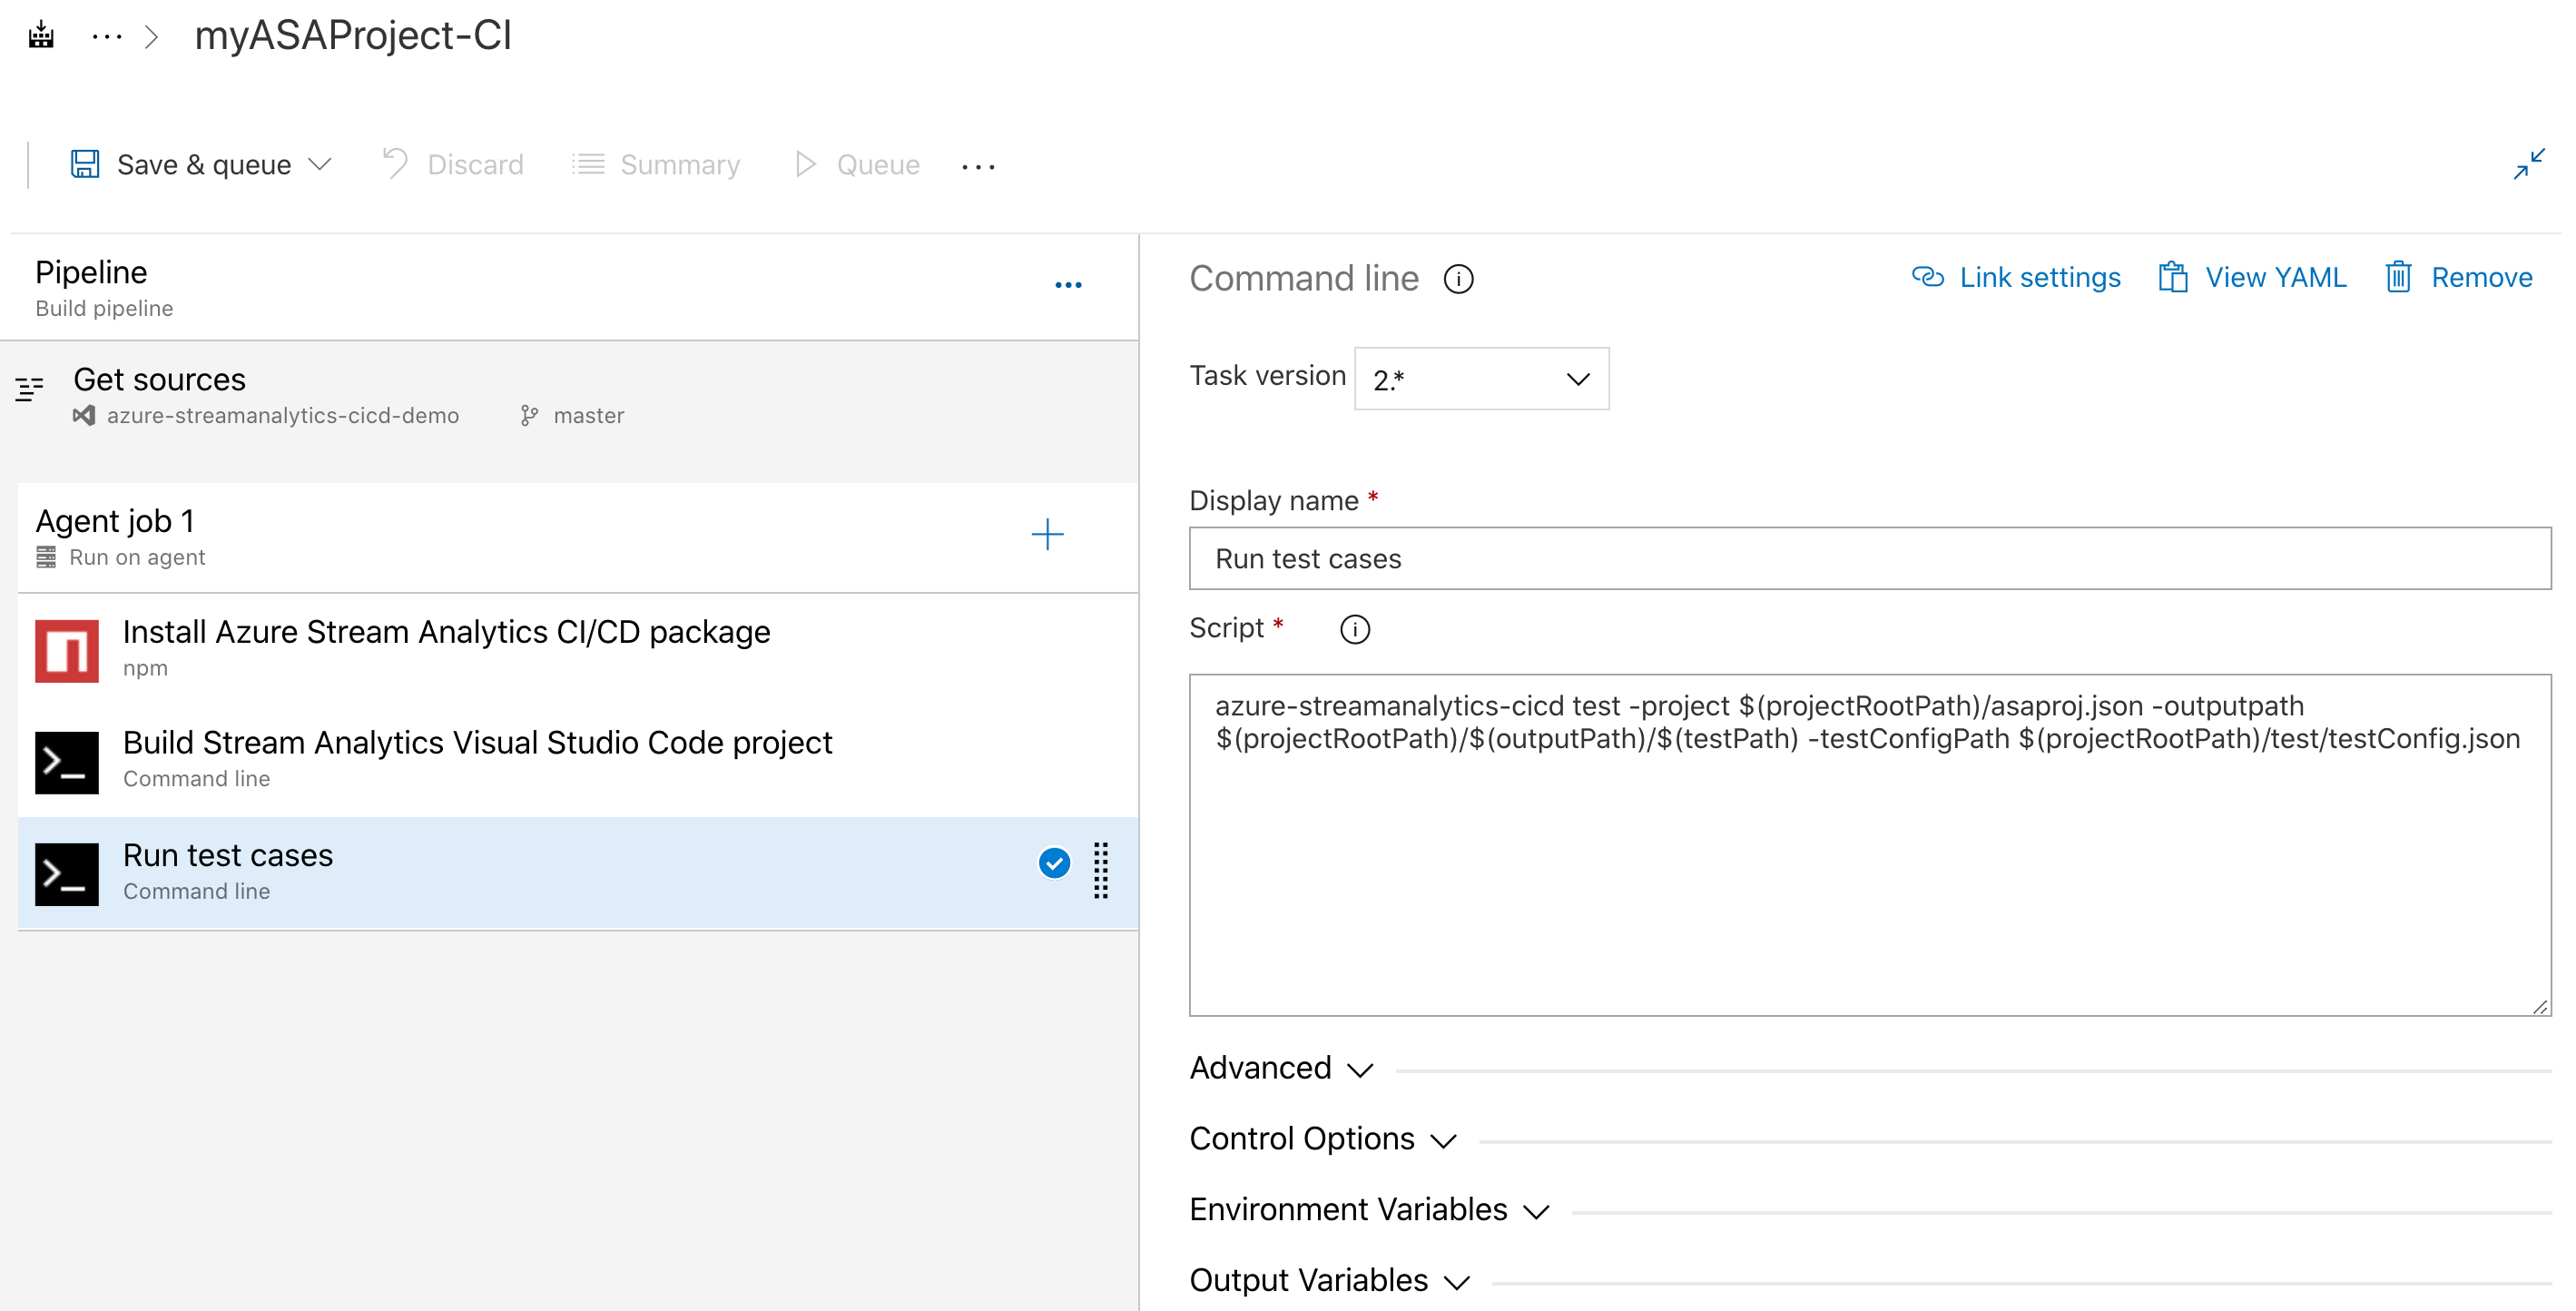
Add a Copy files task
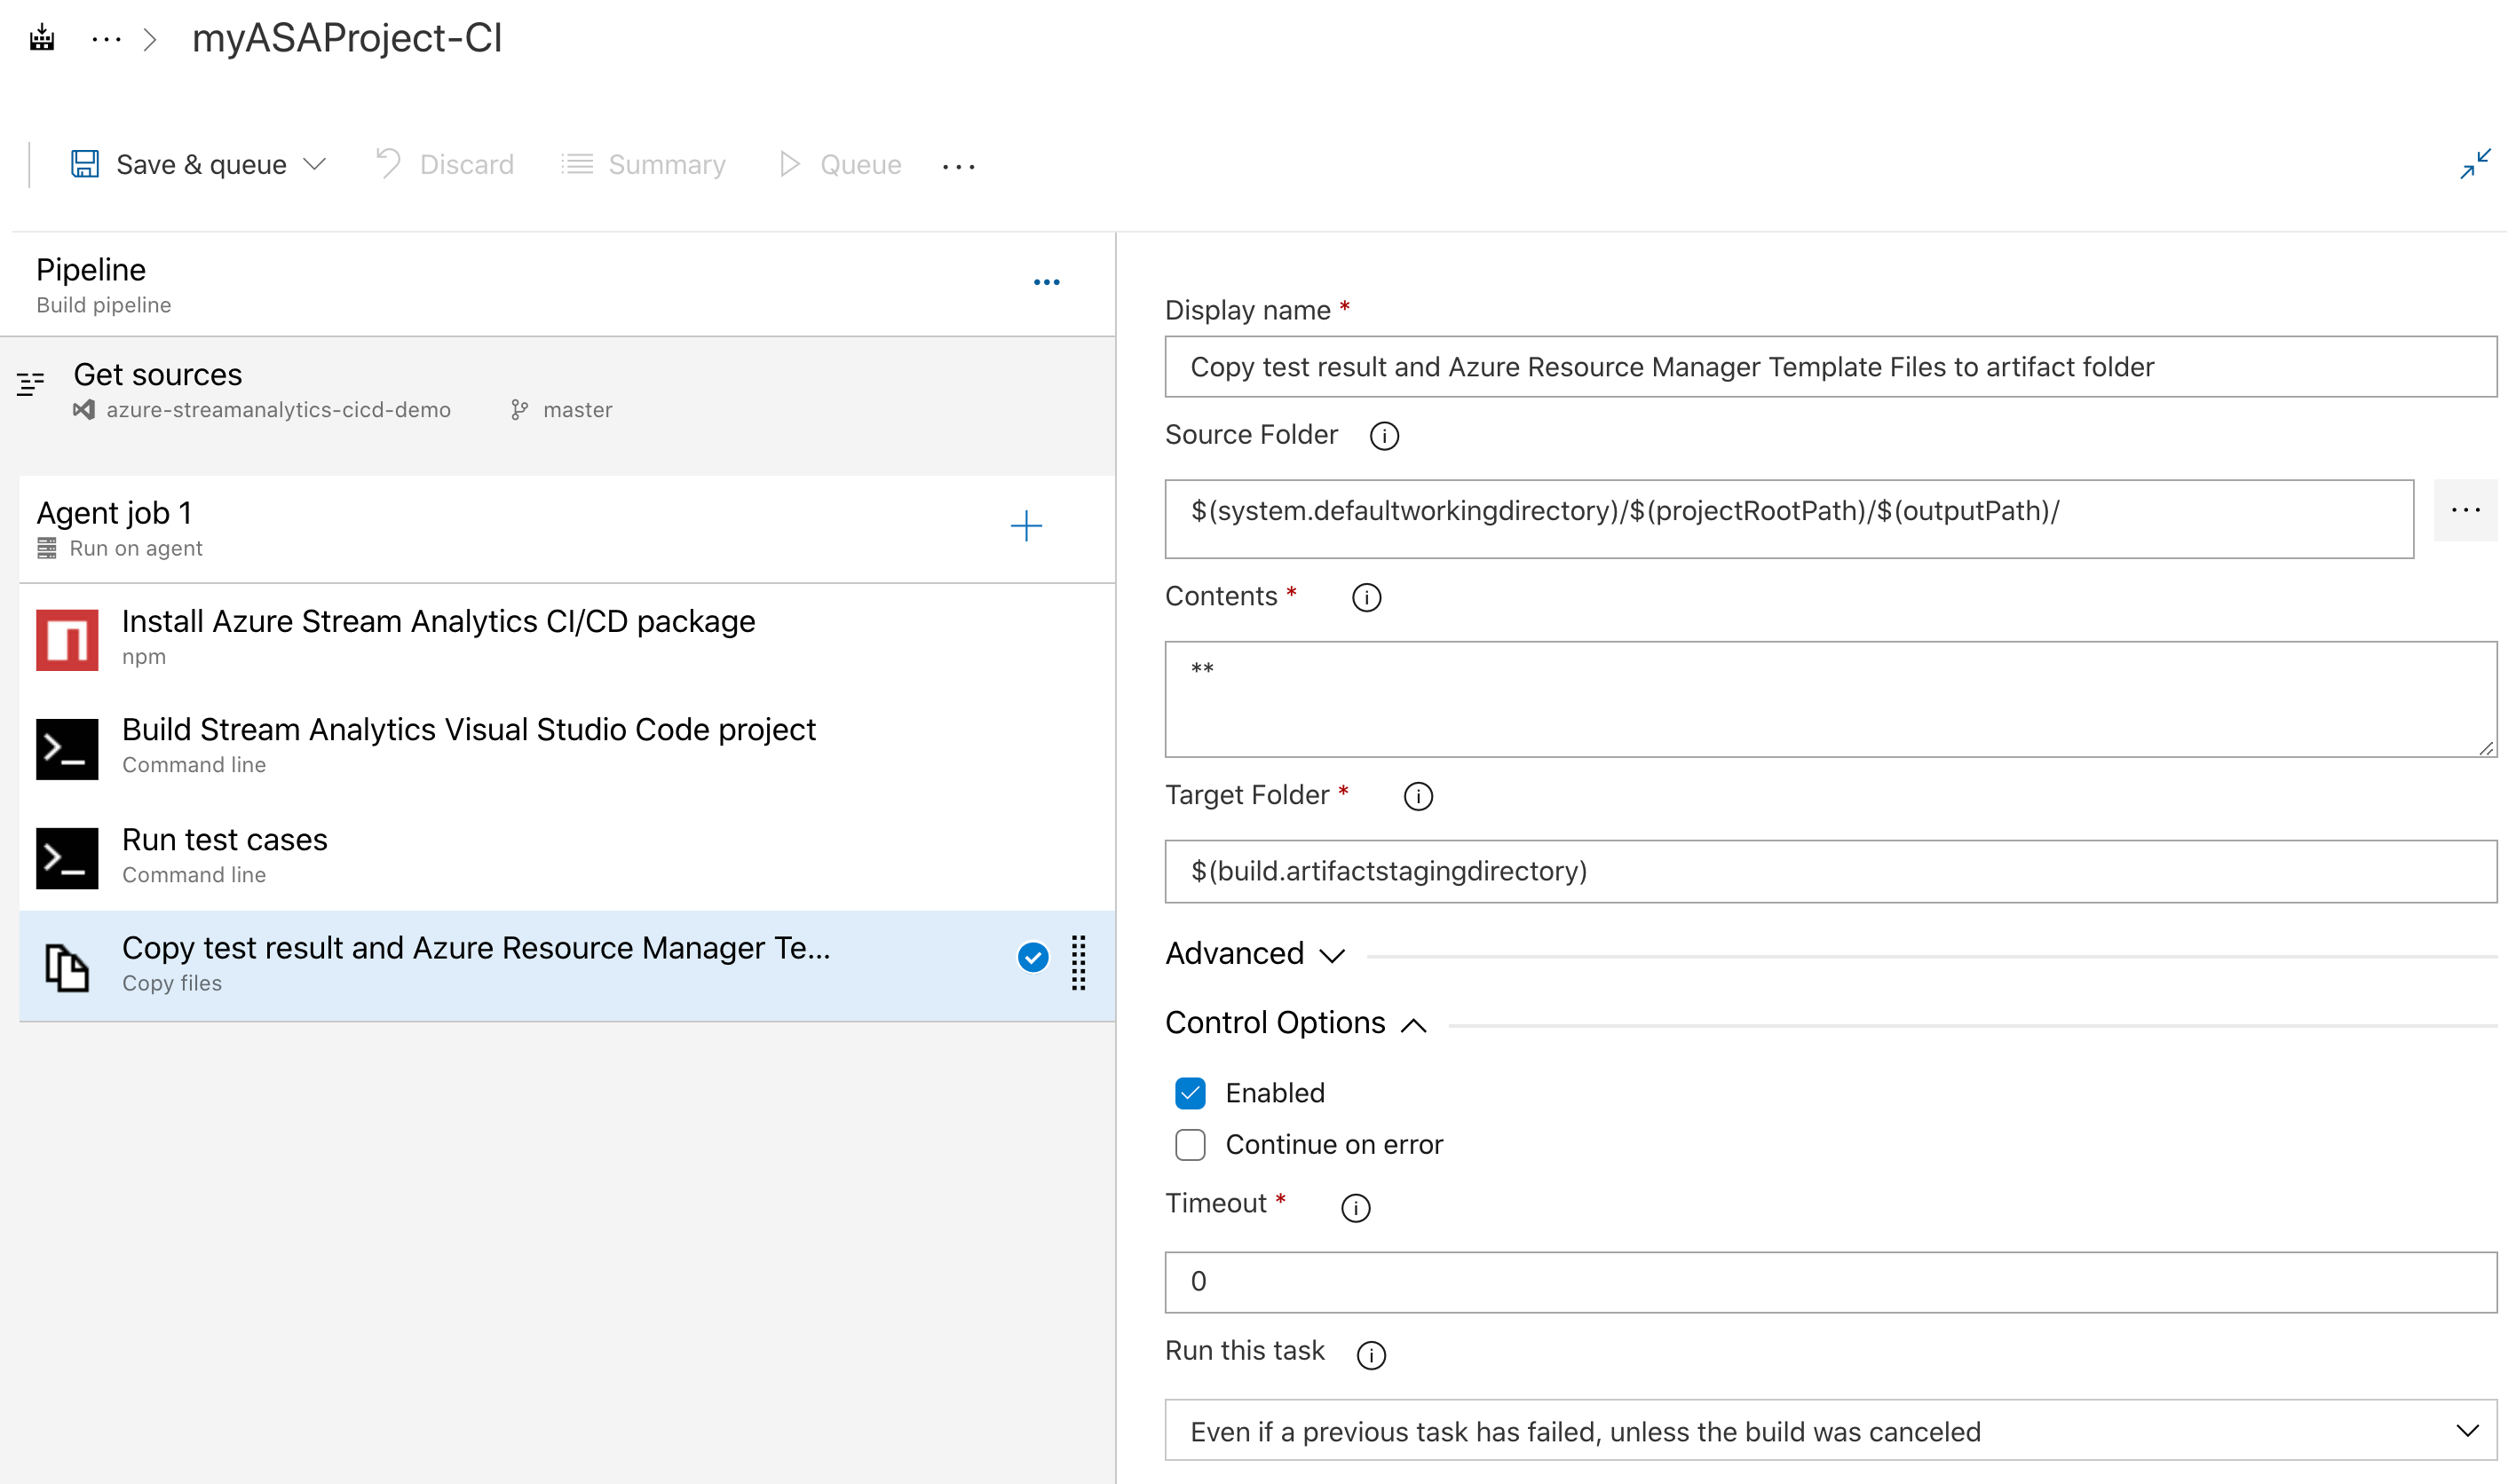
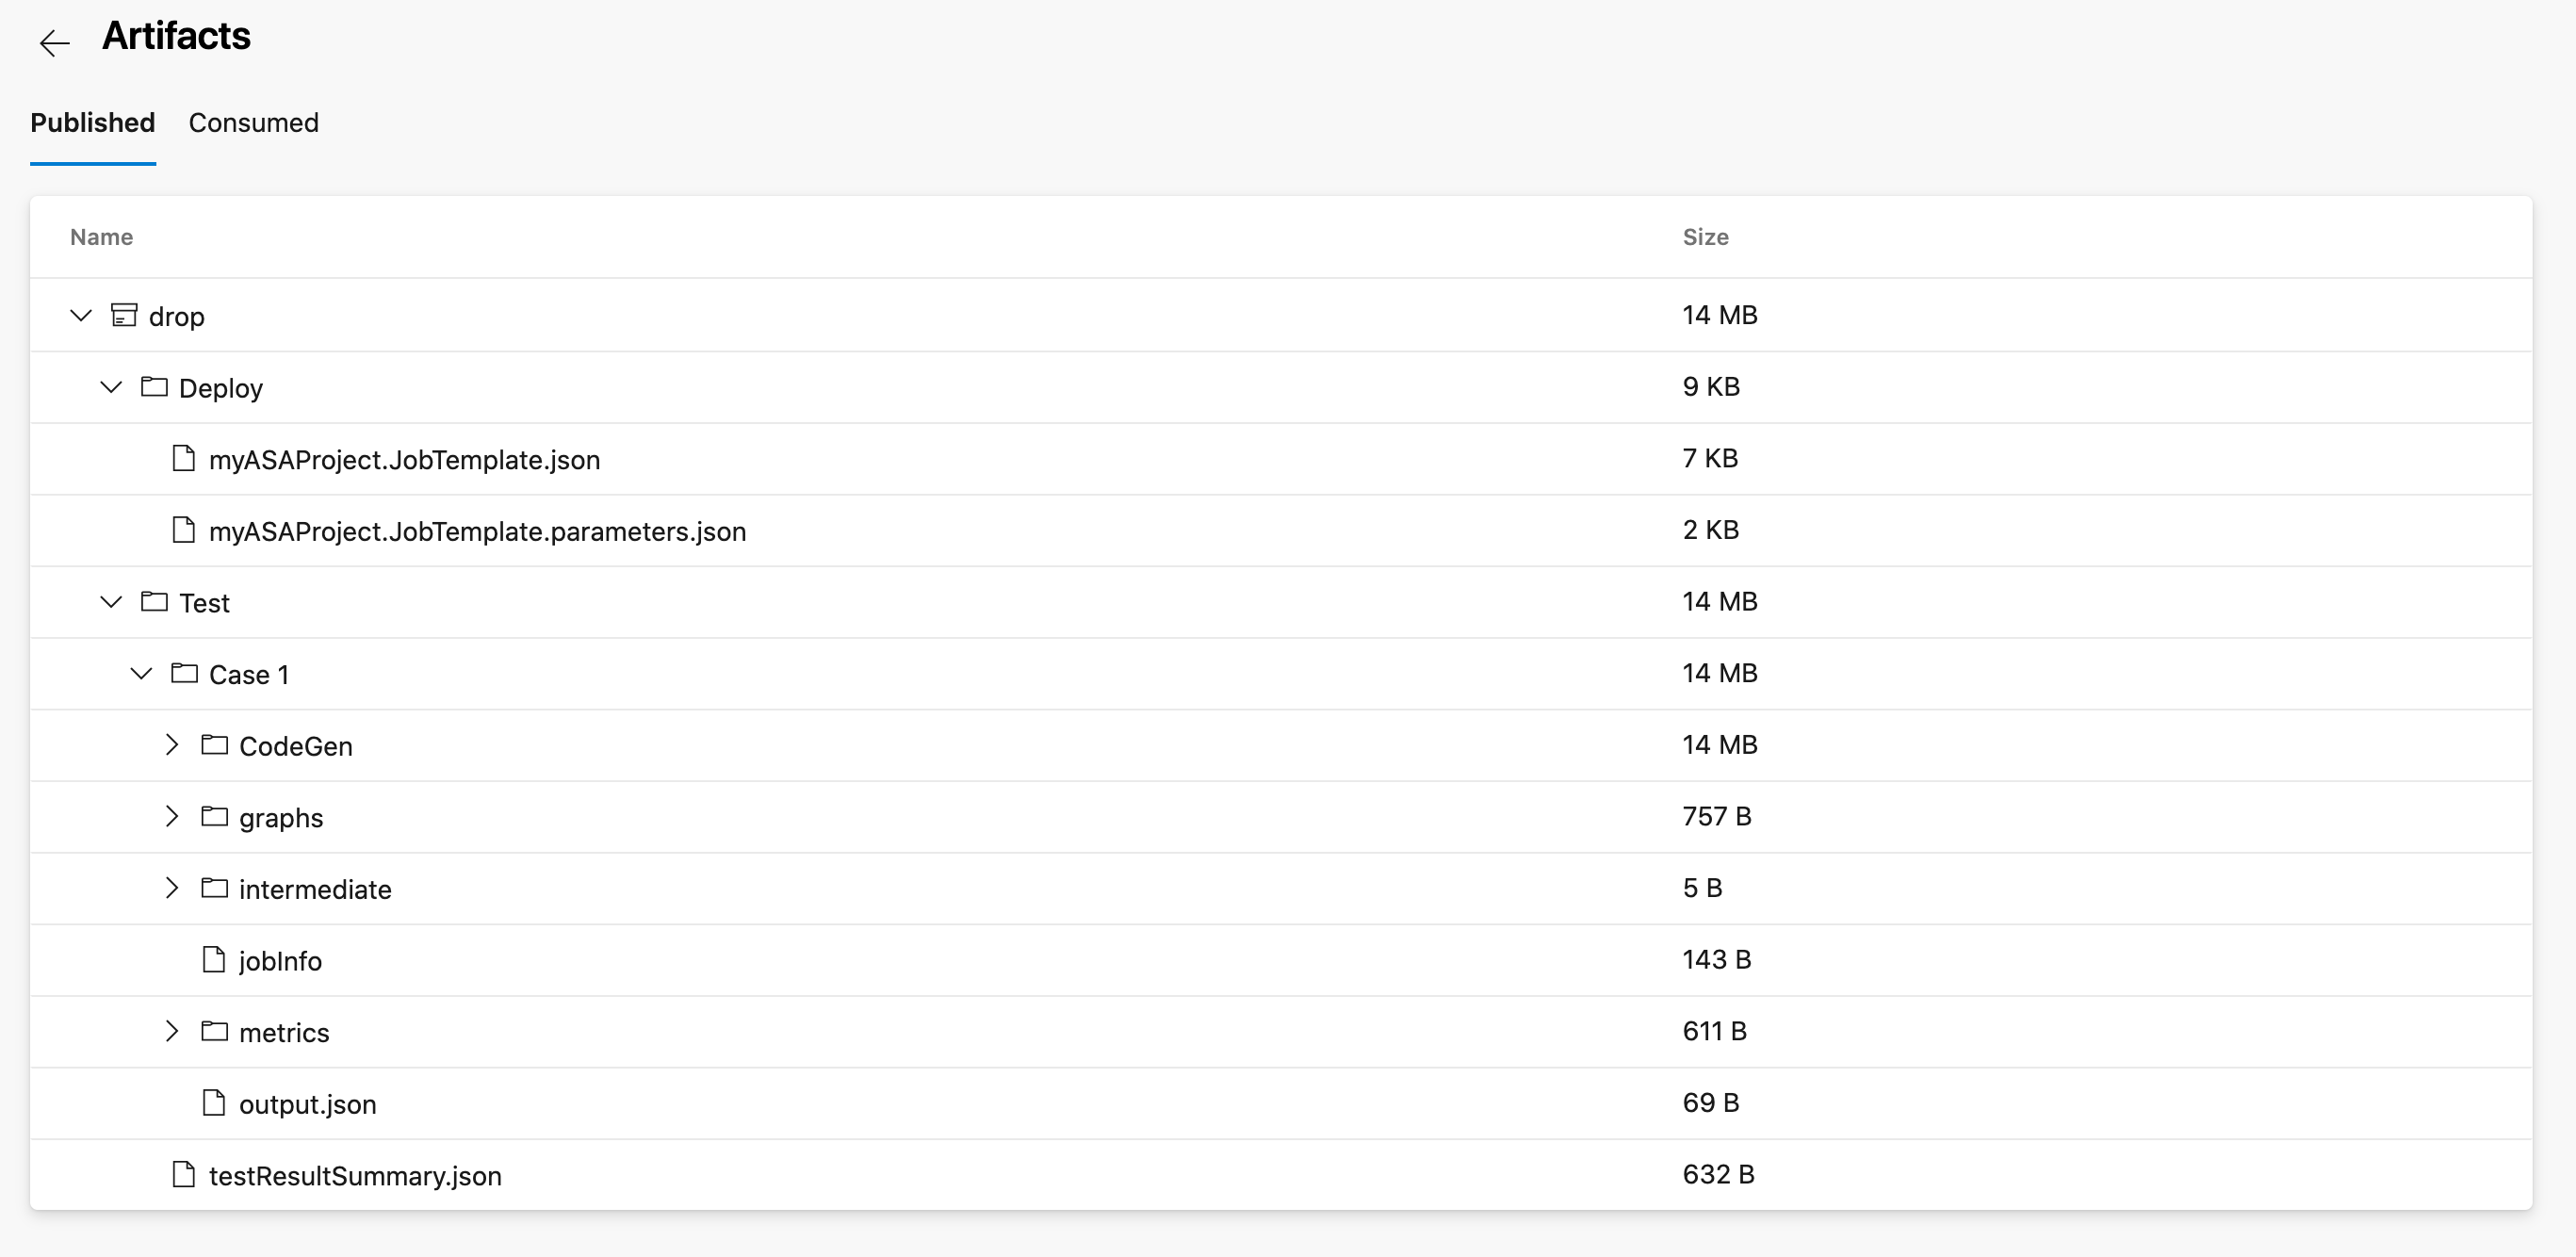
You need to add a copy file task to copy the test summary file and Azure Resource Manager template files to the artifact folder.
On the Tasks page, select the + next to Agent job 1. Search for Copy files. Then enter the following configurations. By assigning
**to Contents, all files of the test results are copied.Parameter Input Display name Copy Files to: $(build.artifactstagingdirectory) Source Folder $(system.defaultworkingdirectory)/$(outputPath)/Contents **Target Folder $(build.artifactstagingdirectory)Expand Control Options. Select Even if a previous task has failed, unless the build was canceled in Run this task.
Add a Publish build artifacts task
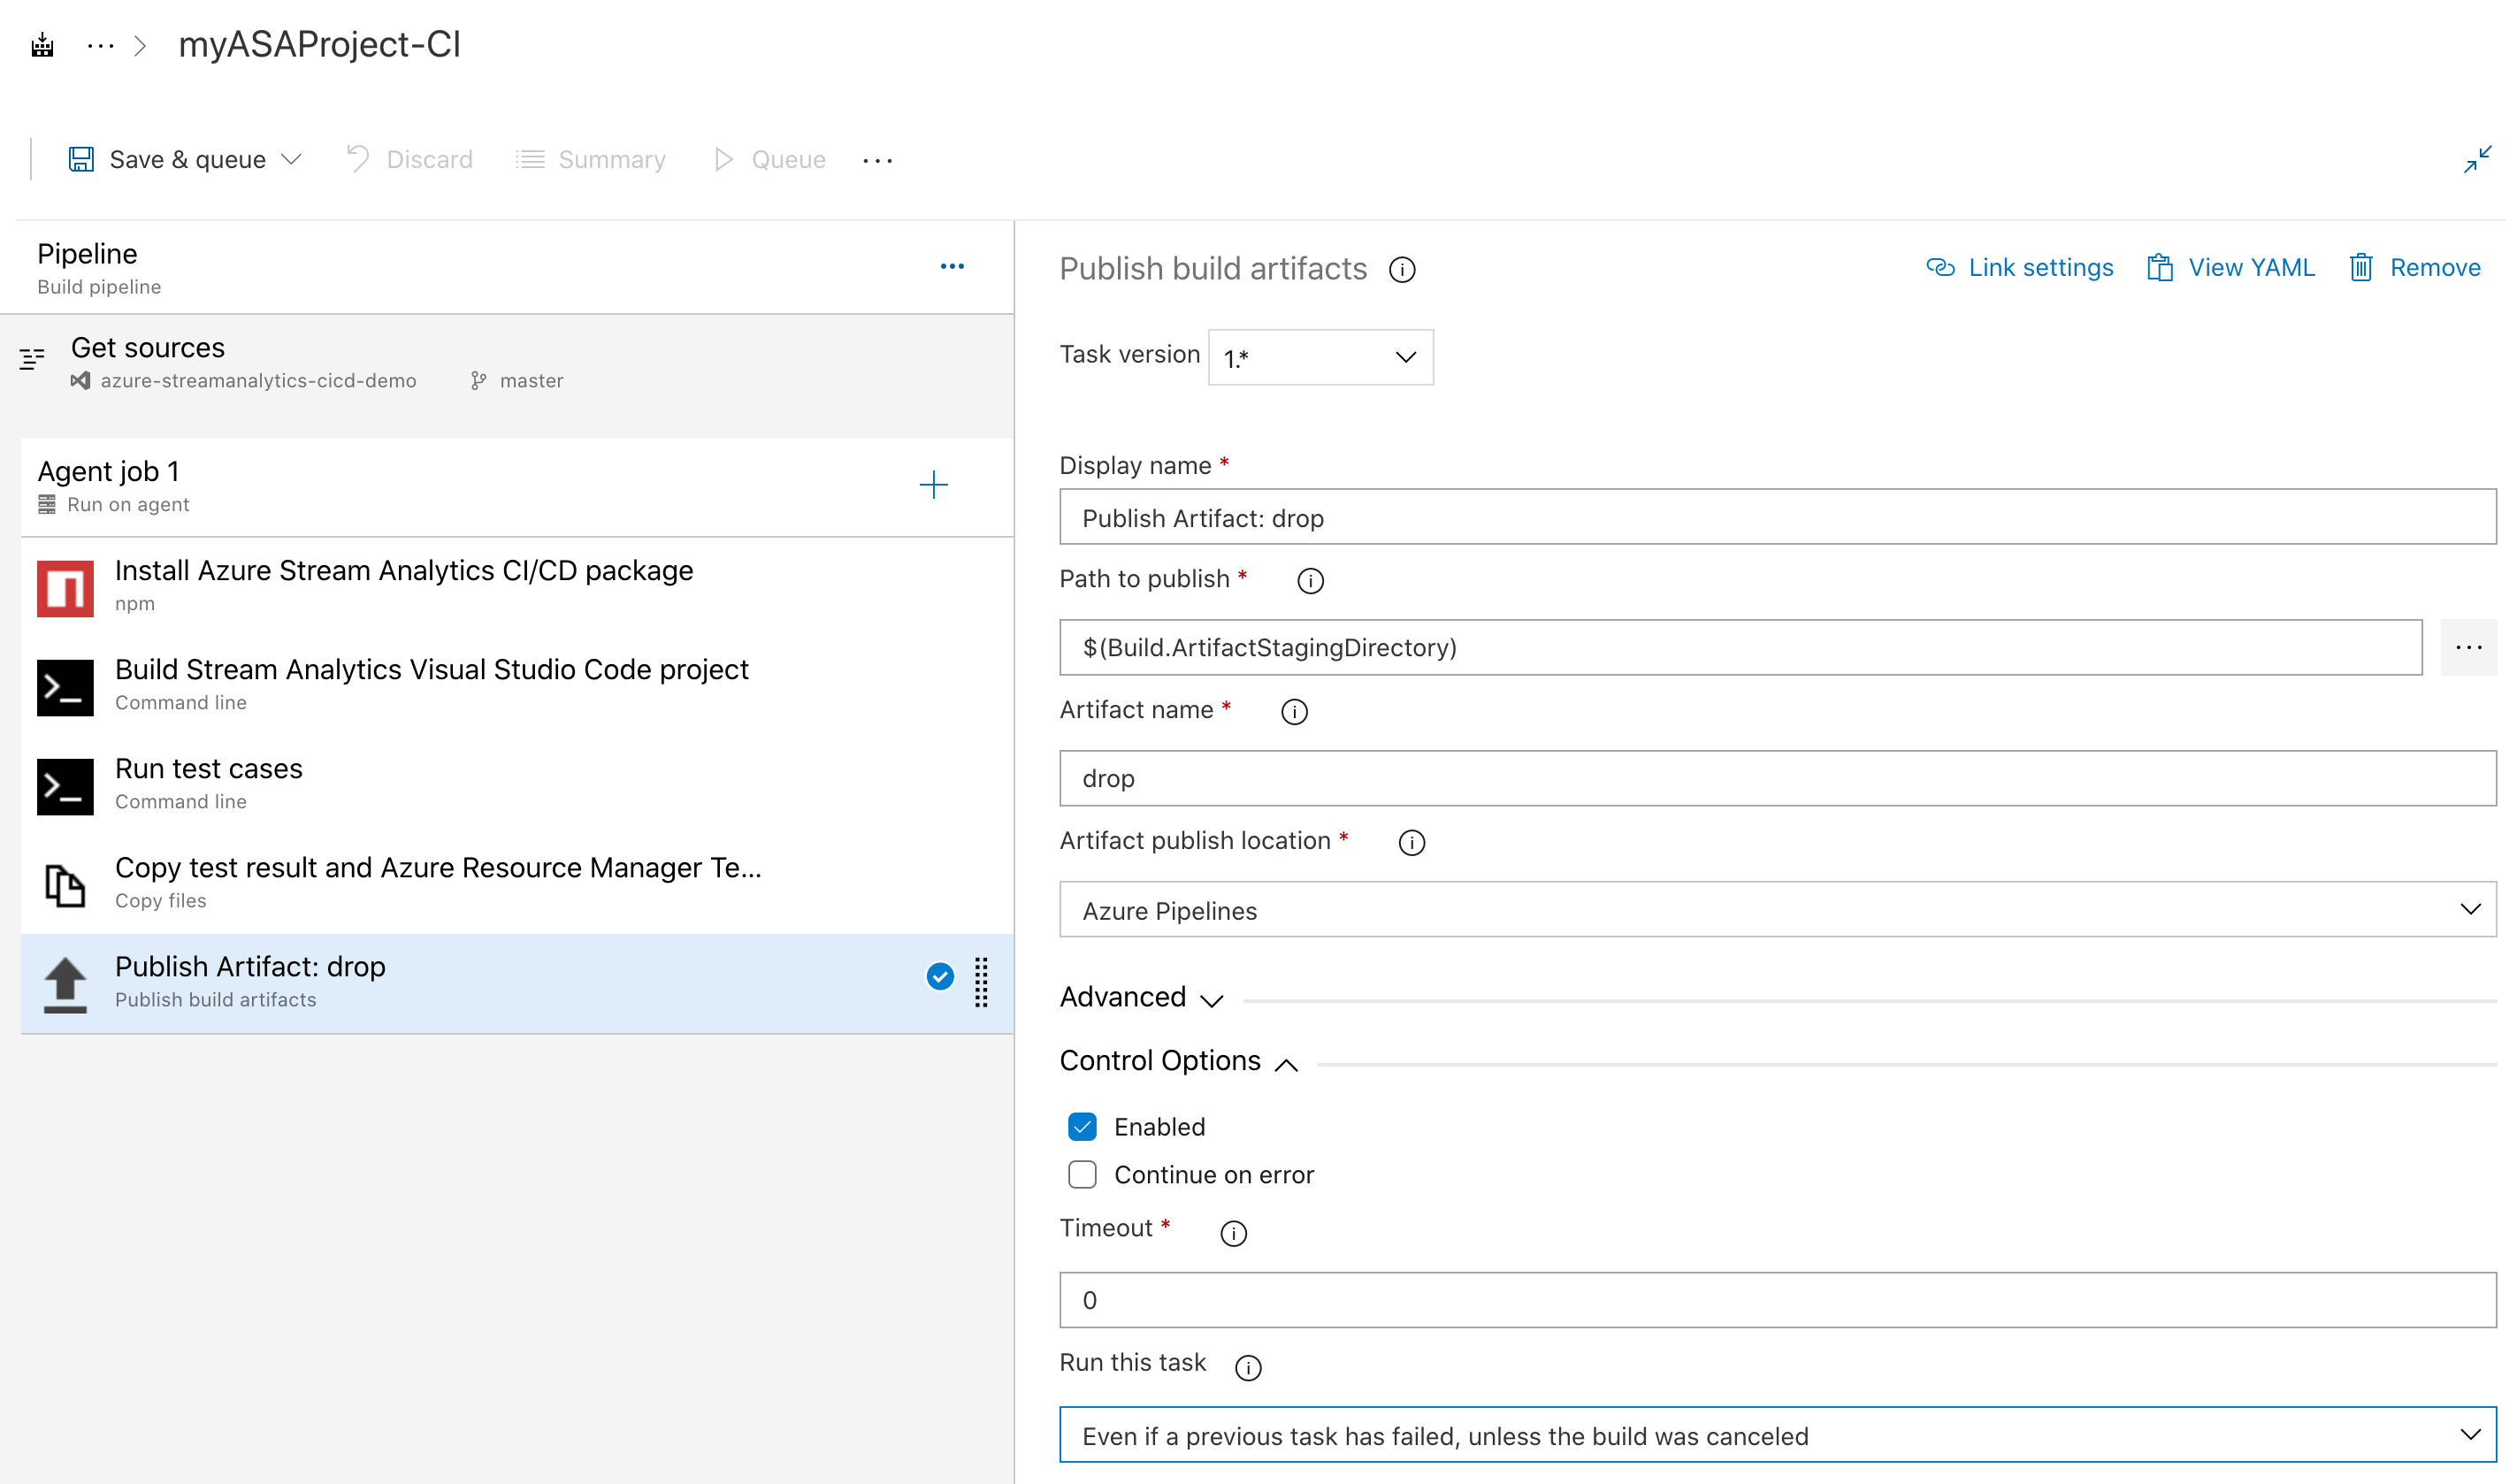
On the Tasks page, select the plus sign next to Agent job 1. Search for Publish build artifacts and select the option with the black arrow icon.
Expand Control Options. Select Even if a previous task has failed, unless the build was canceled in Run this task.
Save and run
Once you have finished adding the npm package, command line, copy files, and publish build artifacts tasks, select Save & queue. When you're prompted, enter a save comment and select Save and run. You can download the testing results from Summary page of the pipeline.
Check the build and test results
The test summary file and Azure Resource Manager Template files can be found in Published folder.

Release with Azure Pipelines
In this section, you learn how to create a release pipeline.
Open a web browser and navigate to your Azure Stream Analytics Visual Studio Code project.
Under Pipelines in the left navigation menu, select Releases. Then select New pipeline.
Select start with an Empty job.
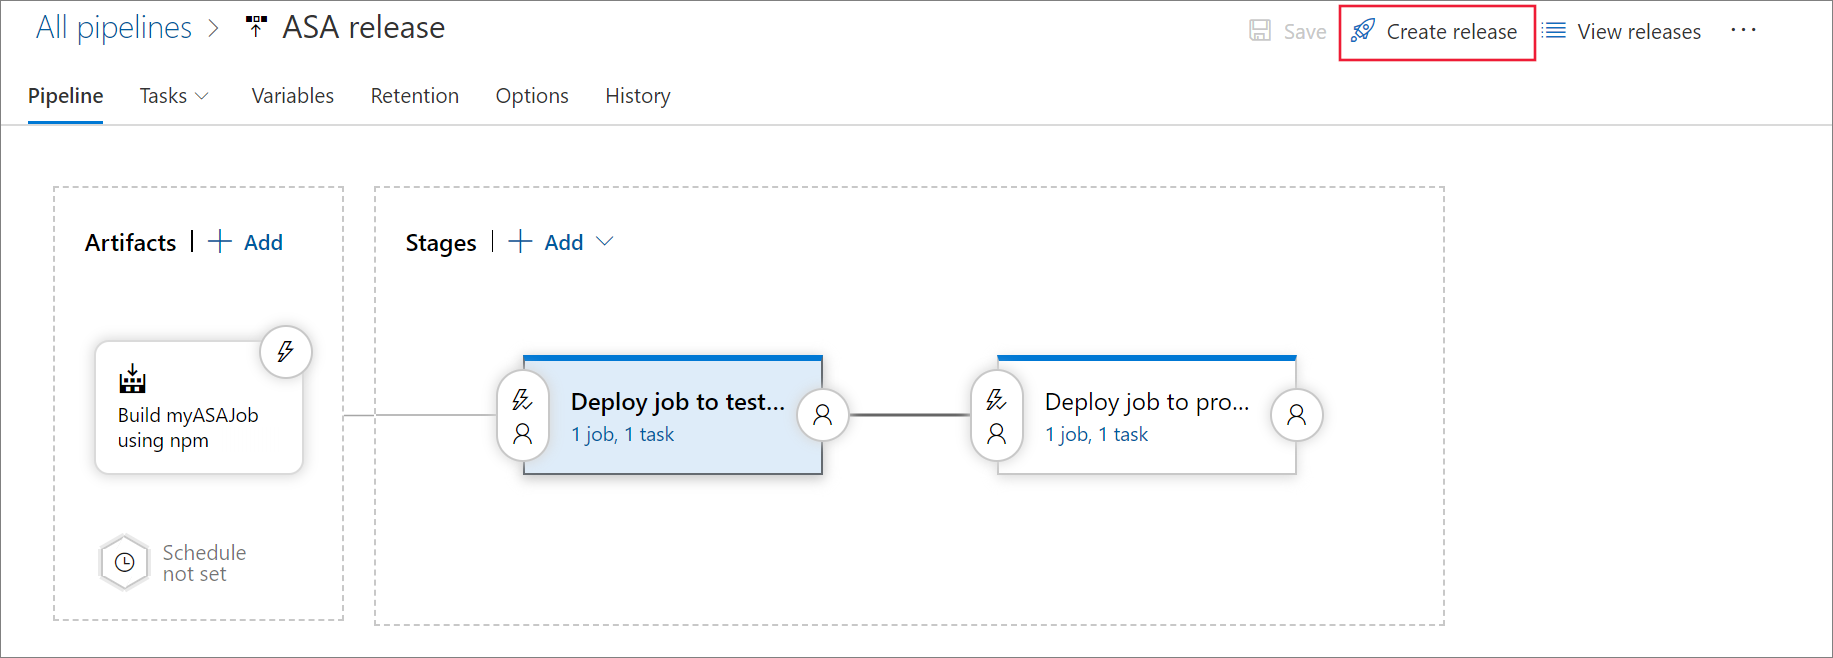
In the Artifacts box, select + Add an artifact. Under Source, select the build pipeline you created and select Add.
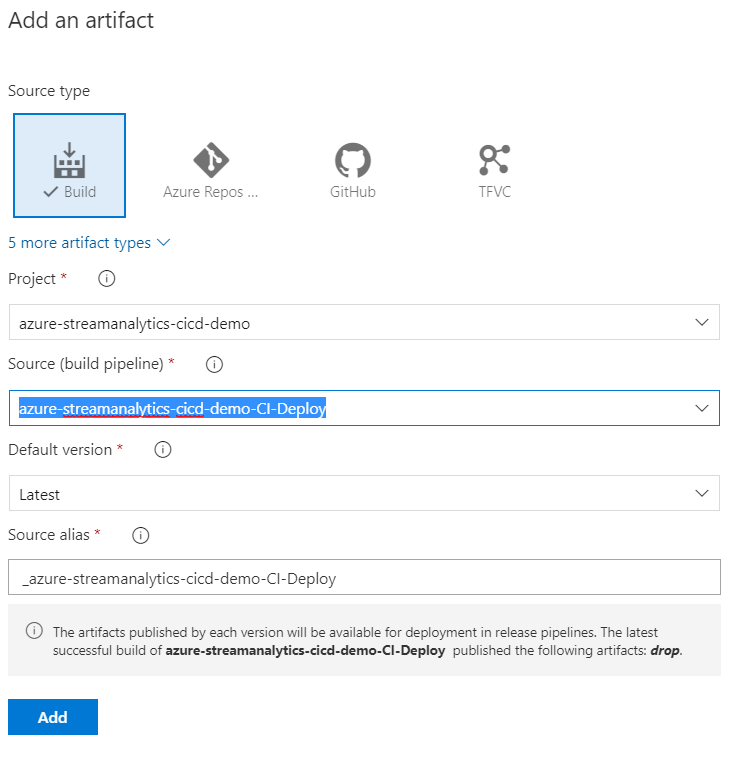
Change the name of Stage 1 to Deploy job to test environment.
Add a new stage and name it Deploy job to production environment.
Add deploy tasks
Note
The Override template parameters is not applicable for ARM v2 builds since parameters are passed as objects. To address this, it's recommended to include a PowerShell script in your pipeline to read the parameter file as JSON and make the necessary parameter modifications.
For more guidance on adding the PowerShell script, please refer to ConvertFrom-Json and Update Object in JSON file.
From the tasks dropdown, select Deploy job to test environment.
Select the + next to Agent job and search for ARM template deployment. Enter the following parameters:
Parameter Value Display name Deploy myASAProject Azure subscription Choose your subscription. Action Create or update resource group Resource group Choose a name for the test resource group that will contain your Stream Analytics job. Location Choose the location of your test resource group. Template location Linked artifact Template $(System.DefaultWorkingDirectory)/_azure-streamanalytics-cicd-demo-CI-Deploy/drop/myASAProject.JobTemplate.jsonTemplate parameters $(System.DefaultWorkingDirectory)/_azure-streamanalytics-cicd-demo-CI-Deploy/drop/myASAProject.JobTemplate.parameters.jsonOverride template parameters -<arm_template_parameter> "your value". You can define the parameters using Variables.Deployment mode Incremental From the tasks dropdown, select Deploy job to production environment.
Select the + next to Agent job and search for ARM template deployment. Enter the following parameters:
Parameter Value Display name Deploy myASAProject Azure subscription Choose your subscription. Action Create or update resource group Resource group Choose a name for the production resource group that will contain your Stream Analytics job. Location Choose the location of your production resource group. Template location Linked artifact Template $(System.DefaultWorkingDirectory)/_azure-streamanalytics-cicd-demo-CI-Deploy/drop/myASAProject.JobTemplate.jsonTemplate parameters $(System.DefaultWorkingDirectory)/_azure-streamanalytics-cicd-demo-CI-Deploy/drop/myASAProject.JobTemplate.parameters.jsonOverride template parameters -<arm_template_parameter> "your value"Deployment mode Incremental
Create a release
To create a release, select Create release in the top-right corner.
