Initiate a storage account failover
Microsoft strives to ensure that Azure services are always available. However, unplanned service outages might occasionally occur. To help minimize downtime, Azure Storage supports customer-managed failover to keep your data available during both partial and complete outages.
This article shows how to initiate an account failover for your storage account using the Azure portal, PowerShell, or the Azure CLI. To learn more about account failover, see Azure storage disaster recovery planning and failover.
Prerequisites
Review these important topics detailed in the disaster recovery guidance article before initiating a customer-managed failover.
- Potential data loss: Data loss should be expected during an unplanned storage account failover. For details on the implications of an unplanned account failover and how to prepare for data loss, see the Anticipate data loss and inconsistencies section.
- Geo-redundancy: Before you can perform a failover, your storage account must be configured for geo-redundancy. Initial synchronization from the primary to the secondary region must complete before the failover process can begin. If your account isn't configured for geo-redundancy, you can change it by following the steps described within the Change how a storage account is replicated article. For more information about Azure storage redundancy options, see the Azure Storage redundancy article.
- Understand the different types of account failover: There are two types of customer-managed failover. See the Plan for failover article to learn about potential use cases for each type, and how they differ.
- Plan for unsupported features and services: Review the Unsupported features and services article and take appropriate action before initiating a failover.
- Supported storage account types: Ensure that your storage account type can be used to initiate a failover. See Supported storage account types.
- Set your expectations for timing and cost: The time it takes the customer-managed failover process to complete can vary, but typically takes less than one hour. An unplanned failover results in the loss of geo-redundancy configuration. Reconfiguring geo-redundant storage (GRS) typically incurs extra time and cost. For more information, see the time and cost of failing over section.
Initiate the failover
You can initiate either a planned or unplanned customer-managed failover using the Azure portal, PowerShell, or the Azure CLI.
Note
We recommend that you use the Azure Az PowerShell module to interact with Azure. To get started, see Install Azure PowerShell. To learn how to migrate to the Az PowerShell module, see Migrate Azure PowerShell from AzureRM to Az.
Complete the following steps to initiate an account failover using the Azure portal:
Navigate to your storage account.
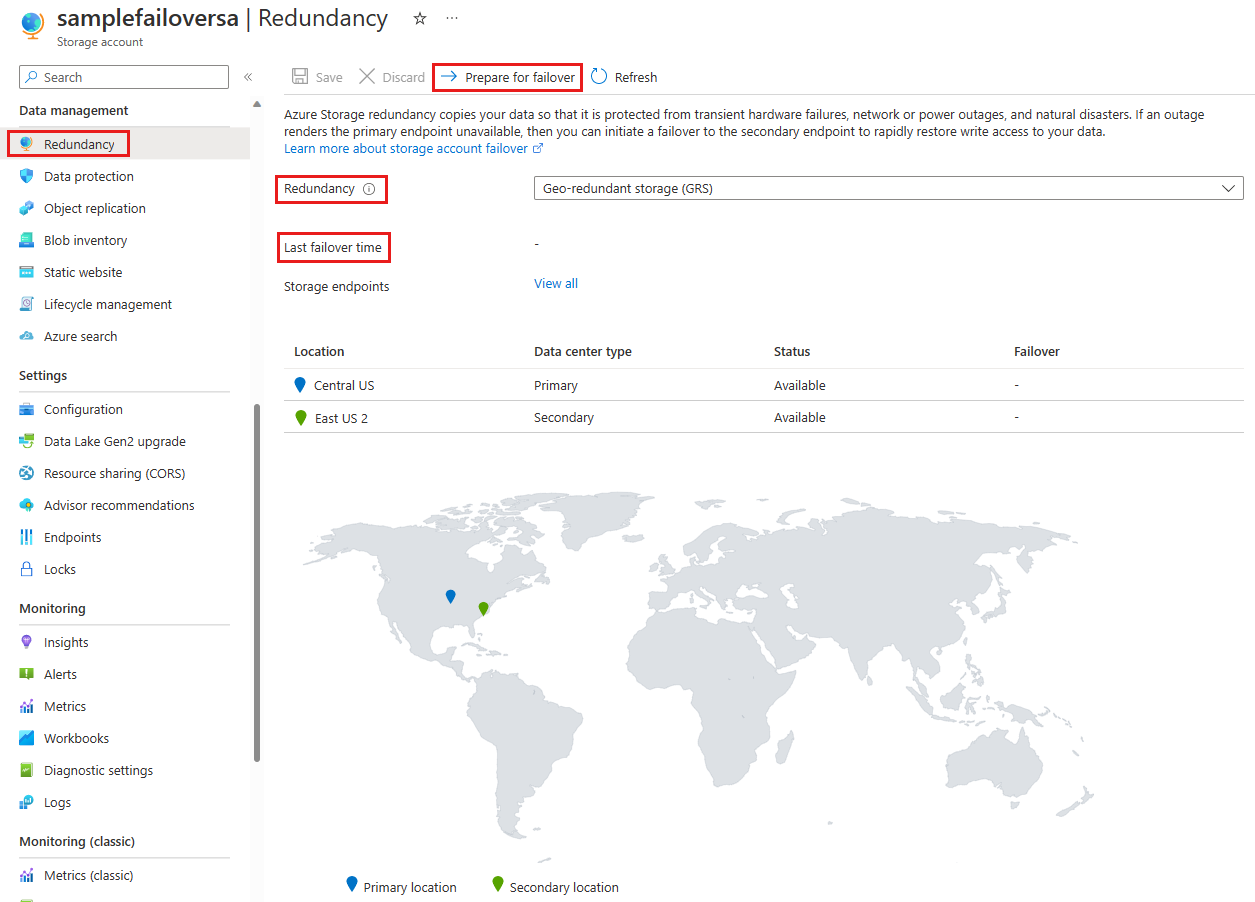
Select Redundancy from within the Data management group. The following image shows the geo-redundancy configuration and failover status of a storage account.
Verify that your storage account is configured for geo-redundant storage (GRS, RA-GRS, GZRS, or RA-GZRS). If it's not, select the desired redundancy configuration from the Redundancy drop-down and select Save to commit your change. After the geo-redundancy configuration is changed, your data is synchronized from the primary to the secondary region. This synchronization takes several minutes, and failover can't be initiated until all data is replicated. The following message appears until the synchronization is complete:
Select Prepare for Customer-Managed failover as shown in the following image:
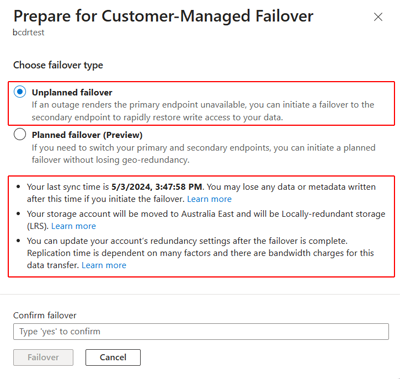
Select the type of failover for which you're preparing. The confirmation page varies depending on the type of failover you select. If you select
Unplanned Failover:A warning is displayed to alert you to the potential data loss, and to information you about the need to manually reconfigure geo-redundancy after the failover:
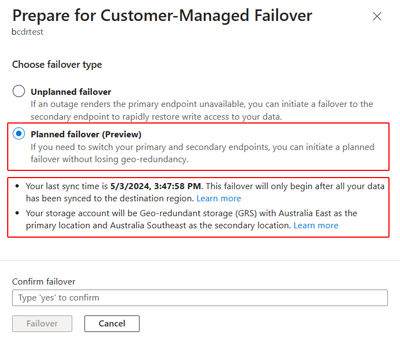
If you select
Planned failover(preview):The Last Sync Time value is displayed. Failover doesn't occur until after all data is synchronized to the secondary region, preventing data from being lost.
Since the redundancy configuration within each region doesn't change during a planned failover or failback, there's no need to manually reconfigure geo-redundancy after a failover.
Review the Prepare for failover page. When you're ready, type yes and select Failover to confirm and initiate the failover process.
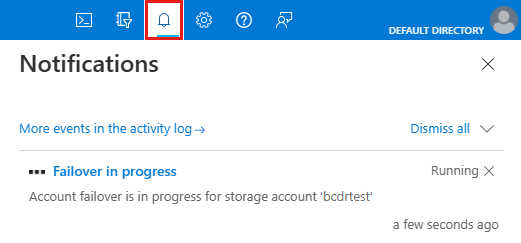
A message is displayed to indicate that the failover is in progress:
Monitor the failover
You can monitor the status of the failover using the Azure portal, PowerShell, or the Azure CLI.
The status of the failover is shown in the Azure portal in Notifications, in the activity log, and on the Redundancy page of the storage account.
Notifications
To check the status of the failover, select the bell-shaped notification icon on the far right of the Azure portal global page header:
Activity log
To view the detailed status of a failover, select the More events in the activity log link in the notification, or go to the Activity log page of the storage account:
Redundancy page
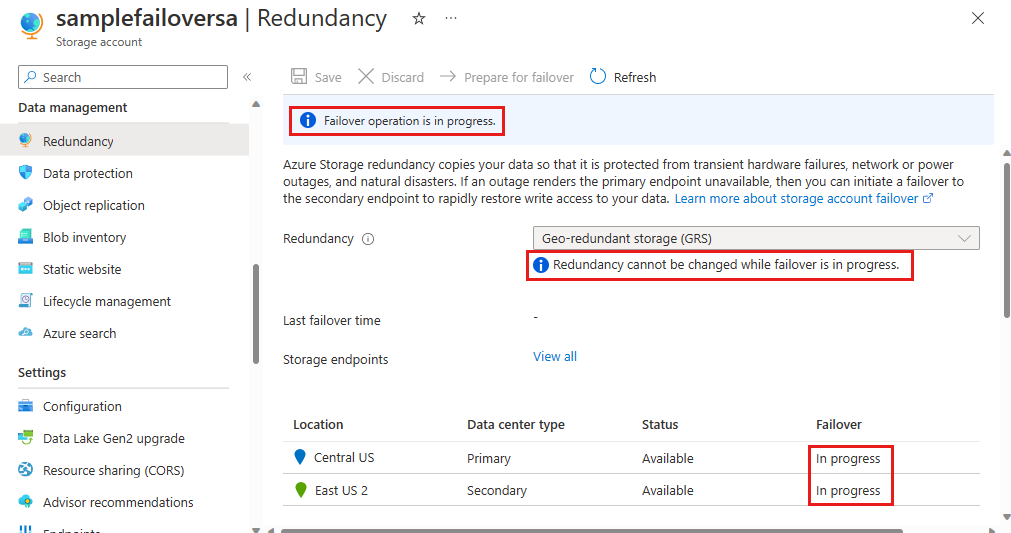
Messages on the redundancy page of the storage account are displayed to provide failover status updates:
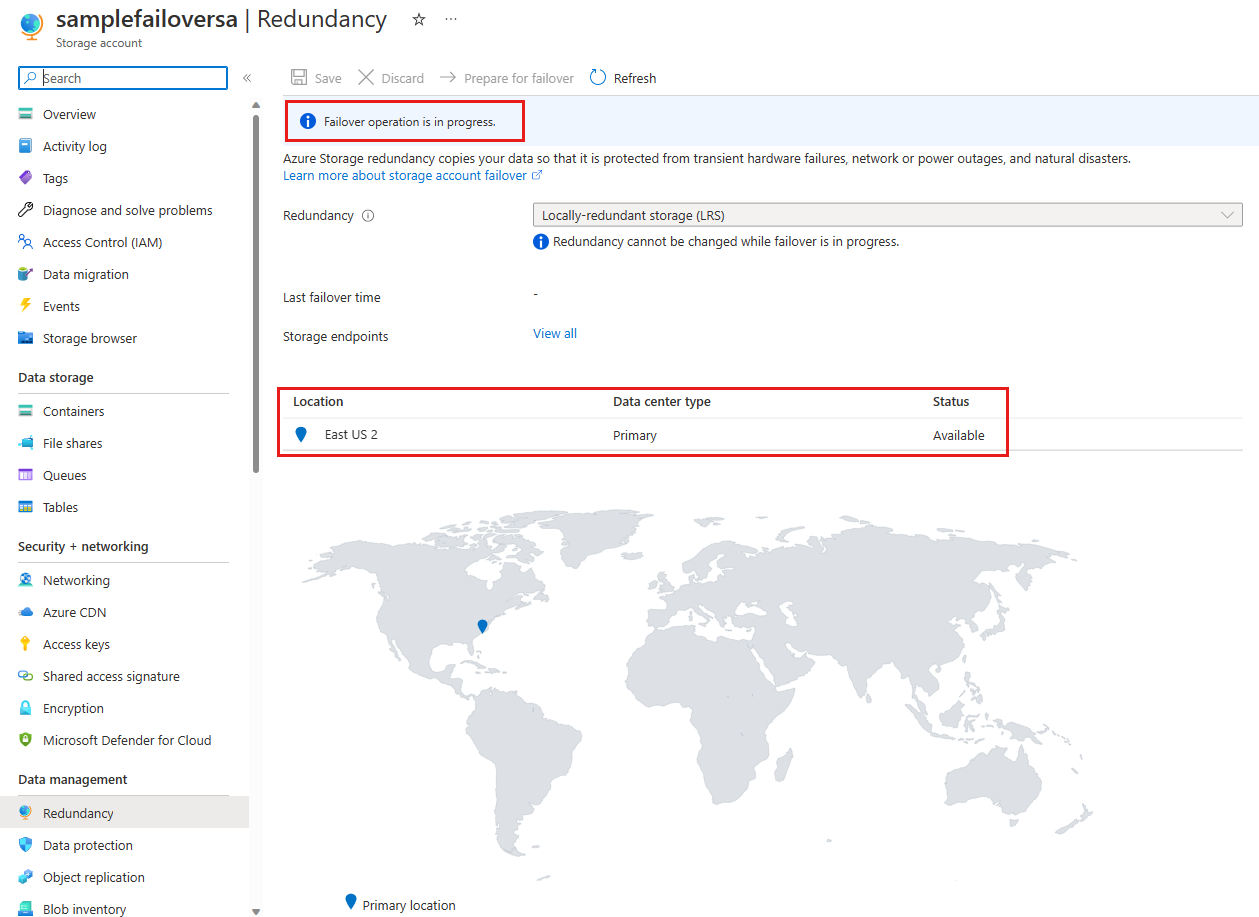
If the failover is nearing completion, the redundancy page might show the original secondary region as the new primary, but still display a message indicating the failover is in progress:
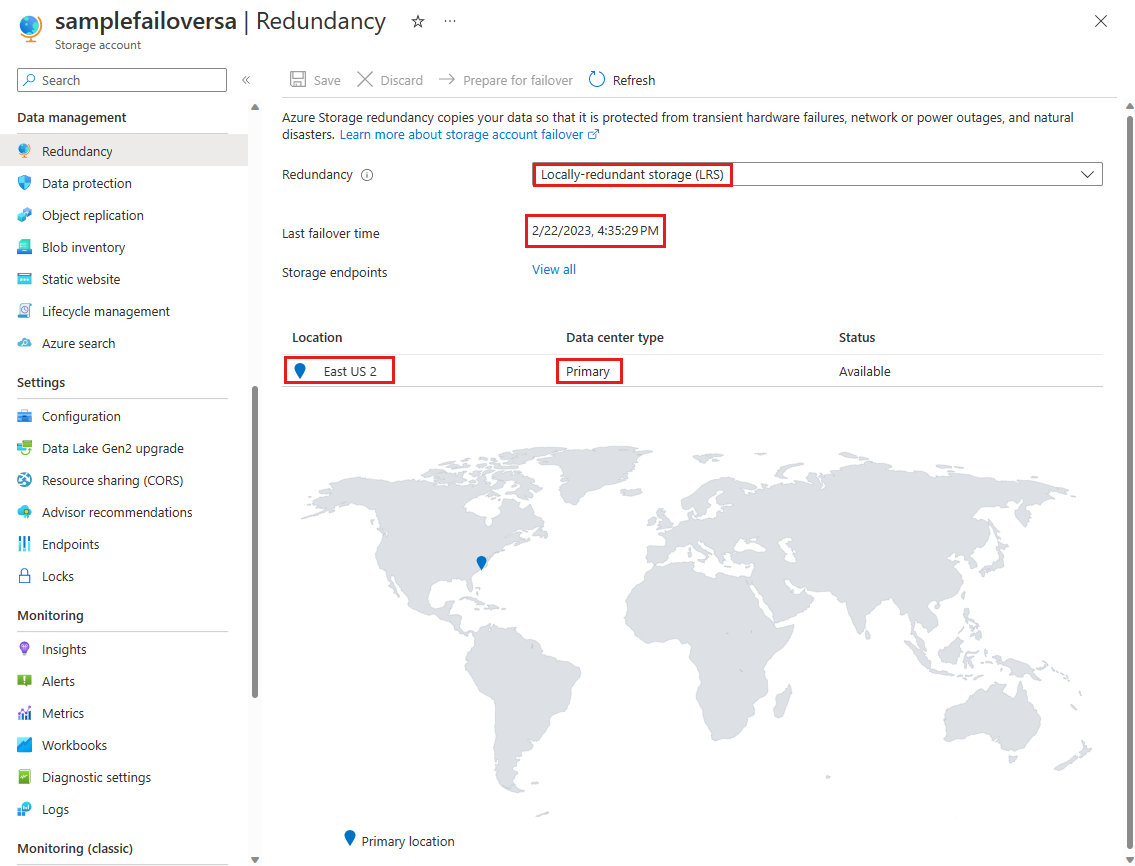
When the failover is complete, the redundancy page displays the last failover time and the new primary region's location. In the case of a planned failover, the new secondary region is also displayed. The following image shows the new storage account status after an unplanned failover:
Important implications of unplanned failover
When you initiate an unplanned failover of your storage account, the DNS records for the secondary endpoint are updated so that the secondary endpoint becomes the primary endpoint. Make sure that you understand the potential impact to your storage account before you initiate a failover.
To estimate the extent of likely data loss before you initiate a failover, check the Last Sync Time property. For more information about checking the Last Sync Time property, see Check the Last Sync Time property for a storage account.
The time it takes to failover after initiation can vary though typically less than one hour.
After the failover, your storage account type is automatically converted to locally redundant storage (LRS) in the new primary region. You can re-enable geo-redundant storage (GRS) or read-access geo-redundant storage (RA-GRS) for the account. Note that converting from LRS to GRS or RA-GRS incurs an additional cost. The cost is due to the network egress charges to re-replicate the data to the new secondary region. For additional information, see Bandwidth Pricing Details.
After you re-enable GRS for your storage account, Microsoft begins replicating the data in your account to the new secondary region. Replication time depends on many factors, which include:
- The number and size of the objects in the storage account. Many small objects can take longer than fewer and larger objects.
- The available resources for background replication, such as CPU, memory, disk, and WAN capacity. Live traffic takes priority over geo replication.
- If using Blob storage, the number of snapshots per blob.
- If using Table storage, the data partitioning strategy. The replication process can't scale beyond the number of partition keys that you use.
When an unplanned failover occurs, all data in the primary region is lost as the secondary region becomes the new primary. All write operations made to the primary region's storage account need to be repeated after geo-redundancy is re-enabled. For more details, refer to Azure storage disaster recovery planning and failover.
The Azure Storage resource provider does not fail over during the failover process. As a result, the Azure Storage REST API's Location property continues to return the original location after the failover is complete.
Storage account failover is a temporary solution to a service outage and shouldn't be used as part of your data migration strategy. For information about how to migrate your storage accounts, see Azure Storage migration overview.
