QuickStart: Get started with Dynatrace
In this quickstart, you create a new instance of Azure Native Dynatrace Service. You can either create a new Dynatrace environment or link to an existing Dynatrace environment.
When you use the integrated Dynatrace experience in Azure portal, the following entities are created and mapped for monitoring and billing purposes.

- Dynatrace resource in Azure - Using the Dynatrace resource, you can manage the Dynatrace environment in Azure. The resource is created in the Azure subscription and resource group that you select during the create process or linking process.
- Dynatrace environment - The Dynatrace environment on Dynatrace Software as a Service (SaaS). When you create a new environment, the environment on Dynatrace SaaS is automatically created, in addition to the Dynatrace resource in Azure.
- Marketplace SaaS resource - The SaaS resource is created automatically, based on the plan you select from the Dynatrace Marketplace offer. This resource is used for billing purposes.
Prerequisites
Before you link the subscription to a Dynatrace environment, complete the pre-deployment configuration.
Find Offer
Use the Azure portal to find Azure Native Dynatrace Service application.
Go to the Azure portal and sign in.
If you've visited the Marketplace in a recent session, select the icon from the available options. Otherwise, search for Marketplace.
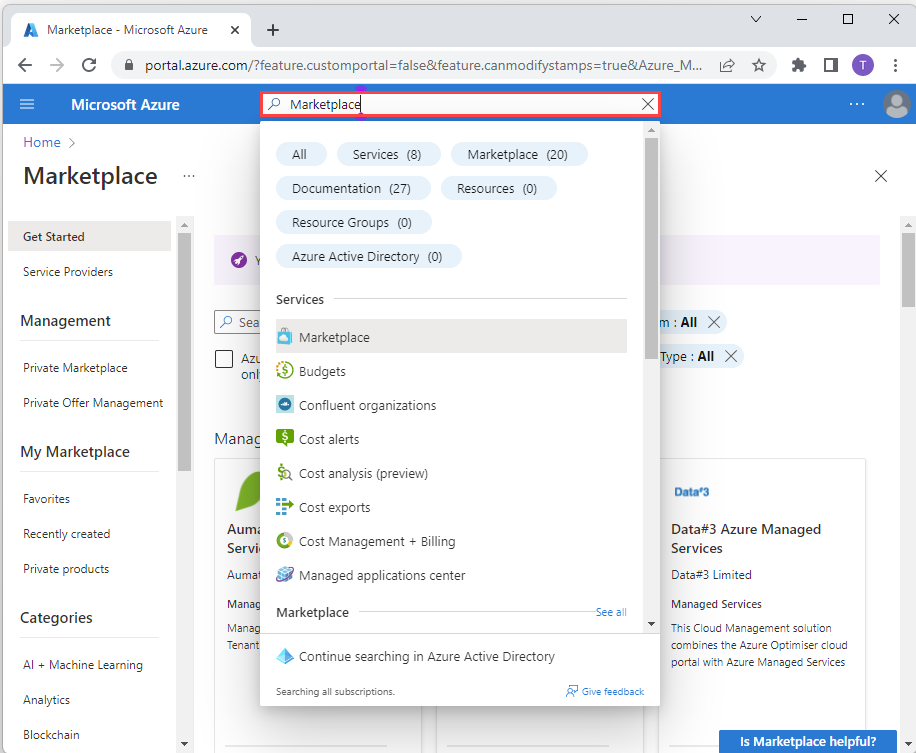
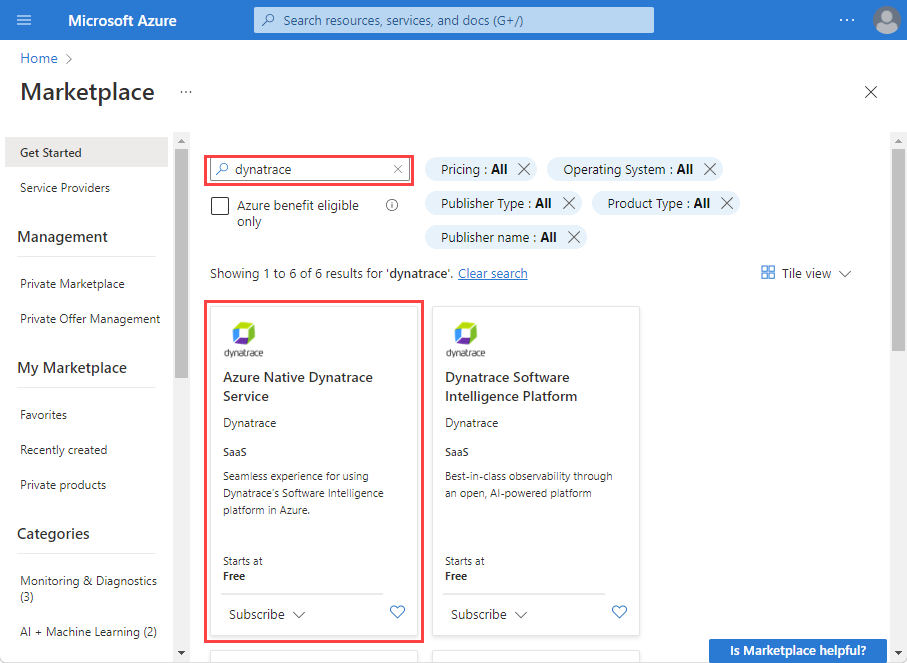
In the Marketplace, search for Dynatrace.
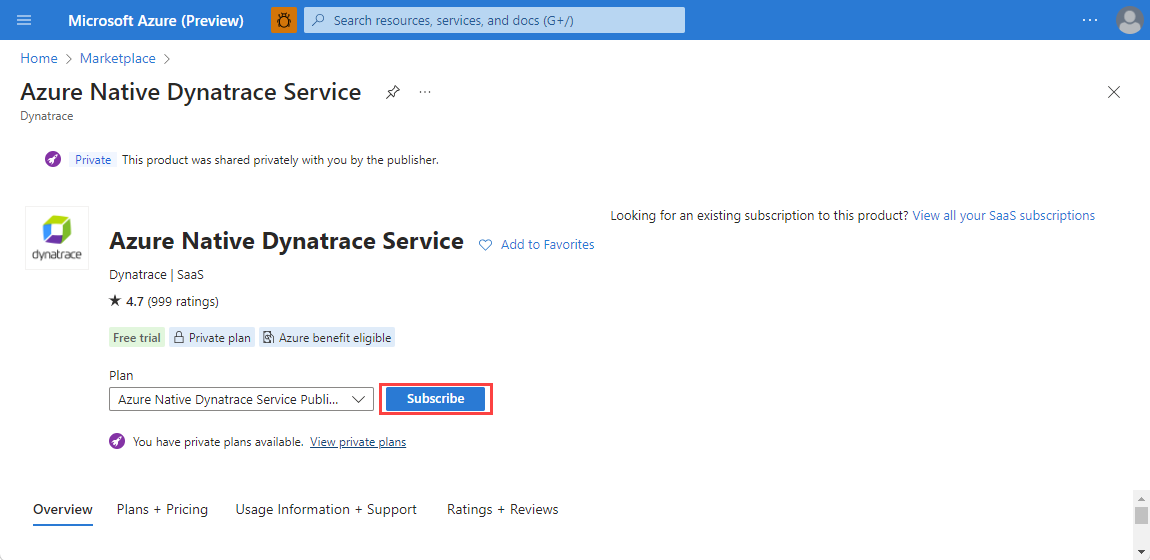
Select Subscribe.
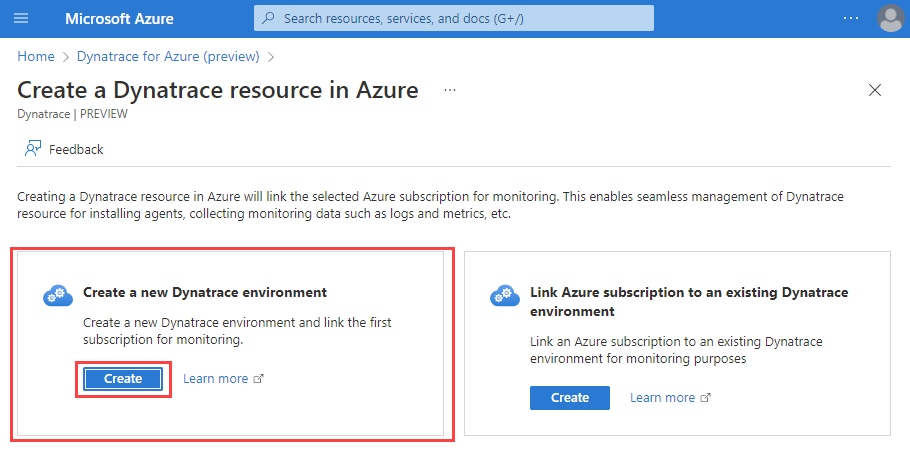
Create a Dynatrace resource in Azure
When creating a Dynatrace resource, you see two options: one to create a new Dynatrace environment, and another to link Azure subscription to an existing Dynatrace environment. If you want to create a new Dynatrace environment, select Create action under the Create a new Dynatrace environment option.
You see a form to create a Dynatrace resource in the working pane.
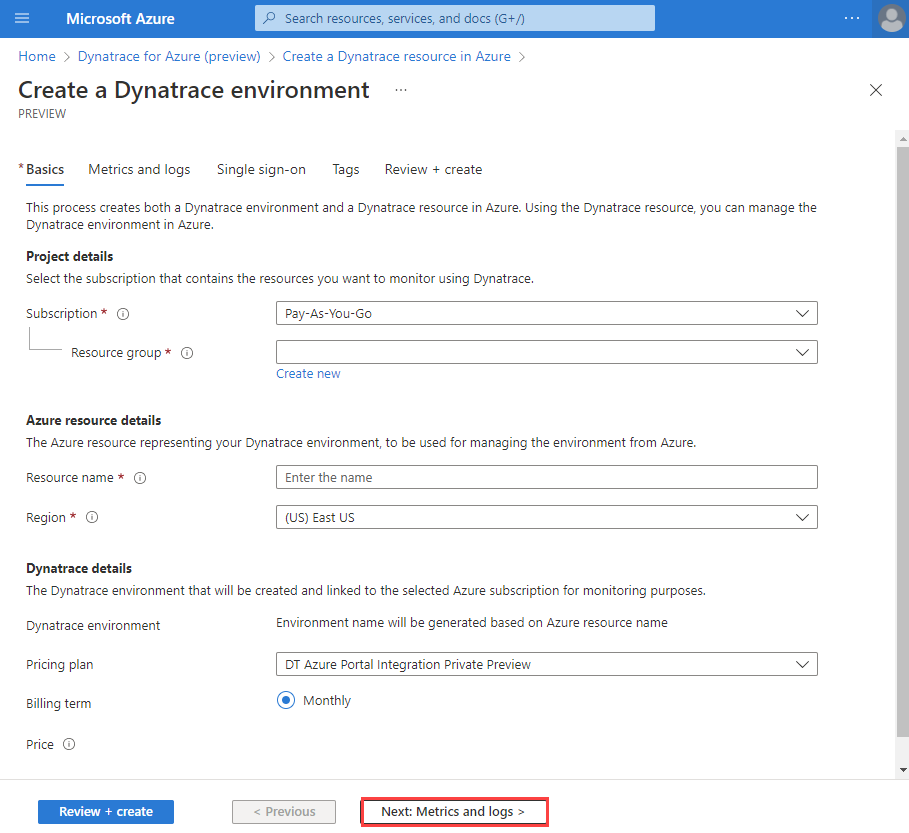
Provide the following values:
Property Description Subscription Select the Azure subscription you want to use for creating the Dynatrace resource. You must have owner or contributor access. Resource group Specify whether you want to create a new resource group or use an existing one. A resource group is a container that holds related resources for an Azure solution. Resource name Specify a name for the Dynatrace resource. This name will be the friendly name of the new Dynatrace environment. Location Select the region. Select the region where the Dynatrace resource in Azure and the Dynatrace environment is created. Pricing plan Select from the list of available plans. Select Next: Metrics and Logs.
Configure metrics and logs
Your next step is to configure metrics and logs for your resources. Azure Native Dynatrace Service supports the metrics for both compute and non-compute resources. Compute resources include VMs, app services and more. If you have an owner role in the subscription, you see the option to enable metrics collection.
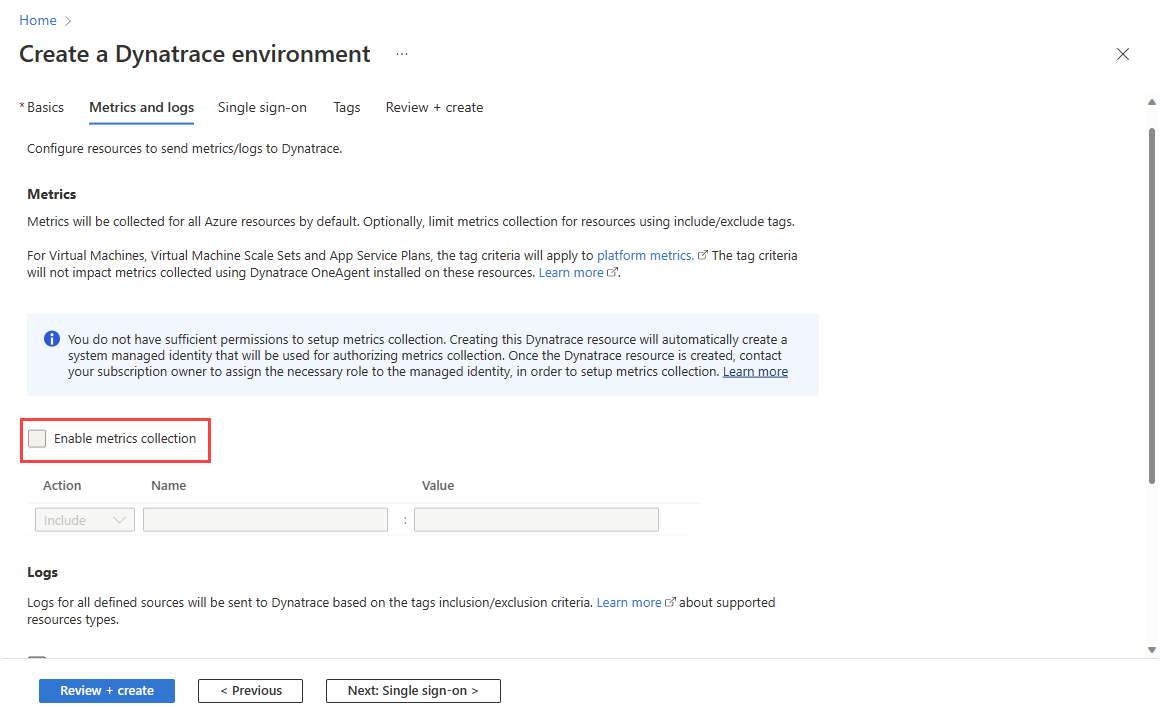
- Metrics for compute resources – Users can send metrics for the compute resources, virtual machines and app services, by installing the Dynatrace OneAgent extension on the compute resources after the Dynatrace resource has been created.
- Metrics for non-compute resources – These metrics can be collected by configuring the Dynatrace resource to automatically query Azure monitor for metrics. To enable metrics collection, select the checkbox. If you have an owner access in your subscription, you can enable and disable the metrics collection using the checkbox. Proceed to the configuring logs. However, if you have contributor access, use the information in the following step.
If you have a contributor role in the subscription, you don't see the option to enable metrics collection because in Azure a contributor can't assign a monitoring reader role to a resource that is required by the metrics crawler to collect metrics.
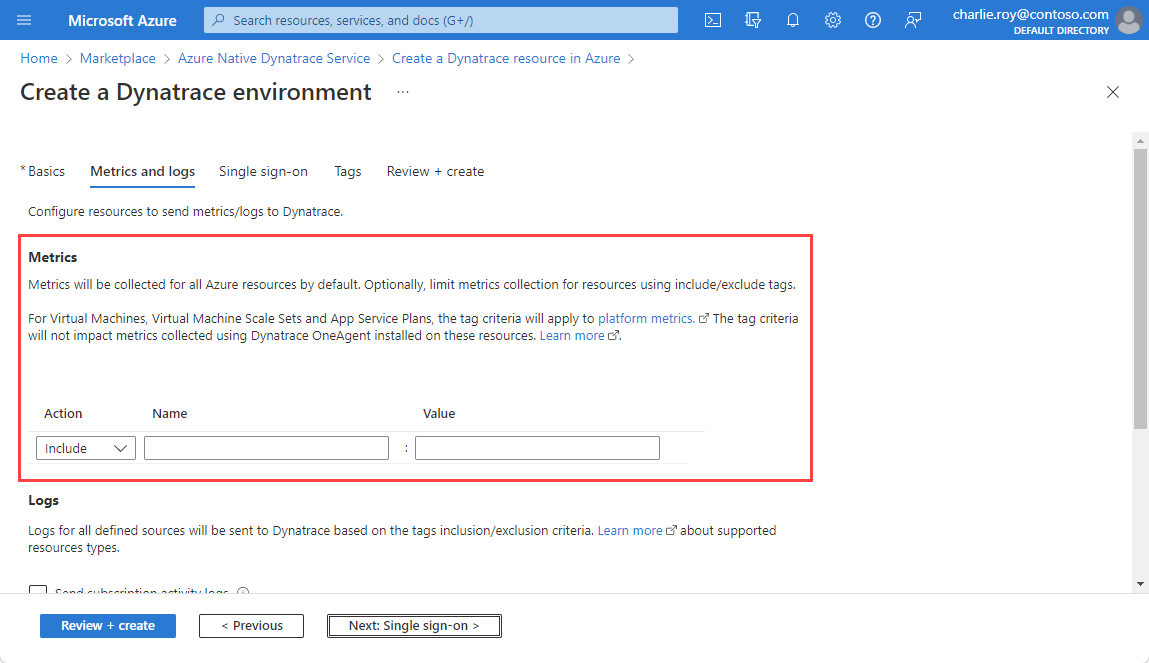
Complete the resource provisioning excluding the metrics configuration and ask an owner to assign an appropriate role manually to your resource. If you have an owner role in the subscription, you can take the following steps to grant a monitoring reader identity to a contributor user:
Go to the resource created by a contributor.
Go to Access control in the resource menu on the left and select Add then Add role assignment.
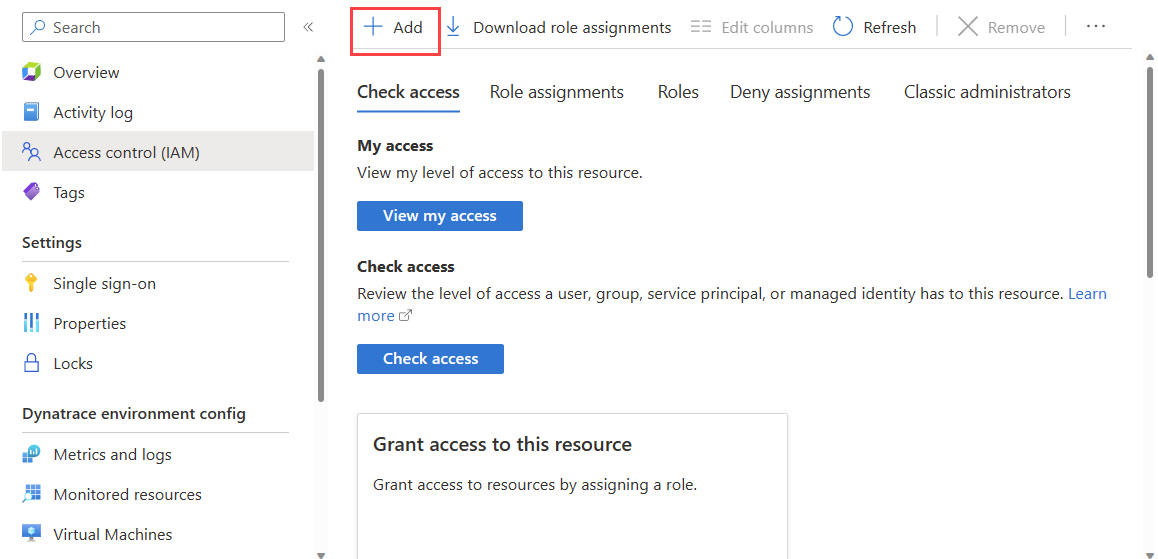
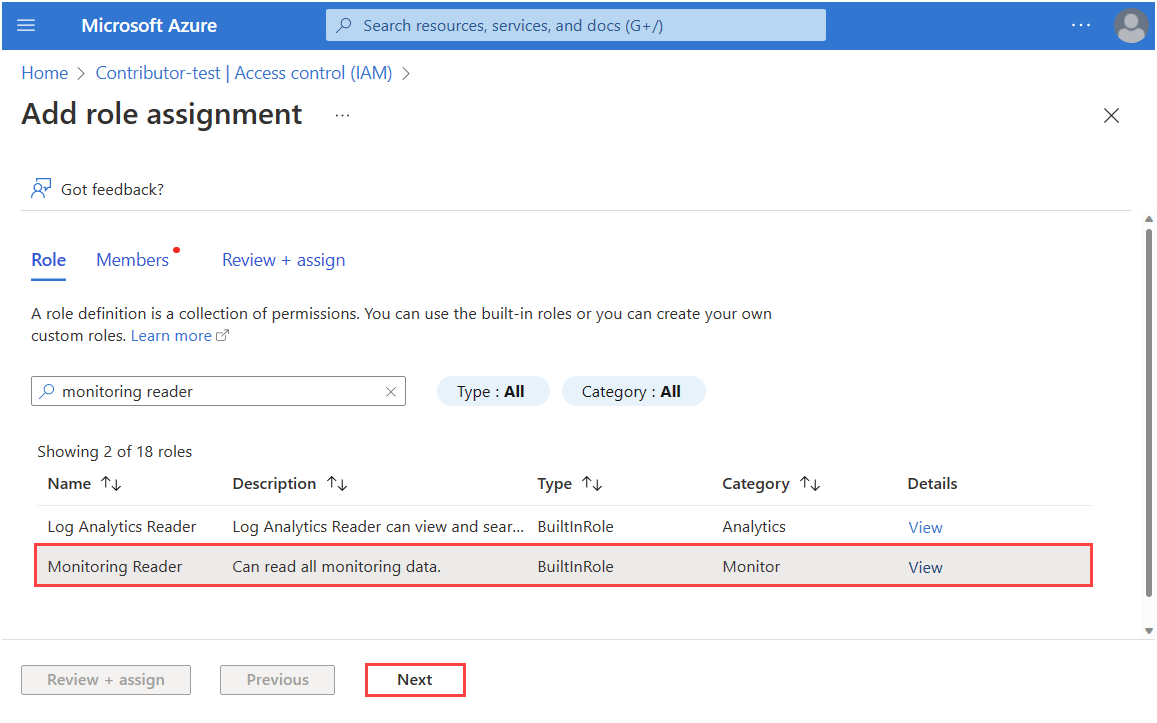
In the list, scroll down and select on Monitoring reader. Then, select Next.
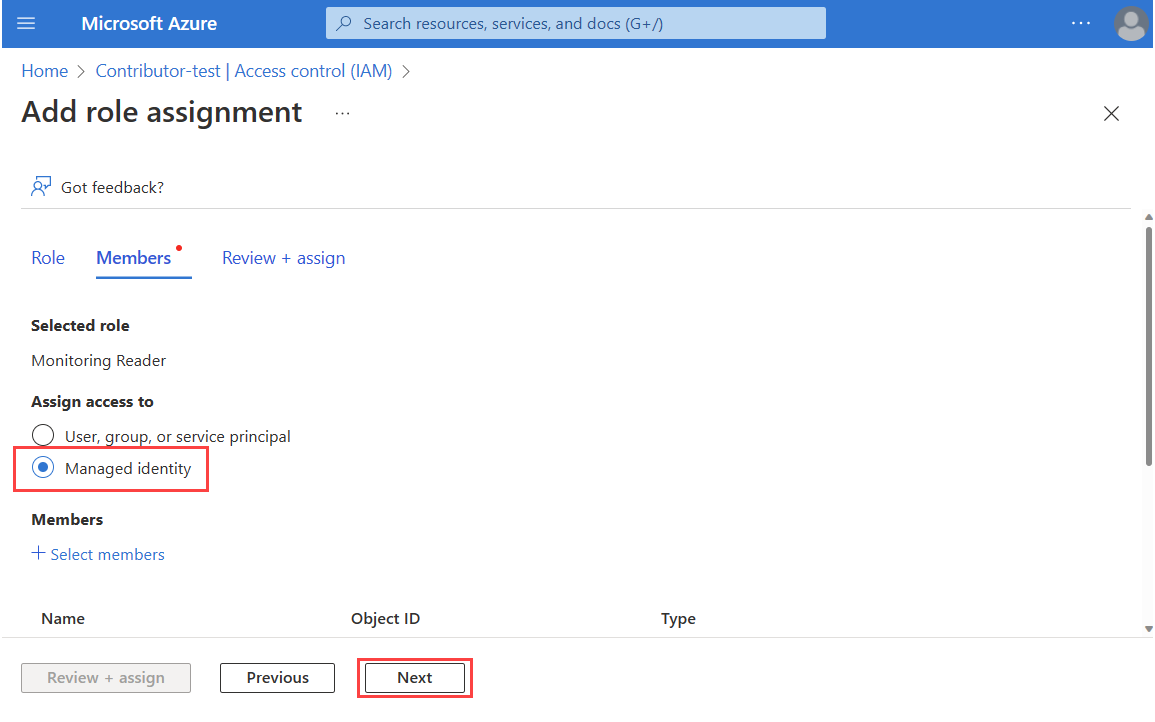
In Assign access to, select Managed identity. Then, Select members.
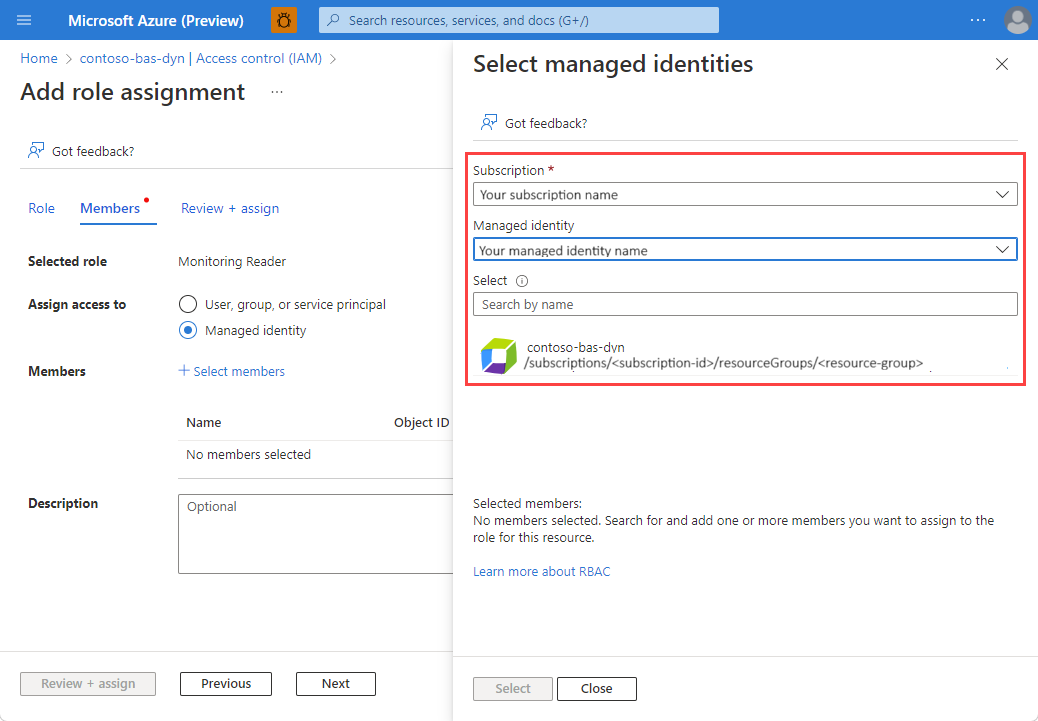
Select the Subscription. In Managed identity, select Dynatrace and the Dynatrace resource created by the contributor. After you select the resource, use Select to continue.
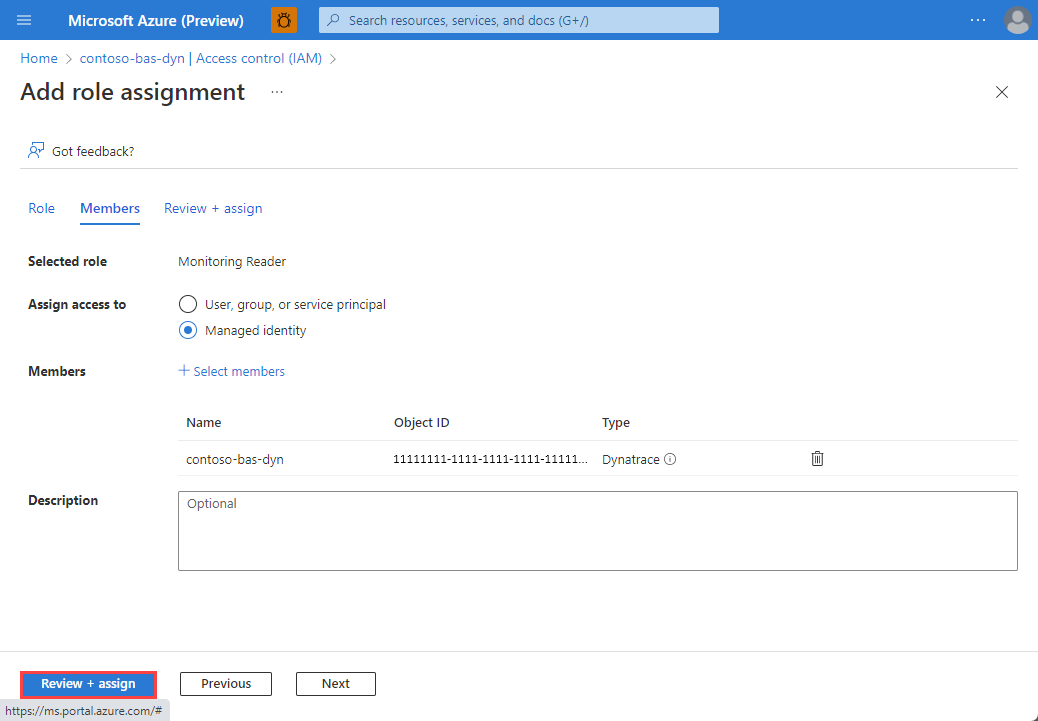
When you have completed the selection, select Review + assign
When creating the Dynatrace resource, you can set up automatic log forwarding for three types of logs:
Send subscription activity logs - Subscription activity logs provide insight into the operations on your resources at the control plane. Updates on service-health events are also included. Use the activity log to determine the what, who, and when for any write operations (PUT, POST, DELETE). There's a single activity log for each Azure subscription.
Send Azure resource logs for all defined sources - Azure resource logs provide insight into operations that were taken on an Azure resource at the data plane. For example, getting a secret from a Key Vault is a data plane operation. Or, making a request to a database is also a data plane operation. The content of resource logs varies by the Azure service and resource type.
Send Microsoft Entra logs – Microsoft Entra logs allow you to route the audit, sign-in, and provisioning logs to Dynatrace. The details are listed in Microsoft Entra activity logs in Azure Monitor. The administrator or security administrator for your Microsoft Entra tenant can enable Microsoft Entra logs.
To send subscription level logs to Dynatrace, select Send subscription activity logs. If this option is left unchecked, none of the subscription level logs are sent to Dynatrace.
To send Azure resource logs to Dynatrace, select Send Azure resource logs for all defined resources. The types of Azure resource logs are listed in Azure Monitor Resource Log categories.
When the checkbox for Azure resource logs is selected, by default, logs are forwarded for all resources. To filter the set of Azure resources sending logs to Dynatrace, use inclusion and exclusion rules and set the Azure resource tags:
- All Azure resources with tags defined in include Rules send logs to Dynatrace.
- All Azure resources with tags defined in exclude rules don't send logs to Dynatrace.
- If there's a conflict between an inclusion and exclusion rule, the exclusion rule applies.
The logs sent to Dynatrace are charged by Azure. For more information, see the pricing of platform logs sent to Azure Marketplace partners.
Once you have completed configuring metrics and logs, select Next: Single sign-on.
Configure single sign-on
You can establish single sign-on to Dynatrace from the Azure portal when your organization uses Microsoft Entra ID as its identity provider. If your organization uses a different identity provider or you don't want to establish single sign-on at this time, you can skip this section.

To establish single sign-on through Microsoft Entra ID, select the checkbox for Enable single sign-on through Microsoft Entra ID.
The Azure portal retrieves the appropriate Dynatrace application from Microsoft Entra ID. The app matches the Enterprise app you provided in an earlier step.
Next steps
Get started with Azure Native Dynatrace Service on