Subscribe to events through portal
This article describes how to create Event Grid subscriptions through the portal.
Create event subscriptions
To create an Event Grid subscription for any of the supported event sources, use the following steps. This article shows how to create an Event Grid subscription for an Azure subscription.
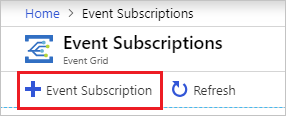
In the Azure portal, search for Event Grid Subscriptions using the search box at the top, and select it from the available options.

Select + Event Subscription.
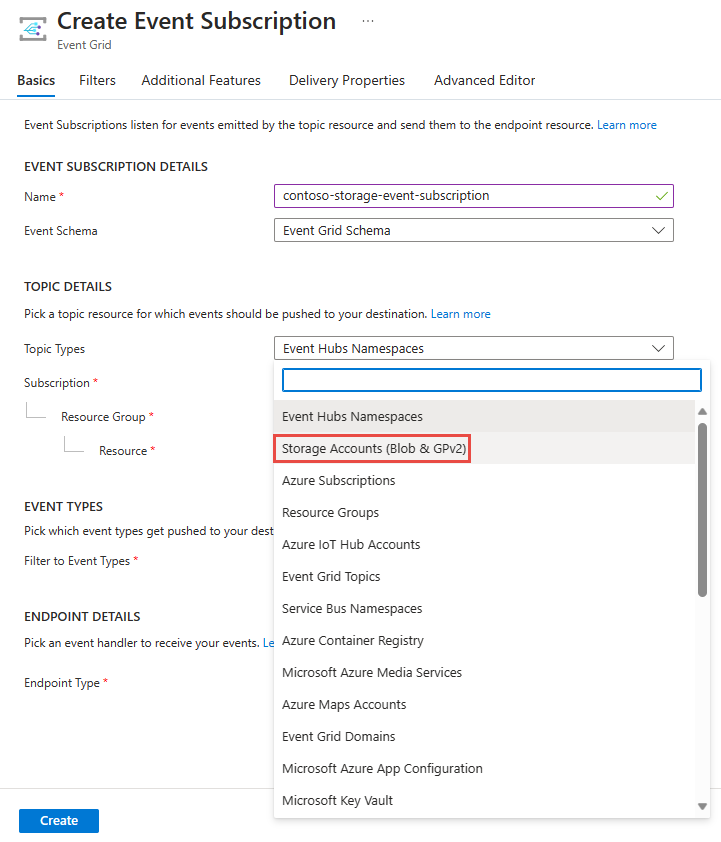
On the Create Event Subscription page, follow these steps:
Enter a name for the event subscription.
Select the type of event source (topic type) on which you want to create a subscription. For example, to subscribe to events for your Azure storage account, select Storage Accounts.
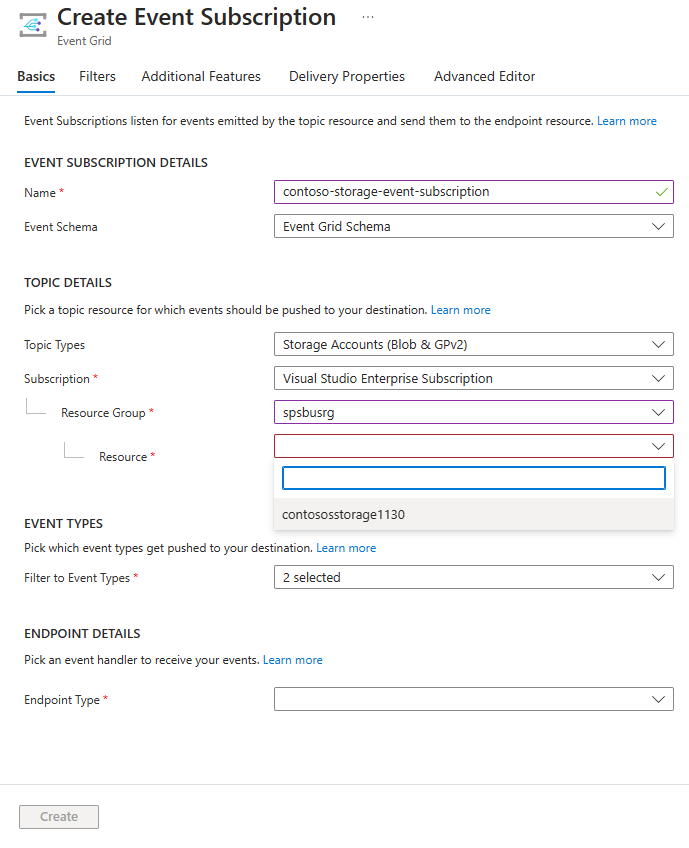
Select the Azure subscription that contains the storage account.
Select the resource group that has the storage account.
Then, select the storage account.
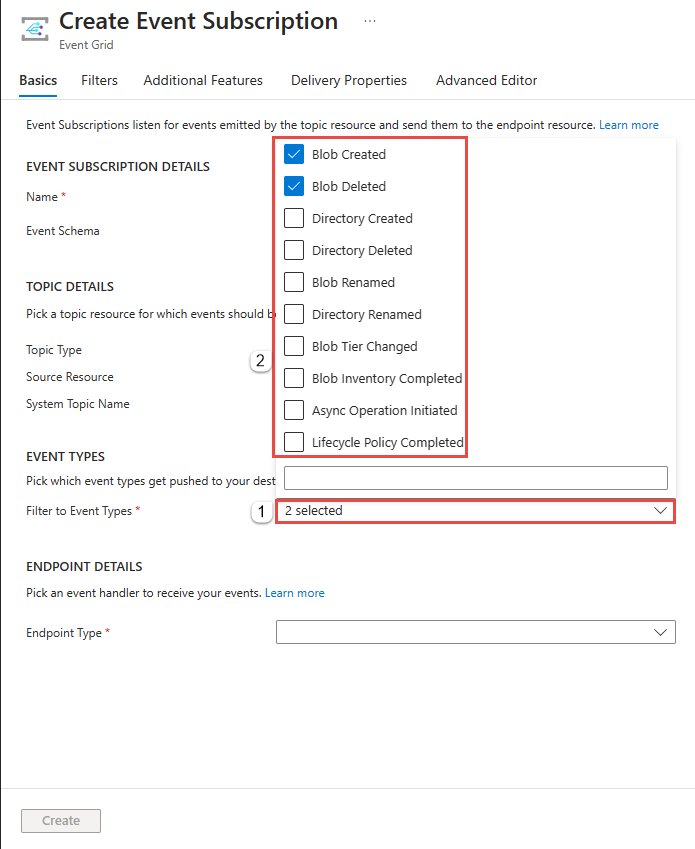
Select the event types that you want to receive on the event subscription.
If there's a system topic for the resource you selected, it shows up as a read-only field for System Topic Name. Otherwise, enter a name for the system topic.
Select an endpoint type, and the endpoint that receives the events. In the following example, Service Bus Queue is selected as the endpoint type and
myqueueis the name of the Service Bus queue that receives events from Event Grid.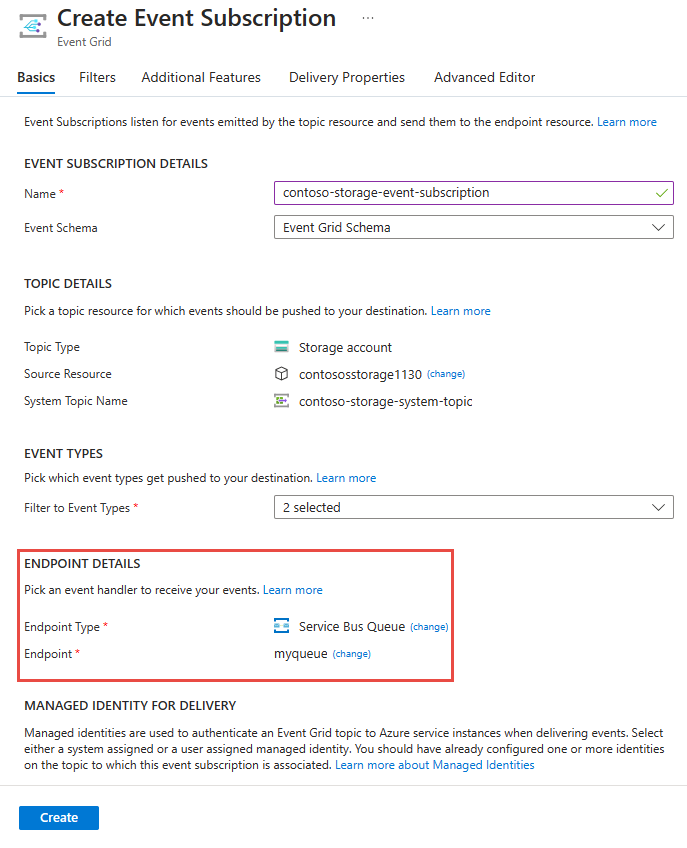
Note
- For a list of supported event handlers, see Event handlers.
- If you enable managed identity for a topic or domain, you need to add the managed identity to the appropriate role-based access control (RBAC) role on the destination for the messages to be delivered successfully. For more information, see Supported destinations and Azure roles.
In the Managed Identity for Delivery section, specify if you want to use a system assigned managed identity or user-assigned managed identity to deliver events to the endpoint or destination.
To enable dead lettering and customize retry policies, select Additional Features.
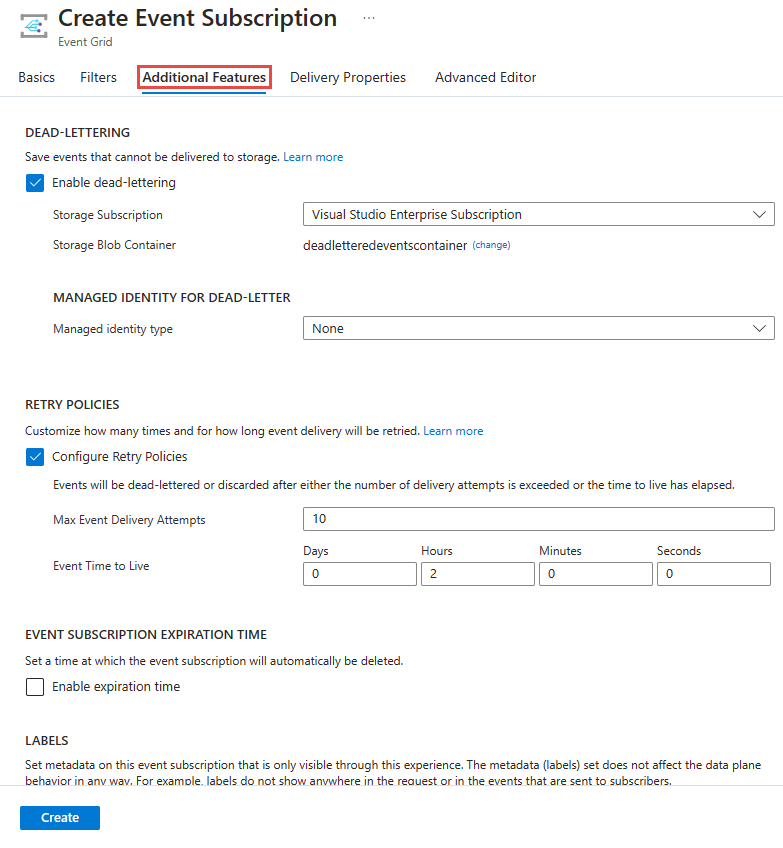
When done, select Create.
Create subscription on resource
Some event sources support creating an event subscription through the portal interface for that resource. Select the event source, and look for Events in left pane.
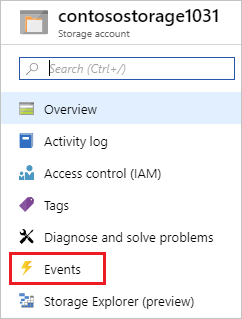
The portal presents you with options for creating an event subscription that is relevant to that source.
Related content
- For information about event delivery and retries, Event Grid message delivery and retry.
- For an introduction to Event Grid, see About Event Grid.
- To quickly get started using Event Grid, see Create and route custom events with Azure Event Grid.