Create a private endpoint for Azure Data Manager for Energy
Azure Private Link provides private connectivity from a virtual network to Azure platform as a service (PaaS). It simplifies the network architecture and secures the connection between endpoints in Azure by eliminating data exposure to the public internet.
By using Azure Private Link, you can connect to an Azure Data Manager for Energy instance from your virtual network via a private endpoint, which is a set of private IP addresses in a subnet within the virtual network. You can then limit access to your Azure Data Manager for Energy instance over these private IP addresses.
You can connect to an Azure Data Manager for Energy instance that's configured with Private Link by using an automatic or manual approval method. To learn more, see the Private Link documentation.
This article describes how to set up a private endpoint for Azure Data Manager for Energy.
Note
To enable private endpoint, public access must be disabled for Azure Data Manager for Energy. If public access is enabled and private endpoint is created, the instance will only be accessed via private endpoint and not by public access.
Note
Terraform currently does not support private endpoint creation for Azure Data Manager for Energy.
Prerequisites
Create a virtual network in the same subscription as the Azure Data Manager for Energy instance. This virtual network allows automatic approval of the Private Link endpoint.
Create a private endpoint during instance provisioning by using the Azure portal
Use the following steps to create a private endpoint while provisioning Azure Data Manager for Energy resource:
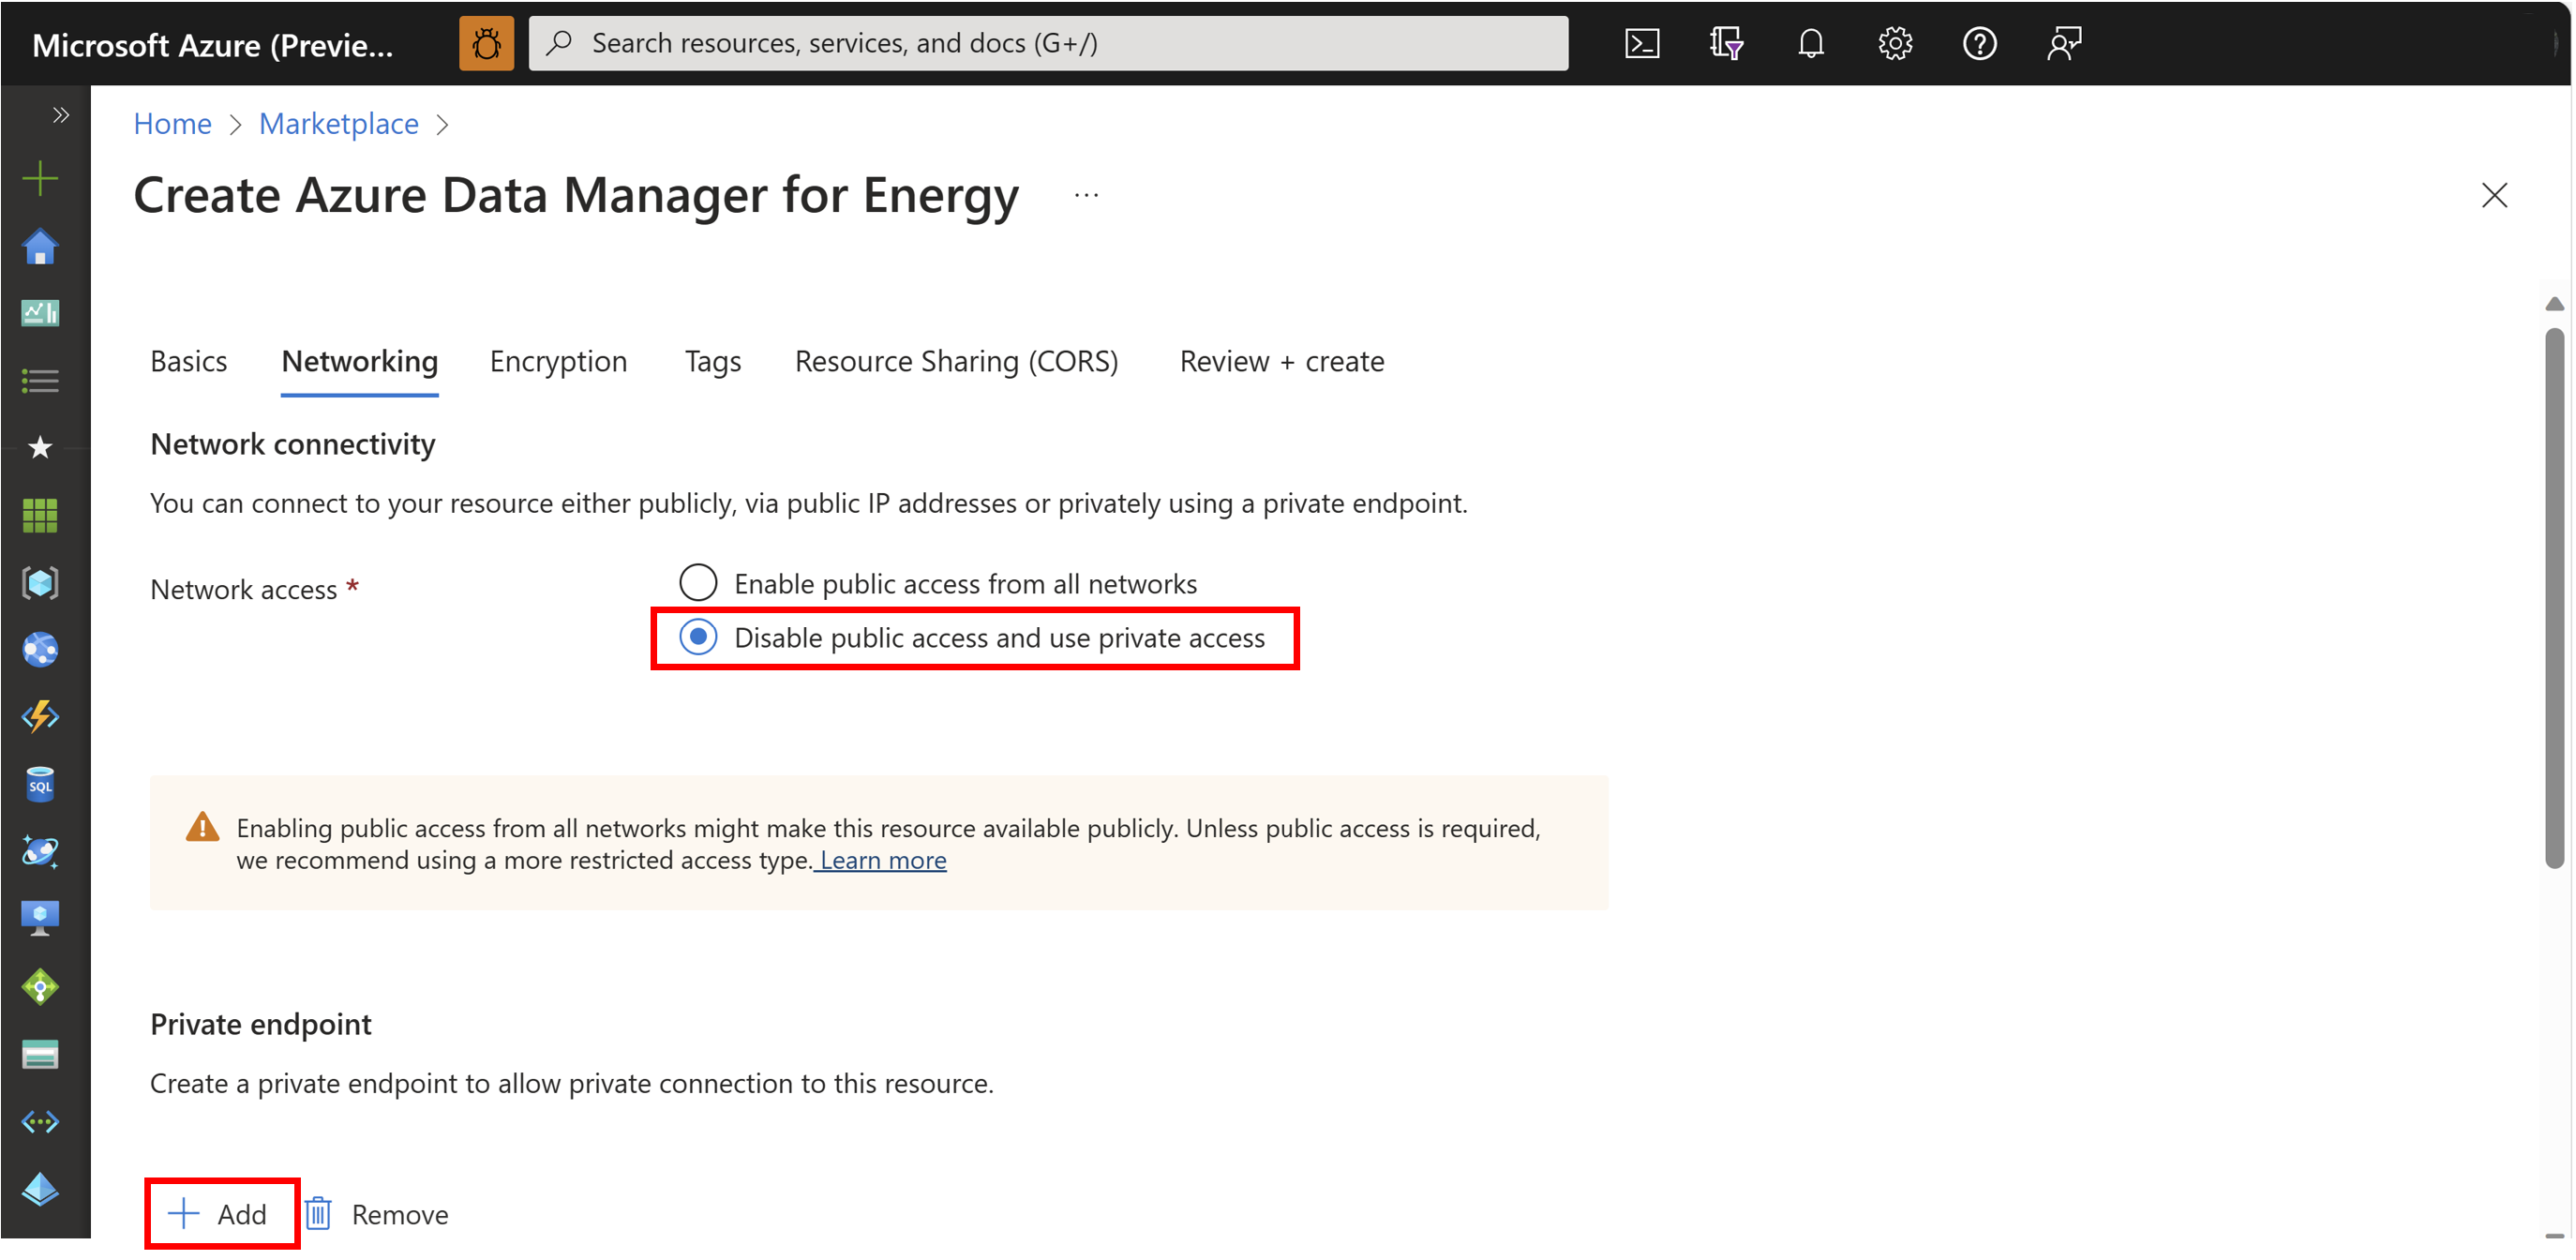
During the creation of Azure Data Manager for Energy instance, select the Networking tab.
In the Networking tab, select Disable public access and use private access and then choose Add under Private endpoint.
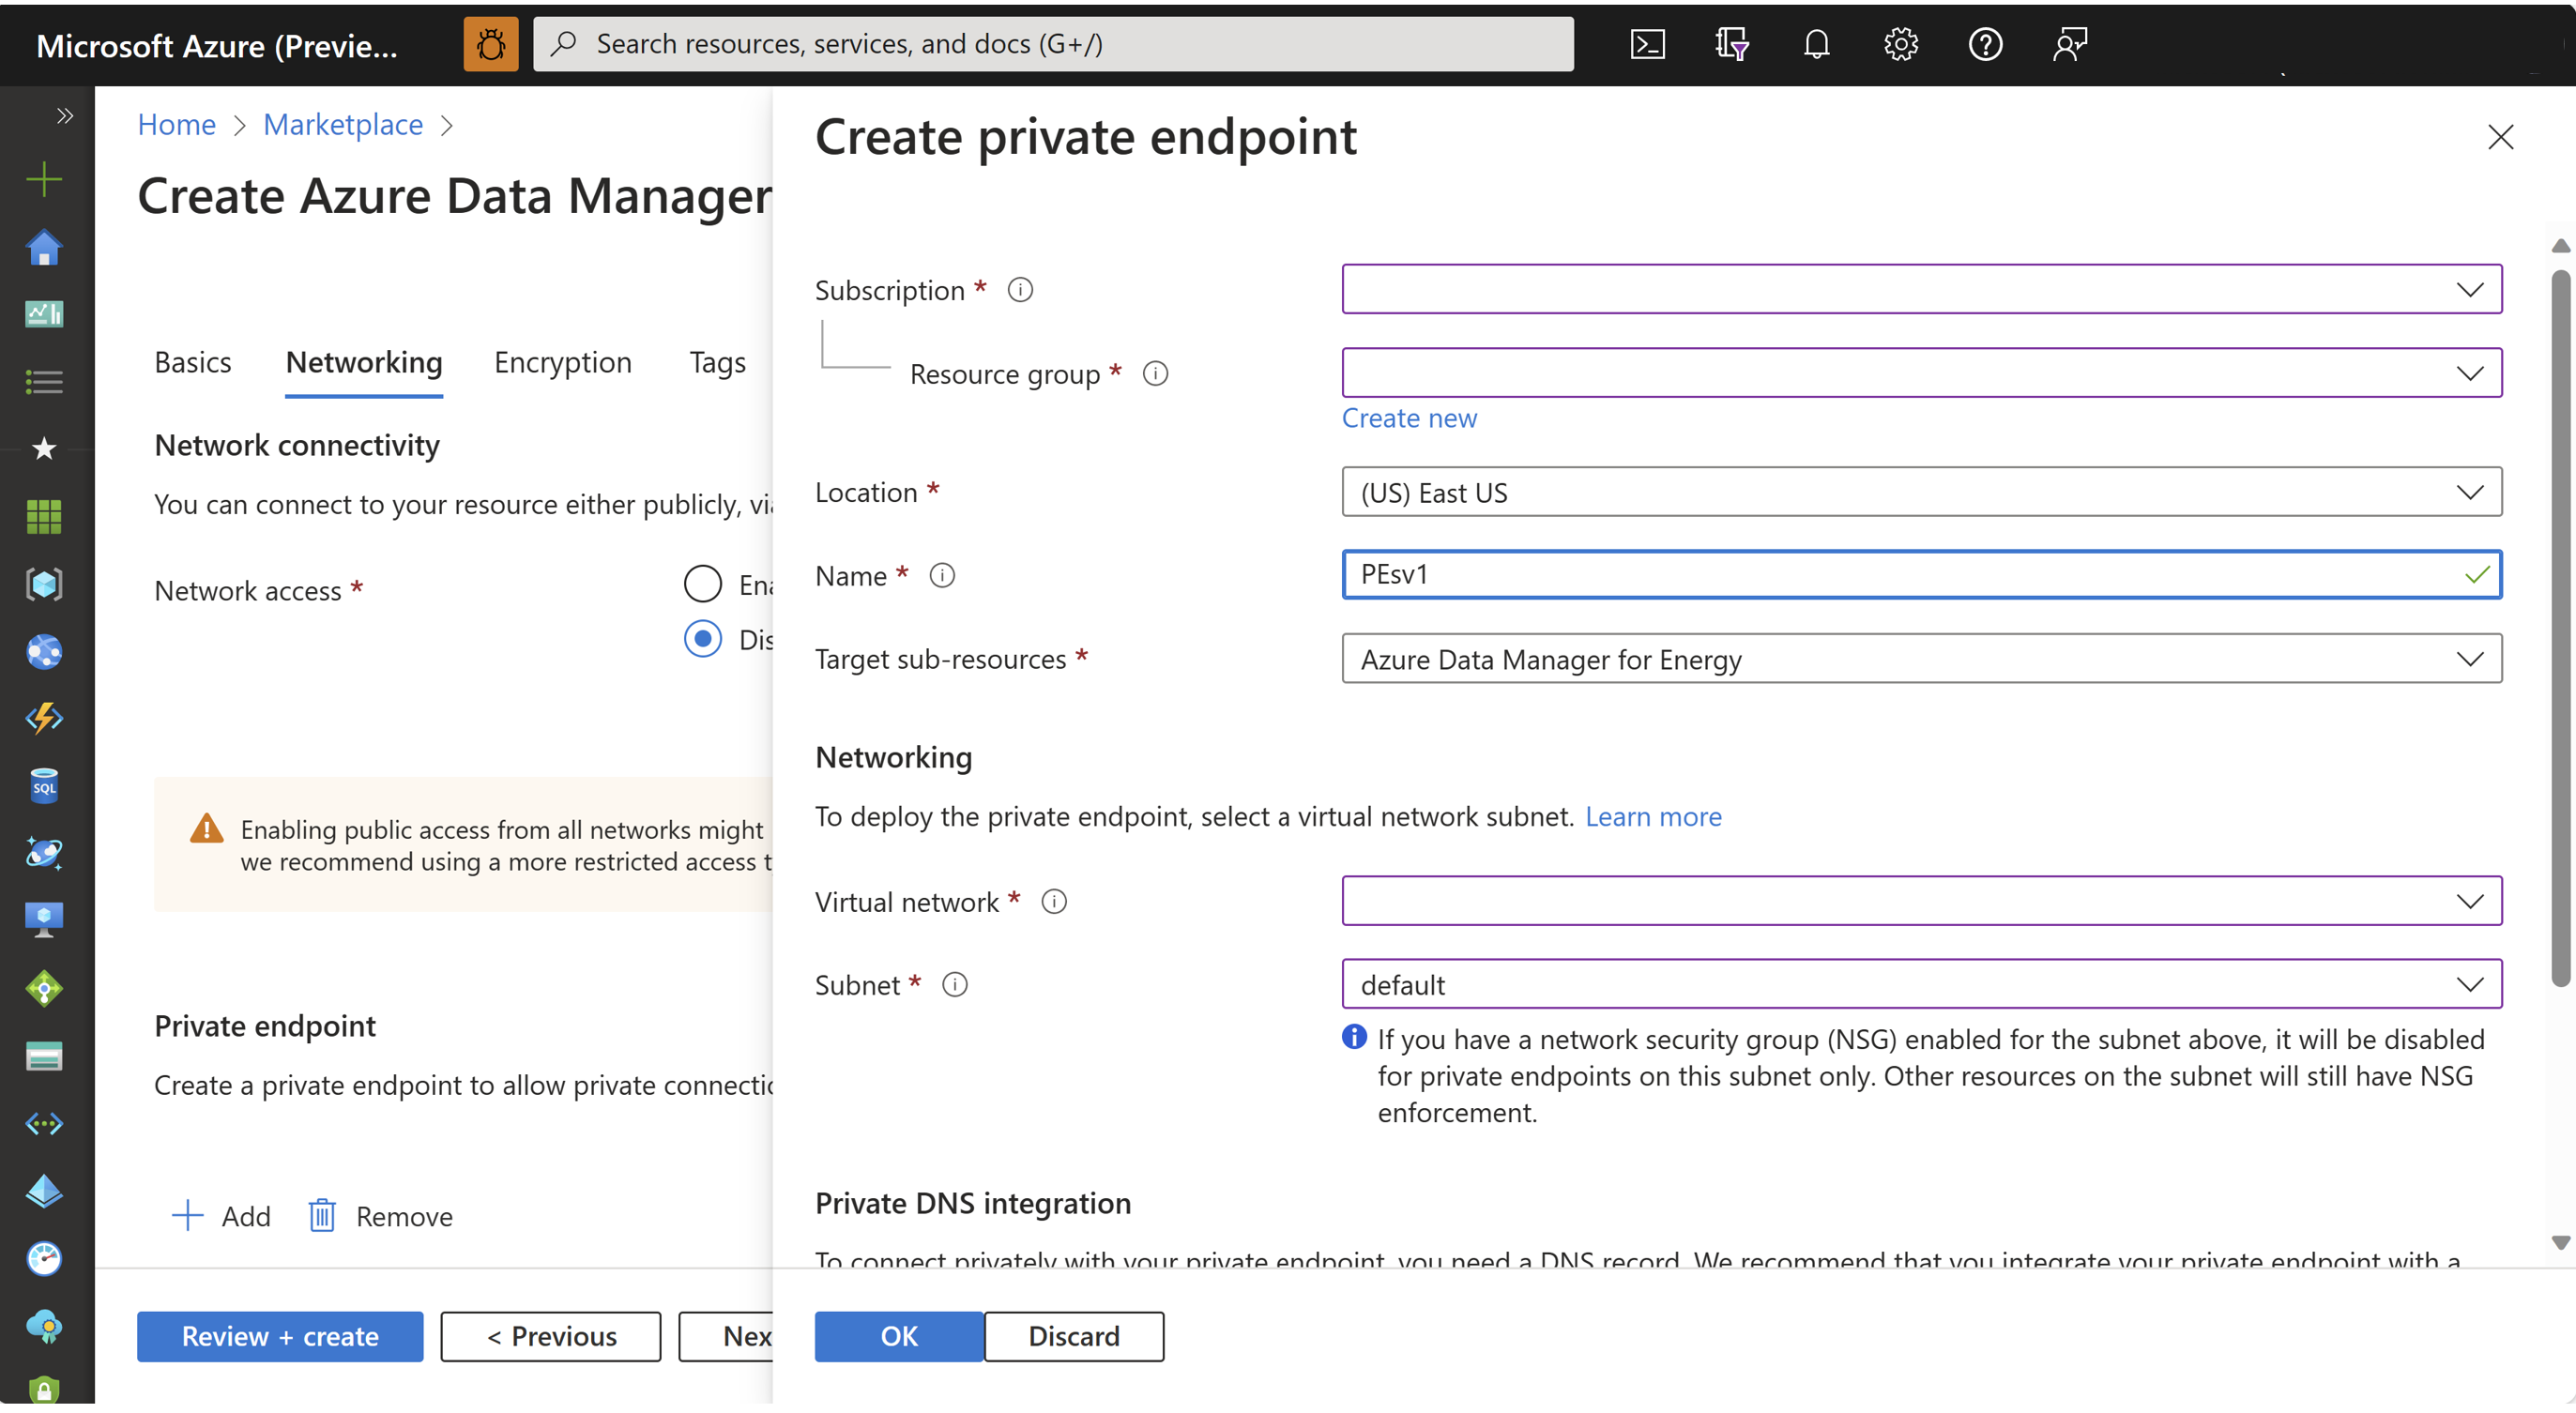
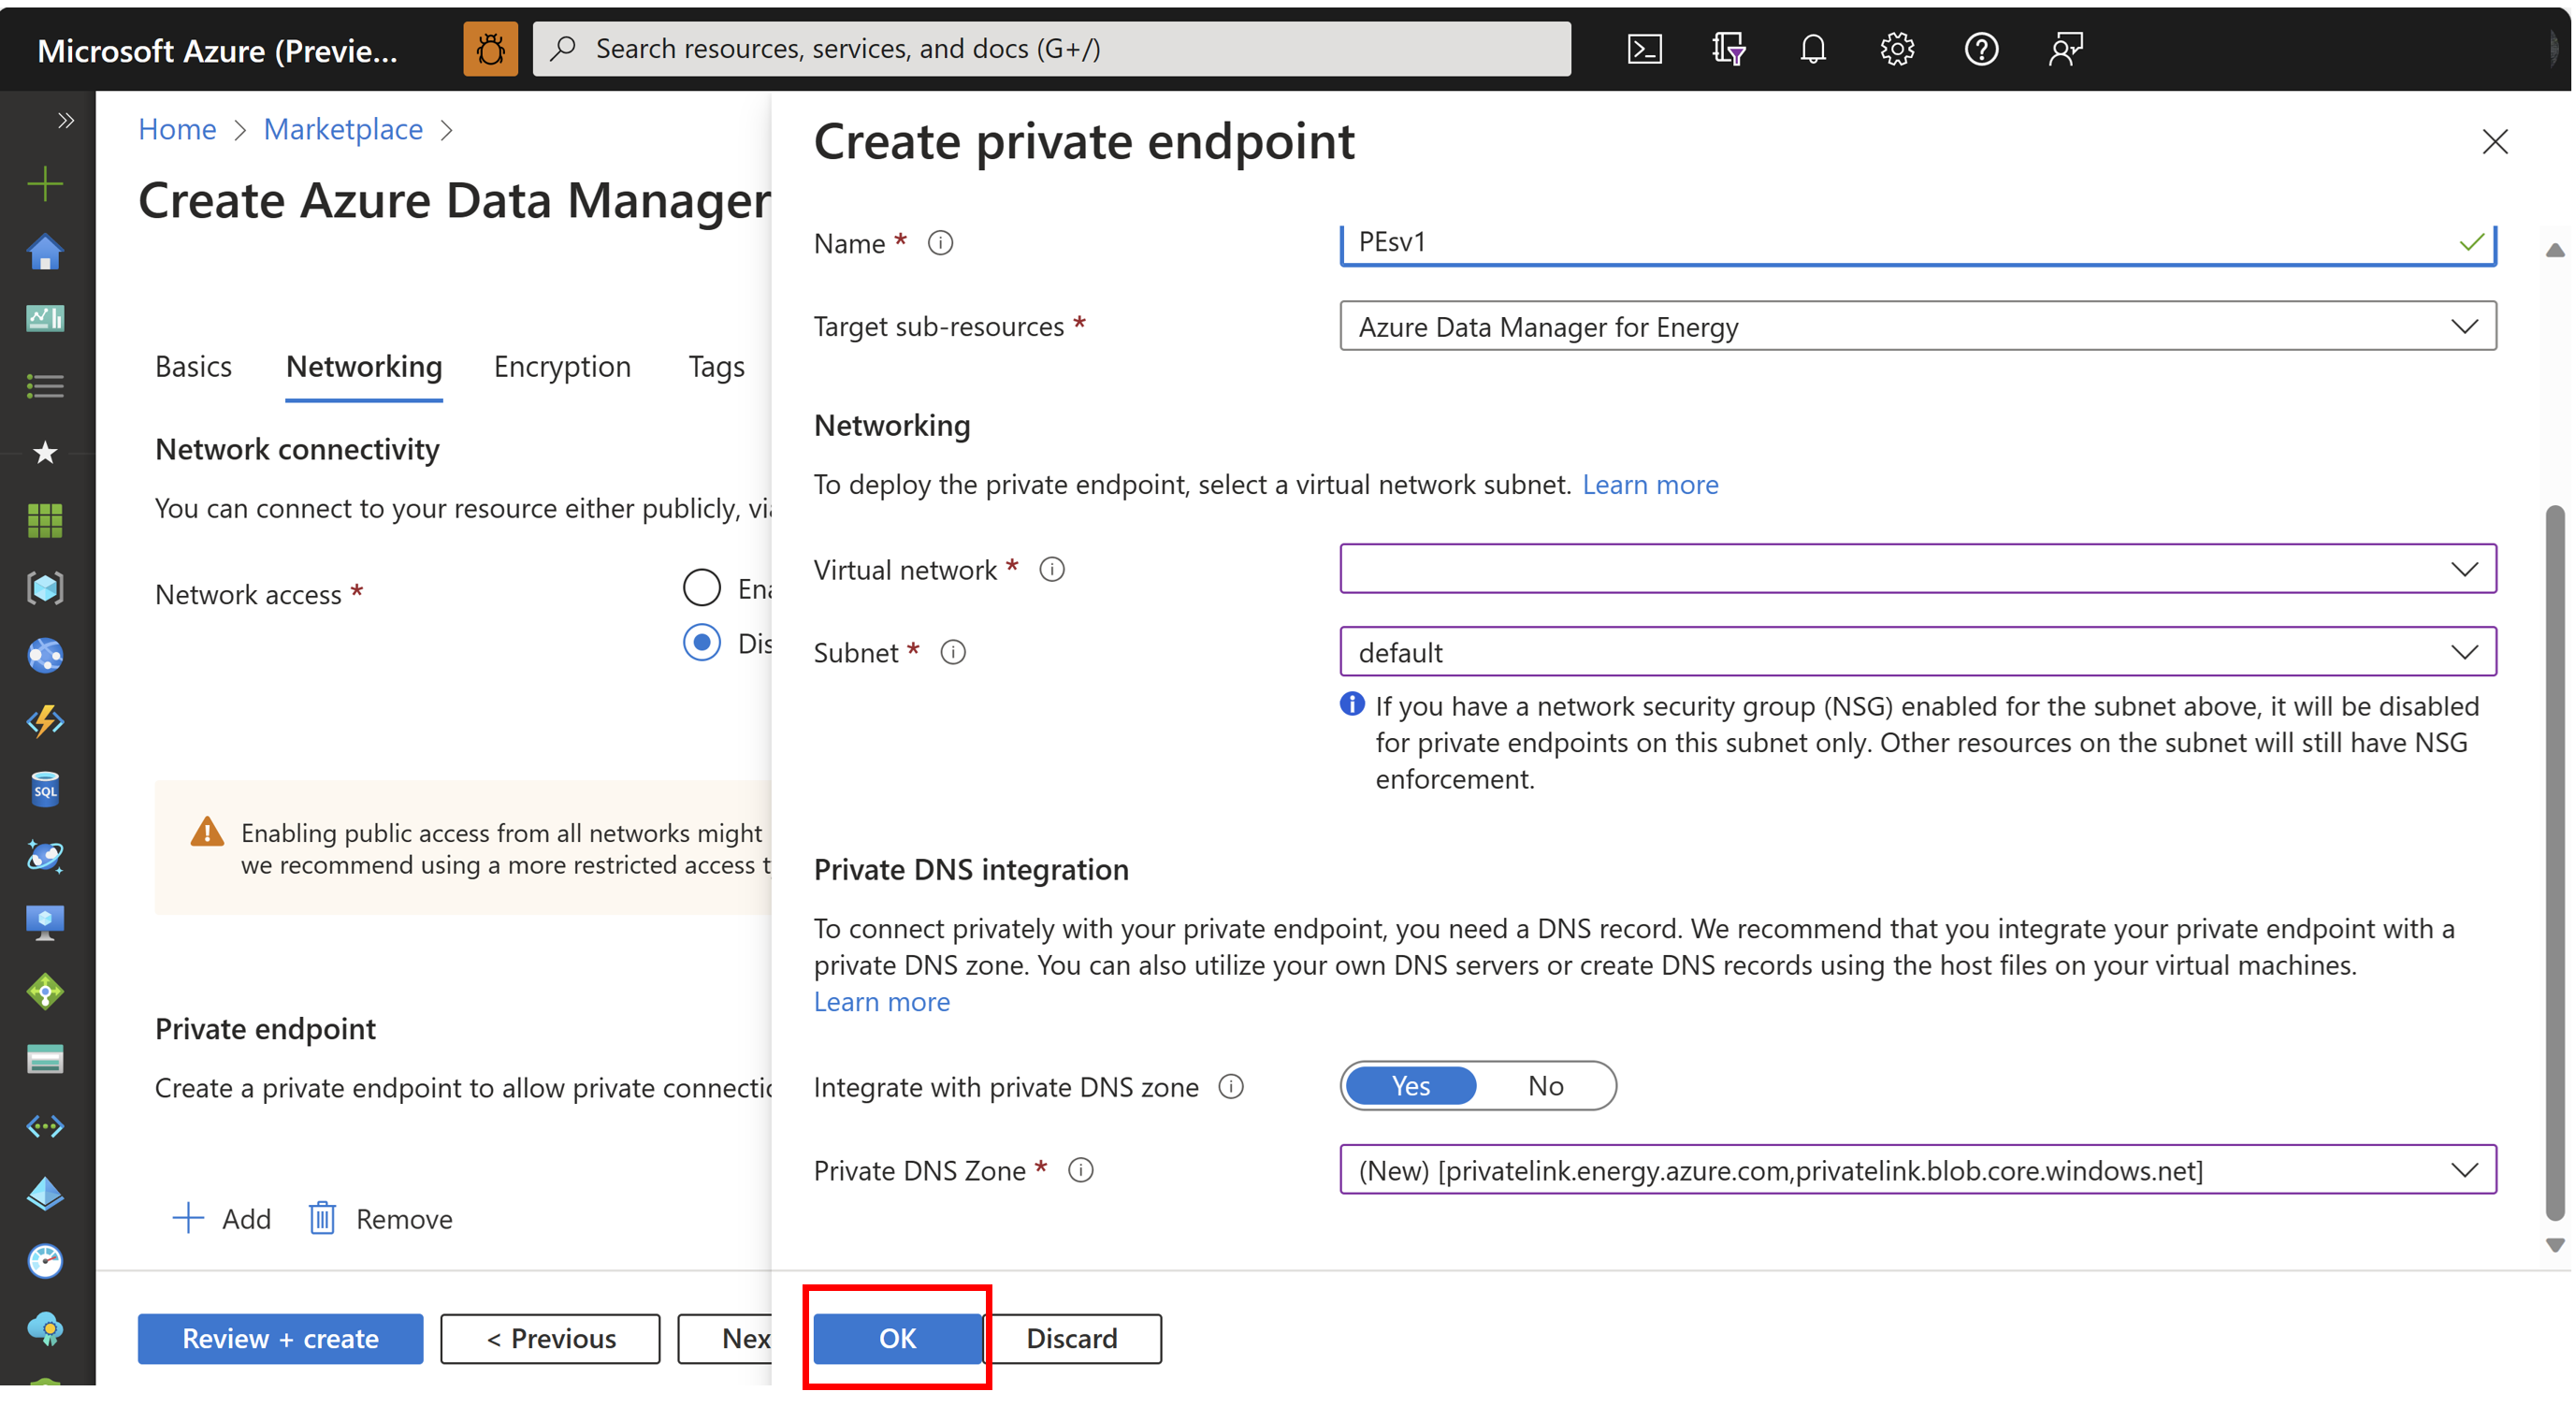
In Create private endpoint, enter or select the following information and select OK:
Setting Value Subscription Select your subscription Resource group Select a resource group Location Select the region where you want to deploy the private endpoint Name Enter a name for your private endpoint. The name must be unique Target sub-resource Azure Data Manager for Energy by default Networking:
Setting Value Virtual network Select the virtual network in which you want to deploy your private endpoint Subnet Select the subnet Private DNS integration:
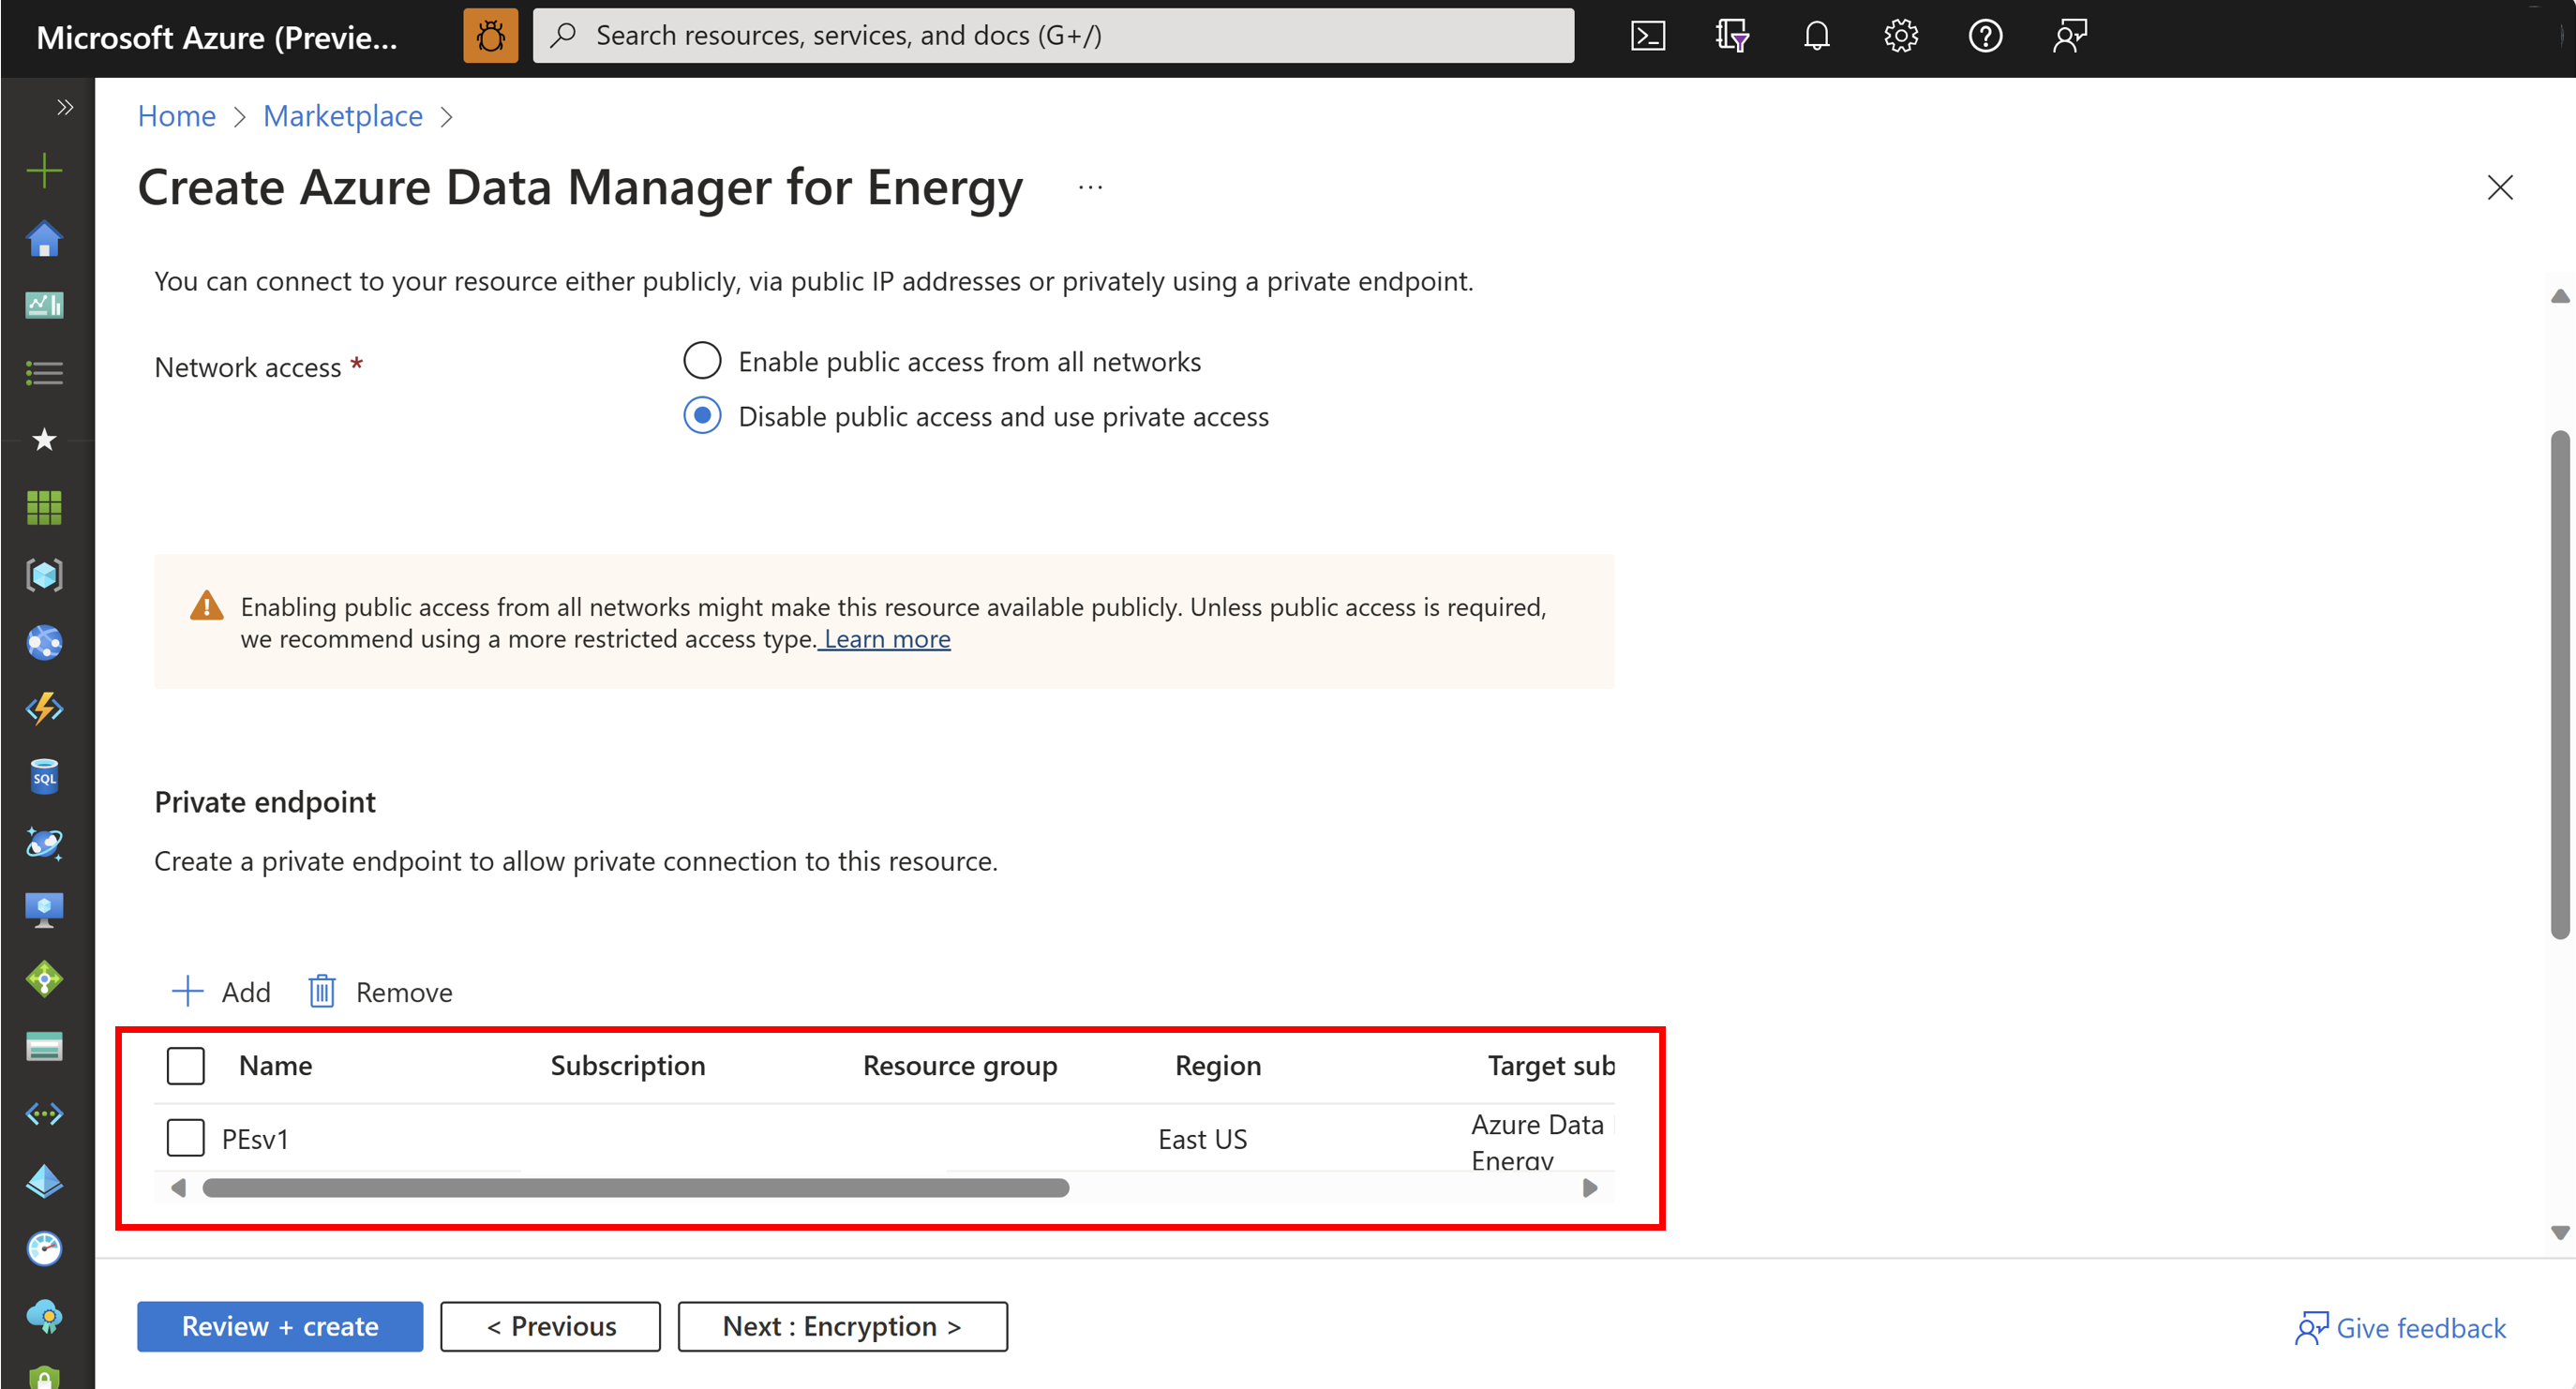
Setting Value Integrate with private DNS zone Leave the default value - Yes Private DNS zone Leave the default value Verify the private endpoint details in the Networking tab and next, select Review+Create after completing other tabs.
On the Review + create page, Azure validates your configurations. When you see Validation passed, select the Create button.
An Azure Data Manager for Energy instance is created with private link.
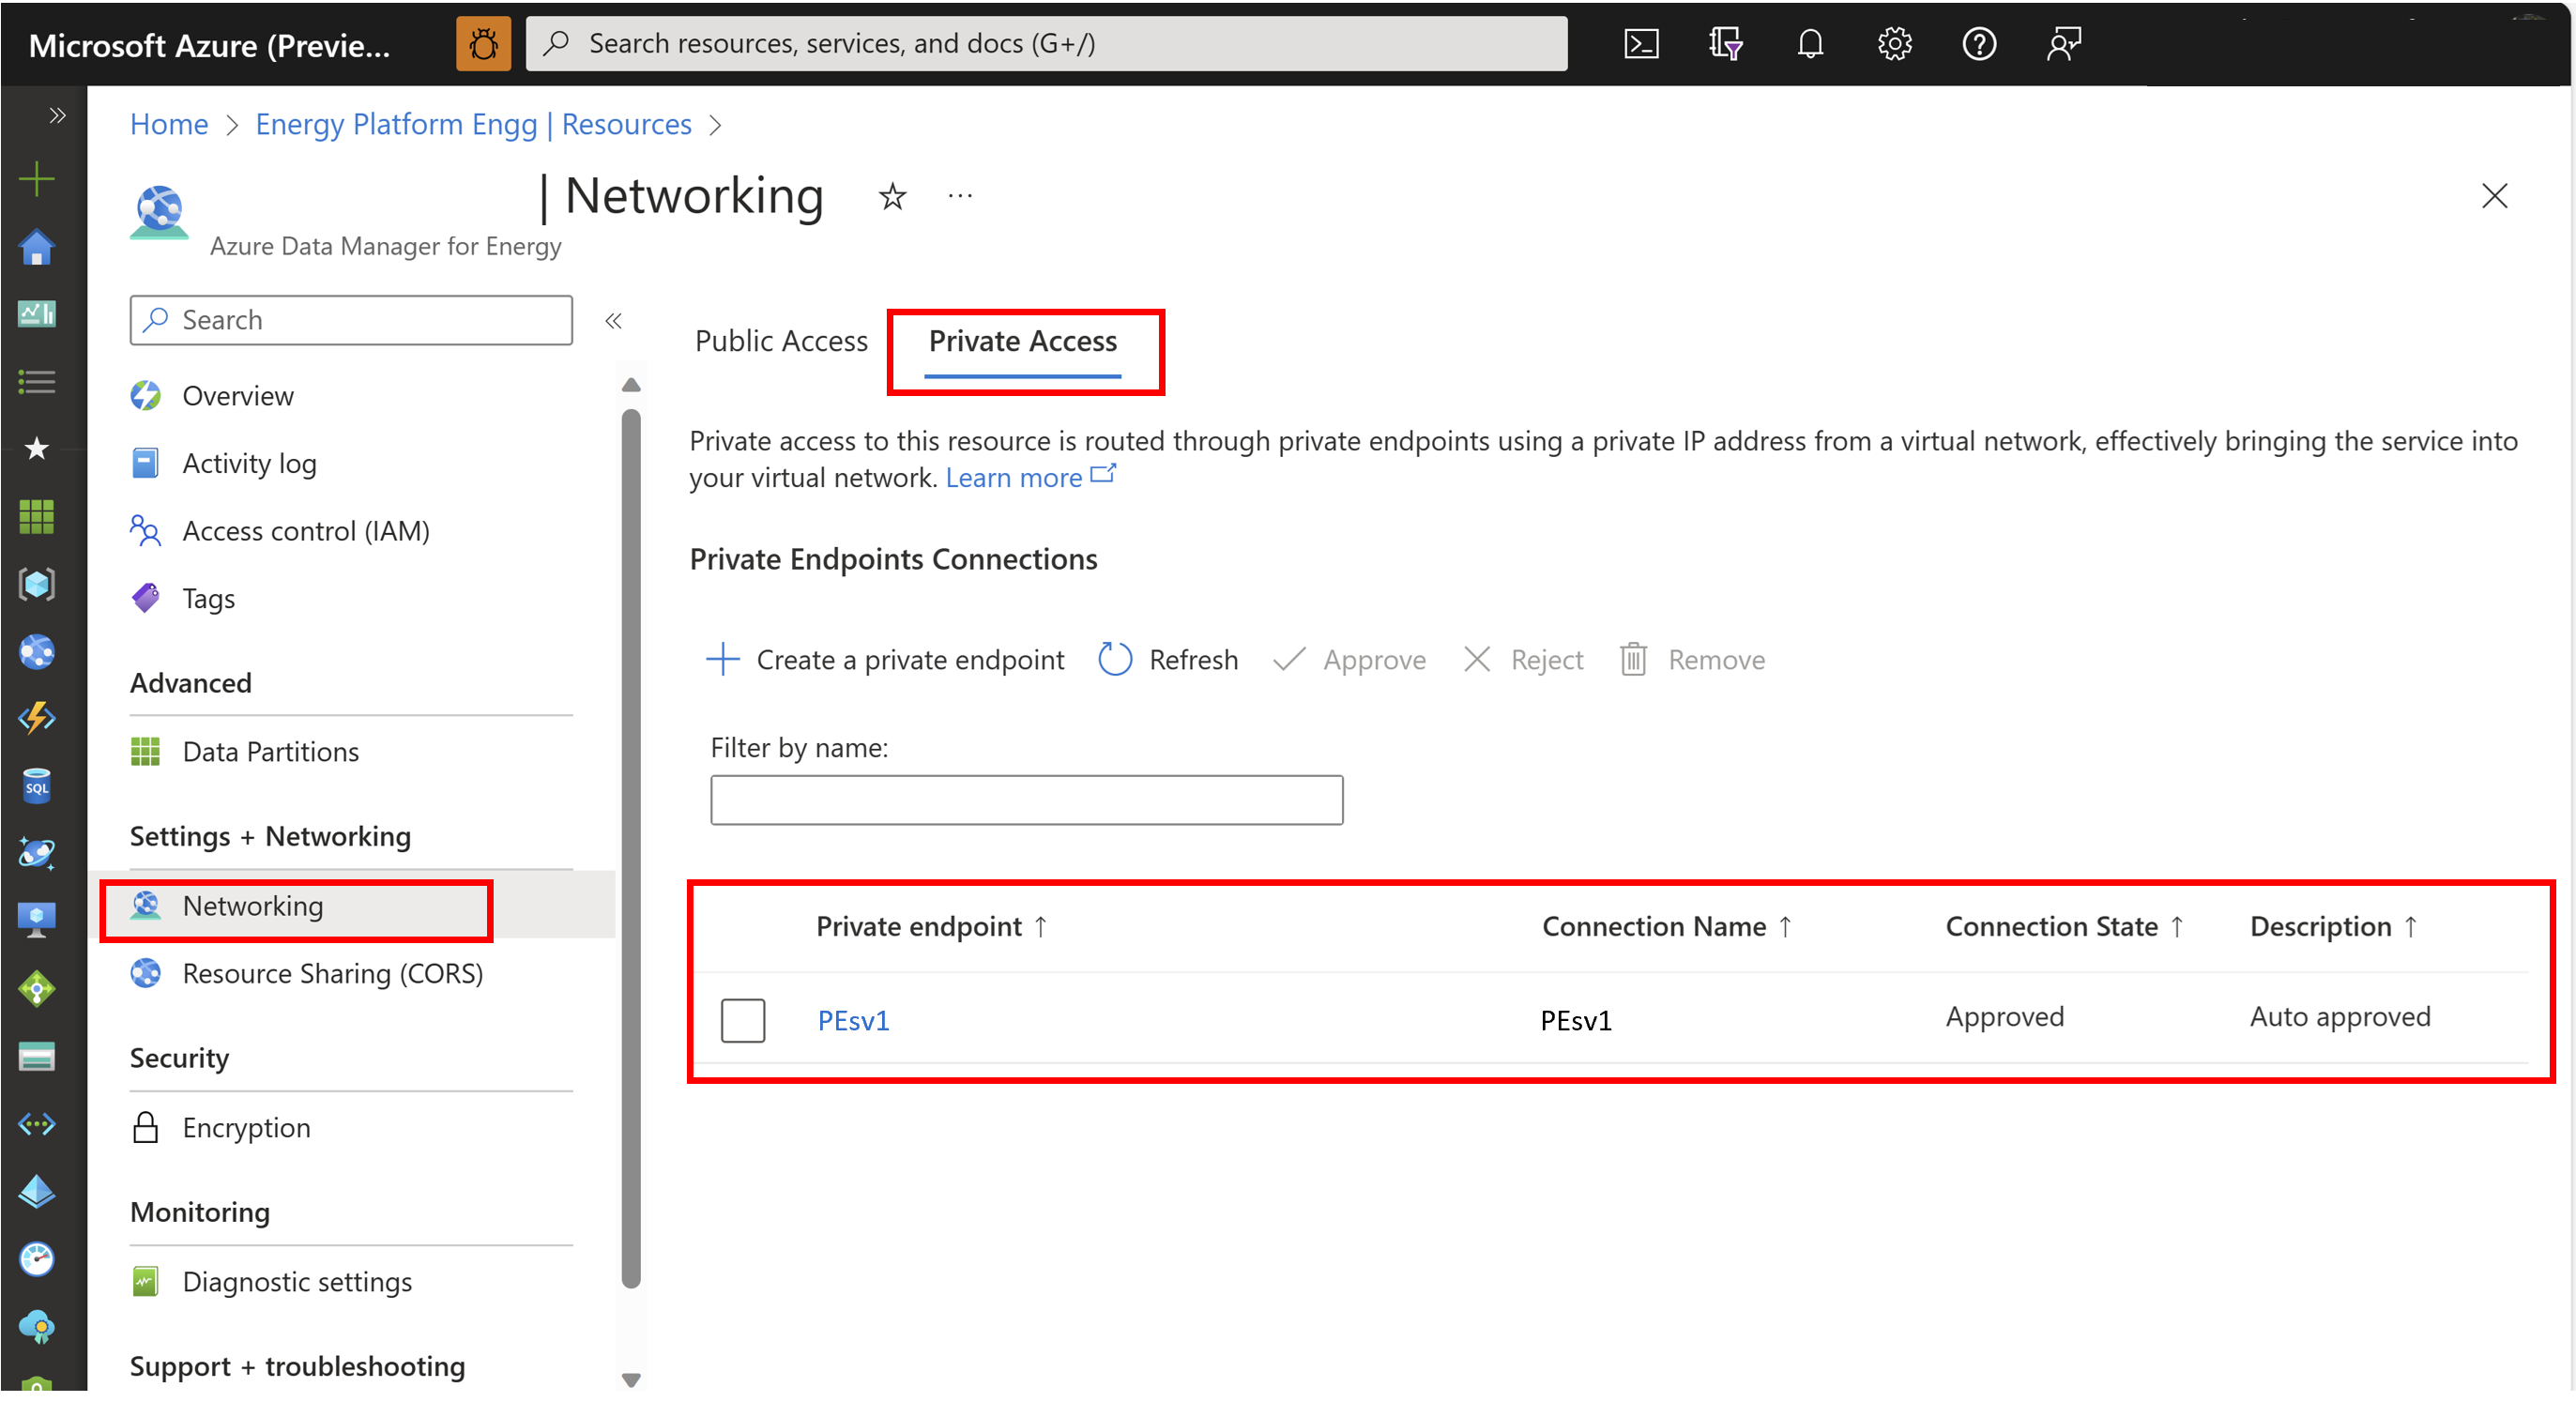
You can navigate to Networking post instance provisioning and see the private endpoint created under Private access tab.
Create a private endpoint post instance provisioning by using the Azure portal
Use the following steps to create a private endpoint for an existing Azure Data Manager for Energy instance by using the Azure portal:
From the All resources pane, choose an Azure Data Manager for Energy instance.
Select Networking from the list of settings.
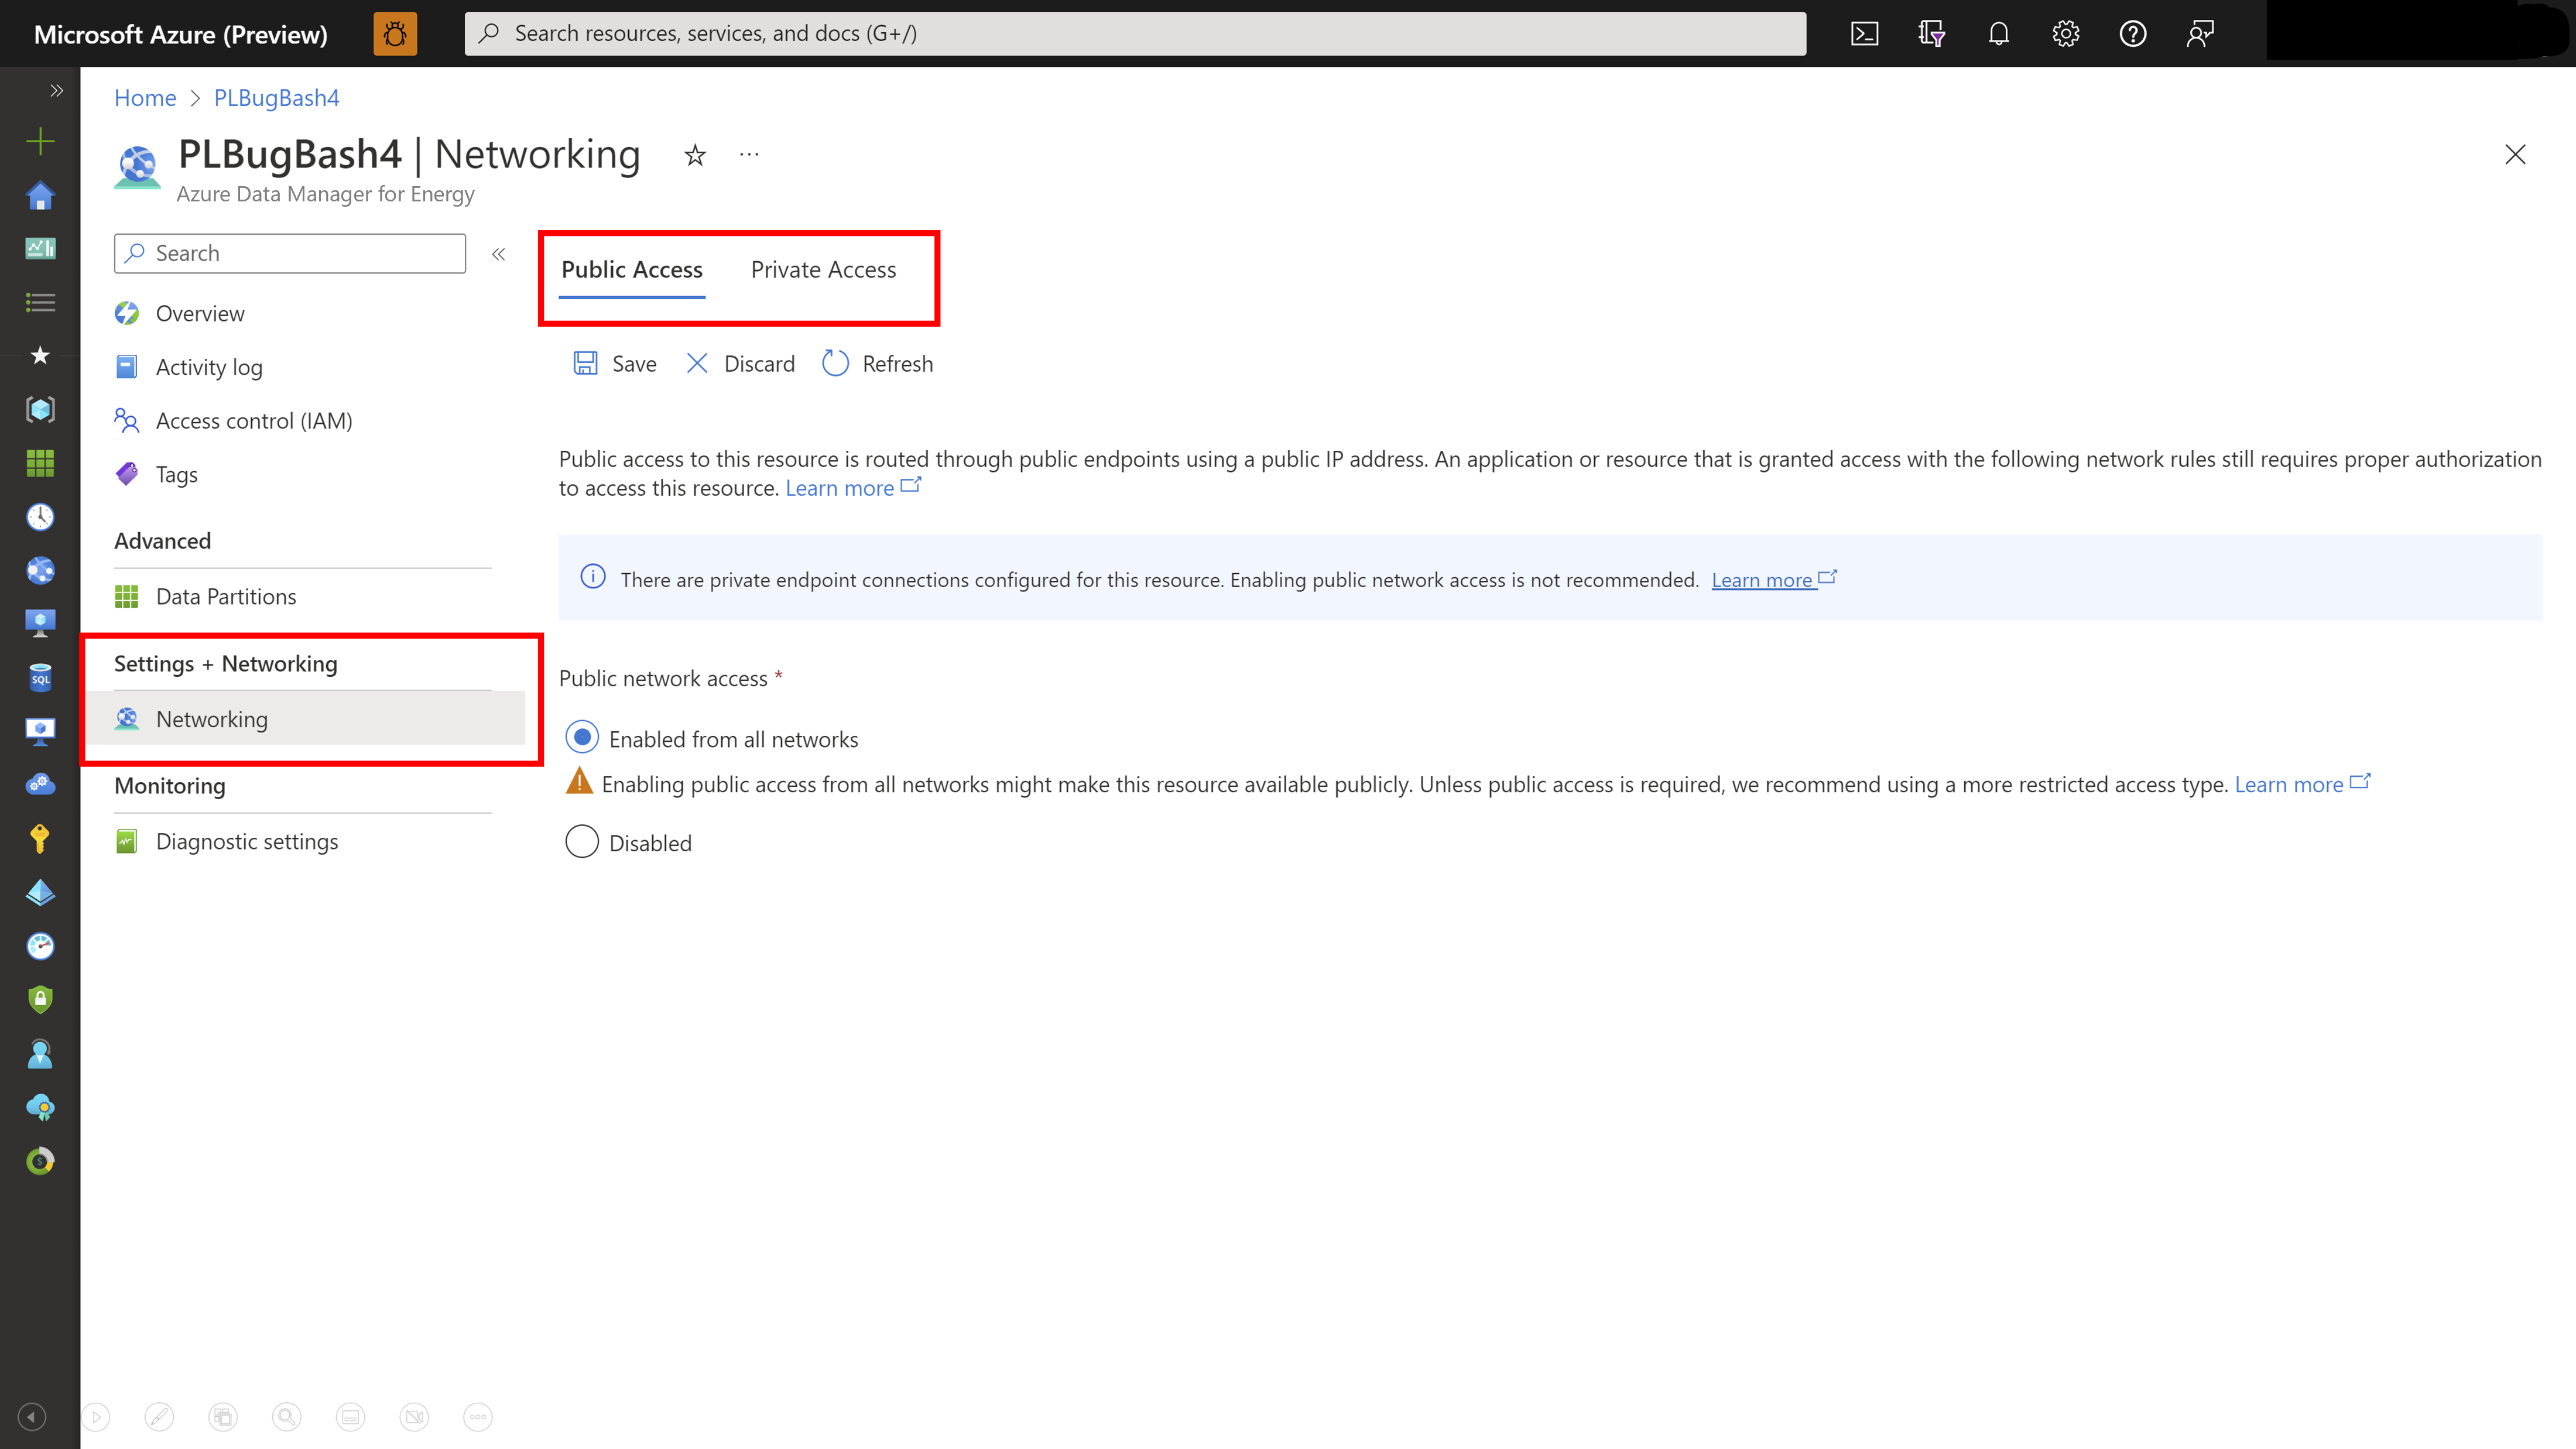
On the Public Access tab, select Enabled from all networks to allow traffic from all networks.
If you want to block traffic from all networks, select Disabled.
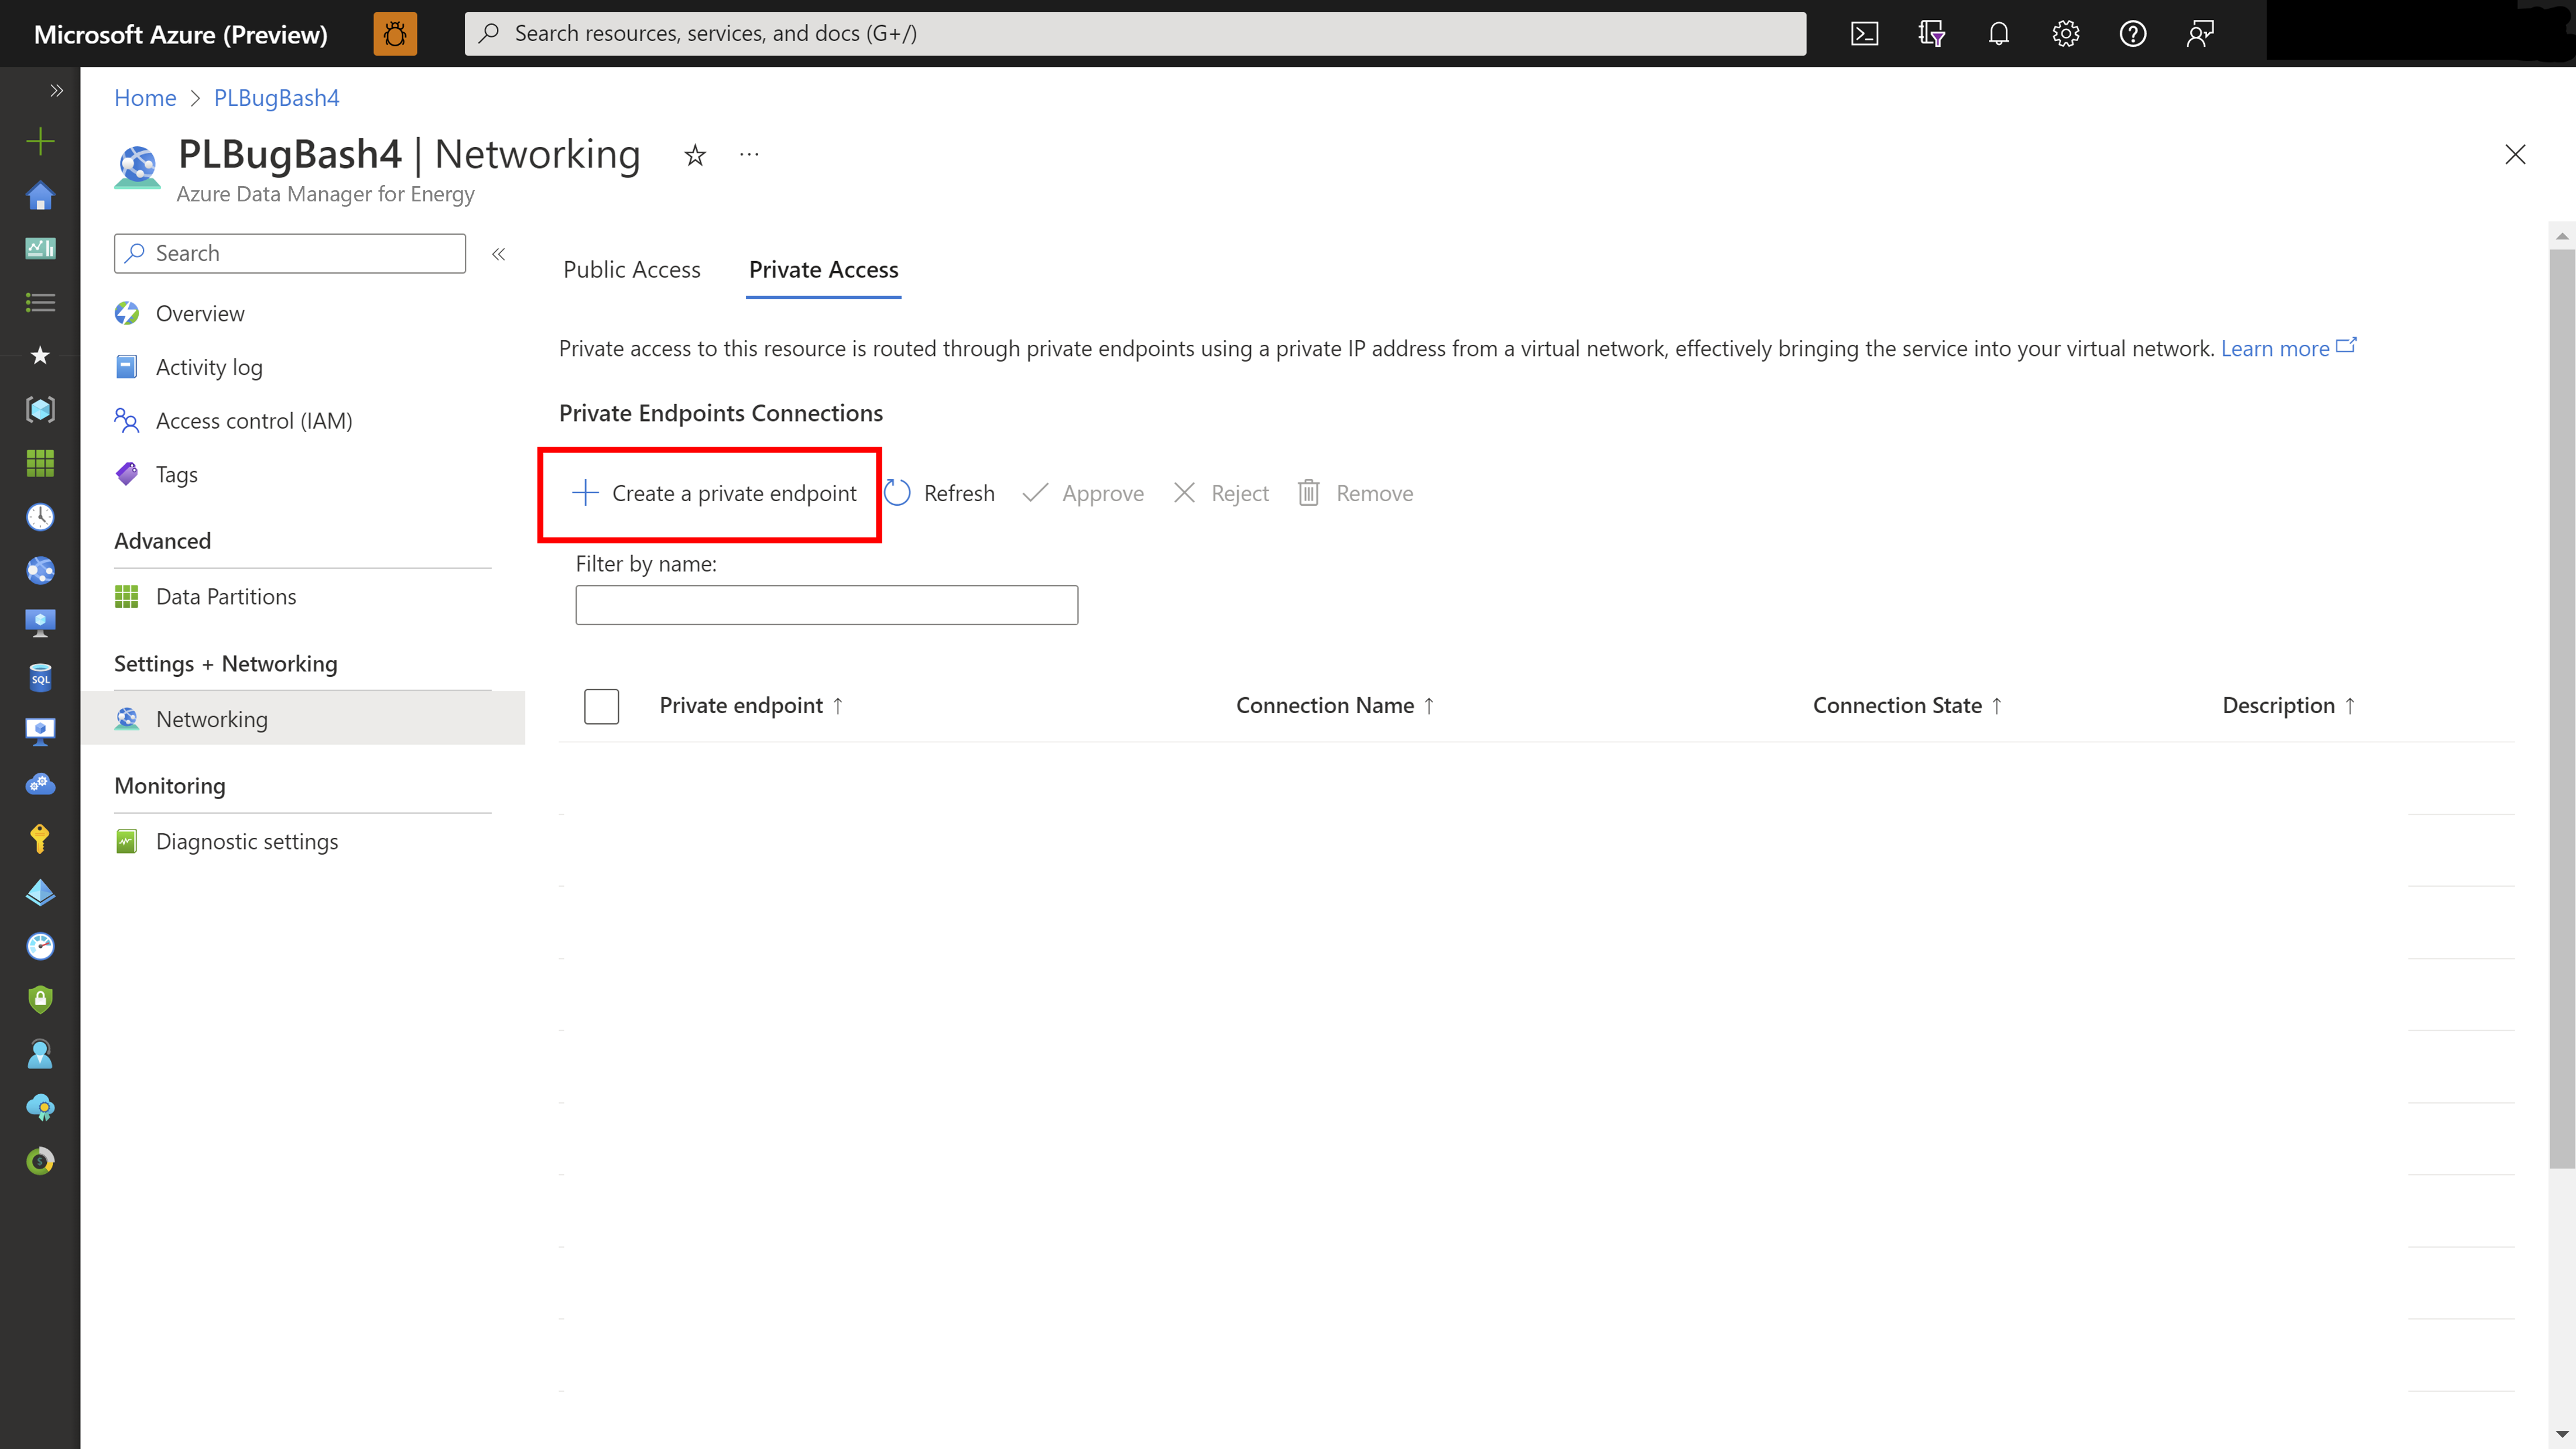
Select the Private Access tab, and then select Create a private endpoint.
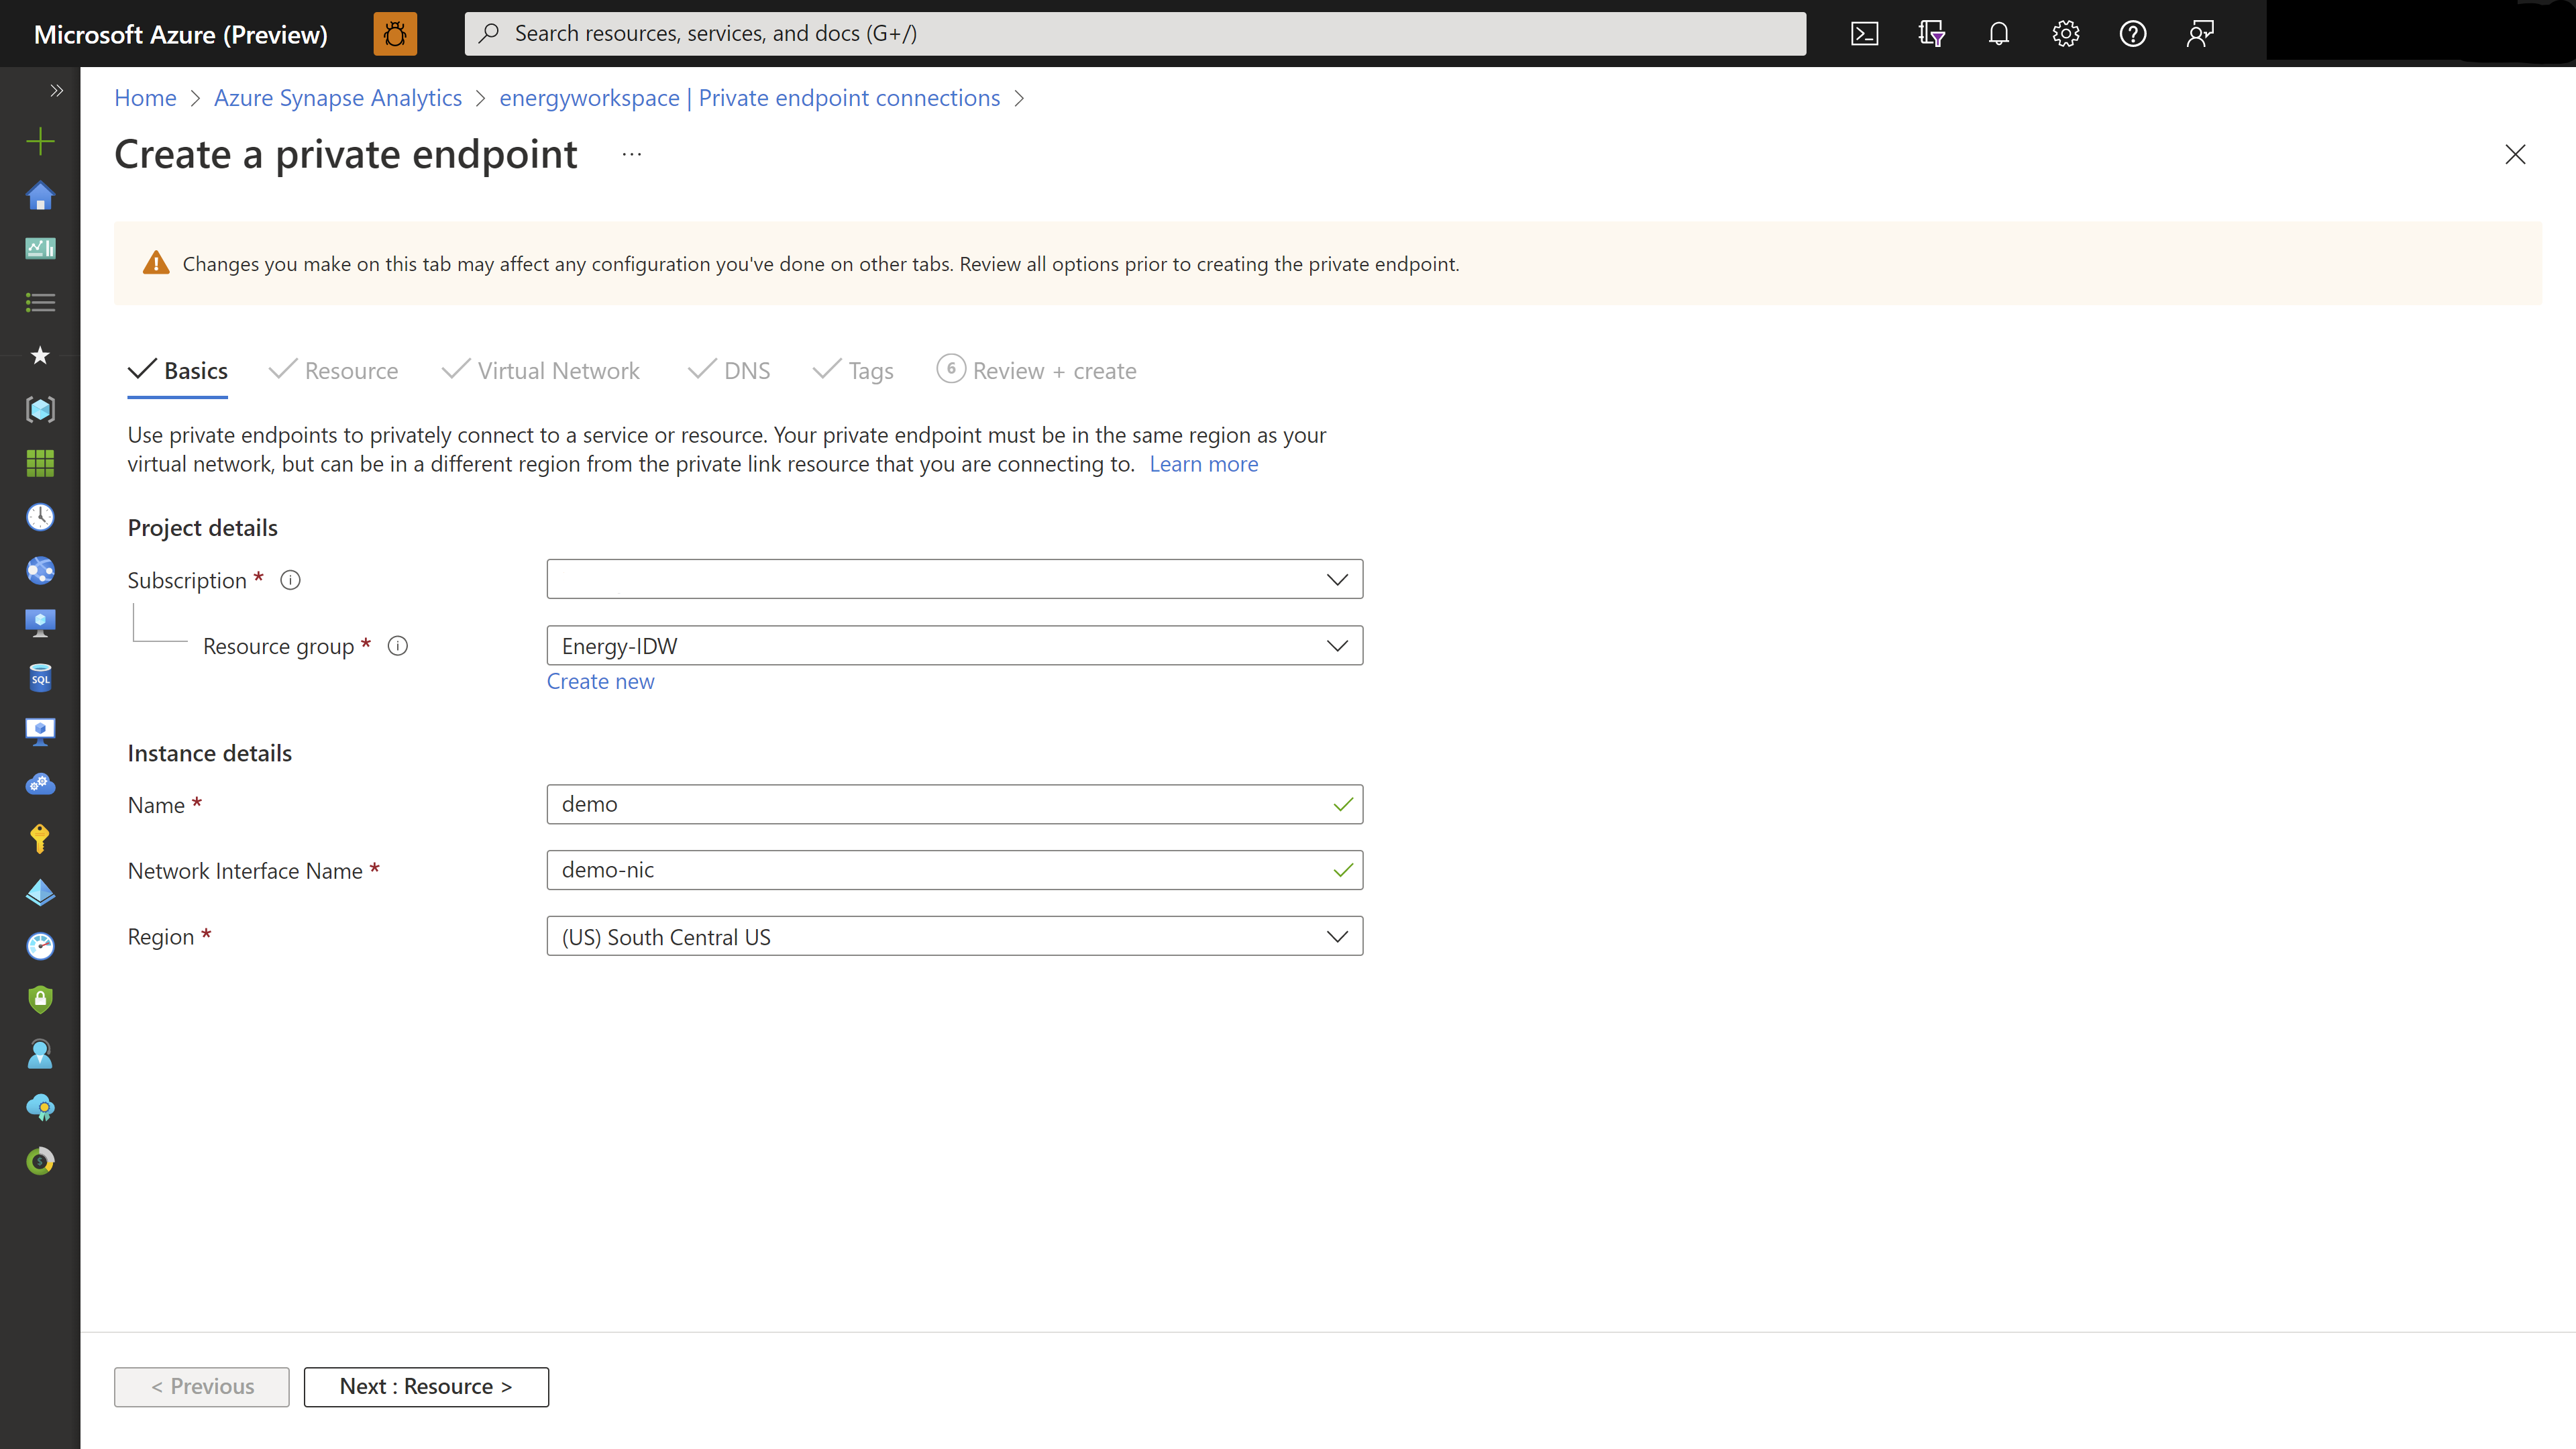
In the Create a private endpoint wizard, on the Basics page, enter or select the following details:
Setting Value Subscription Select your subscription for the project. Resource group Select a resource group for the project. Name Enter a name for your private endpoint. The name must be unique. Region Select the region where you want to deploy Private Link. Note
Automatic approval happens only when the Azure Data Manager for Energy instance and the virtual network for the private endpoint are in the same subscription.
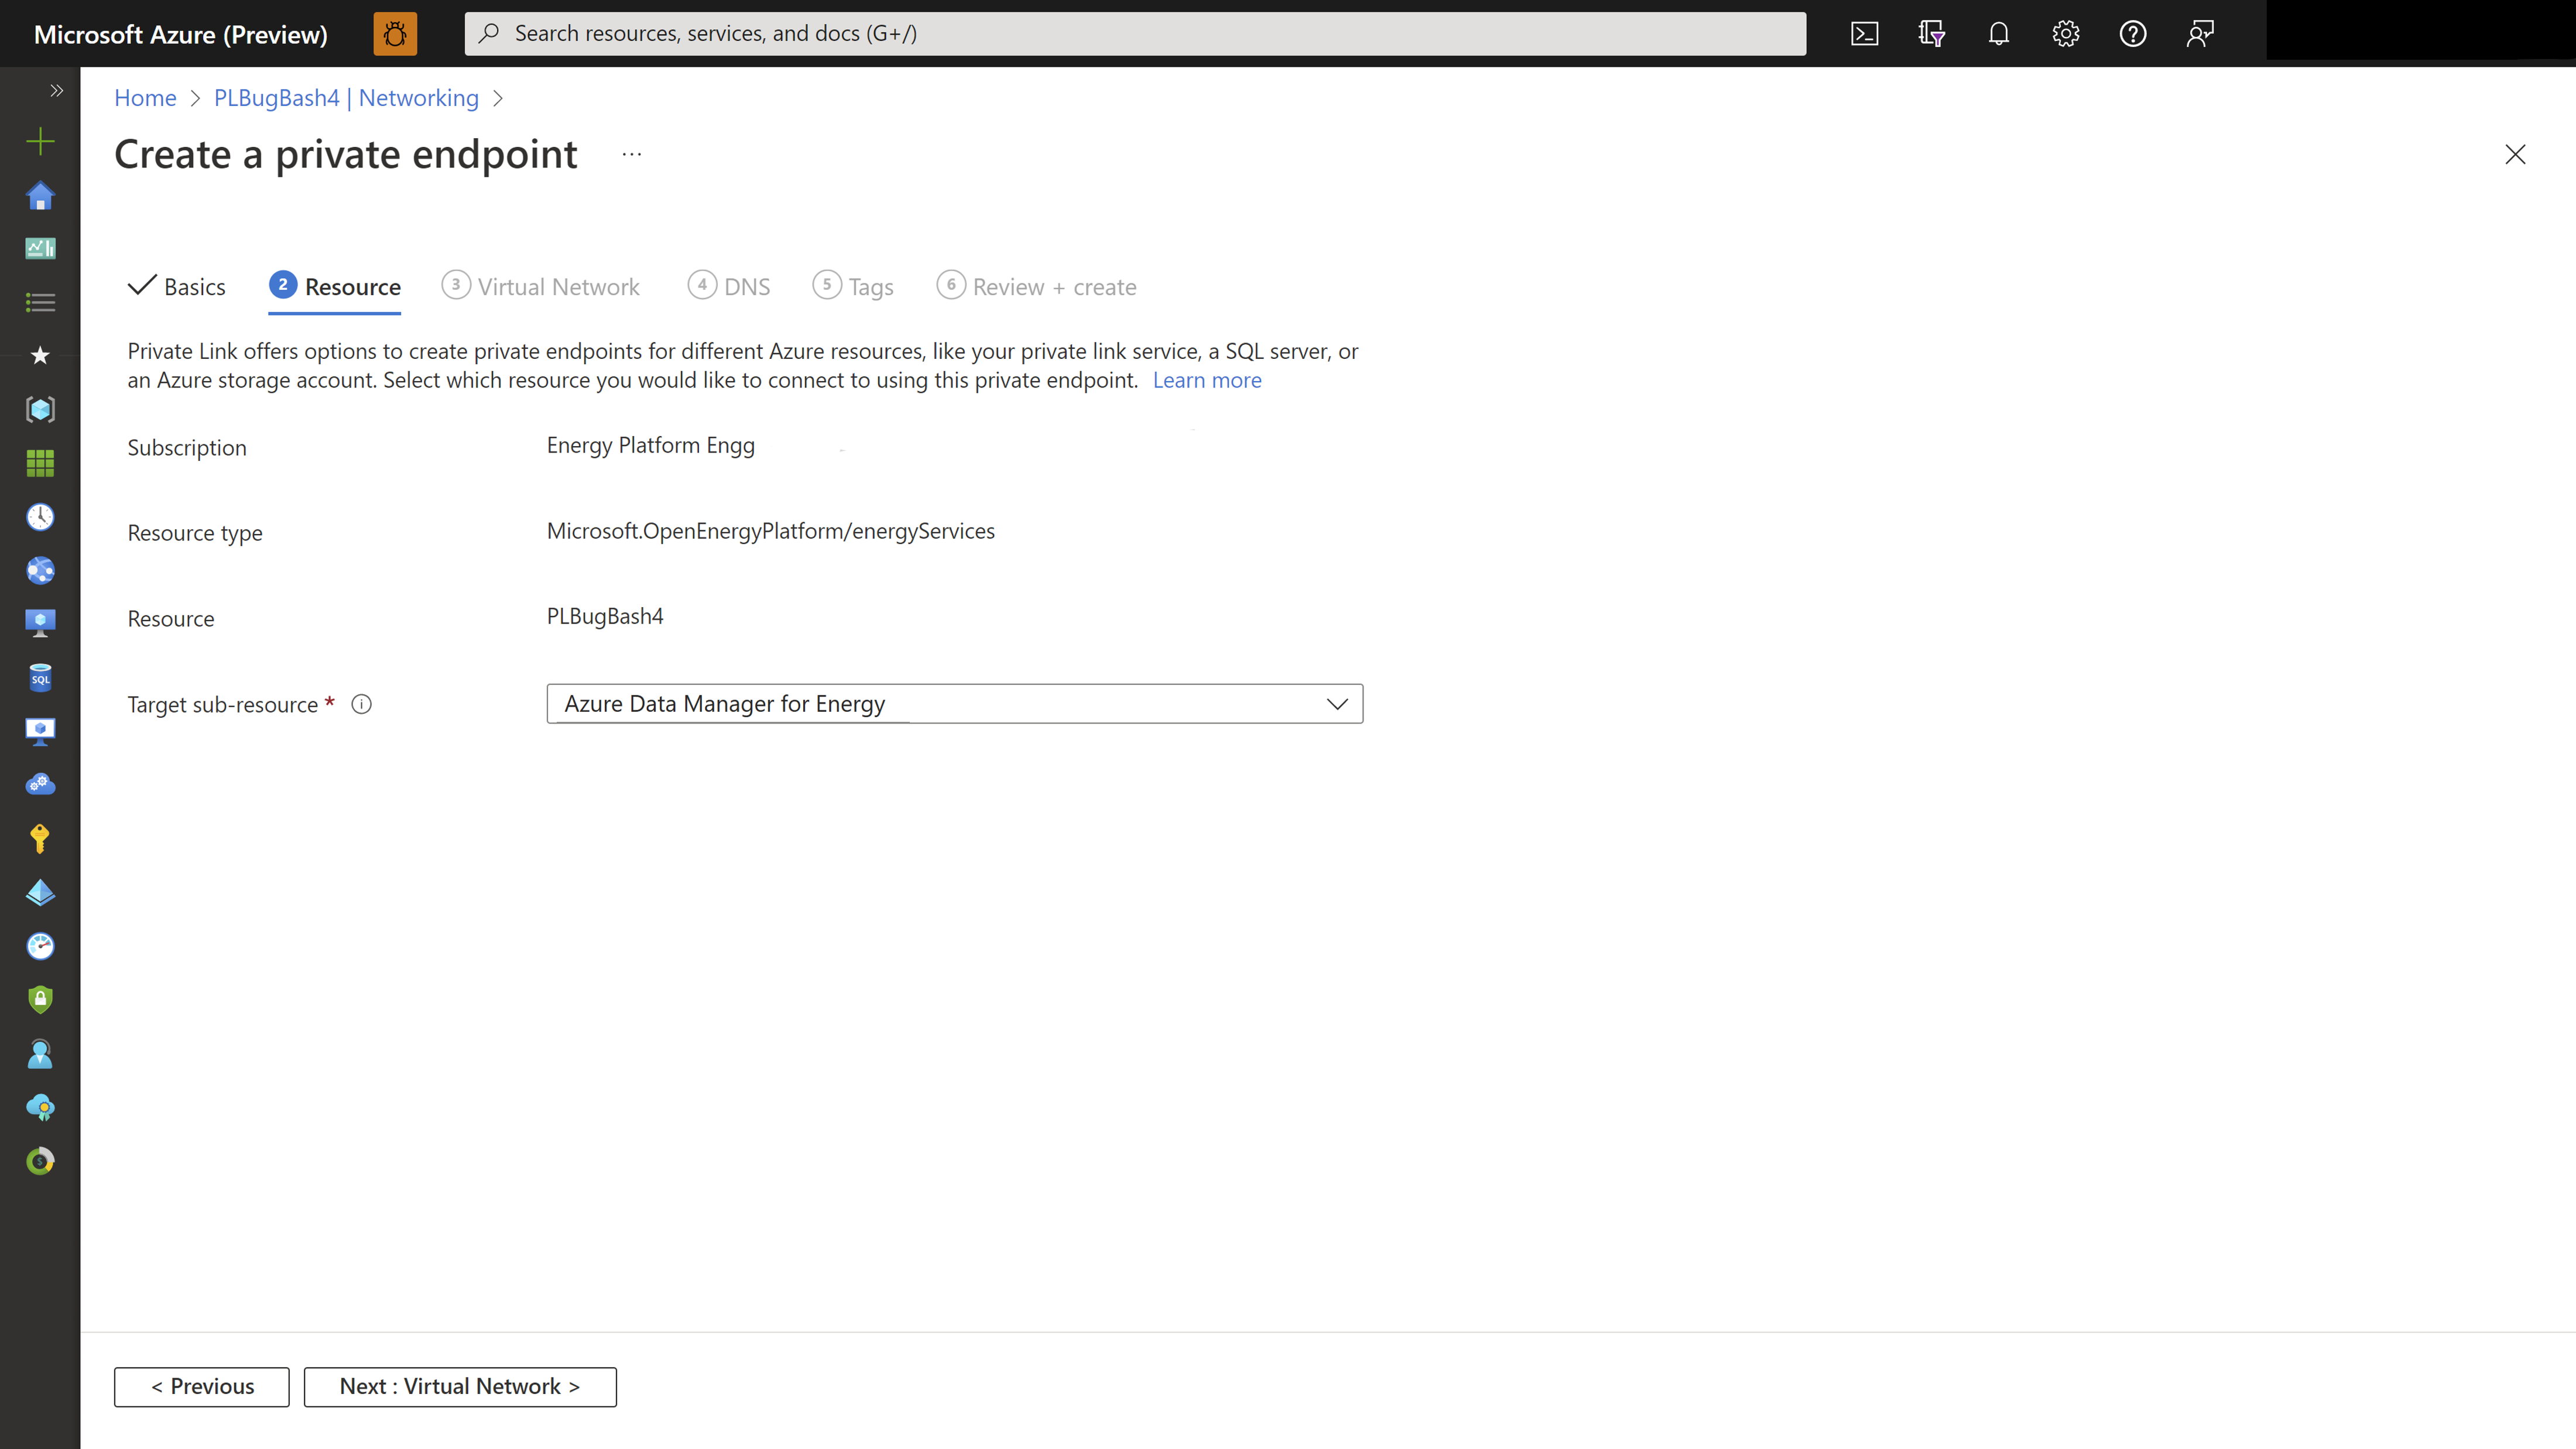
Select Next: Resource. On the Resource page, confirm the following information:
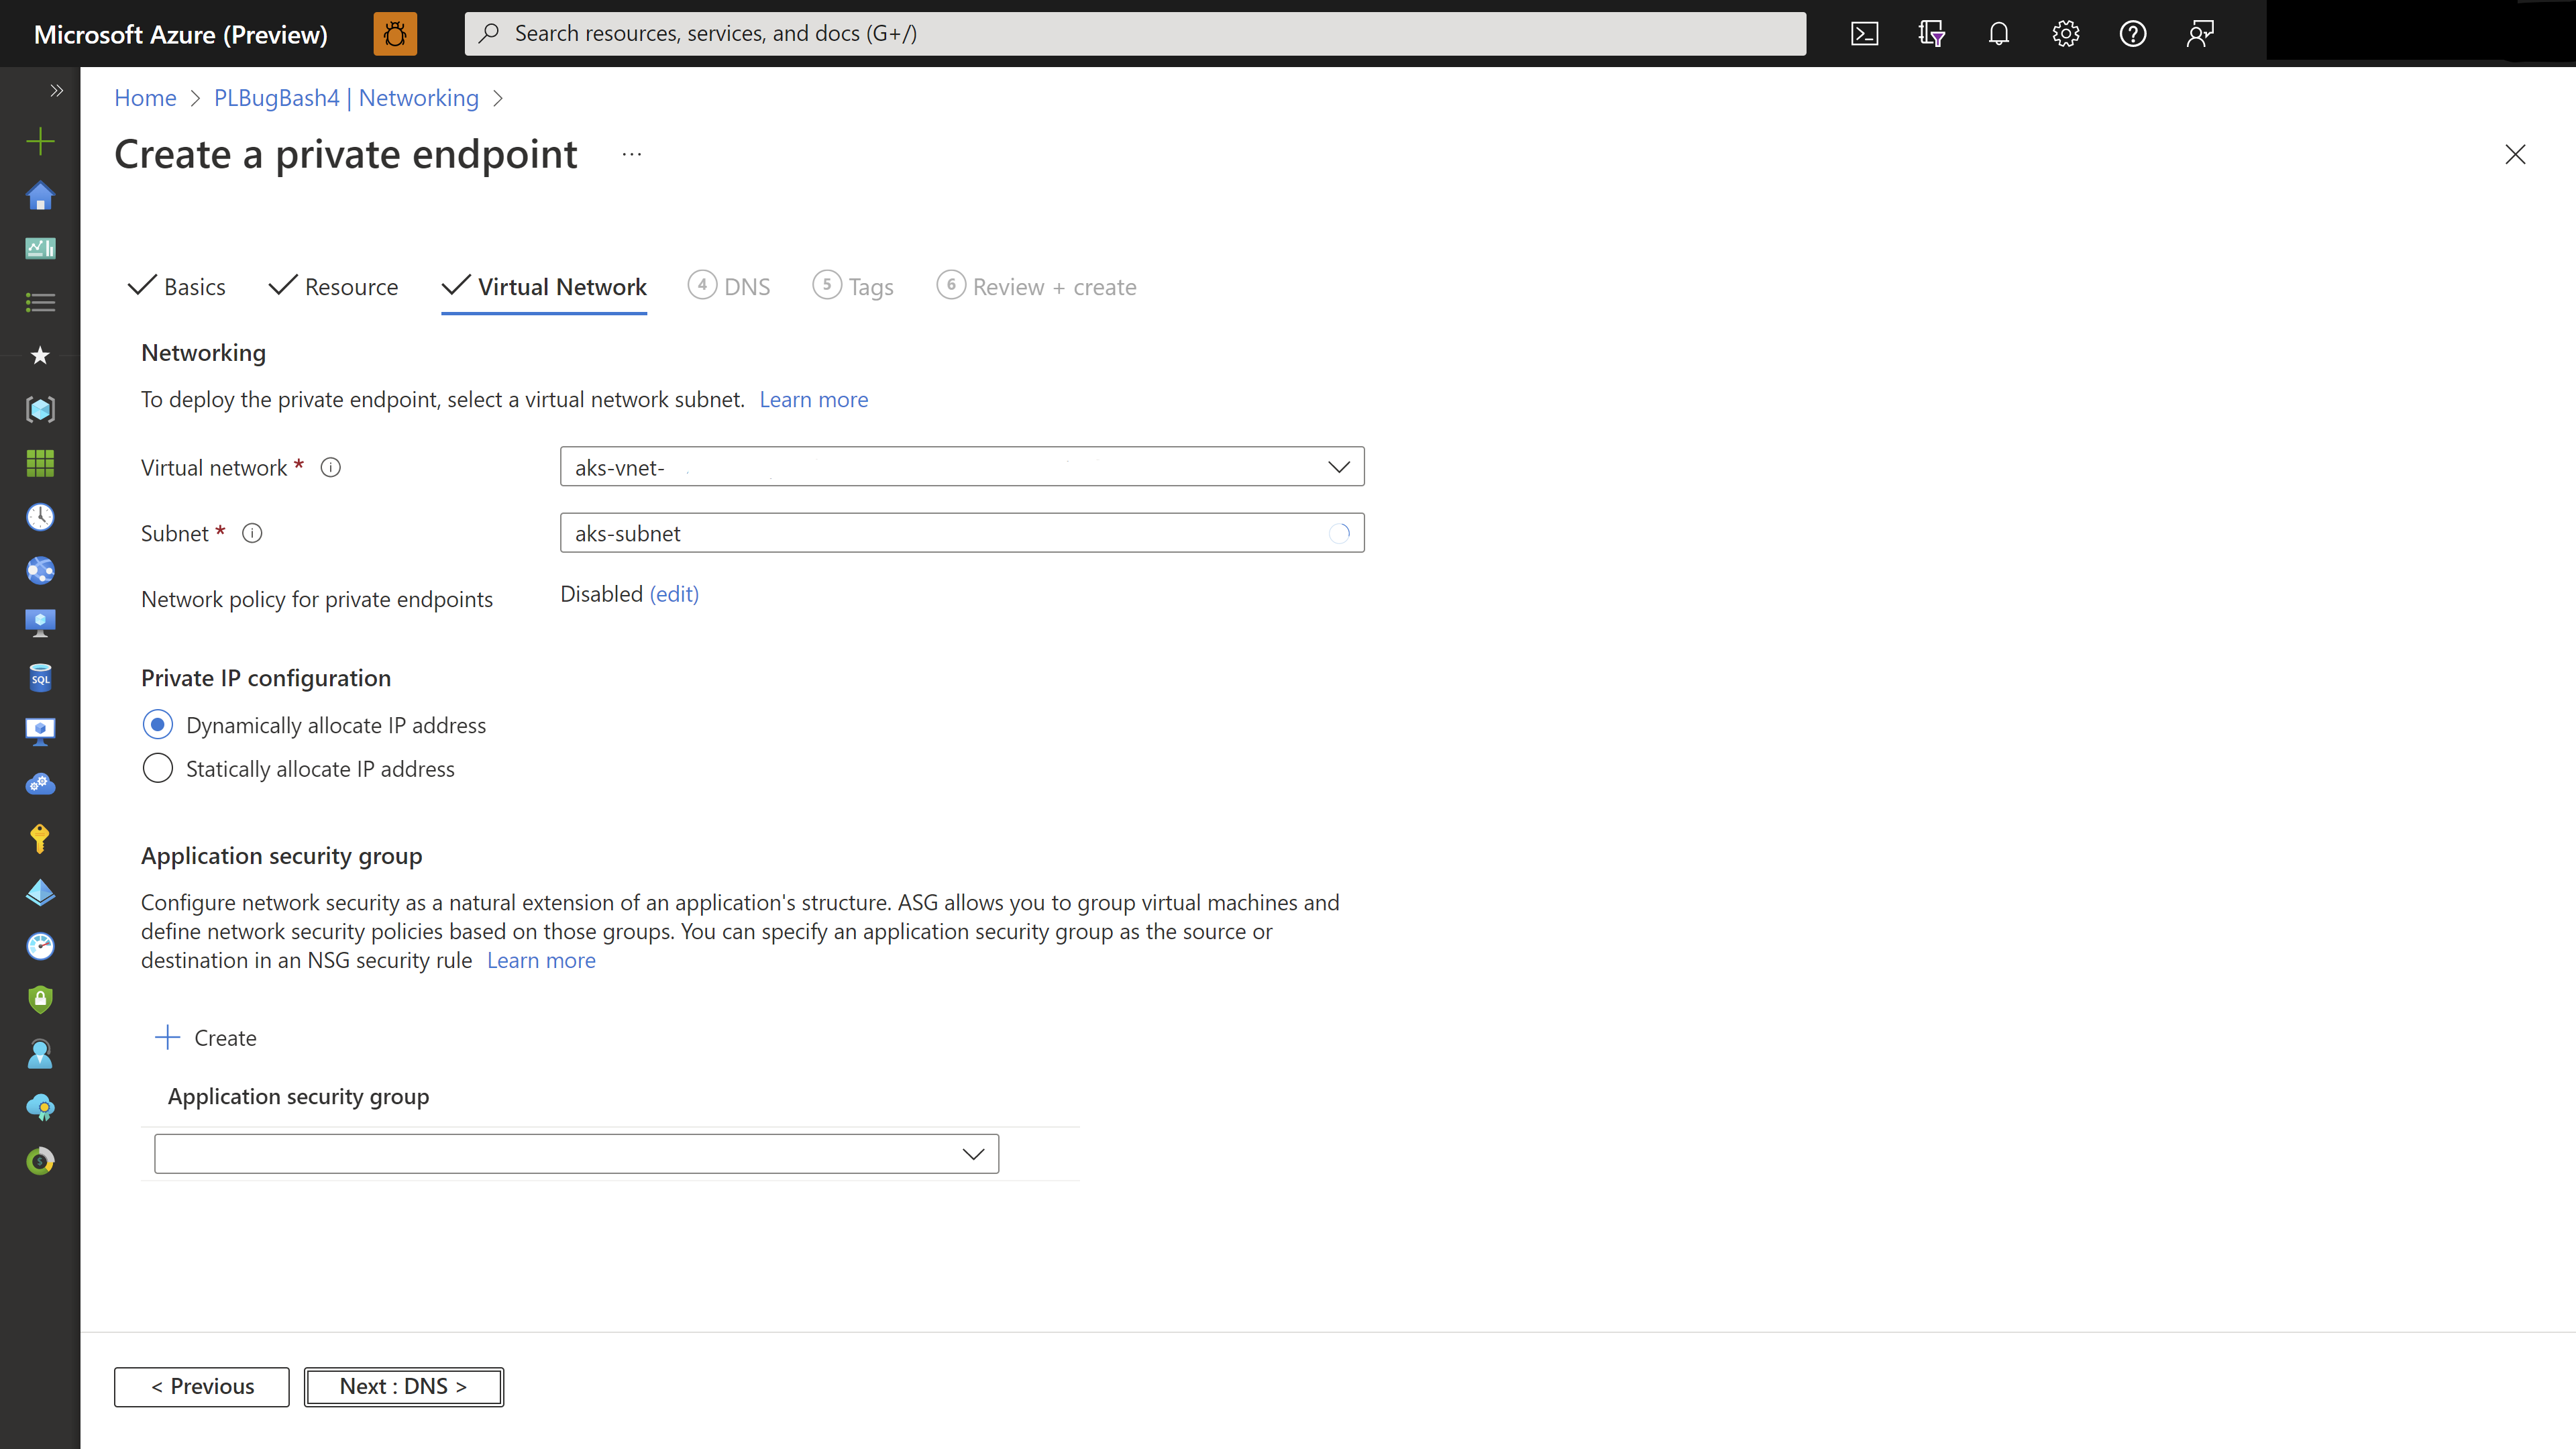
Setting Value Subscription Your subscription Resource type Microsoft.OpenEnergyPlatform/energyServices Resource Your Azure Data Manager for Energy instance Target sub-resource Azure Data Manager for Energy (for Azure Data Manager for Energy) by default Select Next: Virtual Network. On the Virtual Network page, you can:
Configure network and private IP settings. Learn more.
Configure a private endpoint with an application security group. Learn more.
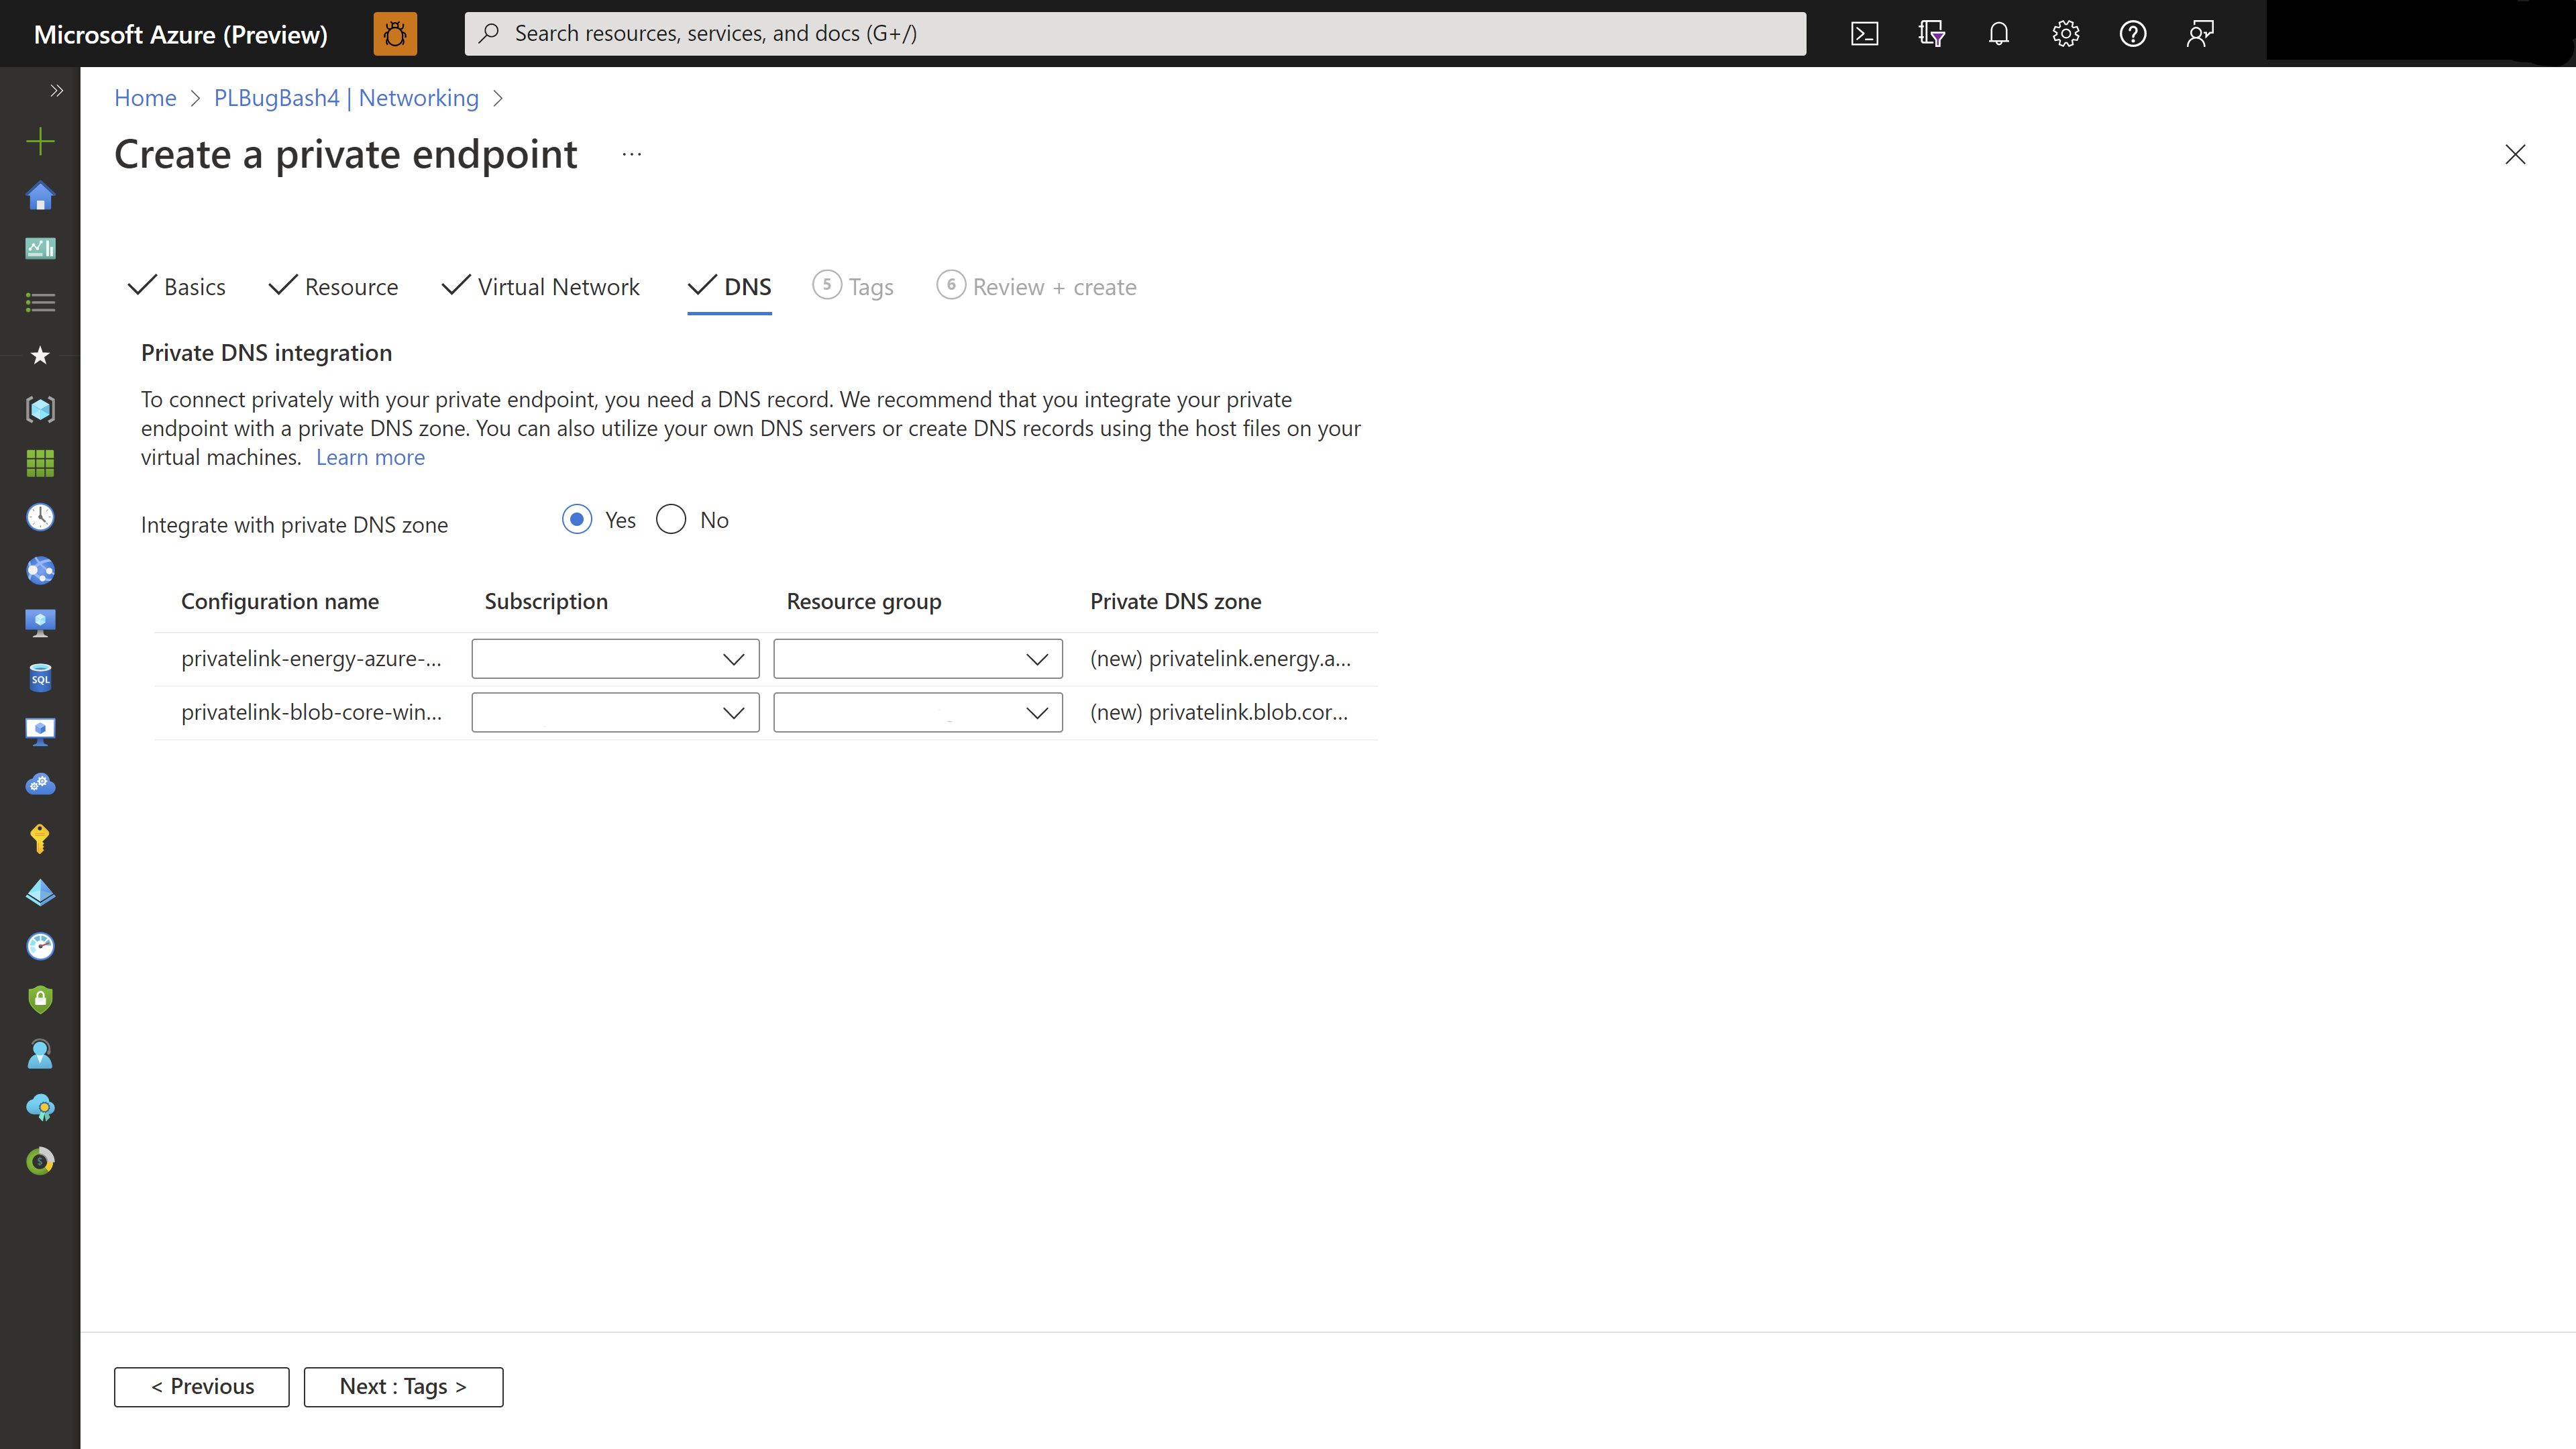
Select Next: DNS. On the DNS page, you can leave the default settings or configure private DNS integration. Learn more.
Select Next: Tags. On the Tags page, you can add tags to categorize resources.
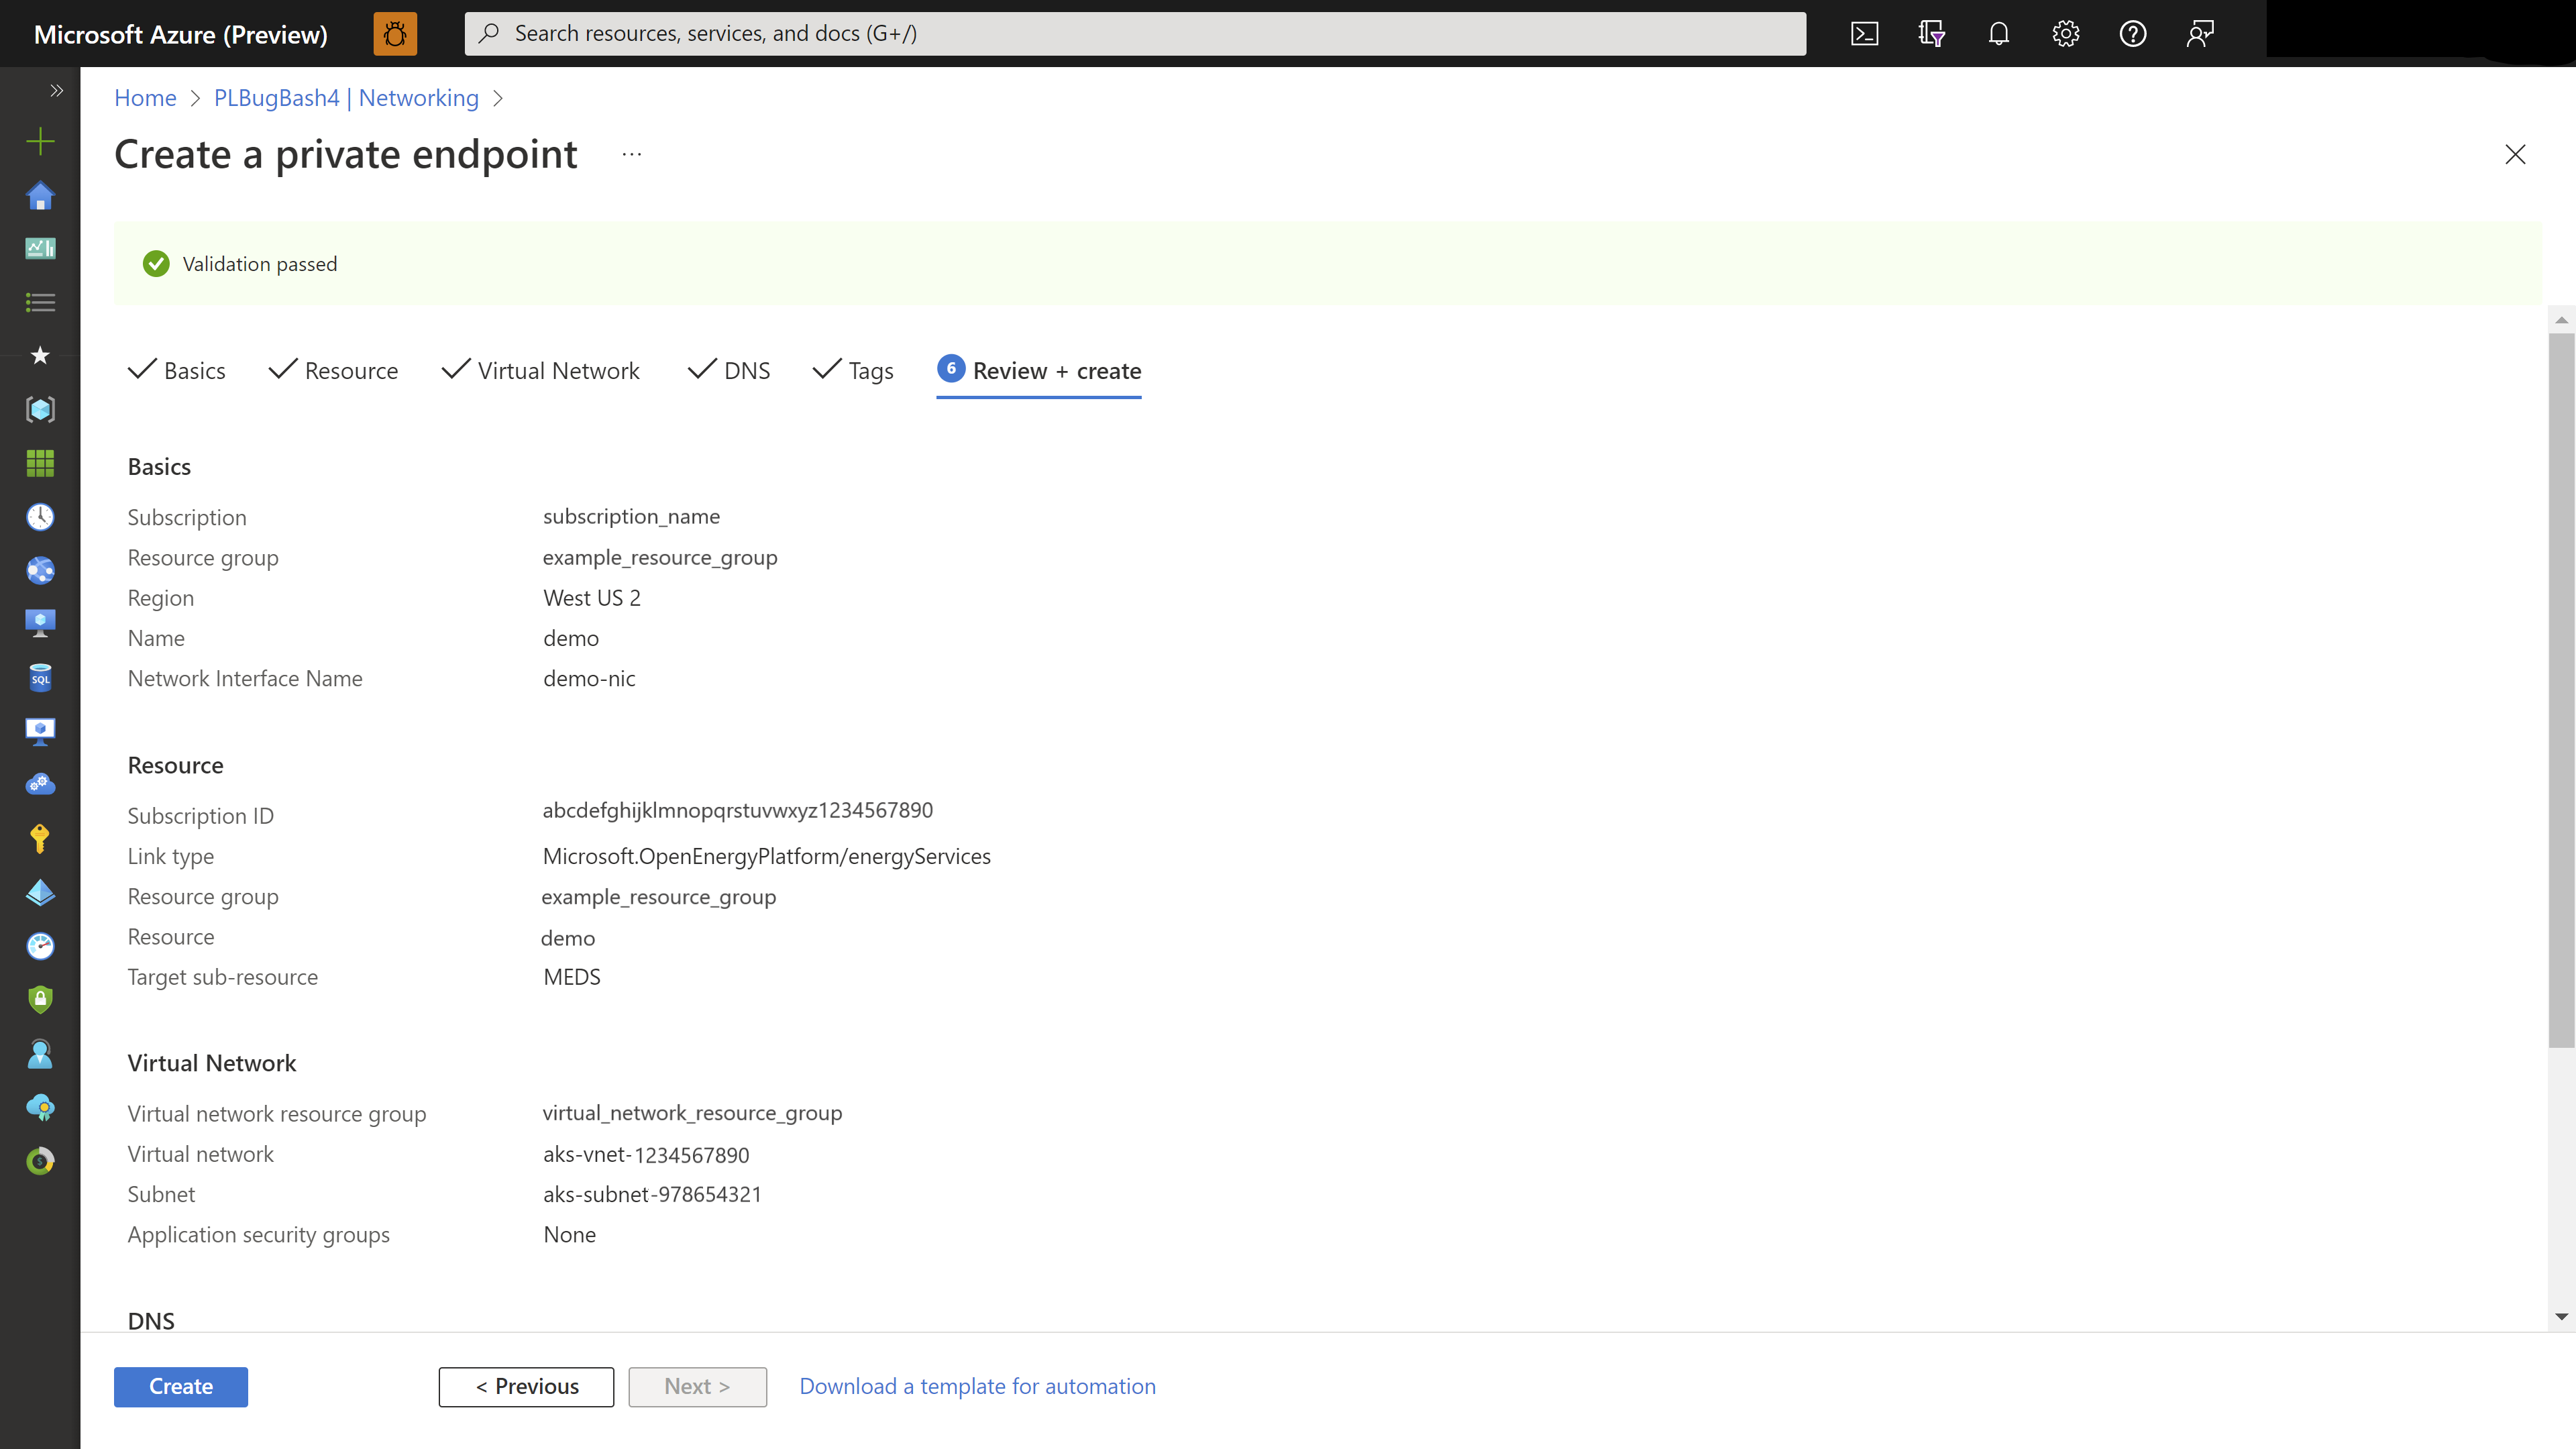
Select Review + create. On the Review + create page, Azure validates your configuration.
When you see Validation passed, select Create.
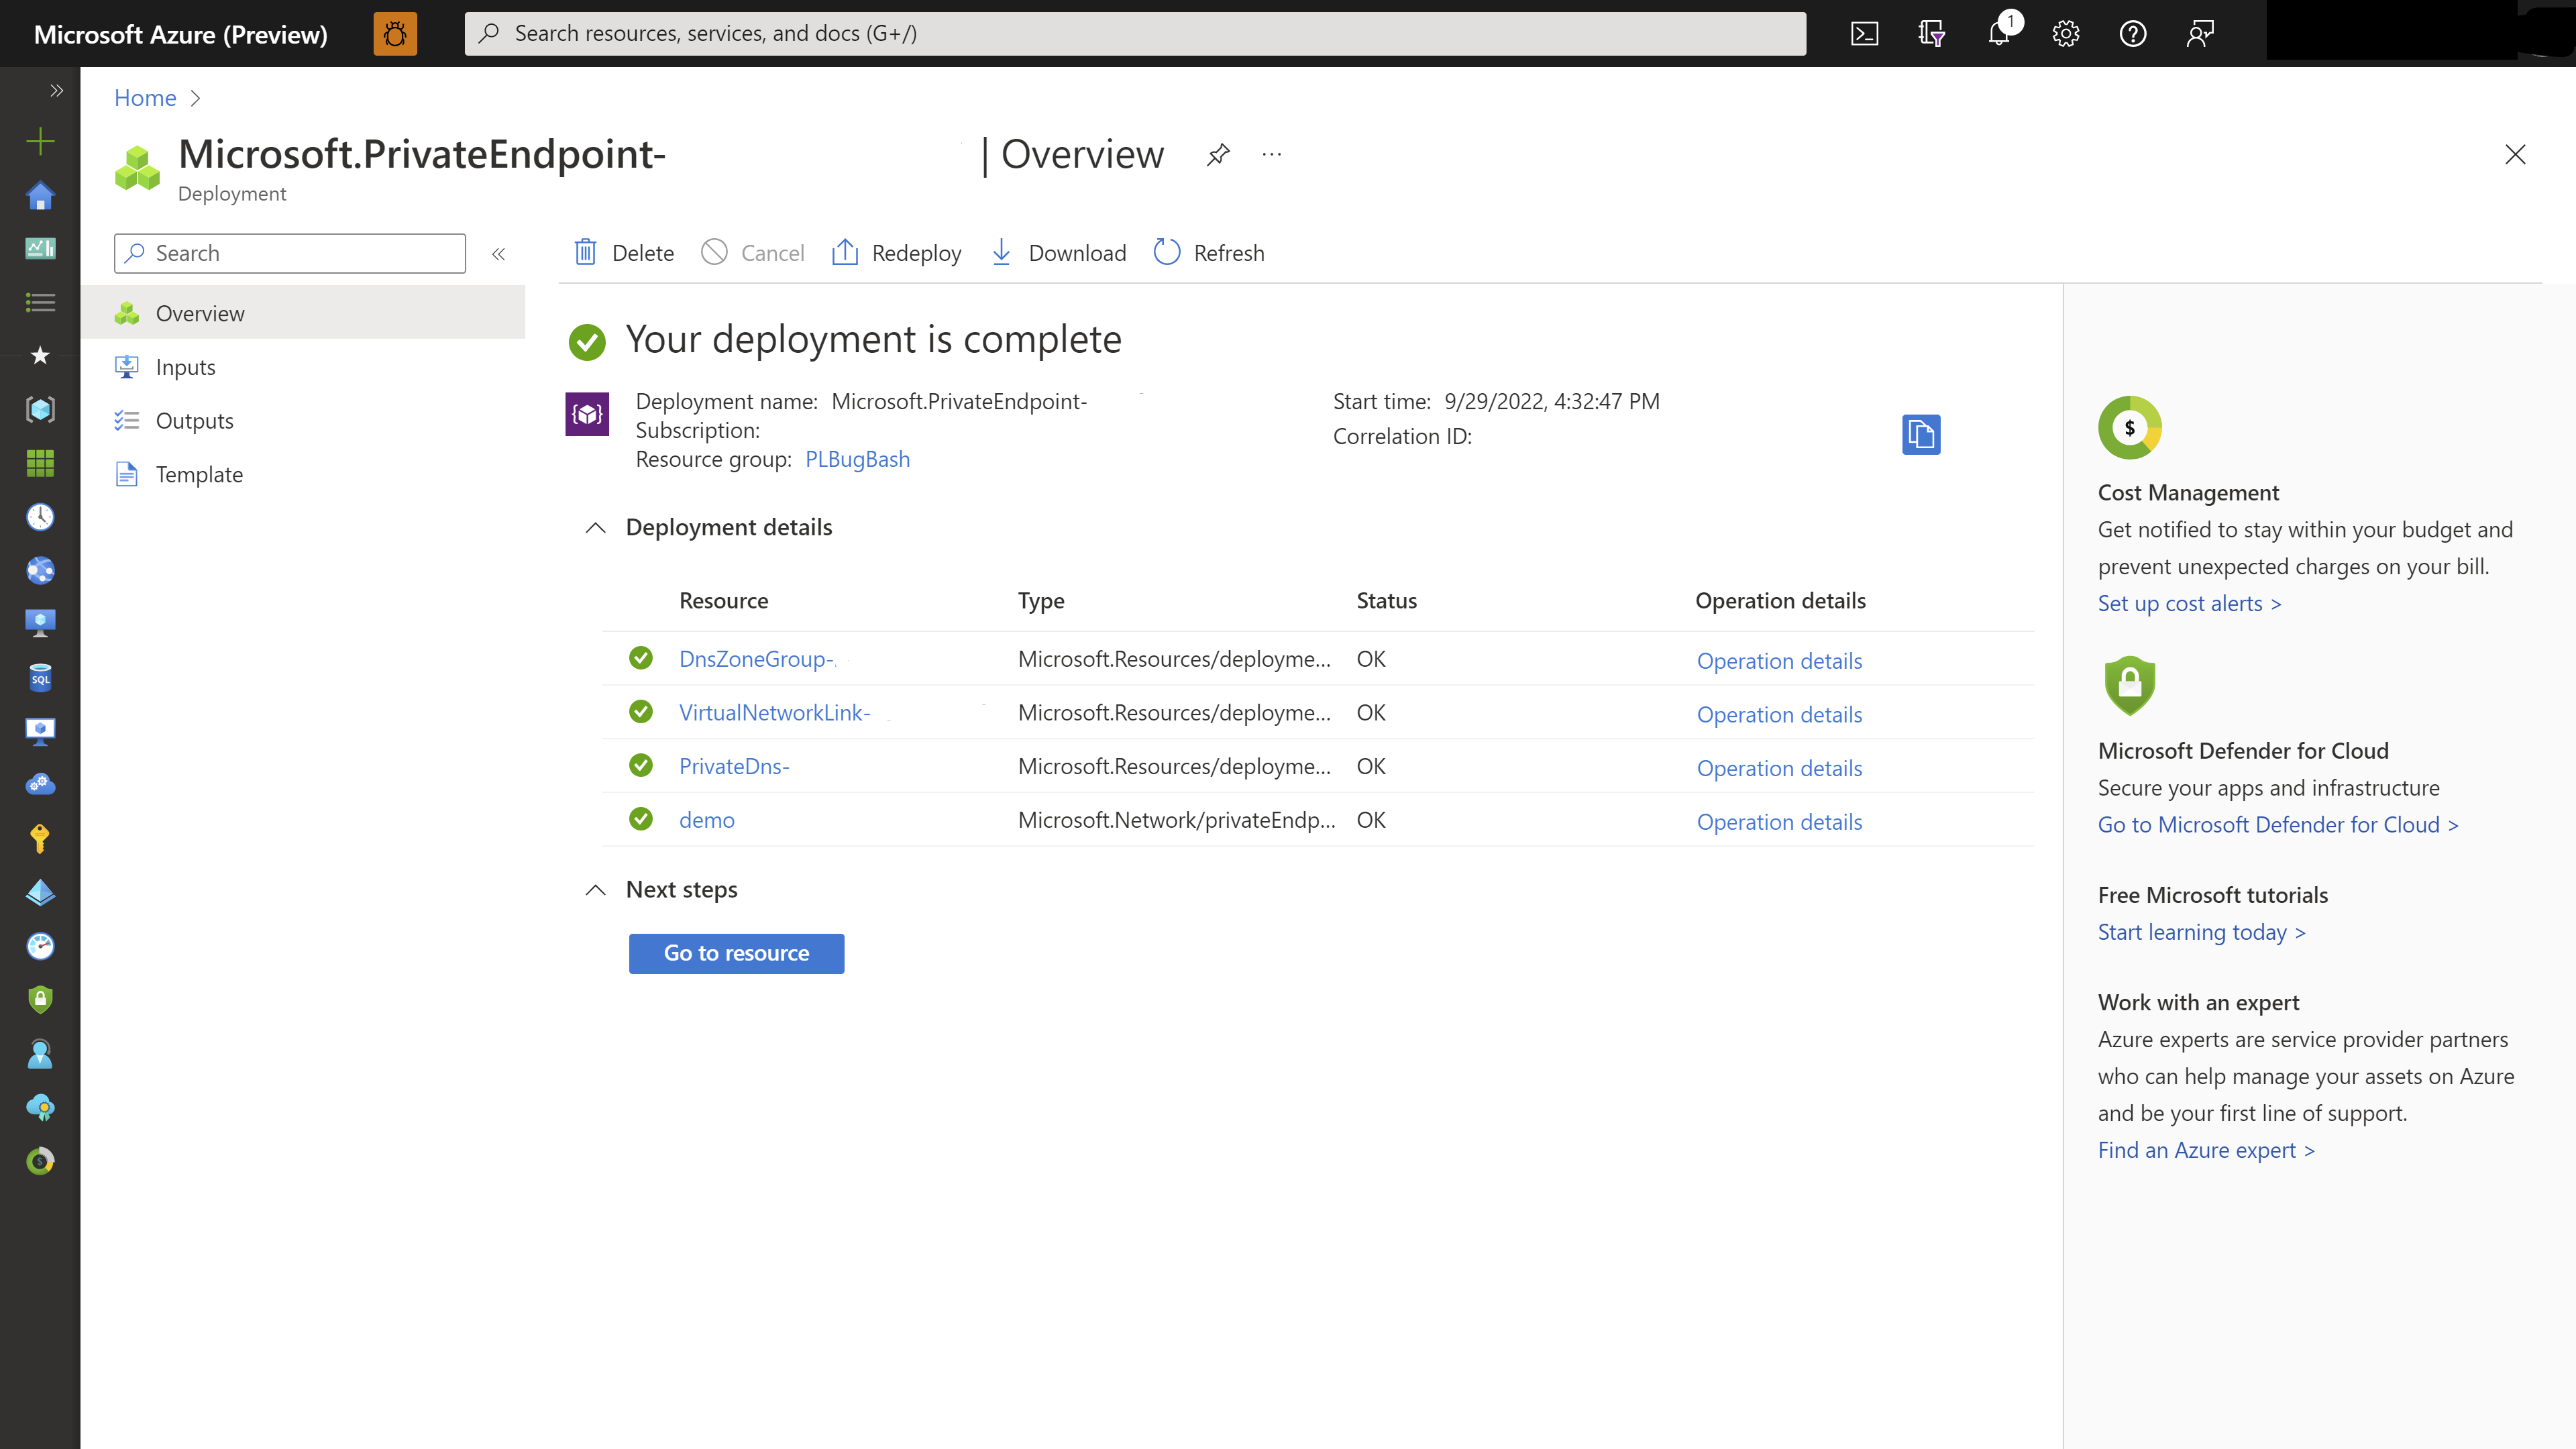
After the deployment is complete, select Go to resource.
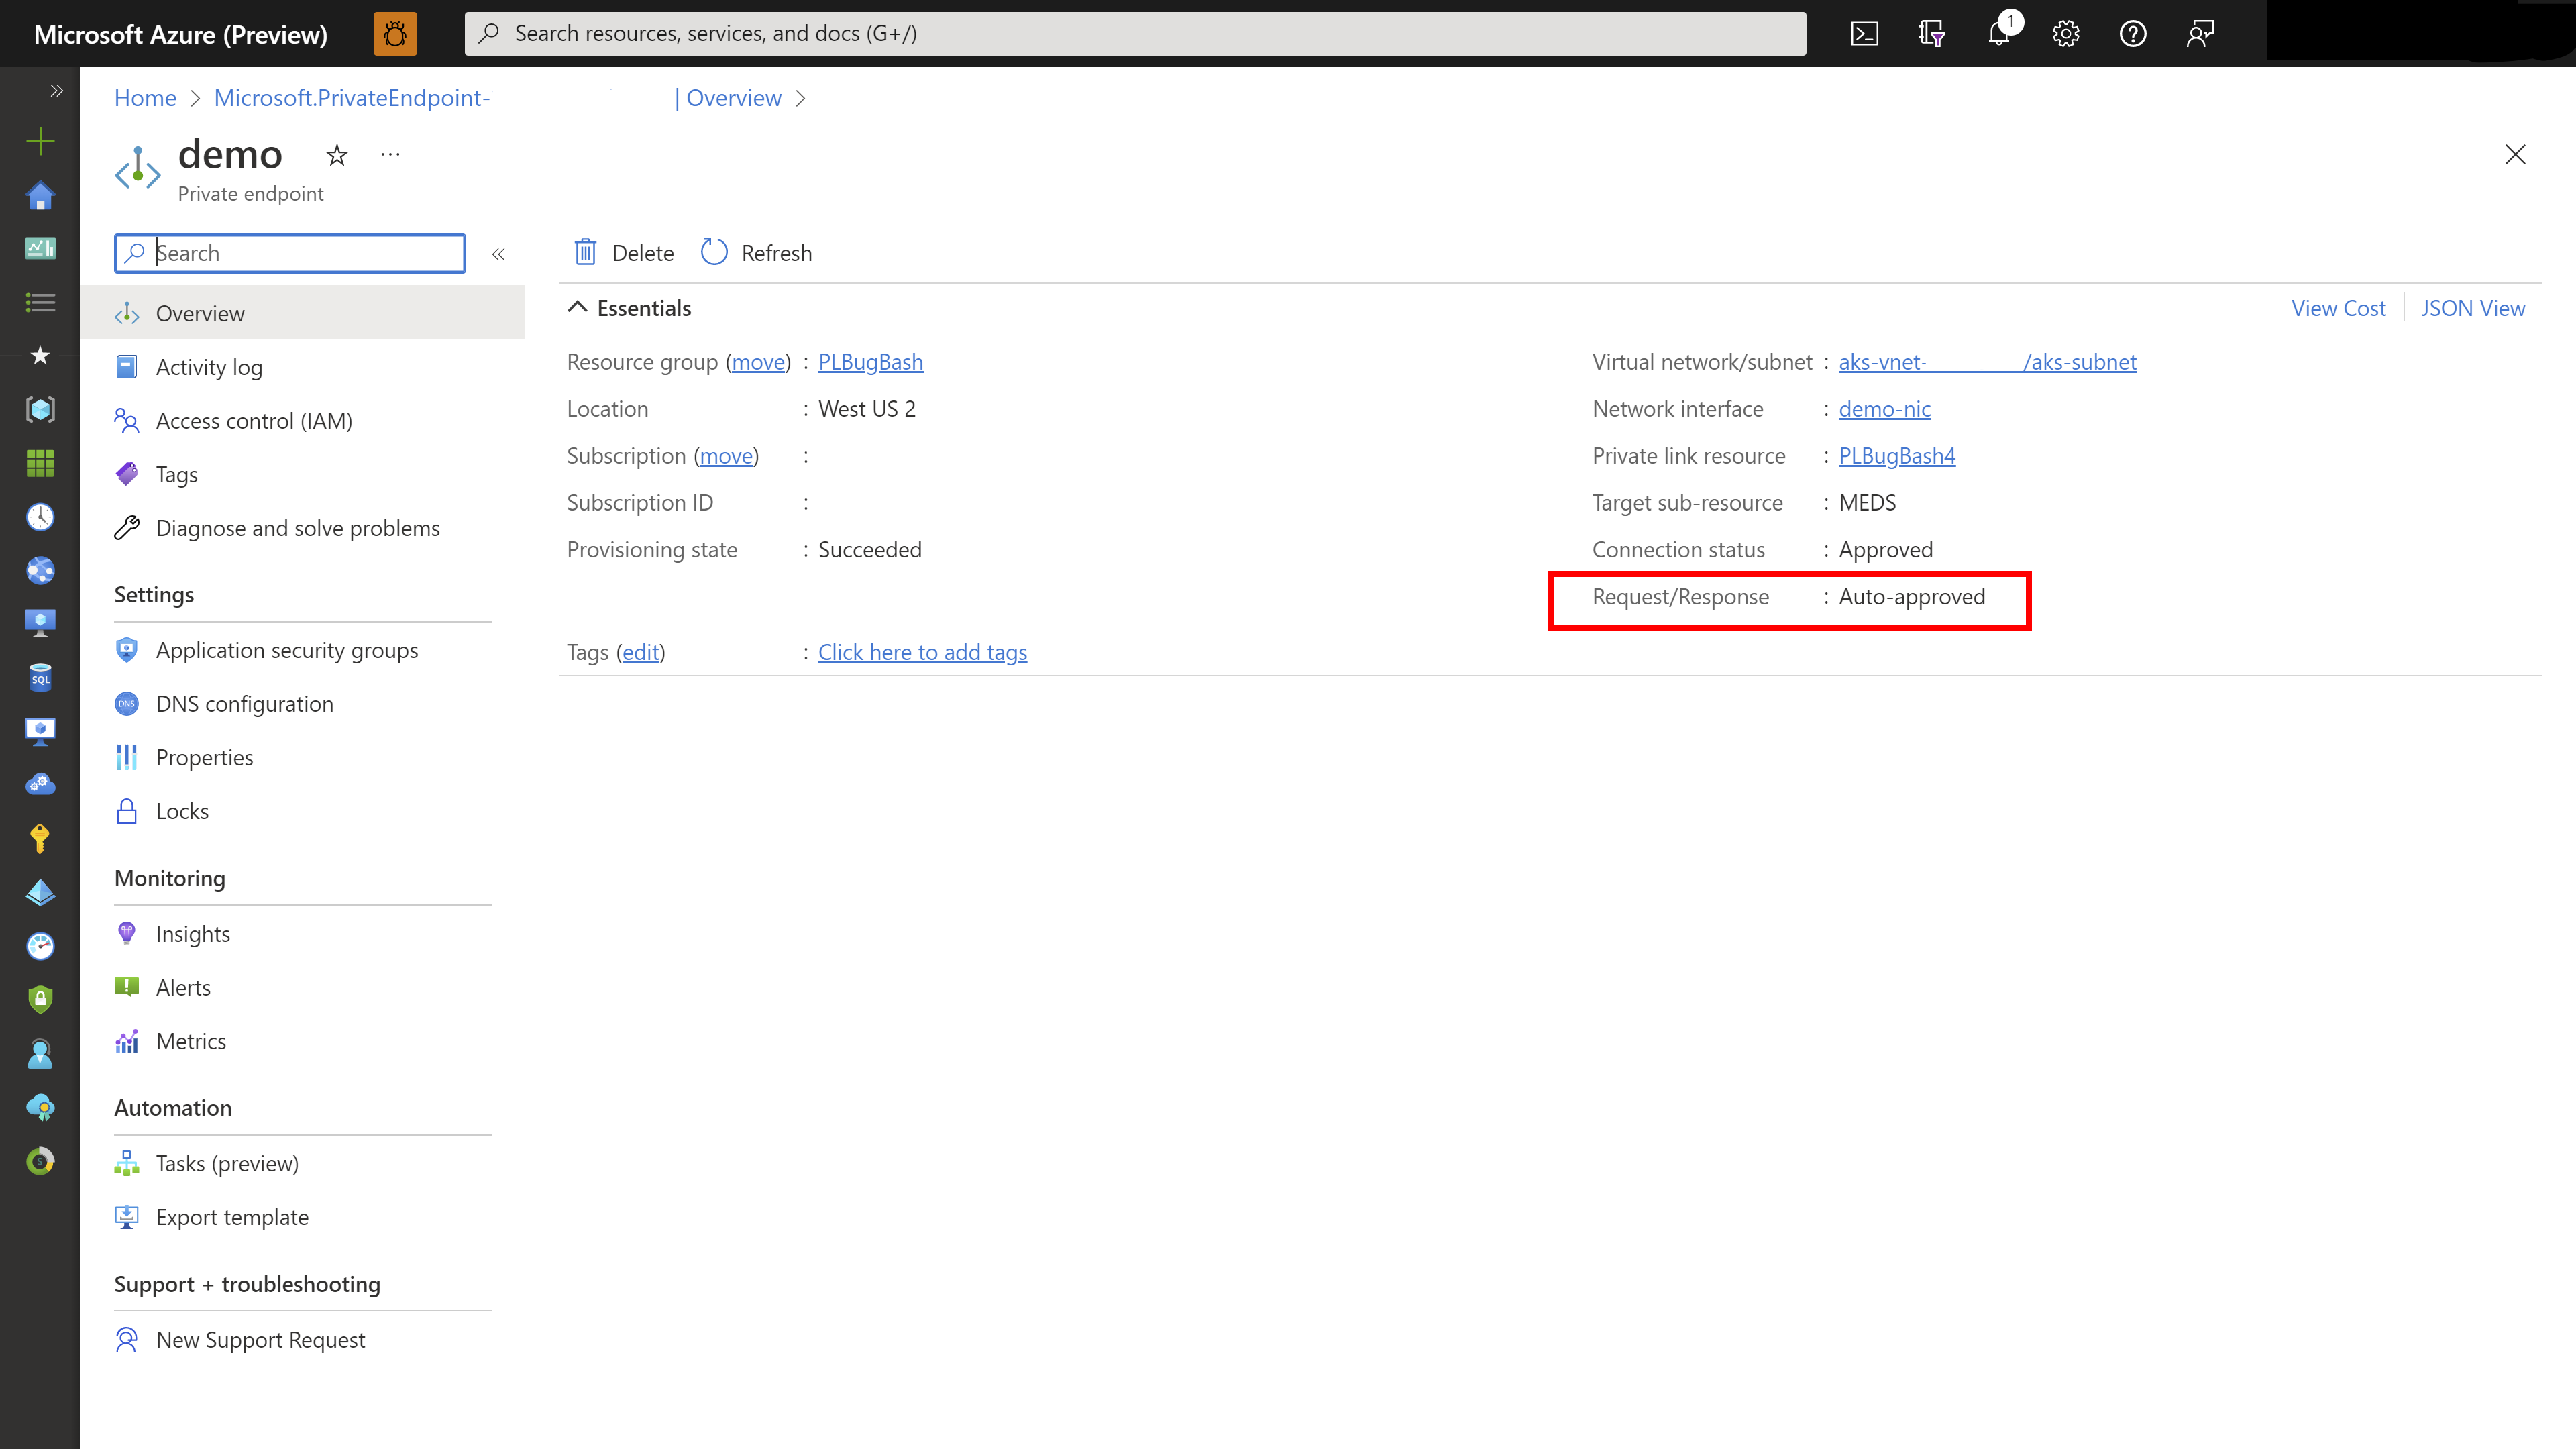
Confirm that the private endpoint that you created was automatically approved.
Select the Azure Data Manager for Energy instance, select Networking, and then select the Private Access tab. Confirm that your newly created private endpoint connection appears in the list.
Note
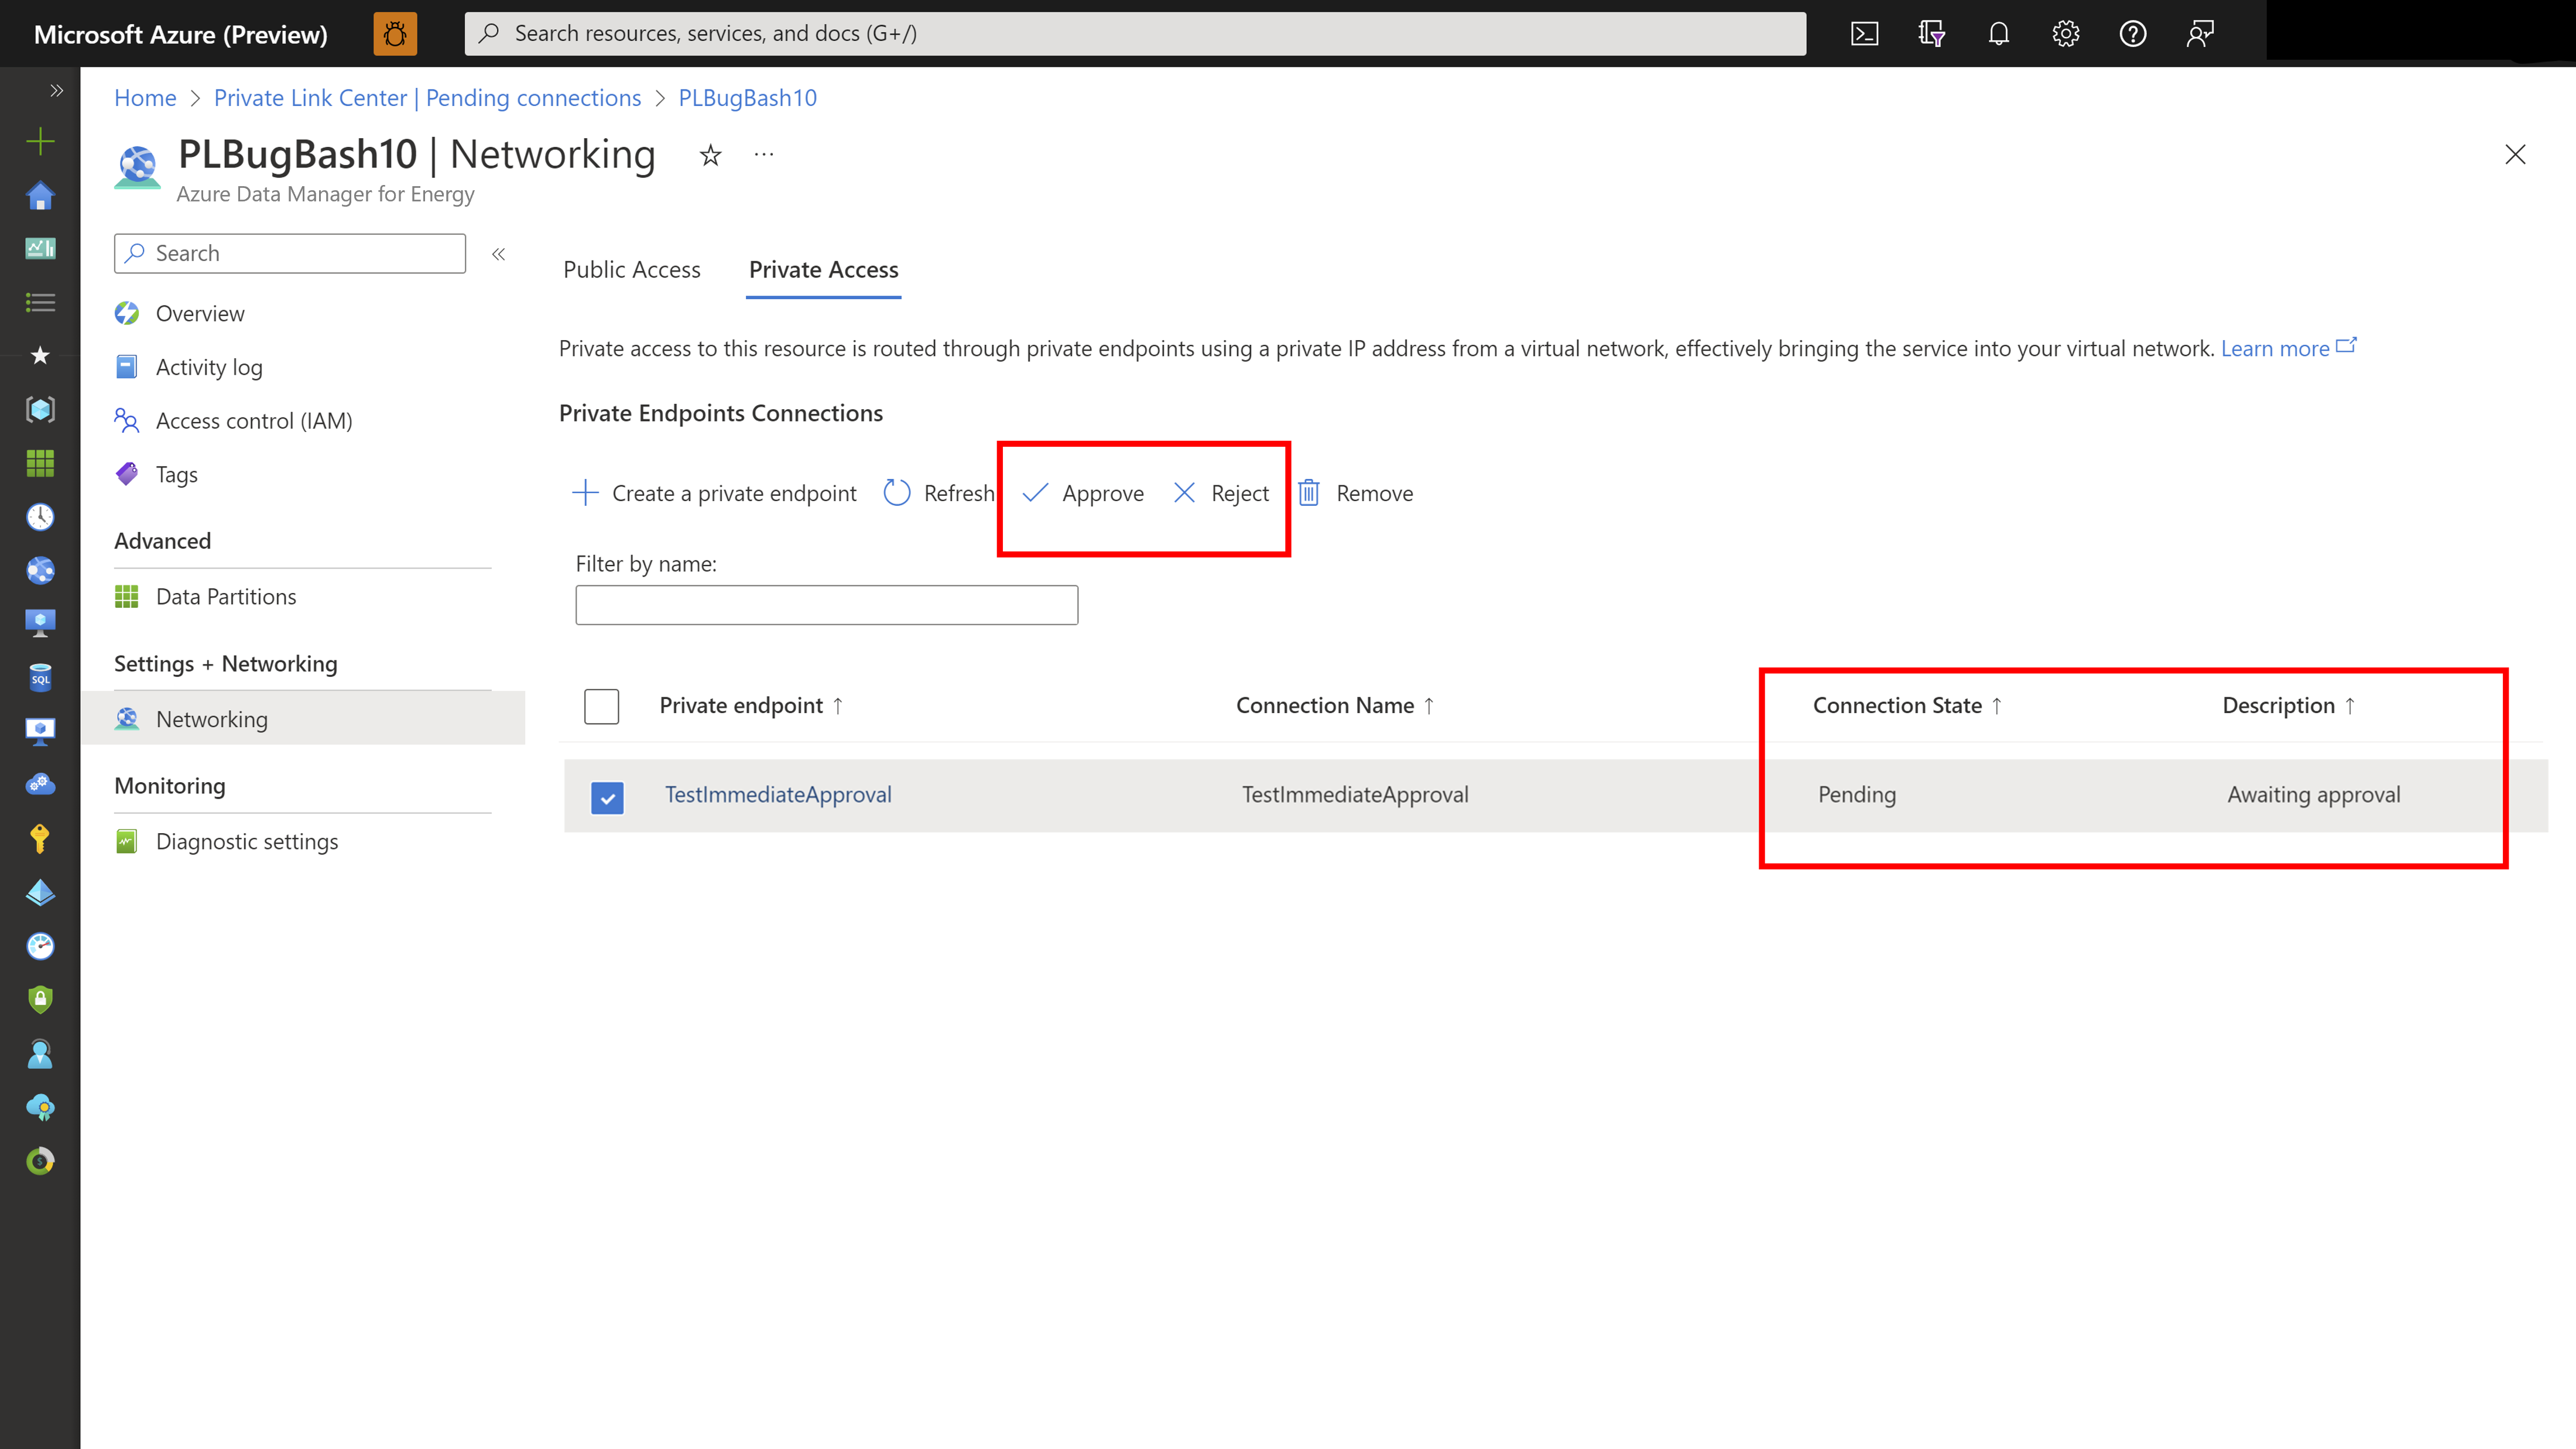
When the Azure Data Manager for Energy instance and the virtual network are in different tenants or subscriptions, you have to manually approve the request to create a private endpoint. The Approve and Reject buttons appear on the Private Access tab.
Manage multiple endpoints in the same virtual network
Access via IP vs DNS
In the same virtual network, you can create multiple endpoints. Each end point will have a different IP. It is not possible to resolve one host name with two difference IPs.
- If you access the resource via IP:
- The resource will be accessible only via the latest private IP address.
- All the previous private IPs in the same vnet will become dangling.
- Even when you delete the latest IP, all the previous IPs still remain dangling.
- If you access via DNS name: You won't see any difference.
Know which endpoint the resource is connected to
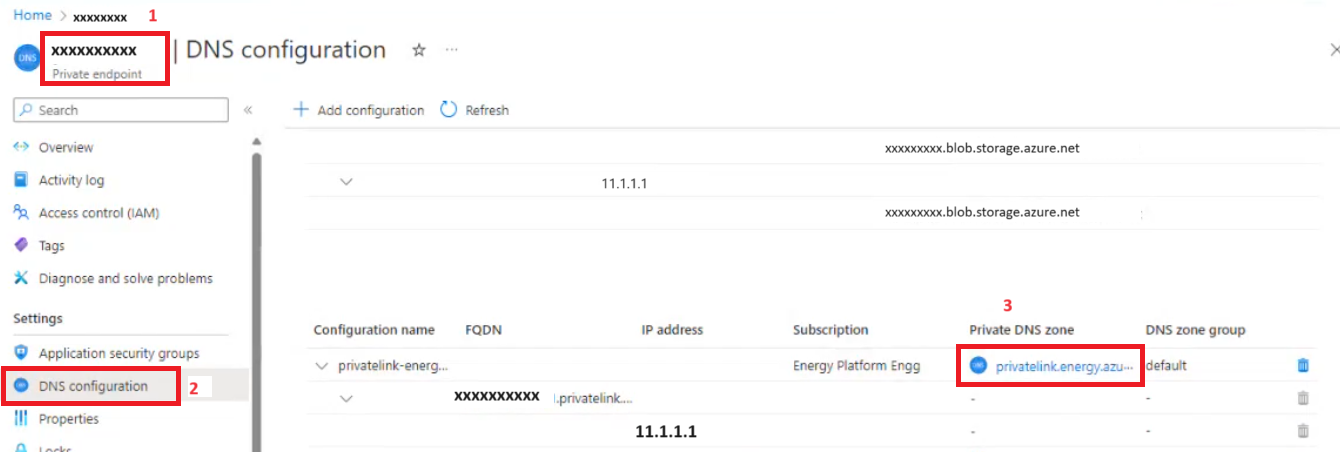
- Go to any of the private endpoints, to the DNS configuration, and to Private DNS Zone associated with ADME resource.
- In the private DNS zone, check the IP associated with the entry for your Azure Data Manager for Energy instance.
- This is the IP to which your resource is connected.
New data partitions with static IP private endpoints
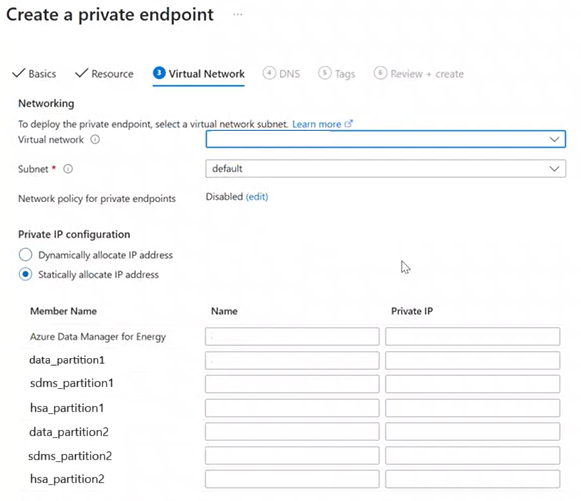
It is preferable to create private endpoints with dynamic IP to enable dynamic data partition creation. If you initiate the creation of new data partitions with static IPs private endpoint, it will fail. Each new data partition requires three additional static IPs which the static IP private endpoint is not able to provide.
To create new data partitions successfully with static IP private endpoint, follow the below steps:
- Create a new private endpoint with either dynamic IP or enable public access.
- Delete existing private endpoint with static IP from Azure Data Manager for Energy instance and delete it from Azure resources also.
- Create new data partitions successfully.
- Delete the newly created private endpoint with dynamic IP and/or disable public access.
- Create a new private endpoint with static IP. This step will now ask to assign additional static IPs needed for new data partition.
Next steps
To learn more about using Customer Lockbox as an interface to review and approve or reject access requests.

