Configure Managed DevOps Pools networking
Managed DevOps Pools agents can be configured to run in an isolated virtual network, or into an existing virtual network. This article describes how to configure your Managed DevOps Pool to run agents in your virtual network.
Adding agents to your own virtual network
You may want to add agents from Managed DevOps Pools to your own virtual network for scenarios such as:
- Your CI/CD Agents need to access resources that are only available in your company network through a service like Express Route
- Your CI/CD Agents need to access resources that are isolated to private endpoints
- You want to network isolate your CI/CD infrastructure by bringing your own VNet with company specific firewall rules
- Any other unique use cases that can't be achieved by out-of-box Managed DevOps Pools networking related features
You can add your pool's agents to your virtual network using the following steps.
- Create or bring your virtual network and subnet
- Delegate the subnet to Microsoft.DevOpsInfrastructure/pools
- Associate the subnet with your Managed DevOps Pool
The previous steps delegate the subnet for exclusive access by the pool and the subnet can't be used by other pools or resources. In order to connect multiple pools to the same virtual network, multiple subnets can be used, each delegated and associated with their own pool.
Create or bring your virtual network and subnet
The subnet must have enough address space to accommodate the max pool size of the pool you want to associate (include the 5 IP address Azure reserves in the subnet). If you're using Express Route, you need to temporary drop or change the management lock on the resource group to allow writes.
Important
The Managed DevOps Pool and virtual network must be in the same region, or you'll get an error similar to the following when you try to create the pool or update the network configuration. Virtual network MDPVN is in region eastus, but pool mdpnonprodsub is in region australiaeast. These must be in the same region.
Grant Reader and Network Contributor access to DevOpsInfrastructure service principal
Ensure the DevOpsInfrastructure principal has the following access on the virtual network:
ReaderandNetwork Contributor- Or add the following permission to a custom role:
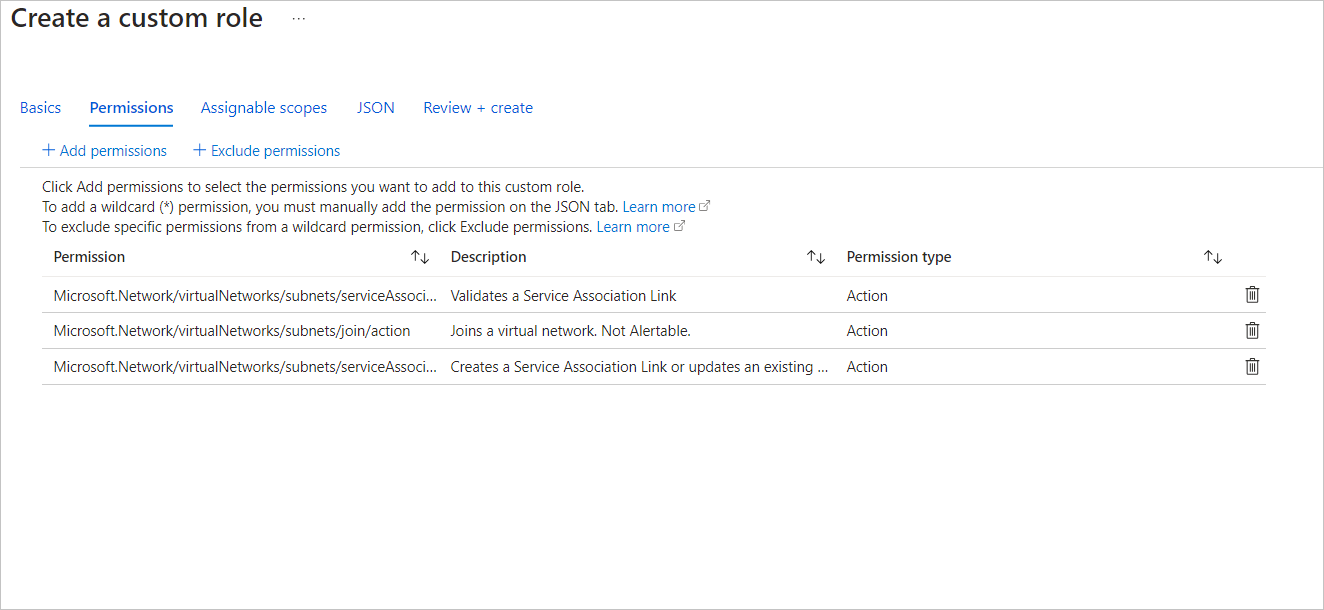
Microsoft.Network/virtualNetworks/*/readMicrosoft.Network/virtualNetworks/subnets/join/actionMicrosoft.Network/virtualNetworks/subnets/serviceAssociationLinks/validate/actionMicrosoft.Network/virtualNetworks/subnets/serviceAssociationLinks/writeMicrosoft.Network/virtualNetworks/subnets/serviceAssociationLinks/delete
Make a custom role for the Service Association Link access. An example role can be created at the resource group or subscription level in the Access Control tab, as shown in the following example.
To check the DevOpsInfrastructure principal access
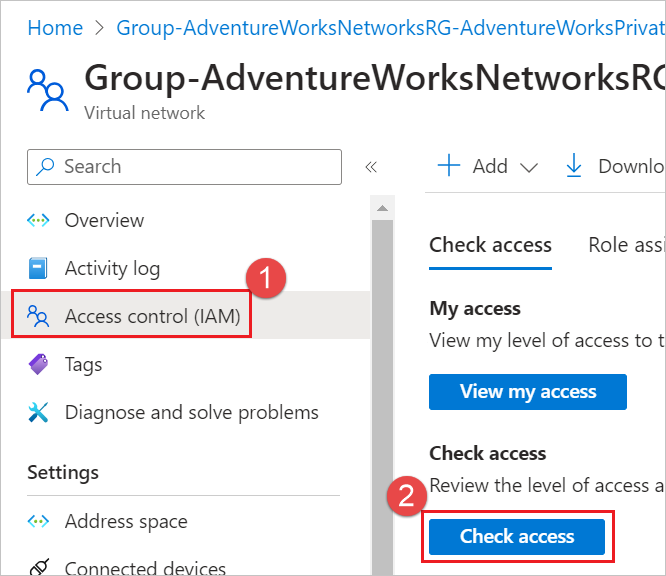
Choose Access control (IAM) for the virtual network, and choose Check access.
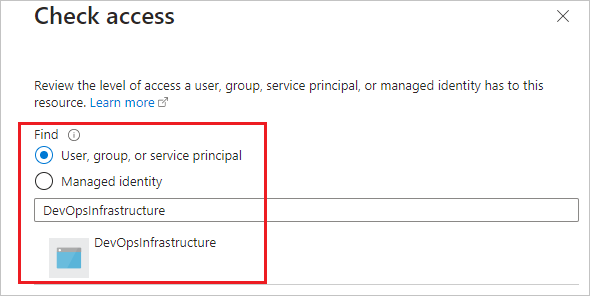
Search for DevOpsInfrastructure and select it.
Verify Reader access. Verify that
Microsoft.Network/virtualNetworks/subnets/join/action,Microsoft.Network/virtualNetworks/subnets/serviceAssociationLinks/validate/actionandMicrosoft.Network/virtualNetworks/subnets/serviceAssociationLinks/writeaccess is assigned. Your custom role should appear here.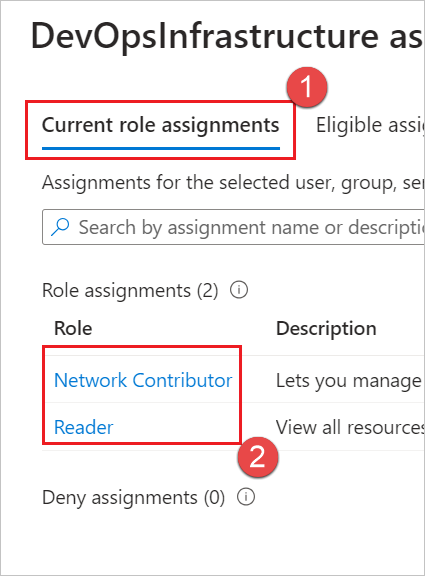
If DevOpsInfrastructure doesn't have those permissions, add them by choosing Access control (IAM) for the virtual network, and choose Grant access to this resource and add them.
Delegate the subnet to Microsoft.DevOpsInfrastructure/pools
The subnet needs to be delegated to the Microsoft.DevOpsInfrastructure/pools to be used.
Open the subnet properties in the Portal and select Microsoft.DevOpsInfrastructure/pools under the Subnet Delegation section and choose Save.
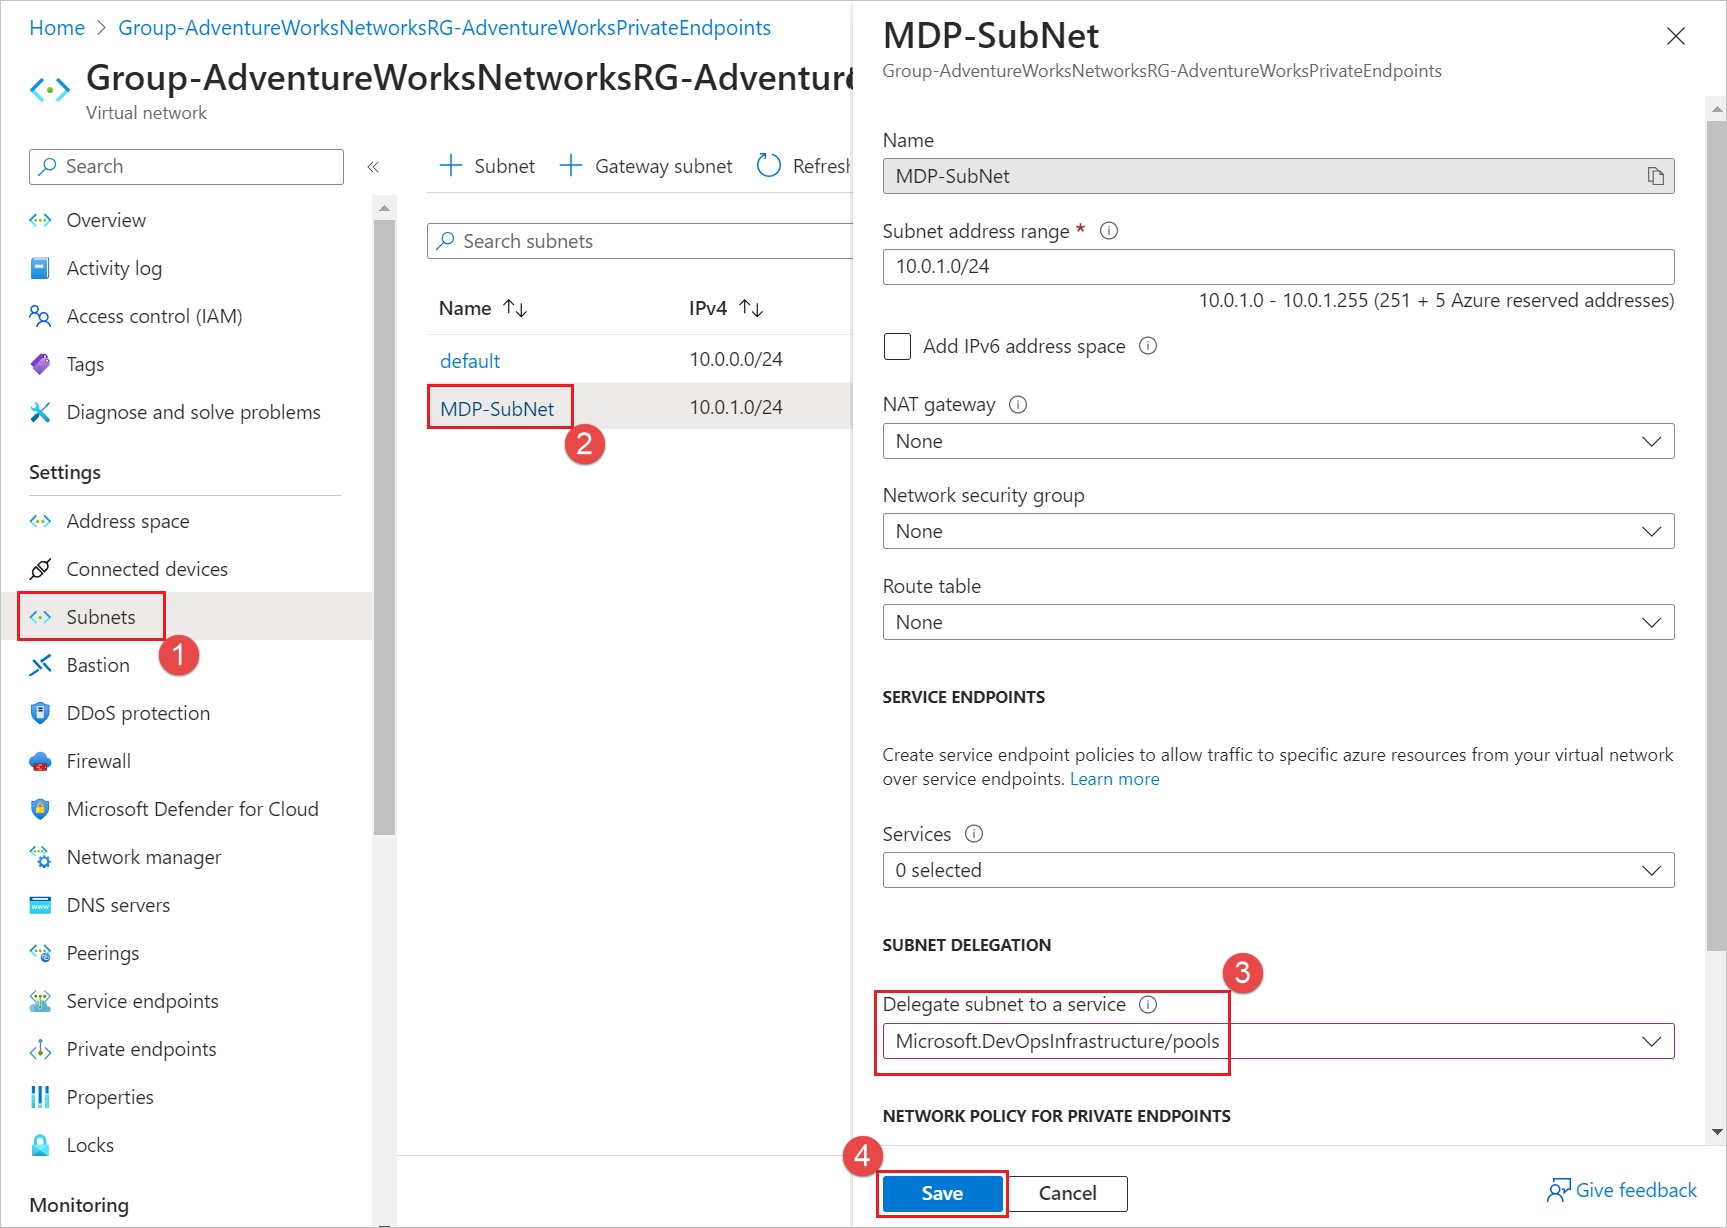
This delegates the subnet for exclusive access for the pool and the subnet can't be used by other pools or resources. In order to connect multiple pools to the same virtual network, multiple subnets must be used, each delegated and associated with their own pool. More information on subnet delegation can be found here.
Once the subnet is delegated to Microsoft.DevOpsInfrastructure/pools, the pool can be updated to use the subnet.
Associate the subnet with your Managed DevOps Pool
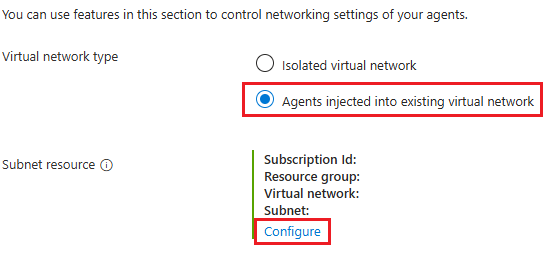
If you're creating a new pool, go to the Networking tab. To update an existing pool, go to Settings > Networking, and choose Agents injected into existing virtual network, Configure.
Choose the Subscription, Virtual Network, and Subnet you delegated to
Microsoft.DevOpsInfrastructure/pools, and choose Ok.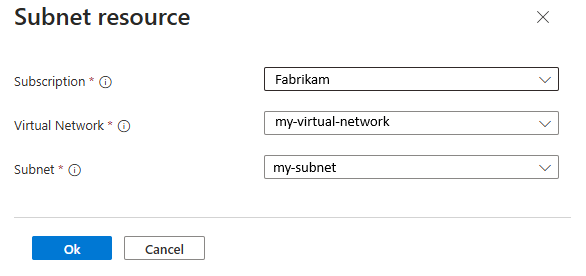
Once the network update completes, newly created resource in the pool will use the delegated subnet.
Restricting outbound connectivity
If you have systems in place on your network (NSG, Firewall etc.) which restrict outbound connectivity, you need to ensure that the following domains can be accessed, otherwise your Managed DevOps Pool will not be functional. All of them are HTTPS, unless otherwise stated.
- Highly secure endpoints that our service depends on:
*.prod.manageddevops.microsoft.com- Managed DevOps Pools endpointrmprodbuilds.azureedge.net- Worker binariesvstsagentpackage.azureedge.net- Azure DevOps agent CDN location*.queue.core.windows.net- Worker queue for communicating with Managed DevOps Pools serviceserver.pipe.aria.microsoft.com- Common client side telemetry solution (and used by the Agent Pool Validation extension among others)azure.archive.ubuntu.com- Provisioning Linux machines - this is HTTP, not HTTPSwww.microsoft.com- Provisioning Linux machines
- Less secure, more open endpoints that our service depends on:
- Needed by our service:
packages.microsoft.com- Provisioning Linux machinesppa.launchpad.net- Provisioning Ubuntu machinesdl.fedoraproject.org- Provisioning certain Linux distros
- Needed by Azure DevOps agent:
dev.azure.com*.services.visualstudio.com*.vsblob.visualstudio.com*.vssps.visualstudio.com*.visualstudio.comThese entries are the minimum domains required. If you have any issues, see Azure DevOps allowlist for the full list of domains required.
- Needed by our service:
If you configure your Azure DevOps Pipeline to run inside of a container, you need to also allowlist the source of the container image (Docker or ACR).
Configure the Azure DevOps Agent to run behind a Proxy
If you configured a proxy service on your image and want your workloads running on your Managed DevOps pool to run behind this proxy, you must add the following environment variables on your image.
VSTS_AGENT_INPUT_PROXYURL- The URL of the configured proxy to run behindVSTS_AGENT_INPUT_PROXYUSERNAME- The username needed to use the proxyVSTS_AGENT_INPUT_PROXYPASSWORD- The password to use the proxy.
For Windows, these environment variables should be system environment variables, and for Linux these variables should be in the /etc/environment file. Setting these system variables incorrectly or without a configured proxy service on the image causes provisioning of new agents to fail with network connectivity issues.
If you are migrating from Azure Virtual Machine Scale Set agents and are already using the proxy environment variables on your image, as described in Azure Virtual Machine Scale Set agents- Customizing Pipeline Agent Configuration, no changes should be required.