Tutorial: Configure continuous deployment for a Python web app in Azure Container Apps
This article is part of a tutorial series about how to containerize and deploy a Python web app to Azure Container Apps. Container Apps enables you to deploy containerized apps without managing complex infrastructure.
In this tutorial, you:
- Configure continuous deployment for a container app by using a GitHub Actions workflow.
- Make a change to a copy of the sample repository to trigger the GitHub Actions workflow.
- Troubleshoot problems that you might encounter with configuring continuous deployment.
- Remove resources that you don't need when you finish the tutorial series.
Continuous deployment is related the DevOps practice of continuous integration and continuous delivery (CI/CD), which is automation of your app development workflow.
The following diagram highlights the tasks in this tutorial.

Prerequisites
To set up continuous deployment, you need:
The resources (and their configuration) that you created in the previous tutorial, which includes an instance of Azure Container Registry and a container app in Azure Container Apps.
A GitHub account where you forked the sample code (Django or Flask) and that you can connect to from Azure Container Apps. (If you downloaded the sample code instead of forking, be sure to push your local repo to your GitHub account.)
Optionally, Git installed in your development environment to make code changes and push to your repo in GitHub. Alternatively, you can make the changes directly in GitHub.
Configure continuous deployment for a container
In the previous tutorial, you created and configured a container app in Azure Container Apps. Part of the configuration was pulling a Docker image from an Azure Container Registry instance. The container image is pulled from the registry when you create a container revision, such as when you first set up the container app.
In this section, you set up continuous deployment by using a GitHub Actions workflow. With continuous deployment, a new Docker image and container revision are created based on a trigger. The trigger in this tutorial is any change to the main branch of your repository, such as with a pull request. When the workflow is triggered, it creates a new Docker image, pushes it to the Azure Container Registry instance, and updates the container app to a new revision by using the new image.
You can run Azure CLI commands in Azure Cloud Shell or on a workstation where Azure CLI is installed.
If you're running commands in a Git Bash shell on a Windows computer, enter the following command before proceeding:
export MSYS_NO_PATHCONV=1
Create a service principal by using the az ad sp create-for-rbac command:
az ad sp create-for-rbac \
--name <app-name> \
--role Contributor \
--scopes "/subscriptions/<subscription-ID>/resourceGroups/<resource-group-name>"
In the command:
- <app-name> is an optional display name for the service principal. If you leave off the
--nameoption, a GUID is generated as the display name. - <subscription-ID> is the GUID that uniquely identifies your subscription in Azure. If you don't know your subscription ID, you can run the az account show command and copy it from the
idproperty in the output. - <resource-group-name> is the name of a resource group that contains the Azure Container Apps container. Role-based access control (RBAC) is on the resource group level. If you followed the steps in the previous tutorial, the name of the resource group is
pythoncontainer-rg.
Save the output of this command for the next step. In particular, save the client ID (
appIdproperty), client secret (passwordproperty), and tenant ID (tenantproperty).- <app-name> is an optional display name for the service principal. If you leave off the
Configure GitHub Actions by using the az containerapp github-action add command:
az containerapp github-action add \
--resource-group <resource-group-name> \
--name python-container-app \
--repo-url <https://github.com/userid/repo> \
--branch main \
--registry-url <registry-name>.azurecr.io \
--service-principal-client-id <client-id> \
--service-principal-tenant-id <tenant-id> \
--service-principal-client-secret <client-secret> \
--login-with-github
In the command:
- <resource-group-name> is the name of the resource group. In this tutorial, it's
pythoncontainer-rg. - <https://github.com/userid/repo> is the URL of your GitHub repository. In this tutorial, it's either
https://github.com/userid/msdocs-python-django-azure-container-appsorhttps://github.com/userid/msdocs-python-flask-azure-container-apps. In those URLs,useridis your GitHub user ID. - <registry-name> is the existing Azure Container Registry instance that you created in the previous tutorial, or one that you can use.
- <client-id> is the value of the
appIdproperty from the previousaz ad sp create-for-rbaccommand. The ID is a GUID of the form00000000-0000-0000-0000-00000000. - <tenant-id> is the value of the
tenantproperty from the previousaz ad sp create-for-rbaccommand. The ID is also a GUID that's similar to the client ID. - <client-secret> is the value of the
passwordproperty from the previousaz ad sp create-for-rbaccommand.
- <resource-group-name> is the name of the resource group. In this tutorial, it's


In the configuration of continuous deployment, a service principal enables GitHub Actions to access and modify Azure resources. The roles assigned to the service principal restrict access to resources. The service principal was assigned the built-in Contributor role on the resource group that contains the container app.
If you followed the steps for the portal, the service principal was automatically created for you. If you followed the steps for the Azure CLI, you explicitly created the service principal before you configured continuous deployment.
Redeploy the web app with GitHub Actions
In this section, you make a change to your forked copy of the sample repository. After that, you can confirm that the change is automatically deployed to the website.
If you haven't already, make a fork of the sample repository (Django or Flask). You can make your code change directly in GitHub or in your development environment from a command line with Git.
Go to your fork of the sample repository and start in the main branch.
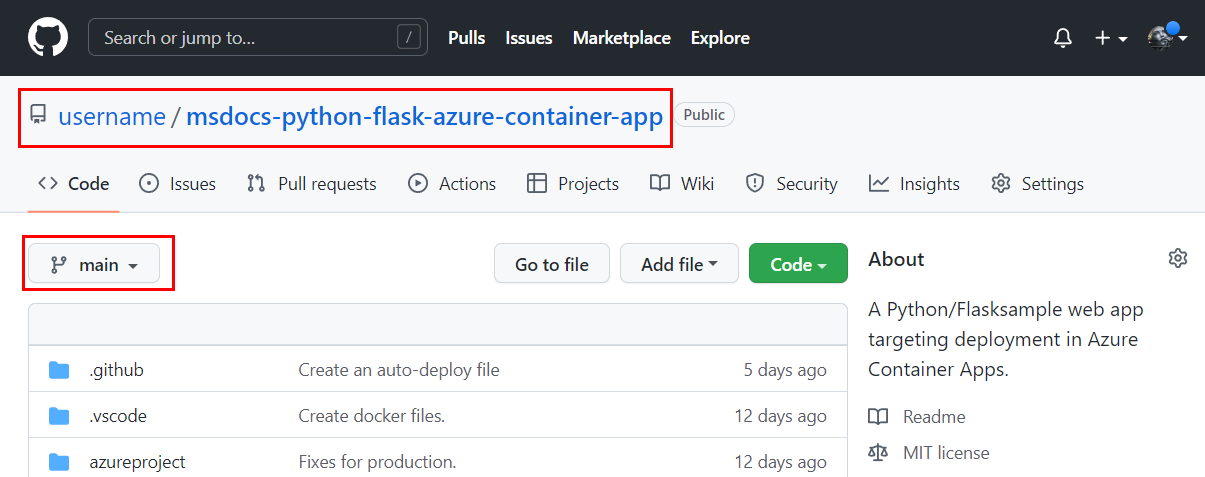
Make a change:
- Go to the /templates/base.html file. (For Django, the path is restaurant_review/templates/restaurant_review/base.html.)
- Select Edit and change the phrase
Azure Restaurant ReviewtoAzure Restaurant Review - Redeployed.

On the bottom of the page you're editing, make sure that Commit directly to the main branch is selected. Then select the Commit changes button.
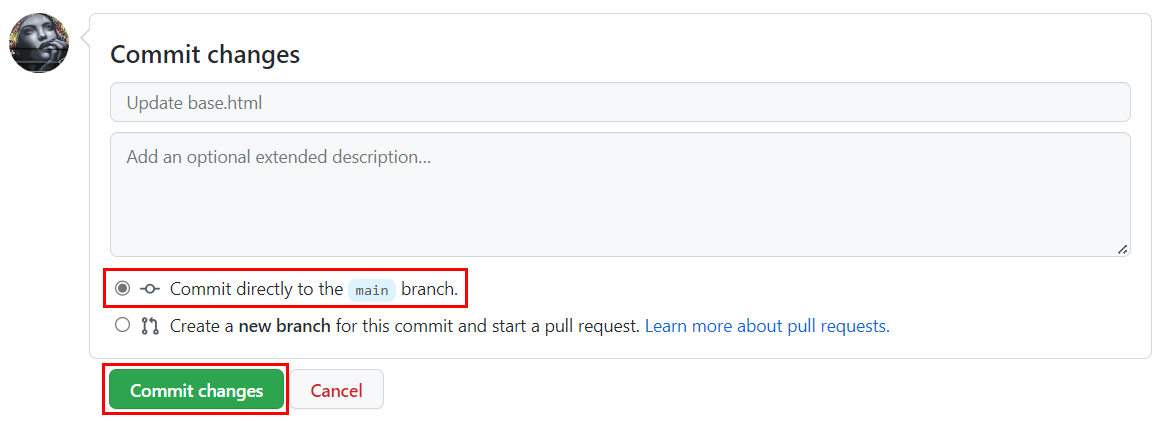


The commit kicks off the GitHub Actions workflow.
Note
This tutorial shows making a change directly in the main branch. In typical software workflows, you make a change in a branch other than main and then create a pull request to merge the change into main. Pull requests also kick off the workflow.
Understand GitHub Actions
Viewing workflow history
If you need to view the workflow history, use one of the following procedures.
On GitHub, go to your fork of the sample repository and open the Actions tab.

Workflow secrets
The .github/workflows/<workflow-name>.yml workflow file that was added to the repo includes placeholders for credentials that are needed for the build and container app update jobs of the workflow. The credential information is stored encrypted in the repository's Settings area, under Security > Secrets and variables > Actions.

If credential information changes, you can update it here. For example, if the Azure Container Registry passwords are regenerated, you need to update the REGISTRY_PASSWORD value. For more information, see Encrypted secrets in the GitHub documentation.
OAuth authorized apps
When you set up continuous deployment, you designate Azure Container Apps as an authorized OAuth app for your GitHub account. Container Apps uses the authorized access to create a GitHub Actions YAML file in .github/workflows/<workflow-name>.yml. You can view your authorized apps, and revoke permissions in your account, under Integrations > Applications.

Troubleshoot
You get errors while setting up a service principal via the Azure CLI
This section can help you troubleshoot errors that you get while setting up a service principal by using the Azure CLI az ad sp create-for-rba command.
If you get an error that contains "InvalidSchema: No connection adapters were found":
Check the shell that you're running in. If you're using a Bash shell, set the
MSYS_NO_PATHCONVvariables asexport MSYS_NO_PATHCONV=1.For more information, see the GitHub issue Unable to create service principal with Azure CLI from Git Bash shell.
If you get an error that contains "More than one application have the same display name":
- The name is already taken for the service principal. Choose another name, or leave off the
--nameargument. A GUID will be automatically generated as a display name.
GitHub Actions workflow failed
To check a workflow's status, go to the Actions tab of the repo:
- If there's a failed workflow, drill into the workflow file. There should be two jobs: build and deploy. For a failed job, check the output of the job's tasks to look for problems.
- If there's an error message that contains "TLS handshake timeout," run the workflow manually. In the repo, on the Actions tab, select Trigger auto deployment to see if the timeout is a temporary issue.
- If you set up continuous deployment for the container app as shown in this tutorial, the workflow file (.github/workflows/<workflow-name>.yml) is created automatically for you. You shouldn't need to modify this file for this tutorial. If you did, revert your changes and try the workflow.
Website doesn't show changes that you merged in the main branch
In GitHub:
- Check that the GitHub Actions workflow ran and that you checked the change into the branch that triggers the workflow.
In the Azure portal:
Check the Azure Container Registry instance to see if a new Docker image was created with a time stamp after your change to the branch.
Check the logs of the container app to see if there's a programming error:
- Go to the container app, and then go to Revision Management > <active container> > Revision details > Console logs.
- Choose the order of the columns to show Time Generated, Stream_s, and Log_s.
- Sort the logs by most recent and look for Python
stderrandstdoutmessages in the Stream_s column. Pythonprintoutput isstdoutmessages.
In the Azure CLI:
- Use the az containerapp logs show command.
You want to stop continuous deployment
Stopping continuous deployment means disconnecting your container app from your repo.
In the Azure portal:
- Go to the container app. On the service menu, select Continuous deployment, and then select Disconnect.
In the Azure CLI:
- Use the az container app github-action remove command.
After you disconnect:
- The .github/workflows/<workflow-name>.yml file is removed from your repo.
- Secret keys aren't removed from the repo.
- Azure Container Apps remains as an authorized OAuth app for your GitHub account.
- In Azure, the container is left with the last deployed container. You can reconnect the container app with the Azure Container Registry instance, so that new container revisions pick up the latest image.
- In Azure, service principals that you created and used for continuous deployment aren't deleted.
Remove resources
If you're done with the tutorial series and you don't want to incur extra costs, remove the resources that you used.
Removing a resource group removes all resources in the group and is the fastest way to remove resources. For an example of how to remove resource groups, see Containerize tutorial cleanup.
Related content
If you plan to build on this tutorial, here are some next steps that you can take: