Configure imaging for Dev Box team customizations
Using a customization file simplifies the creation of dev boxes for your team. With dev box customizations, you can create a shared team customization by creating a file called an image definition. Creating a reusable image from this image definition optimizes customizations and saves time during dev box creation. In this article, you learn how to configure a pool to use an image definition and build reusable images for your development teams.
To configure imaging for Microsoft Dev Box team customizations, enable project-level catalogs and configure catalog sync settings for the project. Then, attach a catalog that contains a definition file to your project, configure a dev box pool to use an image definition, and verify that the customizations apply to a new dev box. When the customizations apply correctly, you can choose to build a reusable image, which makes the creation of new dev boxes quicker.
Important
The Dev Box team customizations feature is currently in preview. For more information about the preview status, see the Supplemental Terms of Use for Microsoft Azure Previews. The document defines legal terms that apply to Azure features that are in beta, in preview, or otherwise not yet released into general availability.
Prerequisites
To complete the steps in this article, you need:
- A dev center with an existing dev box definition and network connection. If you don't have a dev center, follow the steps in Quickstart: Configure Microsoft Dev Box to create it.
- A team customization file that you want to use to create a dev box. If you don't have a customization file, see Write a customization file for a dev box.
Permissions required to configure customizations
To perform the required actions for creating and applying customizations to a dev box, you need the following permissions:
| Action | Permission/Role |
|---|---|
| Enable project-level catalogs for a dev center. | Platform engineer with write access on the subscription. |
| Enable catalog sync settings for a project. | Platform engineer with write access on the subscription. |
| Attach a catalog to a project. | Project Admin or Contributor permissions on the project. |
| Create a customization file. | None specified. Anyone can create a customization file. |
| Use the developer portal to upload and apply a YAML file during dev box creation. | Dev Box User. |
| Add tasks to a catalog. | Permission to add to the repository that hosts the catalog. |
To manage a dev box pool, you need the following permissions:
| Action | Permission |
|---|---|
| Create, delete, or update a dev box pool. | - Owner or Contributor permissions on an Azure subscription or a specific resource group. - DevCenter Project Admin permissions for the project. |
Enable project-level catalogs
To attach a catalog to a project, you must enable project-level catalogs. For more information, see Configure project-level catalogs.
Configure catalog sync settings for the project
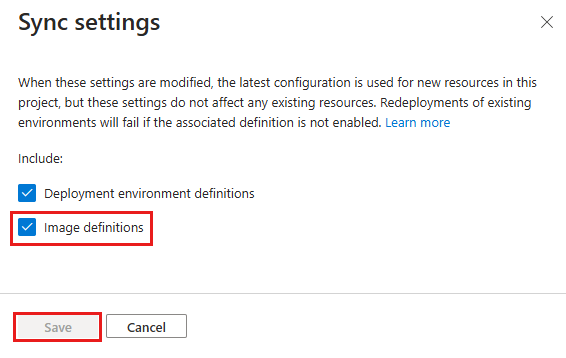
Configure your project to sync image definitions from the catalog. With this setting, you can use the image definitions in the catalog to create dev box pools.
Sign in to the Azure portal.
In the search box, enter projects. In the list of results, select Projects.
Open the Dev Box project for which you want to configure catalog sync settings.
Select Catalogs.
Select Sync settings.
On the Sync settings pane, select Image definitions, and then select Save.
Attach a catalog that contains the definition file
Before you can use a customization file as an image definition, you must attach a catalog that contains the definition file to your dev center or project. The catalog can be from GitHub or Azure Repos.
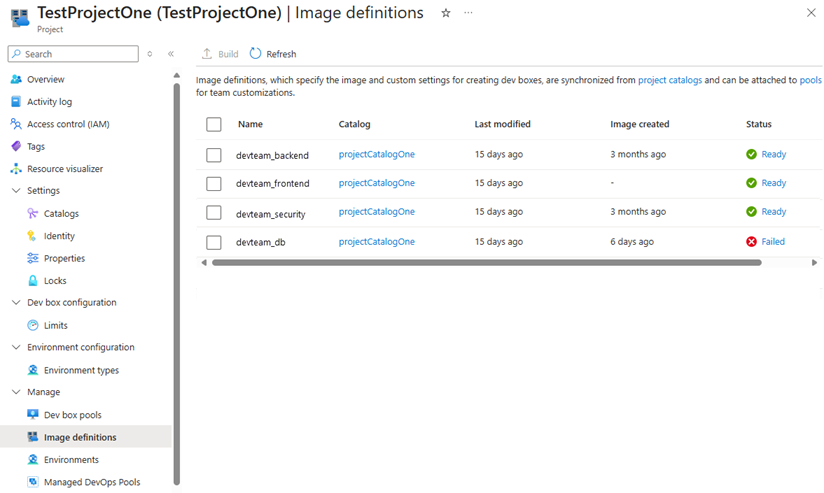
The Image definitions pane lists the image definitions that your project can access.
For more information about attaching catalogs, see Add and configure a catalog from GitHub or Azure Repos.
Configure a dev box pool to use an image definition
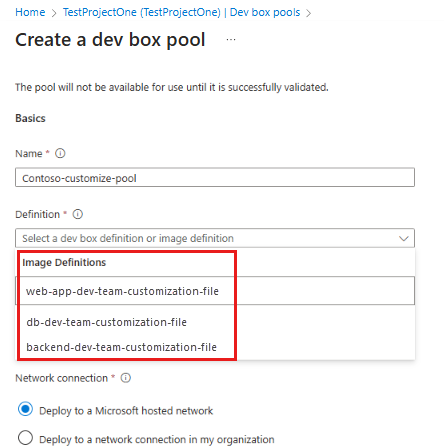
Make customizations available to your development teams by configuring a dev box pool to use a customization file (imagedefinition.yaml). Store the customization file in a repository that's linked to a catalog in your dev center or project. Specify this file as the image definition for the pool, and the customizations are applied to new dev boxes.
The following steps show you how to create a dev box pool and specify an image definition:
Sign in to the Azure portal.
In the search box, enter projects. In the list of results, select Projects.
Open the Dev Box project with which you want to associate the new dev box pool.
Select Dev box pools, and then select Create.
On the Create a dev box pool pane, enter the following values:
Setting Value Name Enter a name for the pool. The pool name is visible to developers to select when they're creating dev boxes. It must be unique within a project. Definition This box lists image definitions from accessible catalogs and dev box definitions. Select an image definition file. Network connection Select Deploy to a Microsoft hosted network, or use an existing network connection. Enable single sign-on Select Yes to enable single sign-on for the dev boxes in this pool. Single sign-on must be configured for the organization. For more information, see Enable single sign-on for dev boxes. Dev box Creator Privileges Select Local Administrator or Standard User. Enable Auto-stop Yes is the default. Select No to disable an auto-stop schedule. You can configure an auto-stop schedule after the pool is created. Stop time Select a time to shut down all the dev boxes in the pool. Time zone Select the time zone that the stop time is in. Licensing Select this checkbox to confirm that your organization has Azure Hybrid Benefit licenses that you want to apply to the dev boxes in this pool. Select Create.
Verify that the new dev box pool appears in the list. You might need to refresh the screen.
Create a dev box by using the developer portal
To verify that customizations from the image definition file are applied, create a dev box in the Microsoft Dev Box developer portal. Follow the steps in Quickstart: Create and connect to a dev box by using the Microsoft Dev Box developer portal. Then connect to the newly created dev box and verify that the customizations work as you expected.
You can make adjustments to the customization file and create a new dev box to test the changes. When you're happy that the customizations are correct, you can build a reusable image.
Build a reusable image
To optimize customizations and create a reusable image for your team, you can use the following steps to build an image from the customization file. This image applies to all dev boxes created from the pool. The DevCenter service creates a Dev Box behind the scenes to create an image, and exports the image to an Azure Compute Gallery in a resource group managed by the DevCenter service.
Assign roles to the DevCenter service
In order to generate an image, you need to assign the DevCenter service the requisite roles to publish an image.
Sign in to the Azure portal.
Select Resource Groups.
Search for the managed by resource group with the name DevCenter(yourProjectName)(a random ID).
Under that resource group, navigate to Access Control, and give the Windows 365 and Project Fidalgo applications the roles Storage Account Contributor, Storage Blob Data Contributor, and Reader.
Build the image
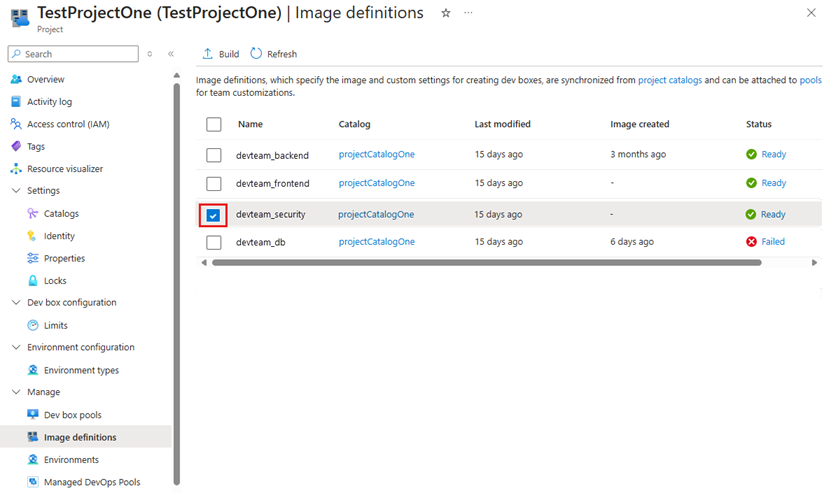
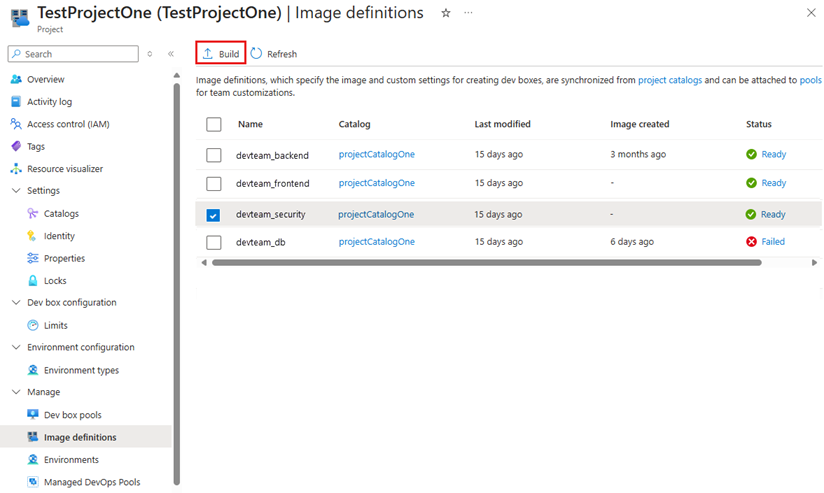
On the Image definitions pane, select the image that you want to build.
Select Build.
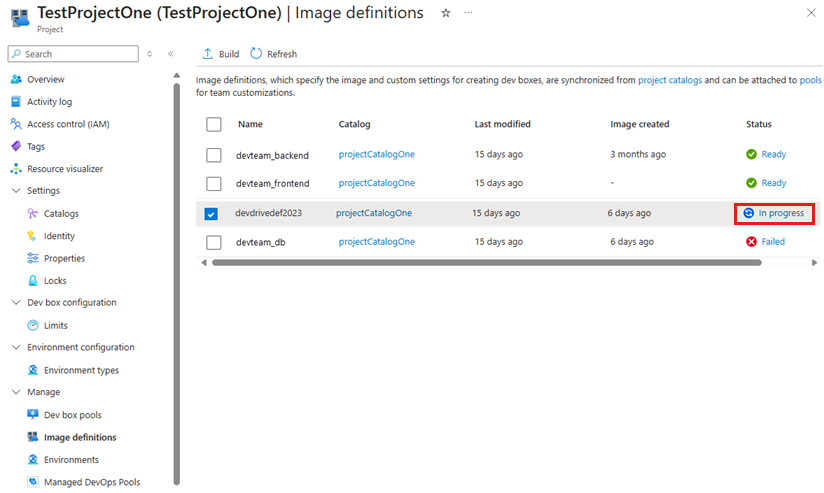
Track the build progress in the Status column.
Important
When you're optimizing your image definition into an image, a dev box is created to run your customization file and generate an image. During this process, this dev box is connected to a virtual network that Microsoft manages. Tasks that require access to on-premises resources might fail.
When the build finishes successfully, the dev box pool automatically uses the image for new dev boxes. You don't need to do any extra configuration to assign the image to the pool. You can now create dev boxes from the pool, and the customizations are applied to each dev box.

