Create risk assessment reports
Risk assessment reports provide details about security scores, vulnerabilities, and operational issues on devices detected by a specific OT network sensor, as well as risks coming from imported firewall rules.
Each Defender for IoT network sensor can generate a risk assessment report.
Prerequisites
To create risk assessment reports, you must be able to access the OT network sensor you want to generate data for:
You must be an Admin user to import firewall rules to an OT sensor or add backup and anti-virus server addresses.
You must be an Admin or Security Analyst user to create or view risk assessment reports on the OT sensor.
For more information, see On-premises users and roles for OT monitoring with Defender for IoT
Generate risk assessment reports from an OT sensor
Use an individual OT sensor to view reports generated for that sensor only.
To generate a report:
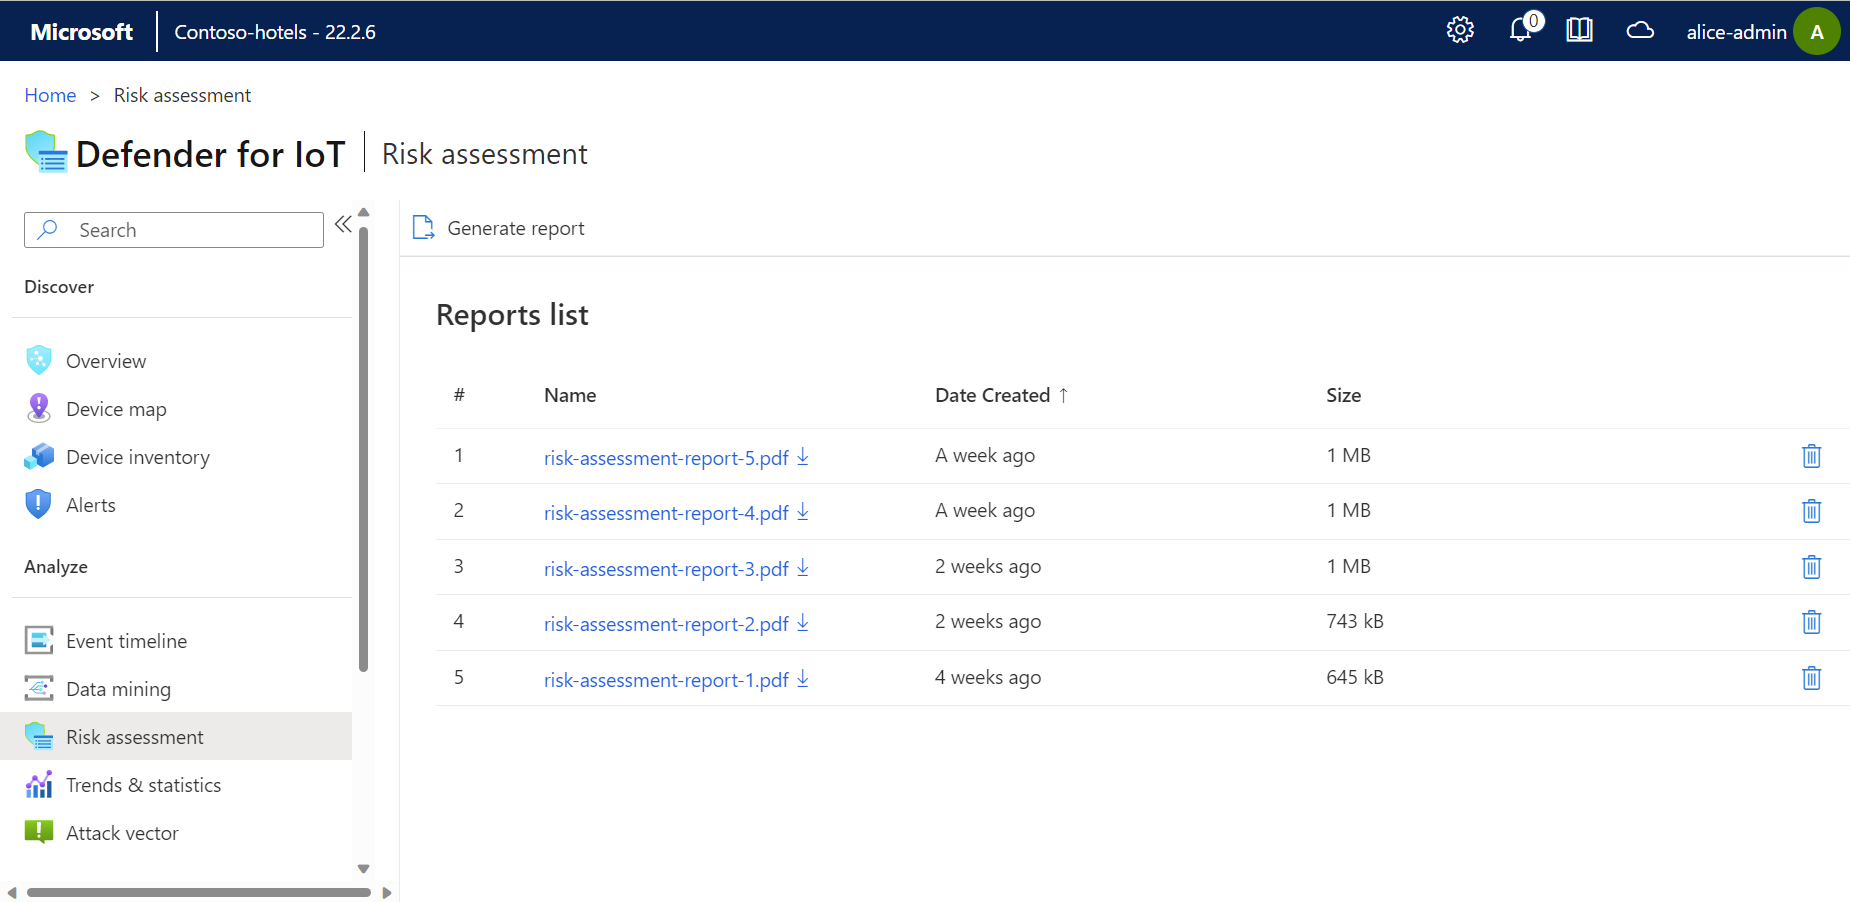
Sign in to the sensor console and select Risk assessment > Generate report. The report is generated and appears in the Reports list, along with the timestamp and report size.
For example:
Reports are automatically named
risk-assessment-report-<integer>, where the<integer>is incremented automatically.Select the report name to download it and open it in your browser.
Risk assessment report contents
Risk assessment reports include the following details:
| Details | Description |
|---|---|
| Security scores | An overall security score for all detected devices, and a security score for each individual device. Security scores are based on data learned from packet inspection, behavioral modeling engines, and a SCADA-specific state machine design, and are categorized as follows: - Secure Devices are devices with a security score above 90%. - Devices Needing Improvement are devices with a security score between 70 percent and 89%. - Vulnerable Devices are devices with a security score below 70%. |
| Security and operational issues | Insight into any of the following security and operational issues: - Configuration issues - Device vulnerability, prioritized by security level - Network security issues - Network operational issues - Connections to ICS networks - Internet connections - Industrial malware indicators - Protocol issues - Attack vectors |
| Firewall rule risk | The Risk Assessment report highlights if a rule isn't secure, or if there's a mismatch between the rule and the monitored network. |
Enrich the risk assessment report
Enrich your sensor with extra data to provide fuller risk assessment reports:
- Import firewall rules to have them assessed for risks in the report
- Lower your risk by defining addresses for your backup and anti-virus server
Import firewall rules to an OT sensor
Import firewall rules to your OT sensor for analysis in Risk assessment reports. Importing firewall rules is supported for the following firewalls:
| Name | Description | File type |
|---|---|---|
| Check Point | Firewall export to R77 | .ZIP |
| Fortinet | Configuration backup | .CONF |
| Juniper | ScreenOS CLI configuration | .TXT |
To import firewall rules:
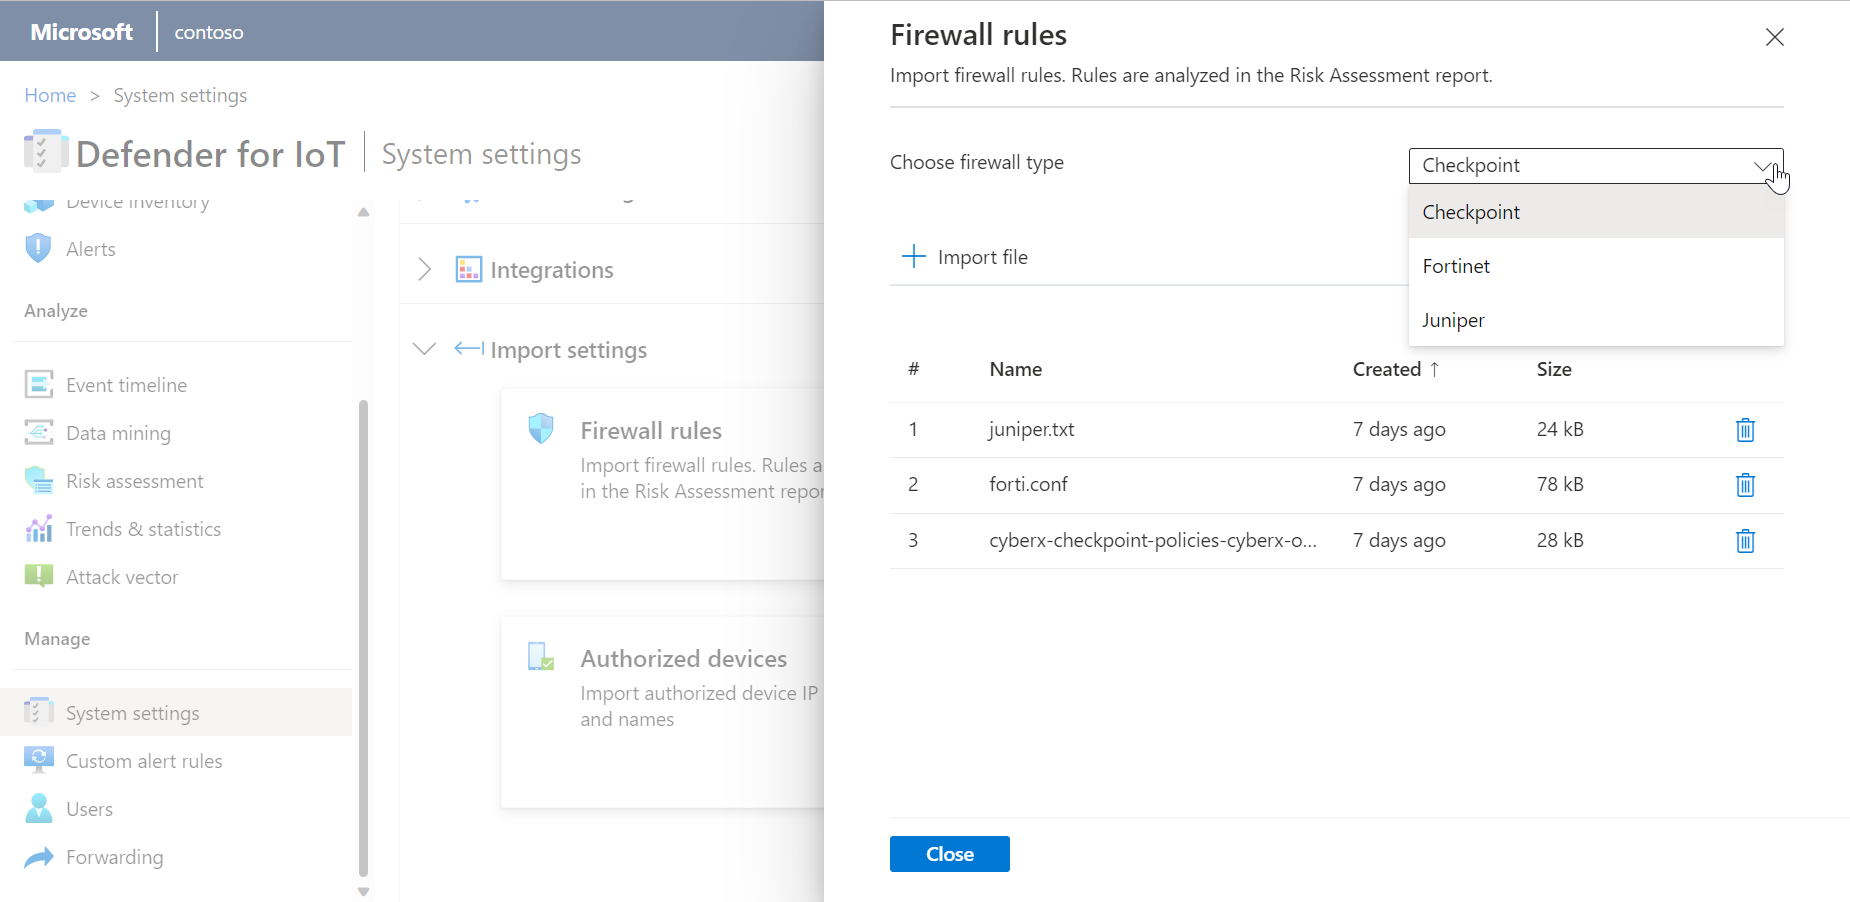
Sign in to your sensor as an Admin user and elect System Settings > Import settings > Firewall rules.
In the Firewall rules pane:
- Select a firewall type from the dropdown menu
- Select + Import file to browse to and select the file you want to import.
For example:
Define backup and anti-virus servers on an OT sensor
Backup and anti-virus servers aren't defined on your sensor by default. We recommend defining these addresses on your sensor to keep your network risk assessment low.
To add backup and anti-virus server addresses:
- Sign into your OT sensor and select System Settings > System Properties > Vulnerability Assessment.
- Add your backup and anti-virus server addresses to the backup_servers and AV_addresses fields, respectively. Use commas to separate multiple addresses.
- Select Save to save your changes.
View risk assessment reports for multiple sensors
Use an OT sensor to view risk assessment reports for all connected sensors.
To generate a report:
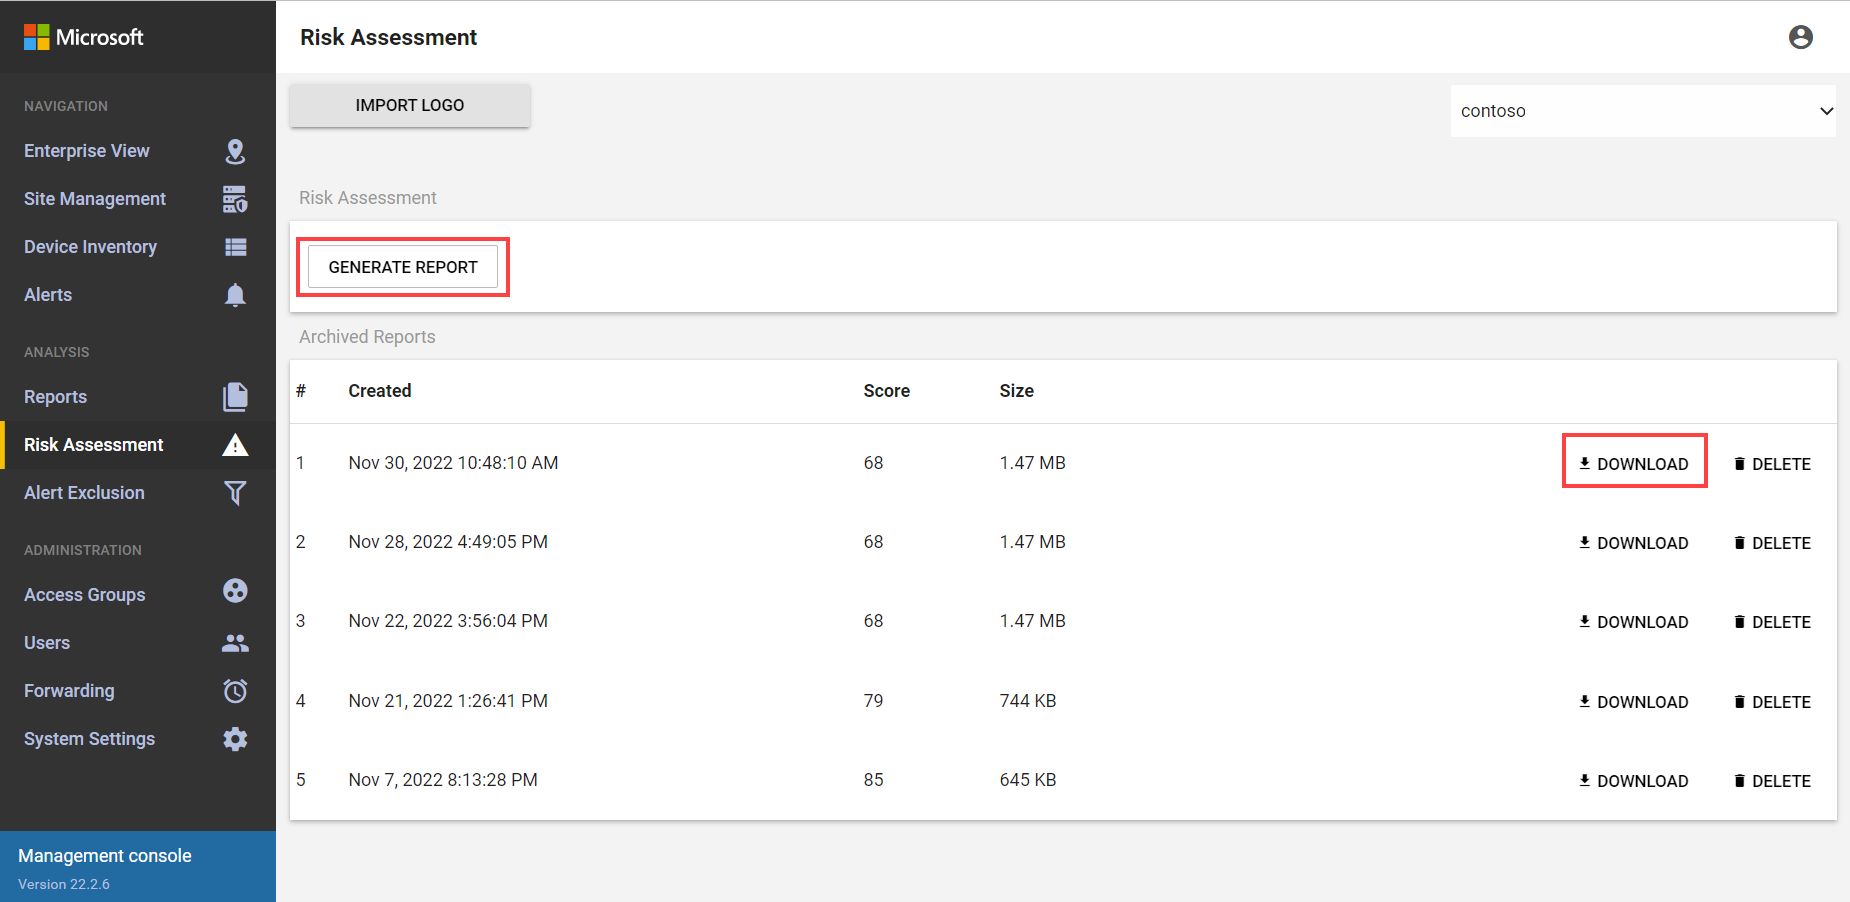
Sign in to your OT sensor and select Risk assessment.
From the Select Sensor drop-down menu, select the sensor for which you want to generate the report, and then select Generate Report.
A new report is listed in the Archived Reports area, listed by the time and date it was created, and showing the security score and report size.
For example:
Select Download to download a report and open it in your browser.
Next steps
Take action based on the recommendations provided in the risk assessment reports to improve your overall network security score. For example, you might install the latest security or firmware updates, or investigate any PLCs that are currently in unsecure states.
For more information, see Enhance security posture with security recommendations.
Continue creating other reports for more security data from your OT sensor. For more information, see:


