Critical assets protection in Microsoft Defender for Cloud
Critical assets protection enables security administrators to automatically tag the "crown jewel" resources that are most critical to their organizations, allowing Defender for Cloud to provide them with the highest level of protection and prioritize security issues on these assets above anything else.
Defender for Cloud suggests pre-defined classification rules that were developed by our research team to discover critical assets automatically, and allows you to create custom classification rules based on your business and organizational conventions.
Critical asset rules are bi-directionally synced with Microsoft Security Exposure Management - rules that were created in Microsoft Security Exposure Management are synced to Defender for Cloud, and vice versa. Learn more about critical assets protection in Microsoft Security Exposure Management.
Availability
| Aspect | Details |
|---|---|
| Release state | General Availability |
| Prerequisites | Defender Cloud Security Posture Management (CSPM) enabled |
| Required Microsoft Entra ID built-in roles: | To create/edit/read classification rules: Security Operator or higher To read classification rules: Global Reader, Security Reader |
| Clouds: | All commercial clouds |
Set up critical asset rules
Sign in to the Azure portal.
Navigate to Microsoft Defender for Cloud > Environment Settings.
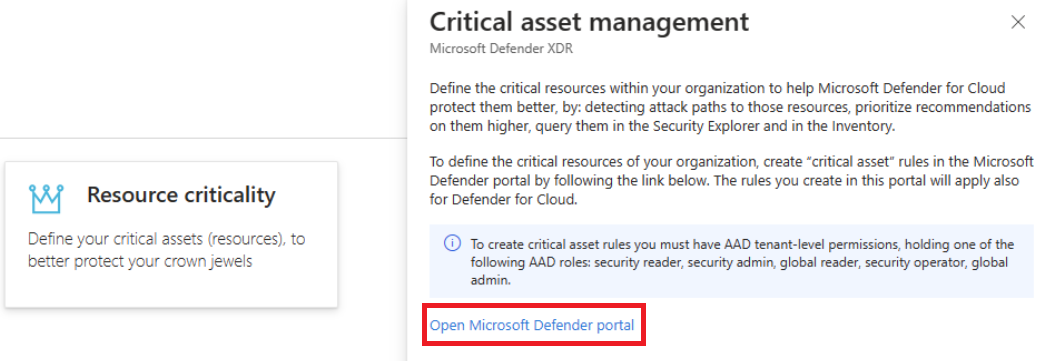
Select the Resource criticality tile.
The Critical asset management pane opens. Select Open Microsoft Defender portal."
You then arrive at the Critical asset management page in the Microsoft Defender XDR portal.
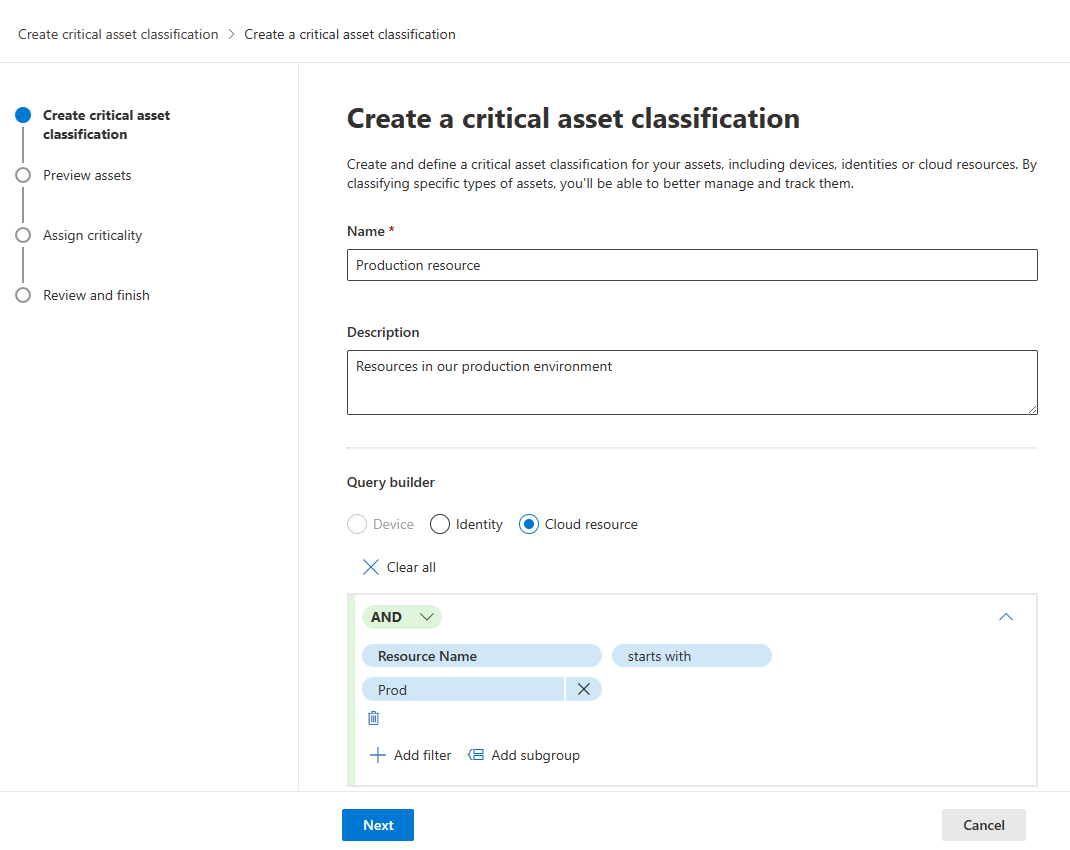
To create custom critical asset rules to tag your resources as Critical resources in Defender for Cloud, select the Create a new classification button.
Add a name and description for your new classification, and use under Query builder, select Cloud resource to build your critical assets rule. Then select Next.
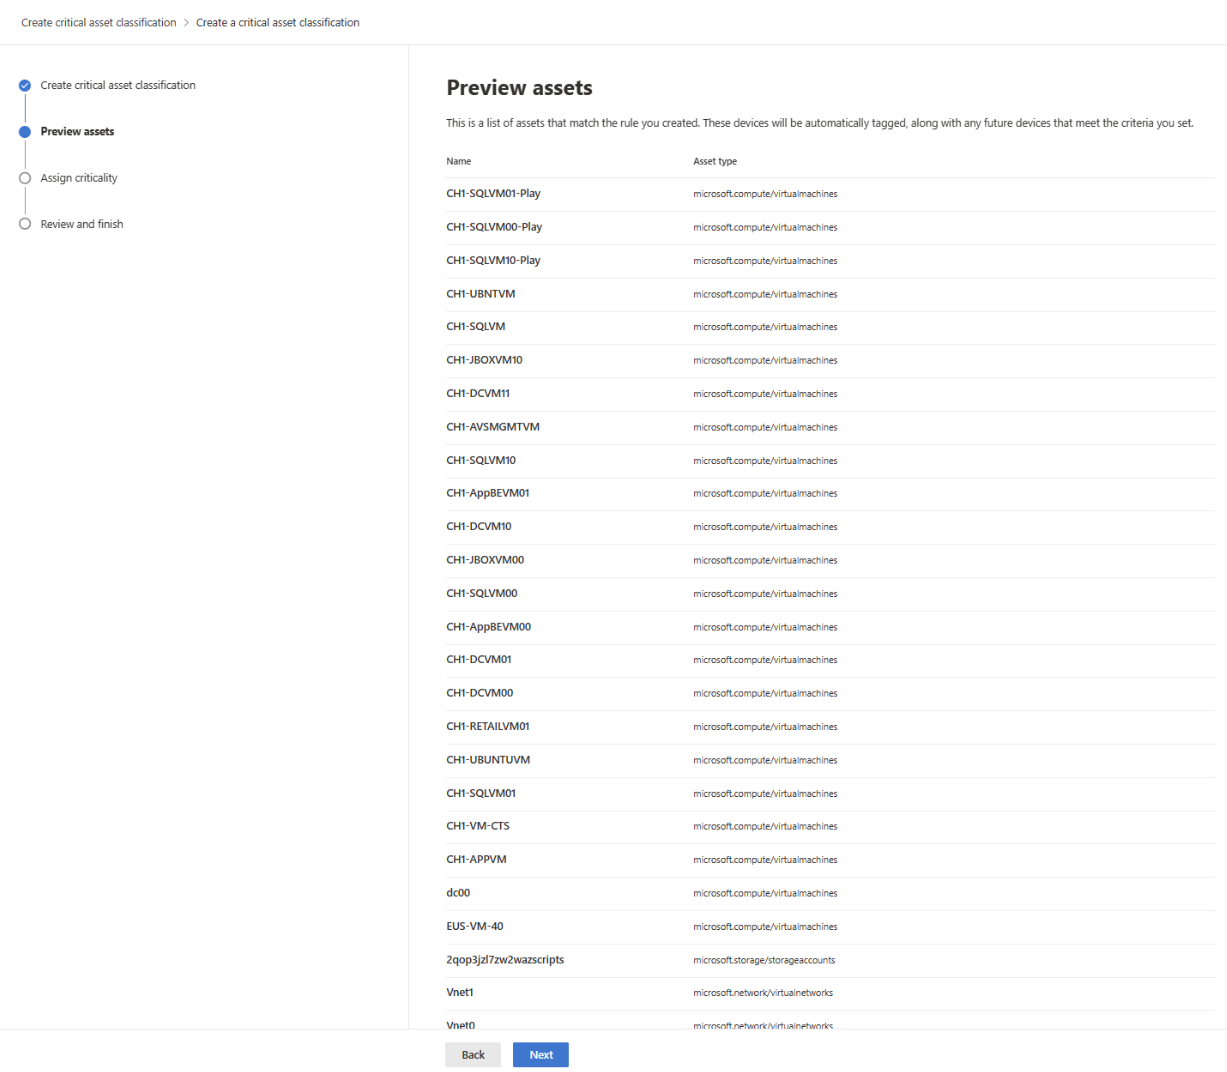
On the Preview assets page, you can see a list of assets that match the rule you created. After reviewing the page, select Next.
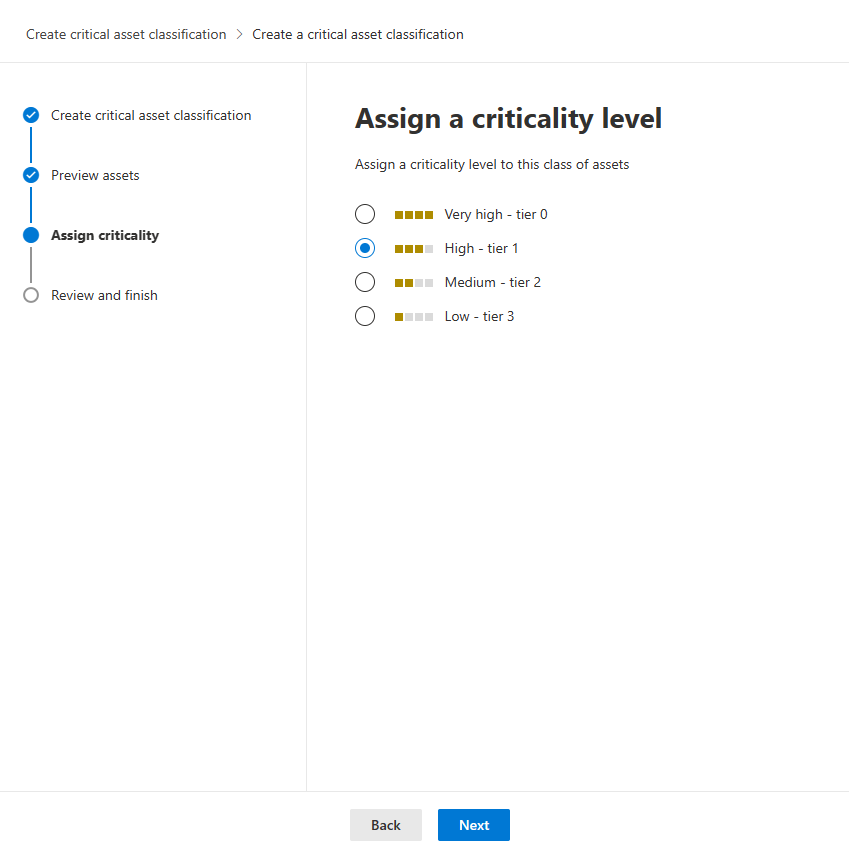
On the Assign criticality page, assign the criticality level to all assets matching the rule. Then select Next.
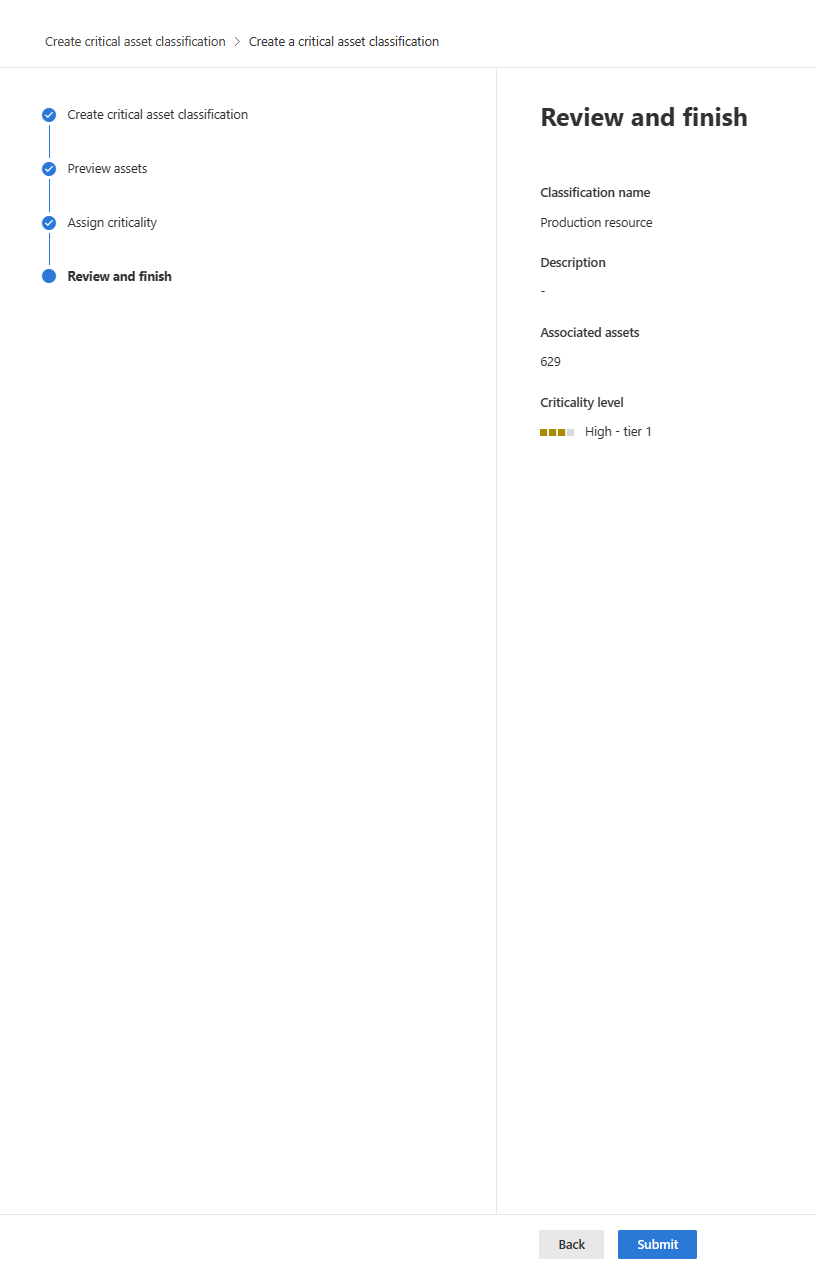
You can then see the Review and finish page. Review the results, and once you approve, select Submit.
After you select Submit, you can close the Microsoft Defender XDR portal. You should wait for up to two hours until all assets matching your rule are tagged as Critical.
Note
Your critical asset rules apply to all the resources in the tenant that match the rule's condition.
View and protect your critical assets in Defender for Cloud
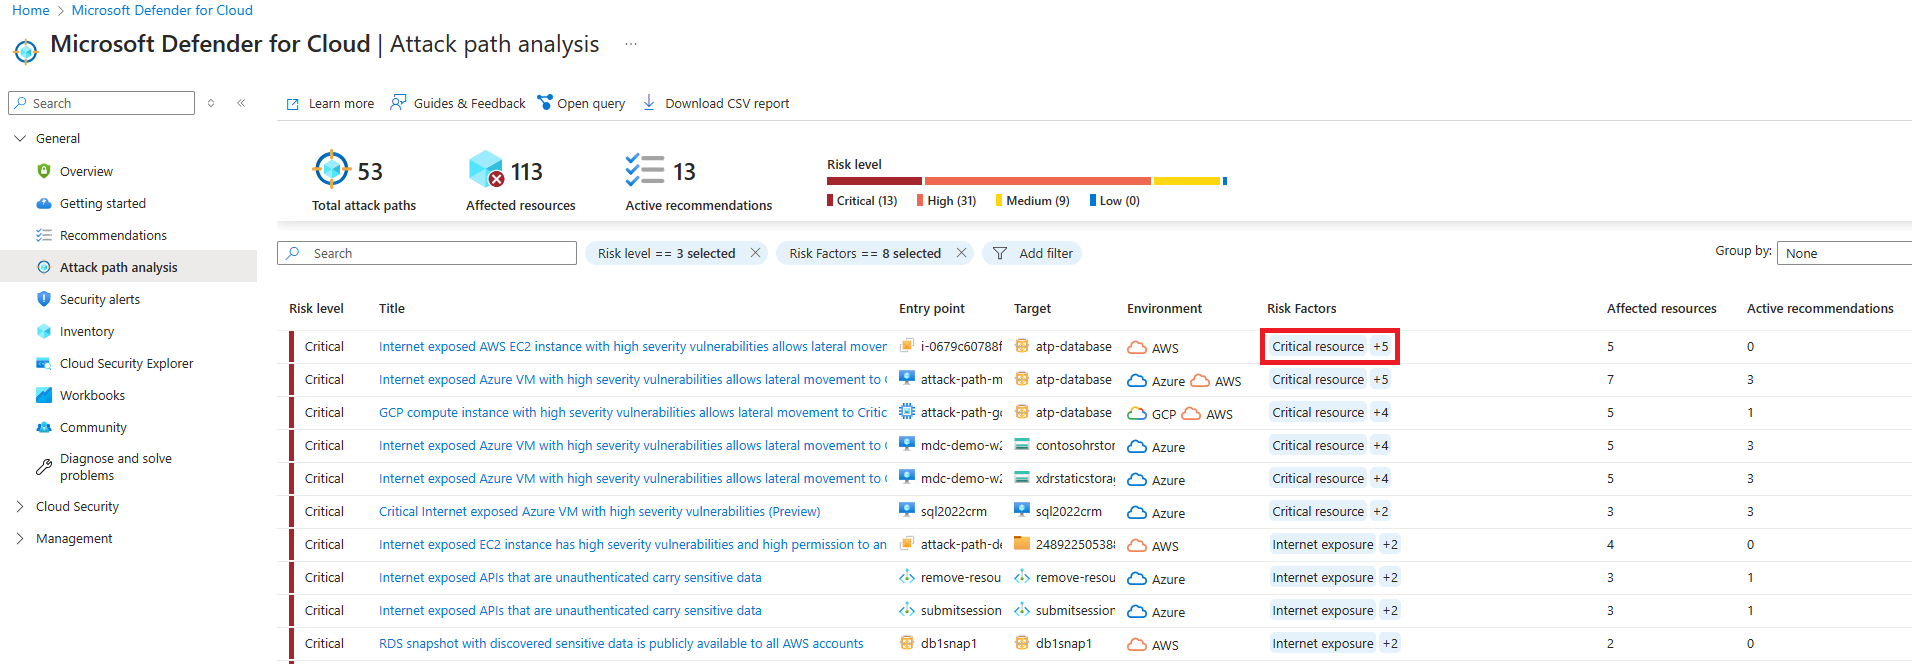
Once your assets are updated, go to the Attack path analysis page in Defender for Cloud. You can see all the attack paths to your critical assets.
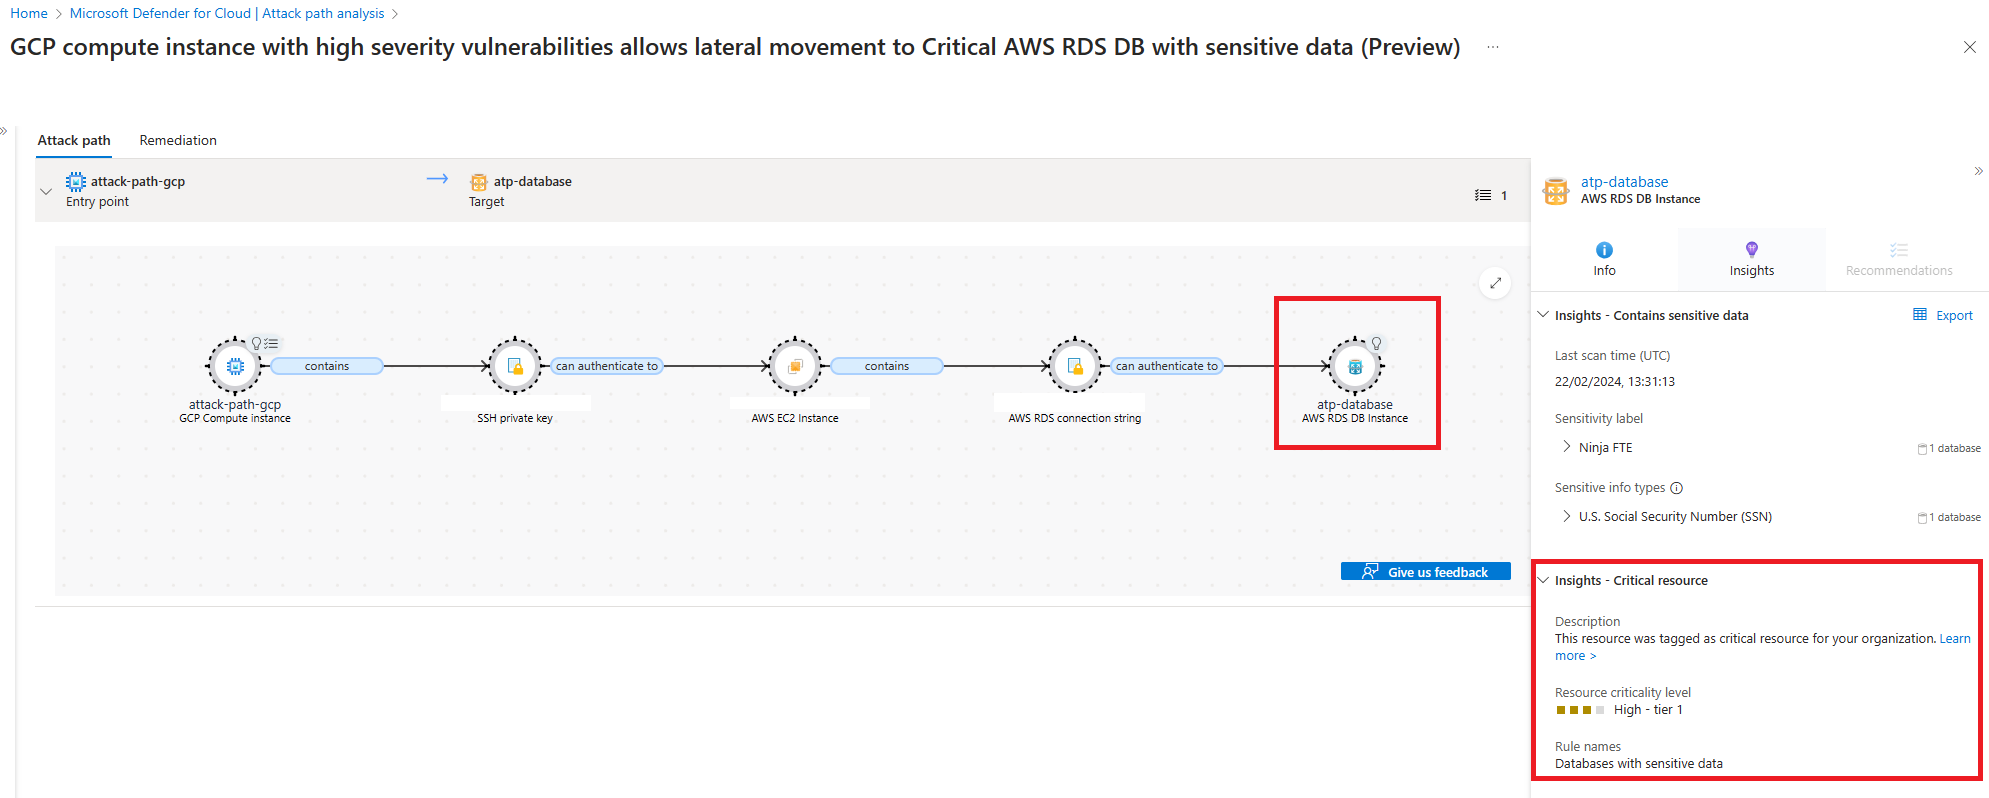
If you select an attack path title, you can see its details. Select the target, and under Insights - Critical resource, you can see the critical asset tagging information.
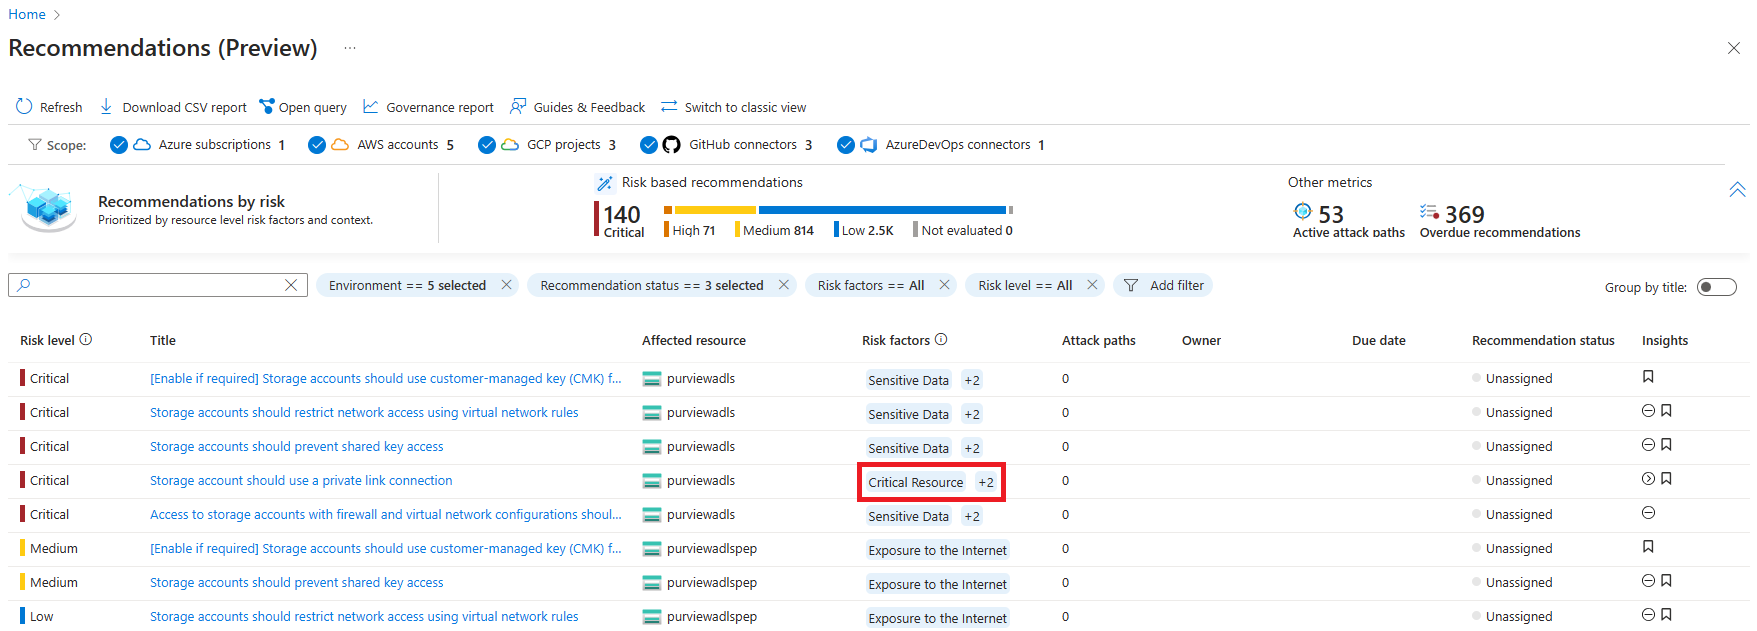
In the Recommendations page of Defender for Cloud, select the Preview available banner to see all the recommendations, which are now prioritized based on asset criticality.
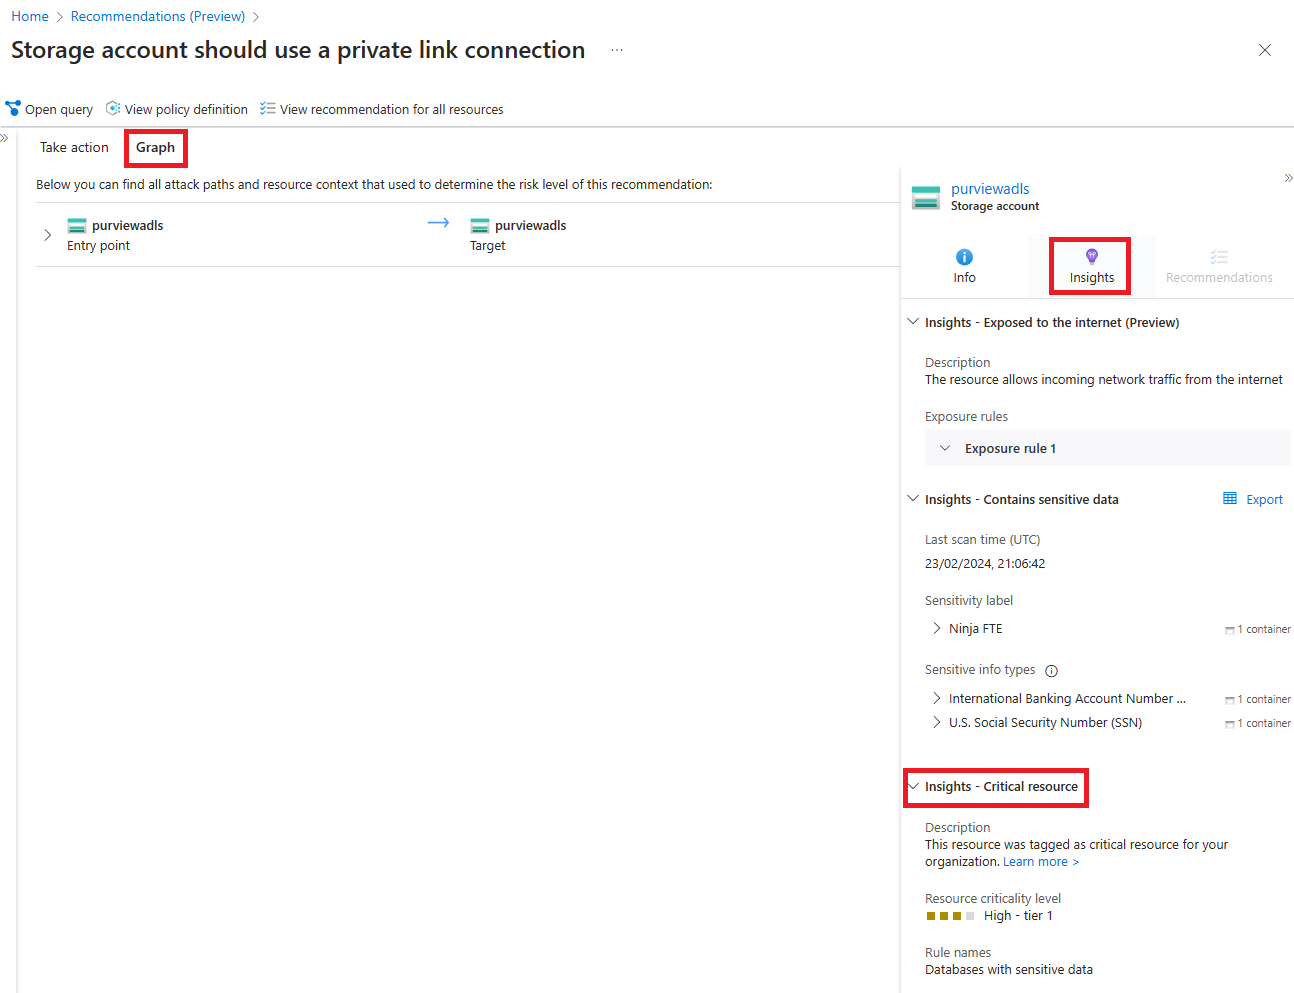
Select a recommendation, and then choose the Graph tab. Then choose the target, and select the Insights tab. You can see the critical asset tagging information.
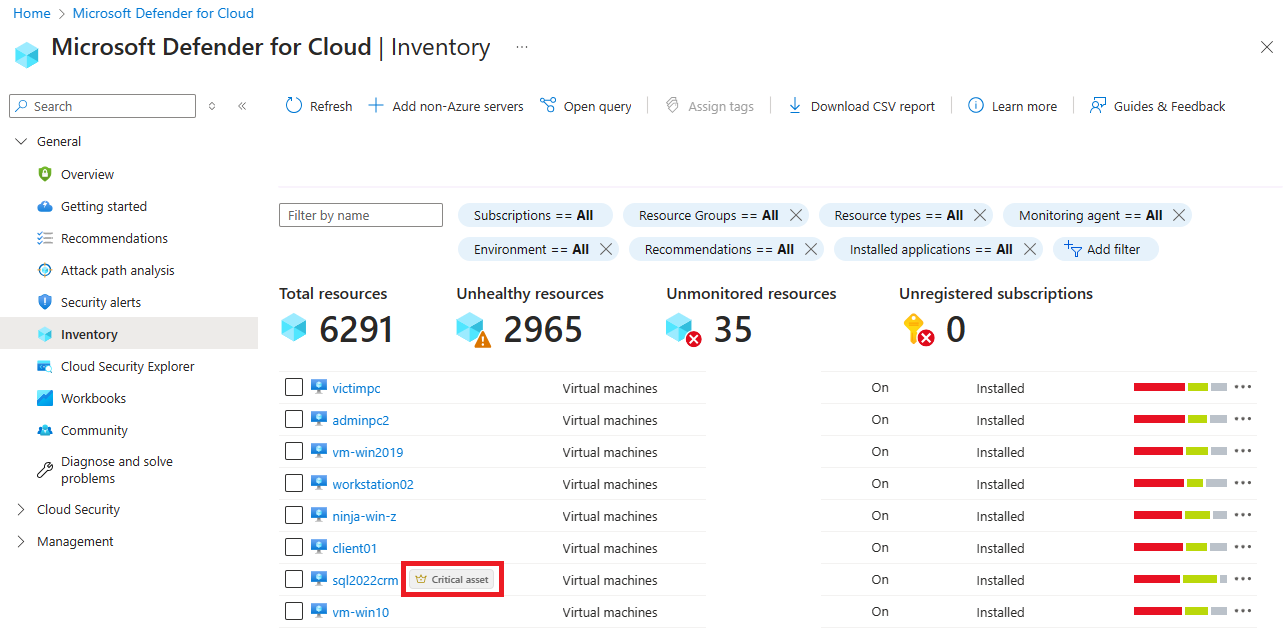
In the Inventory page of Defender for Cloud, you can see the critical assets in your organization.
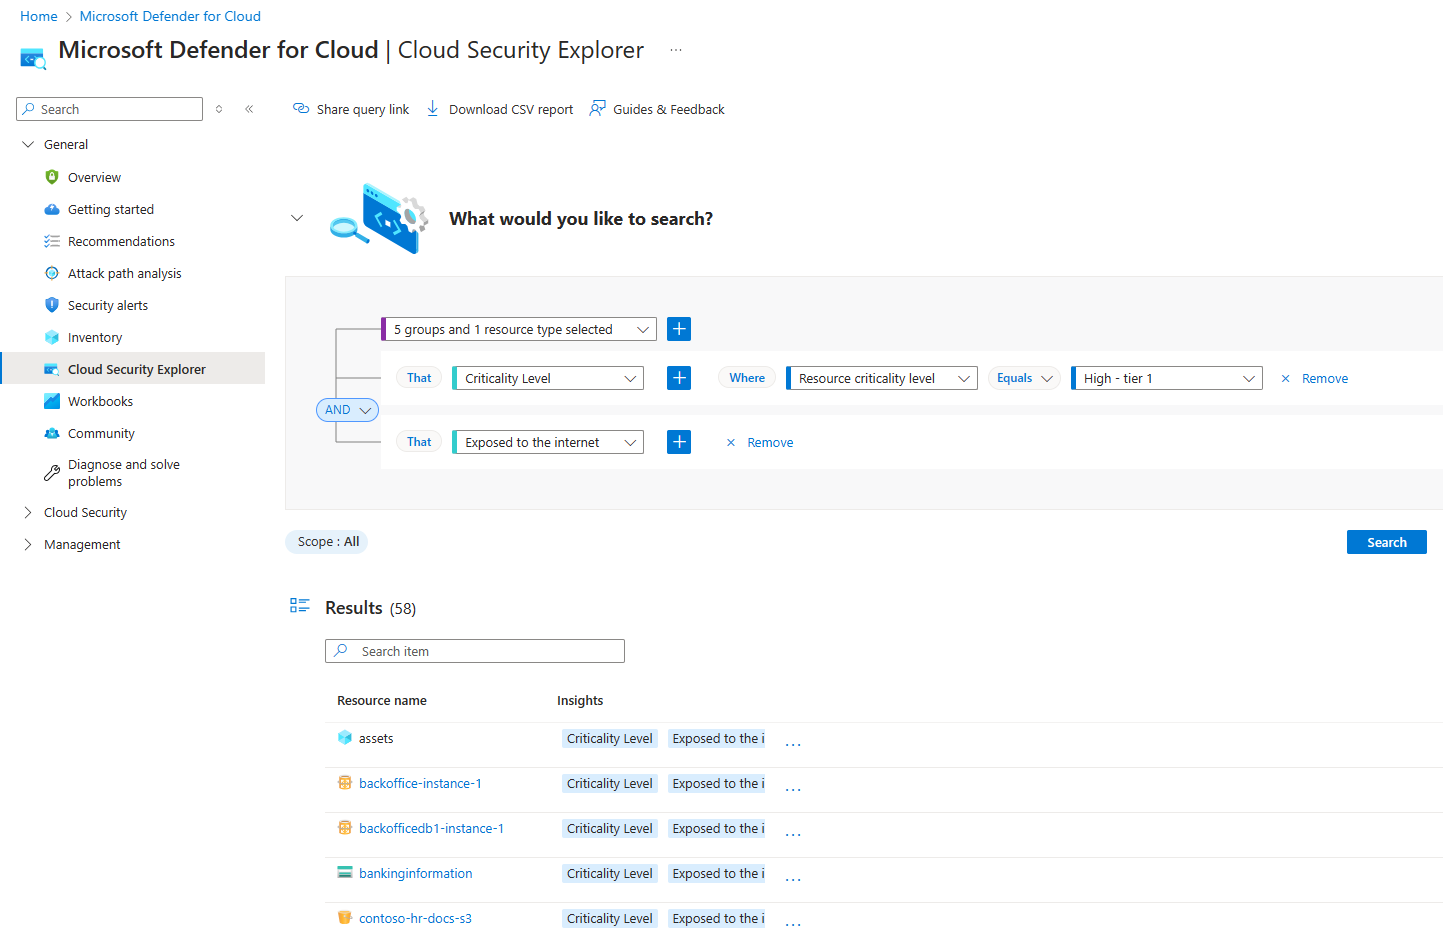
To run custom queries on your critical assets, go to the Cloud Security Explorer page in Defender for Cloud.
Related content
For more information about improving your cloud security posture, see Cloud security posture management (CSPM).

