Notebook compute resources
This article covers the options for notebook compute resources. You can run a notebook on an all-purpose compute resource, serverless compute, or, for SQL commands, you can use a SQL warehouse, a type of compute-optimized for SQL analytics. For more on compute types, see Compute.
Serverless compute for notebooks
Serverless compute allows you to quickly connect your notebook to on-demand computing resources.
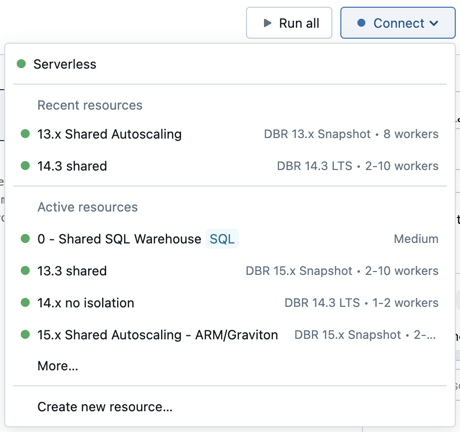
To attach to the serverless compute, click the Connect drop-down menu in the notebook and select Serverless.
See Serverless compute for notebooks for more information.
Attach a notebook to an all-purpose compute resource
To attach a notebook to an all-purpose compute resource, you need the CAN ATTACH TO permission on the compute resource.
Important
As long as a notebook is attached to a compute resource, any user with the CAN RUN permission on the notebook has implicit permission to access the compute resource.
To attach a notebook to a compute resource, click the compute selector in the notebook toolbar and select the resource from the dropdown menu.
The menu shows a selection of all-purpose compute and SQL warehouses you have used recently or are currently running.

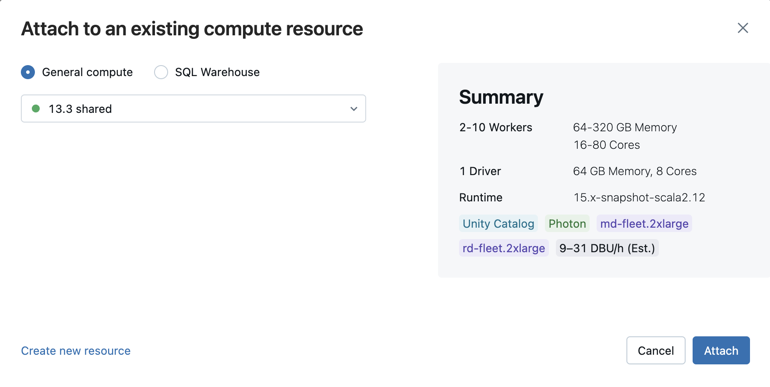
To select from all available compute, click More…. Select from the available general compute or SQL warehouses.

You can also create a new all-purpose compute resource by selecting Create new resource… from the dropdown menu.
Important
An attached notebook has the following Apache Spark variables defined.
| Class | Variable Name |
|---|---|
SparkContext |
sc |
SQLContext/HiveContext |
sqlContext |
SparkSession (Spark 2.x) |
spark |
Do not create a SparkSession, SparkContext, or SQLContext. Doing so will lead to inconsistent behavior.
Use a notebook with a SQL warehouse
When a notebook is attached to a SQL warehouse, you can run SQL and Markdown cells. Running a cell in any other language (such as Python or R) throws an error. SQL cells executed on a SQL warehouse appear in the SQL warehouse’s query history. The user who ran a query can view the query profile from the notebook by clicking the elapsed time at the bottom of the output.
Running a notebook requires a pro or serverless SQL warehouse. You must have access to the workspace and the SQL warehouse.
To attach a notebook to a SQL warehouse do the following:
Click the compute selector in the notebook toolbar. The dropdown menu shows compute resources that are currently running or that you have used recently. SQL warehouses are marked with
 .
.From the menu, select a SQL warehouse.
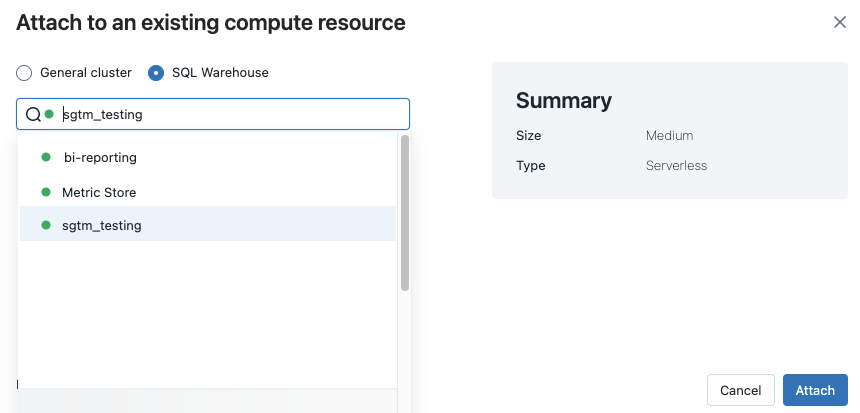
To see all available SQL warehouses, select More… from the dropdown menu. A dialog appears showing compute resources available for the notebook. Select SQL Warehouse, choose the warehouse you want to use, and click Attach.

You can also select a SQL warehouse as the compute resource for a SQL notebook when you create a workflow or scheduled job.
SQL warehouse limitations
See Known limitations Databricks notebooks for more information.
Detach a notebook
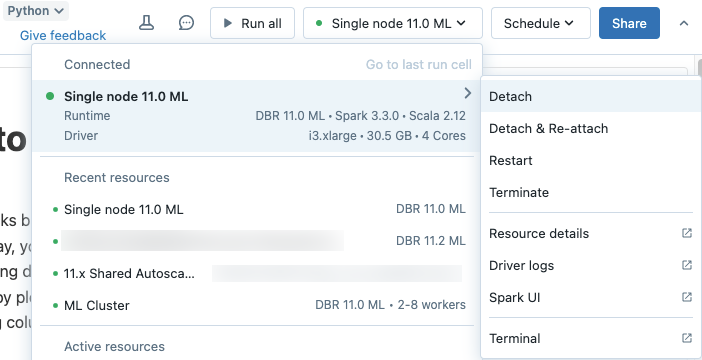
To detach a notebook from a compute resource, click the compute selector in the notebook toolbar and hover over the attached compute in the list to display a side menu. From the side menu, select Detach.

You can also detach notebooks from a an all-purpose compute resource using the Notebooks tab on the compute’s details page.
Tip
Azure Databricks recommends that you detach unused notebooks from compute. This frees up memory space on the driver.