Tutorial: Transfer data via storage accounts with Azure Stack Edge Pro GPU
APPLIES TO:  Azure Stack Edge Pro - GPU
 Azure Stack Edge Pro 2
 Azure Stack Edge Pro R
 Azure Stack Edge Mini R
This tutorial describes how to add and connect to storage accounts on your Azure Stack Edge Pro device. After you've added the storage accounts, Azure Stack Edge Pro can transfer data to Azure.
This procedure can take around 30 minutes to complete.
In this tutorial, you learn how to:
- Add a storage account
- Connect to the storage account
Prerequisites
Before you add storage accounts to Azure Stack Edge Pro, make sure that:
You've installed your physical device as described in Install Azure Stack Edge Pro.
You've activated the physical device as described in Activate your Azure Stack Edge Pro.
Add an Edge storage account
To create an Edge storage account, do the following procedure:
In the Azure portal, select your Azure Stack Edge resource and then go to the Overview. Your device should be online. Go to Cloud storage gateway > Storage accounts.
Select + Add storage account on the device command bar.
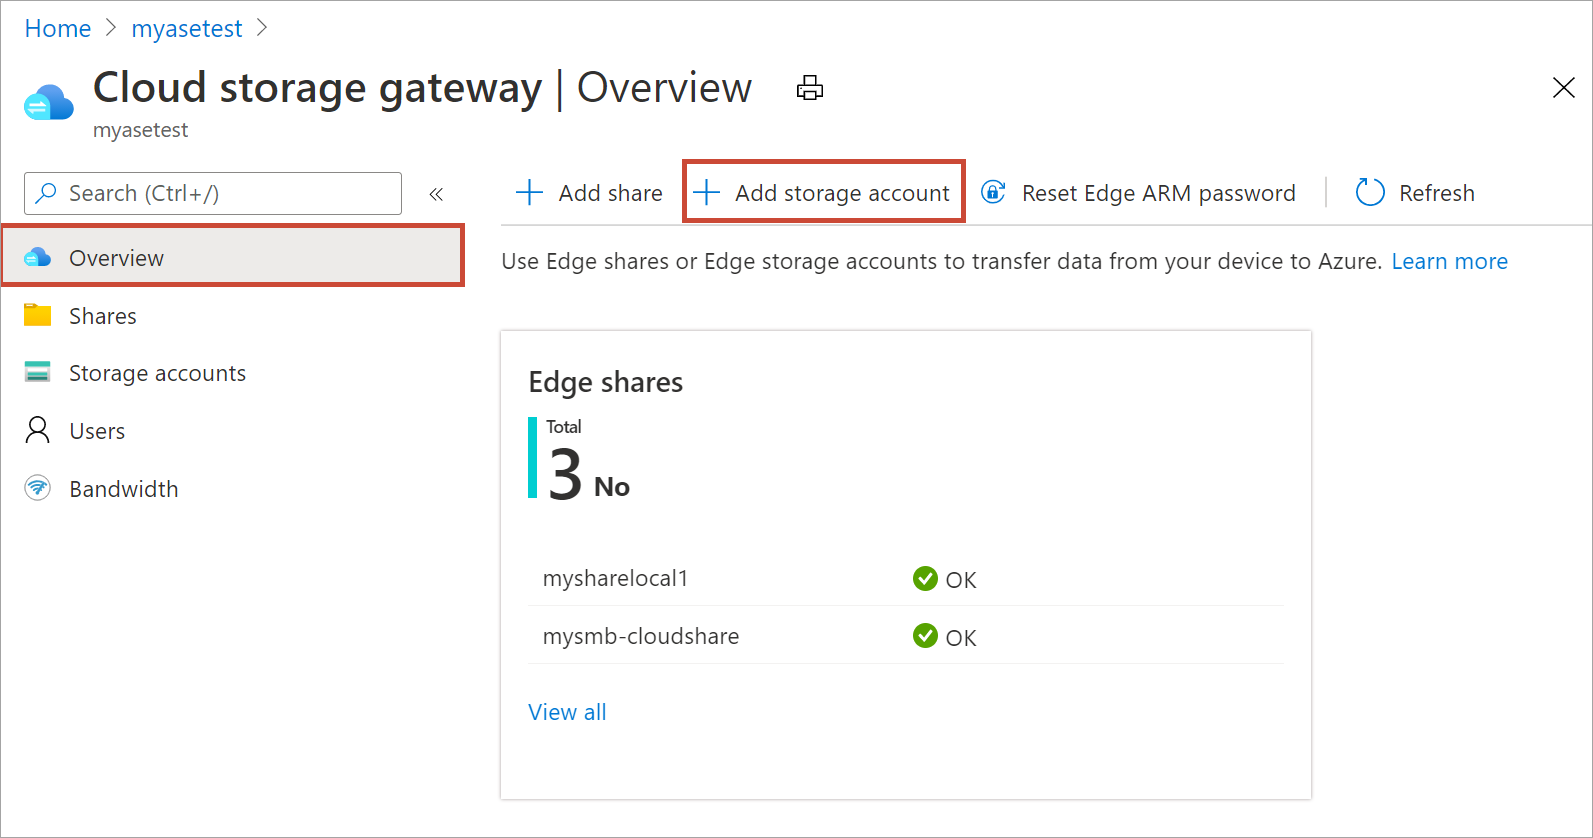
In the Add Edge storage account pane, specify the following settings:
Provide a unique name for the Edge storage account on your device. Storage account names can only contain lowercase numbers and letters. Special characters are not allowed. Storage account name has to be unique within the device (not across the devices).
Provide an optional description for the information on the data the storage account is holding.
By default, the Edge storage account is mapped to an Azure Storage account in the cloud, and the data from the storage account is automatically pushed to the cloud. Specify the Azure storage account that your Edge storage account is mapped to.
Important
Tiering data from an Azure Stack Edge Pro device to the mapped Azure Storage account uses Managed Service Identity to authorize the data access. Make sure that the Azure Storage account that you use has the following roles being assigned to the Managed identities for Azure Stack Edge resource:
- Storage Blob Data Contributor
- Storage File Data Privileged Contributor
- Contributor
For more information, see Assign an Azure role for access to blob data.
Create a new container, or select from an existing container in the Azure storage account. Any data from the device that is written to the Edge storage account is automatically uploaded to the selected storage container in the mapped Azure Storage account.
After all the storage account options are specified, select Add to create the Edge storage account. You are notified when the Edge storage account is successfully created. The new Edge storage account is then displayed in the list of storage accounts in the Azure portal.
If you select this new storage account and go to Access keys, you can find the blob service endpoint and the corresponding storage account name. Copy this information as these values together with the access keys will help you connect to the Edge storage account.

You get the access keys by Connecting to the device local APIs using Azure Resource Manager.
Connect to the Edge storage account
You can now connect to Edge storage REST APIs over http or https.
- Https is the secure and recommended way.
- Http is used when connecting over trusted networks.
Connect via http
Connection to Edge storage REST APIs over http requires the following steps:
- Add the Azure consistent service VIP and blob service endpoint to the remote host
- Verify the connection
Each of these steps is described in the following sections.
Add device IP address and blob service endpoint to the remote client
Go to the local web UI of your device and sign into your device. Ensure that the device is unlocked.
Go to the Network settings page. Make a note of the device IP address for the network interface used to connect to the client.
If working with a remote Windows client, start Notepad as an administrator, and then open the hosts file located at
C:\Windows\System32\Drivers\etc.Add the following entry to your hosts file:
<Device IP address> <Blob service endpoint>You got the blob service endpoint from the Edge storage account created in the Azure portal. You will use the suffix of the blob service endpoint only.
For reference, use the following image. Save the
hostsfile.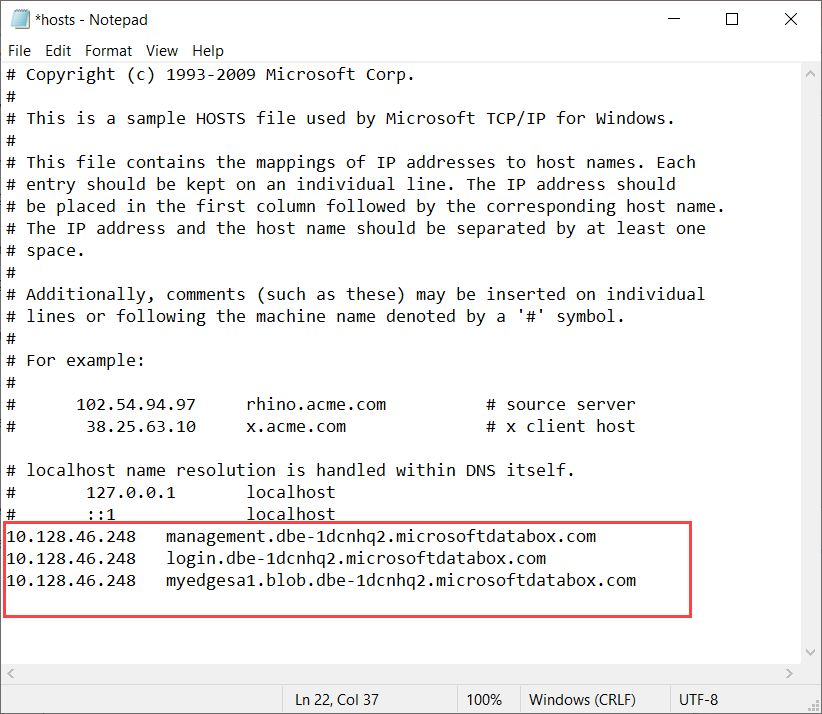
Verify connection
To verify the connection, you would typically need the following information (may vary) you gathered in the previous step:
- Storage account name.
- Storage account access key.
- Blob service endpoint.
You already have the storage account name and the blob service endpoint. You can get the storage account access key by connecting to the device via the Azure Resource Manager using an Azure PowerShell client.
Follow the steps in Connect to the device via Azure Resource Manager. Once you have signed into the local device APIs via the Azure Resource Manager, get the list of storage accounts on the device. Run the following cmdlet:
Get-AzureRMStorageAccount
From the list of the storage accounts on the device, identify the storage account for which you need the access key. Note the storage account name and resource group.
A sample output is shown below:
PS C:\windows\system32> Get-AzureRmStorageAccount

StorageAccountName ResourceGroupName Location SkuName     Kind    AccessTier CreationTime          ProvisioningState EnableHttpsTrafficOnly
------------------ ----------------- -------- -------     ----    ---------- ------------          ----------------- ----------------------
myasetiered1       myasetiered1      DBELocal StandardLRS Storage            11/27/2019 7:10:12 PM Succeeded         False
To get the access key, run the following cmdlet:
Get-AzureRmStorageAccountKey
A sample output is shown below:
PS C:\windows\system32> Get-AzureRmStorageAccountKey

cmdlet Get-AzureRmStorageAccountKey at command pipeline position 1
Supply values for the following parameters:
(Type !? for Help.)
ResourceGroupName: myasetiered1
Name: myasetiered1

KeyName Value    Permissions
------- -----    -----------
key1    Jb2brrNjRNmArFcDWvL4ufspJjlo+Nie1uh8Mp4YUOVQNbirA1uxEdHeV8Z0dXbsG7emejFWI9hxyR1T93ZncA==        Full
key2    6VANuHzHcJV04EFeyPiWRsFWnHPkgmX1+a3bt5qOQ2qIzohyskIF/2gfNMqp9rlNC/w+mBqQ2mI42QgoJSmavg==        Full
Copy and save this key. You will use this key to verify the connection using Azure Storage Explorer.
To verify that the connection is successfully established, use Storage Explorer to attach to an external storage account. If you do not have Storage Explorer, download Storage Explorer.
If this is the first time you are using Storage Explorer, you need to perform the following steps.
From the top command bar, go to Edit > Target Azure Stack APIs.
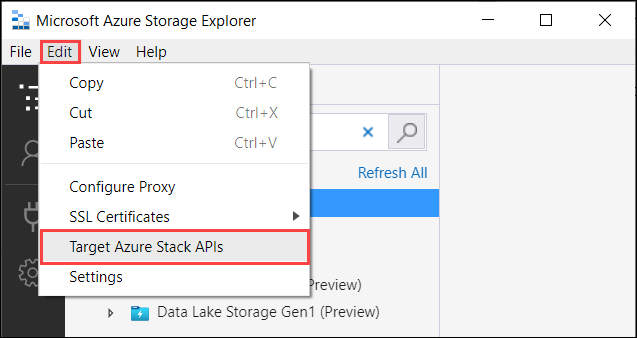
Restart the Storage Explorer for the changes to take effect.
Follow these steps to connect to the storage account and verify the connection.
In Storage Explorer, select storage accounts. Right-click and select the Connect to Azure Storage option.
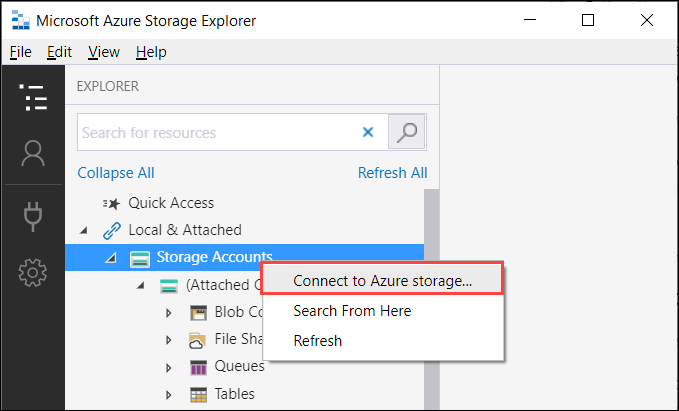
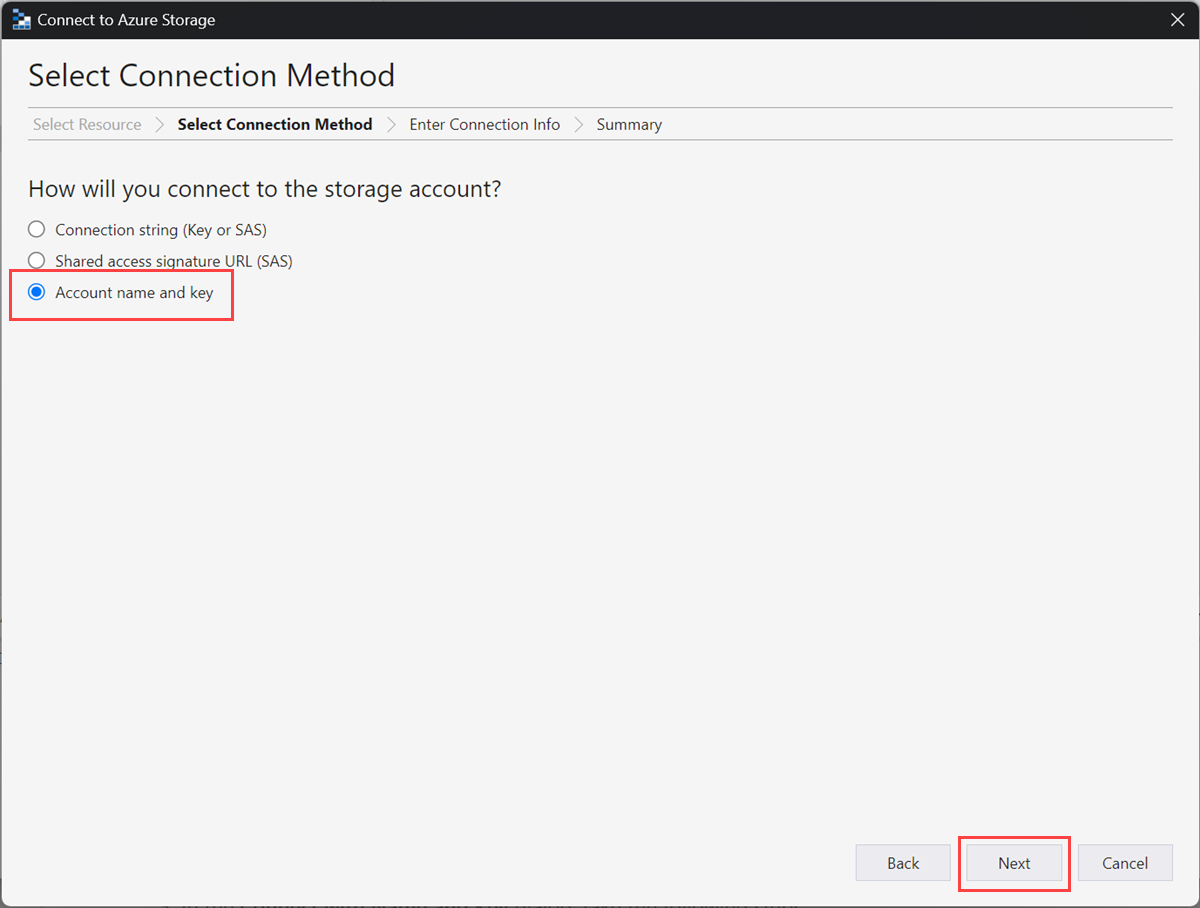
In the Connect to Azure Storage dialog, select Use a storage account name and key.
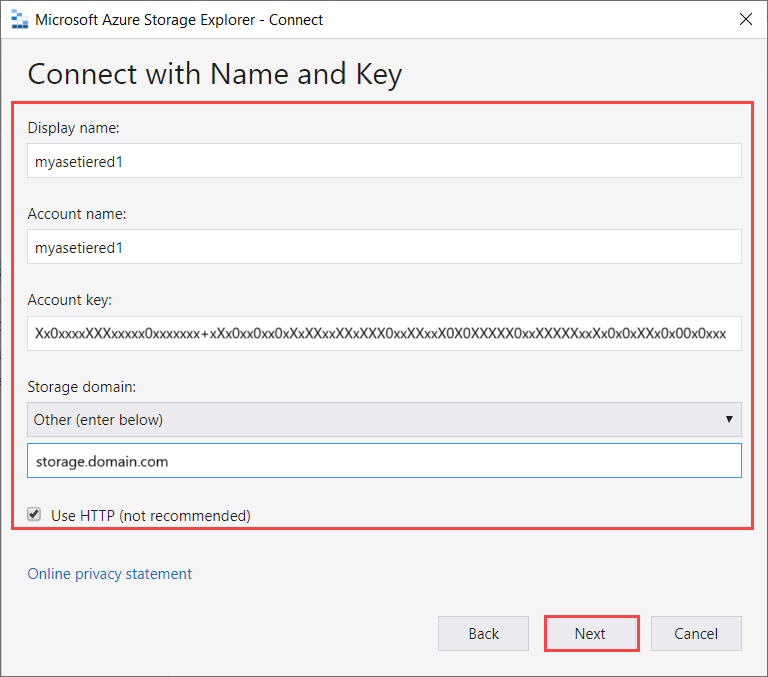
In the Connect with Name and Key dialog, take the following steps:
- Enter a display name for your Edge storage account.
- Provide the Edge storage account name.
- Paste the access key that you got from the device local APIs via Azure Resource Manager.
- Select Storage domain as Other (enter below) and then provide the suffix of blob service endpoint in the format:
<appliance name>.<DNSdomain>. - Check Use HTTP option as transfer is over http.
- Select Next.
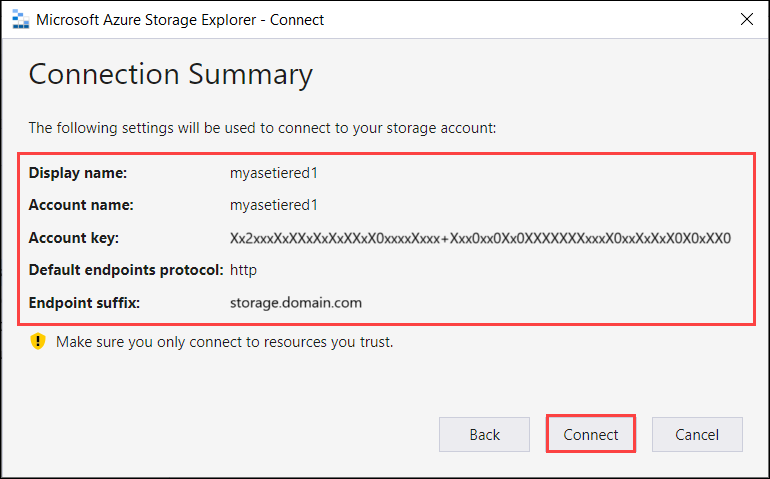
In the Connection Summary dialog, review the provided information. Select Connect.
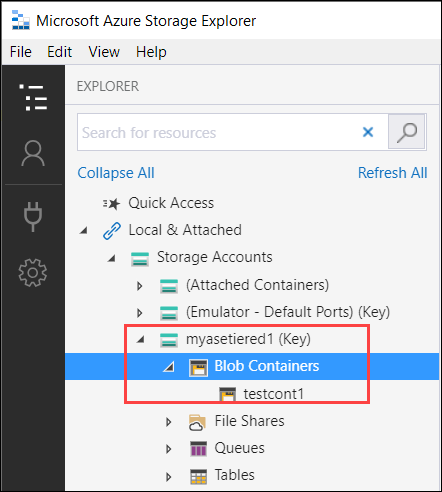
The account that you successfully added is displayed in the left pane of Storage Explorer with (External, Other) appended to its name. Select Blob Containers to view the container.
The next step to verify is that the data transfer is actually working correctly over this connection.
Take the following steps to load data into your Edge storage account on the device and it should automatically get tiered to the mapped Azure Storage account.
Select the container to which you want to load the data in your Edge storage account. Select Upload and then select Upload files.
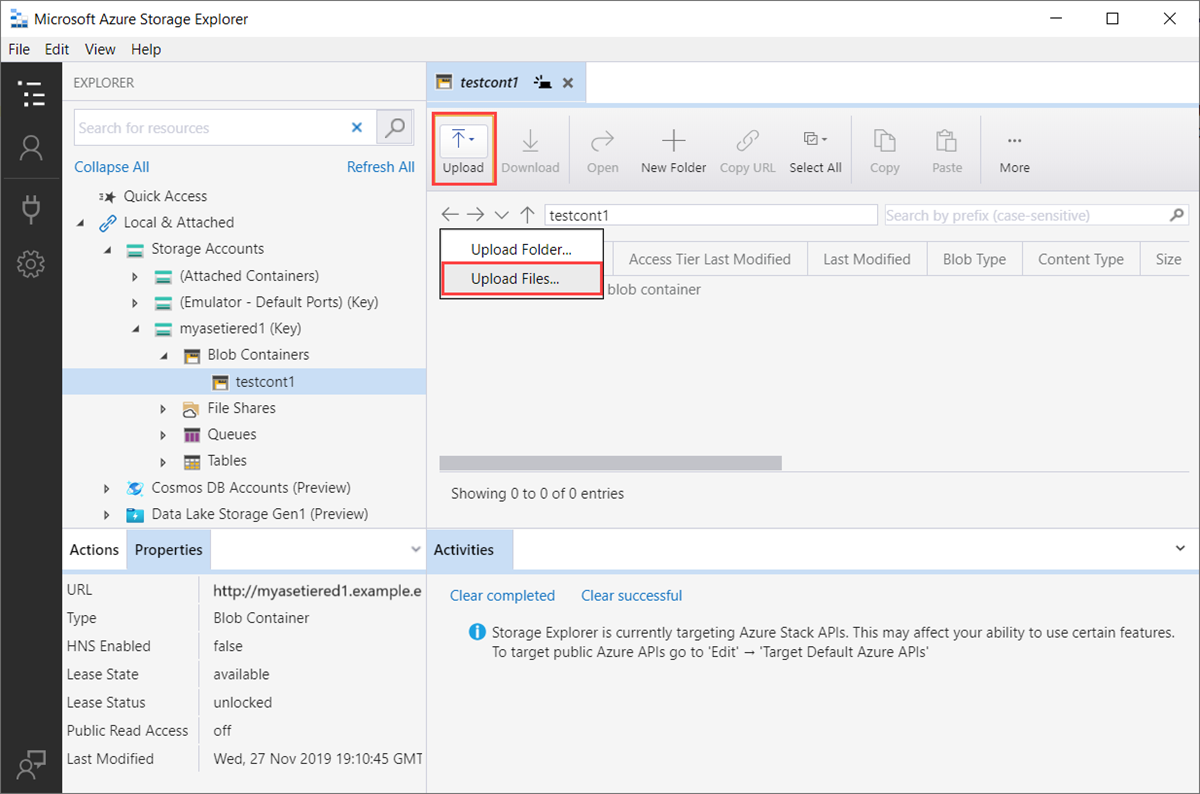
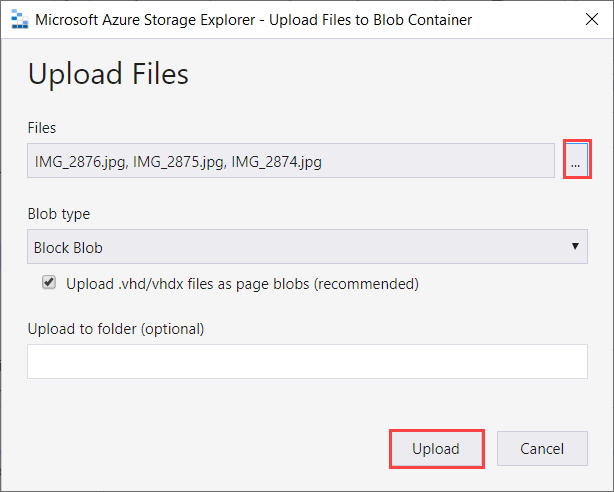
In the Upload files dialog, navigate to and select the files that you want to upload. Select Next.
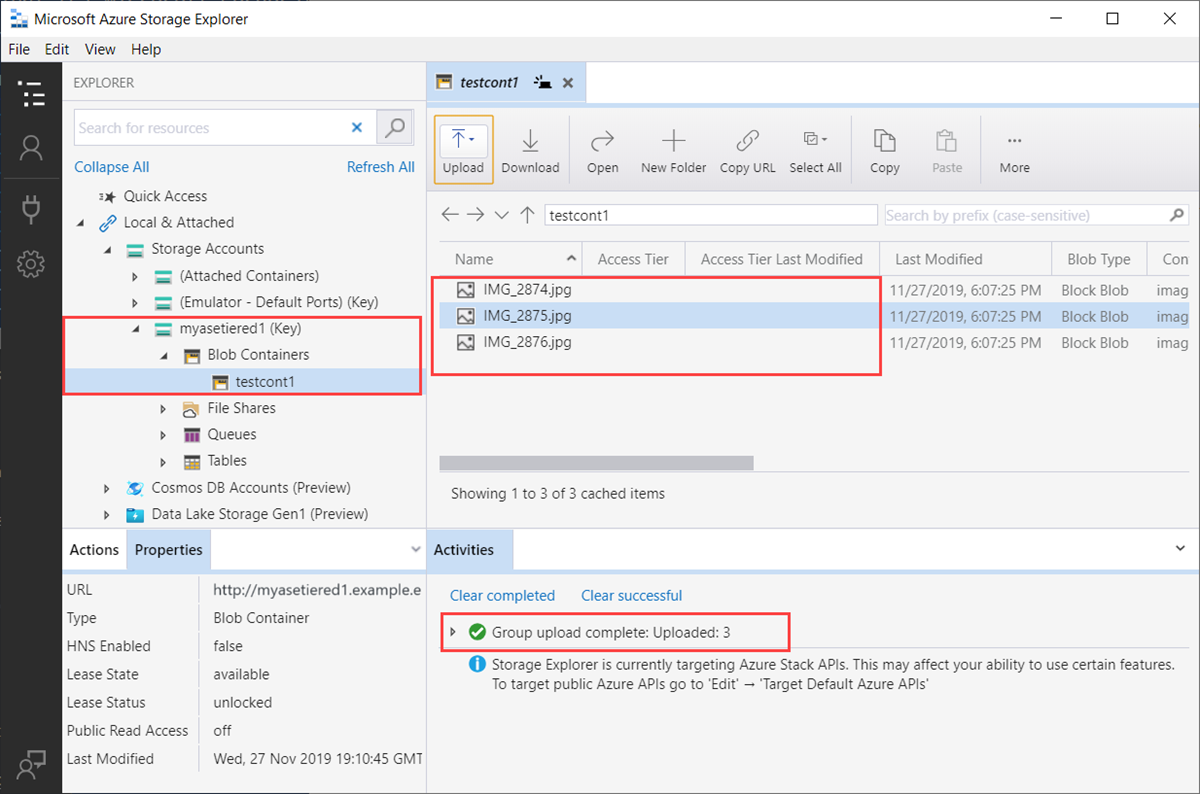
Verify that the files have uploaded. The uploaded files show up in the container.
Next, you will connect to the Azure Storage account that was mapped to this Edge storage account. Any data that is uploaded to the Edge storage account should automatically tier to the Azure Storage account.
To get the connection string for the Azure Storage account, go to the Azure Storage account > Access keys and copy the connection string.
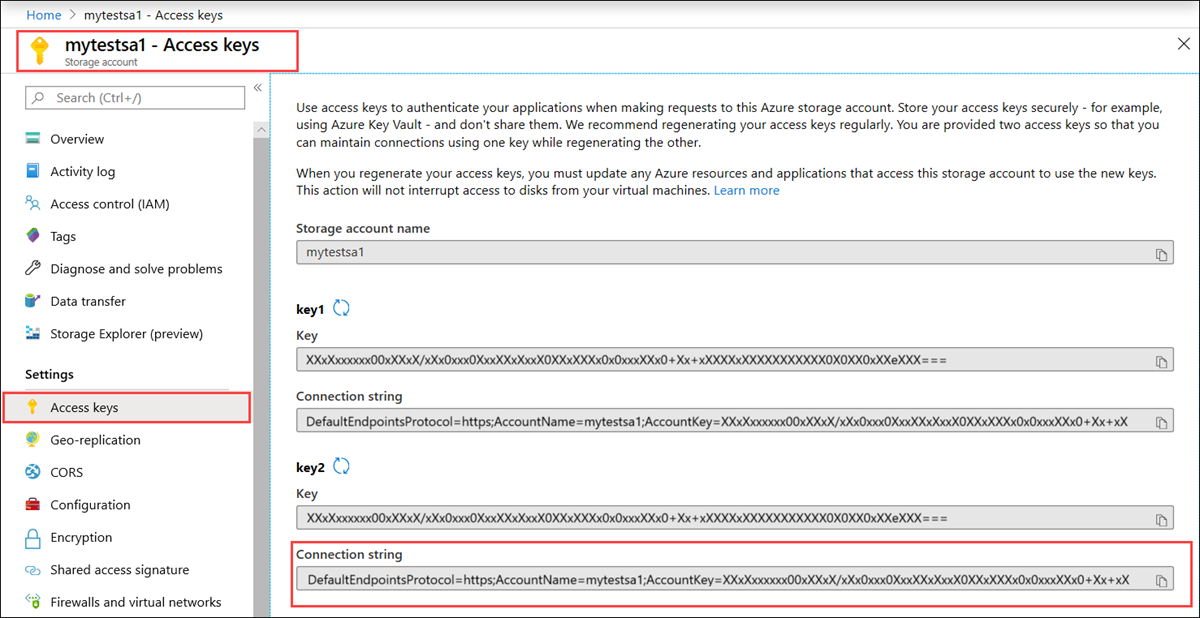
Use the connection string to attach to the Azure Storage account.
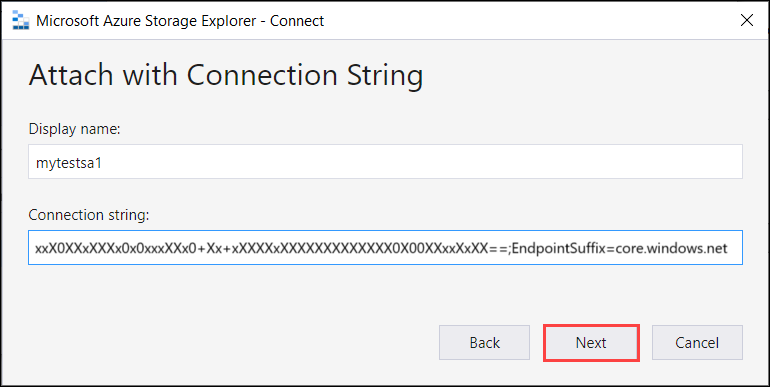
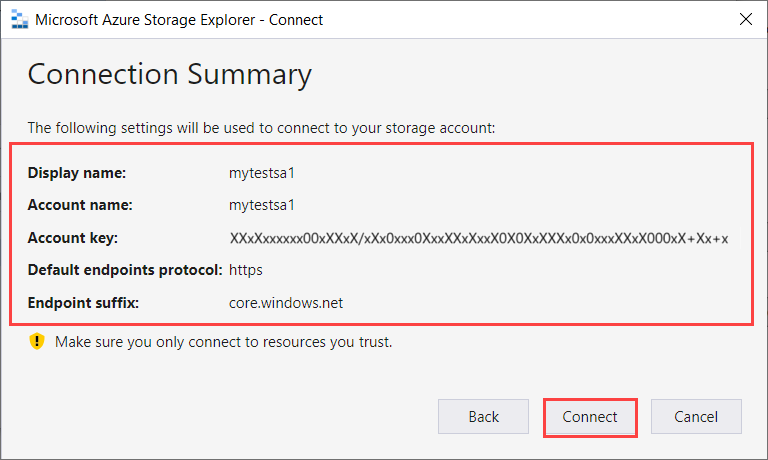
In the Connection Summary dialog, review the provided information. Select Connect.
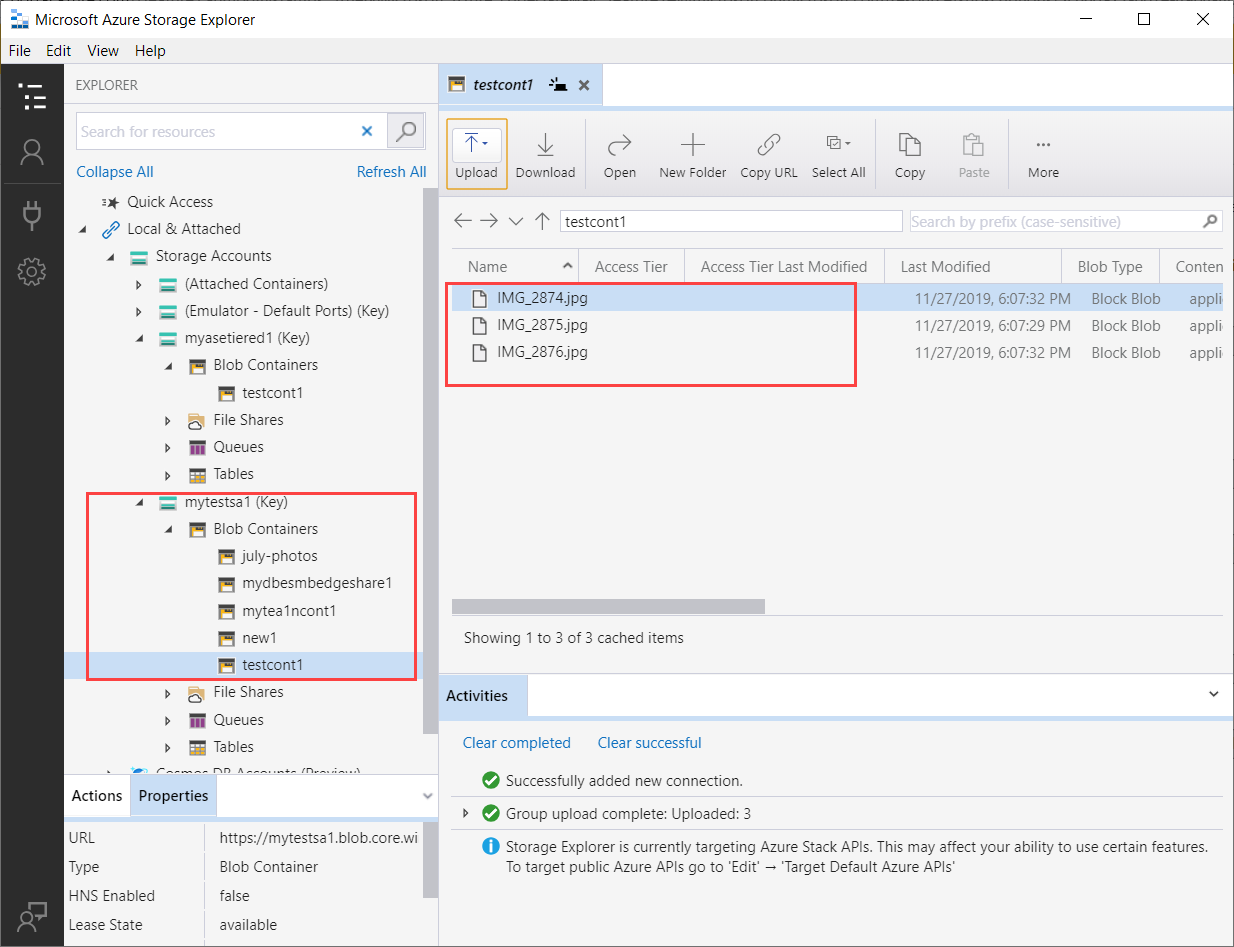
You will see that the files you uploaded in the Edge storage account were transferred to the Azure Storage account.
Connect via https
Connection to Azure Blob storage REST APIs over https requires the following steps:
- Get your blob endpoint certificate
- Import the certificate on the client or remote host
- Add the device IP and blob service endpoint to the client or remote host
- Configure and verify the connection
Each of these steps is described in the following sections.
Get certificate
Accessing Blob storage over HTTPS requires an SSL certificate for the device. You will also upload this certificate to your Azure Stack Edge Pro device as .pfx file with a private key attached to it. For more information on how to create (for test and dev purposes only) and upload these certificates to your Azure Stack Edge Pro device, go to:
- Create the blob endpoint certificate.
- Upload the blob endpoint certificate.
- Import certificates on the client accessing the device.
Import certificate
If using Azure Storage Explorer to connect to the storage accounts on the device, you also need to import certificate into Storage Explorer in PEM format. In Windows environment, Base-64 encoded .cer is the same as the PEM format.
Take the following steps to import the certificates on Azure Storage Explorer:
Make sure that Azure Storage Explorer is targeting the Azure Stack APIs. Go to Edit > Target Azure Stack APIs. When prompted, restart Storage Explorer for the change to take effect.
To import SSL certificates, go to Edit > SSL certificates > Import certificates.
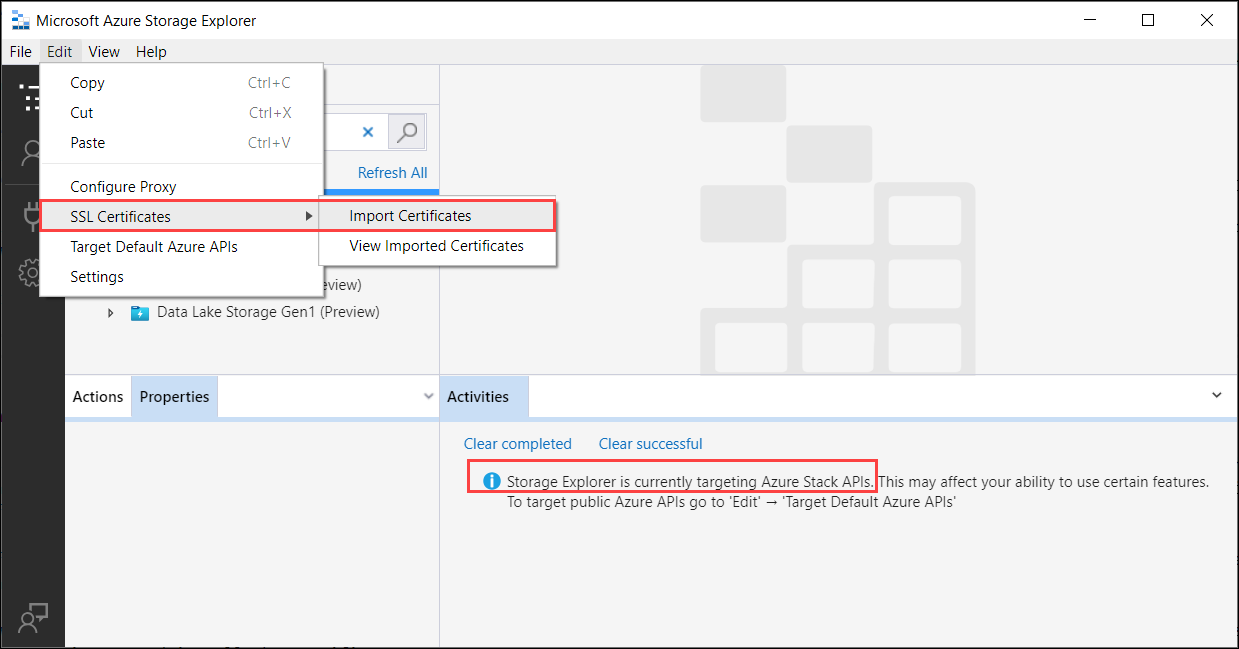
Navigate and provide the signing chain and blob certificates. Both the signing chain and the blob certificate should be in PEM format which is the same as Base64-encoded format on Windows system. You will be notified that the certificates were successfully imported.
Add device IP address and blob service endpoint
Follow the same steps to add device IP address and blob service endpoint when connecting over http.
Configure and verify connection
Follow the steps to Configure and verify connection that you used while connecting over http. The only difference is that you should leave the Use http option unchecked.
Next steps
In this tutorial, you learned about the following Azure Stack Edge Pro topics:
- Add a storage account
- Connect to a storage account
To learn how to transform your data by using Azure Stack Edge Pro, advance to the next tutorial: